wheel VOLVO S60 2007 Workshop Manual
[x] Cancel search | Manufacturer: VOLVO, Model Year: 2007, Model line: S60, Model: VOLVO S60 2007Pages: 200, PDF Size: 4.03 MB
Page 132 of 200
WARNING!
The temperature grade for this tire is established for a tire that is properly inflated and not overloaded. Excessive
speed, under-inflation, or excessive loading, either separately or in combination, can cause heat buildup and tire
failure.
pg. 156 Wheels and tires
Snow chains, snow tires, studded tires
Snow chains
Snow chains can be used on your Volvo with the following restrictions:
Snow chains should be installed on front wheels only. Use only Volvo approved snow chains.
If accessory, aftermarket or "custom" tires and wheels are installed and are of a size different than the original tires
and wheels, chains in some cases CANNOT be used. Sufficient clearances between chains and brakes, suspension and
body components must be maintained.
Some strap -on type chains will interfere with brake components and therefore CANNOT be used.
All Wheel Drive models: Snow chains should only be installed on the front wheels. Only chains adapted for AWD
models should be used.
Consult your Volvo retailer for additional snow chain information.
CAUTION!
- Check local regulations regarding the use of snow chains before installing. Always follow the chain manufacturer's
installation instructions carefully. Install chains as tightly as possible and retighten periodically.
- Never exceed the chain manufacturer's specified maximum speed limit. (Under no circumstances should you
exceed 31 mph (50 km/h)).
- Avoid bumps, holes or sharp turns when driving with snow chains.
- The handling of the vehicle can be adversely affected when driving with chains. Avoid fast or sharp turns as well
as locked wheel braking.
Snow tires, studded tires
1
Tires for winter use:
Owners who live in or regularly commute through areas with sustained periods of snow or icy driving conditions are
strongly advised to fit suitable winter tires to help retain the highest degree of traction.
It is important to install winter tires on all four wheels to help retain traction during cornering, braking, and
accelerating. Failure to do so could reduce traction to an unsafe level or adversely affect handling.
Do not mix tires of different design as this could also negatively affect overall tire road grip.
Winter tires wear more quickly on dry roads in warm weather. They should be removed when the winter driving
season has ended.
Studded tires should be run-in 300-600 miles (500-1000 km) during which the vehicle should be driven as smoothly
as possible to give the studs the opportunity to seat properly in the tires. The tires should have the same rotational
direction throughout their entire lifetime.
NOTE: Please consult state or provincial regulations restricting the use of studded winter tires before installing such
tires.
1. Where permitted
ProCarManuals.com
Page 133 of 200

pg. 157 Wheels and tires
Temporary spare
The spare tire in your vehicle is called a "Temporary Spare".
Recommended tire pressure (see the placard on the B-pillar or on the fuel filler door) should be maintained irrespective
of which position on the vehicle the temporary spare tire is used on.
In the event of damage to this tire, a new one can be purchased from your Volvo retailer.
WARNING!
Current legislation prohibits the use of the "Temporary Spare" tire other than as a temporary replacement for a
punctured tire. It must be replaced as soon as possible by a standard tire. Road holding and handling may be affected
with the "Temporary Spare" in use. Do not exceed 50 mph (80 km/h). Do not drive farther than 50 miles (80 km) on
a temporary spare tire.
CAUTION!
The vehicle must not be driven with wheels of different dimensions or with a spare tire other than the one that came
with the vehicle. The use of different size wheels can seriously damage your vehicle's transmission.
pg. 158 Wheels and tires
Changing wheels
Changing wheels
The spare wheel is located under the carpet on the trunk floor. The jack and crank are secured in the wheel recess.
There are two jack attachment points on each side of the vehicle (see illustration on next page).
To change a wheel:
- Engage the parking brake.
- Put the gear selector in (P)ark (automatic transmission) or reverse (manual transmission).
ProCarManuals.com
Page 134 of 200
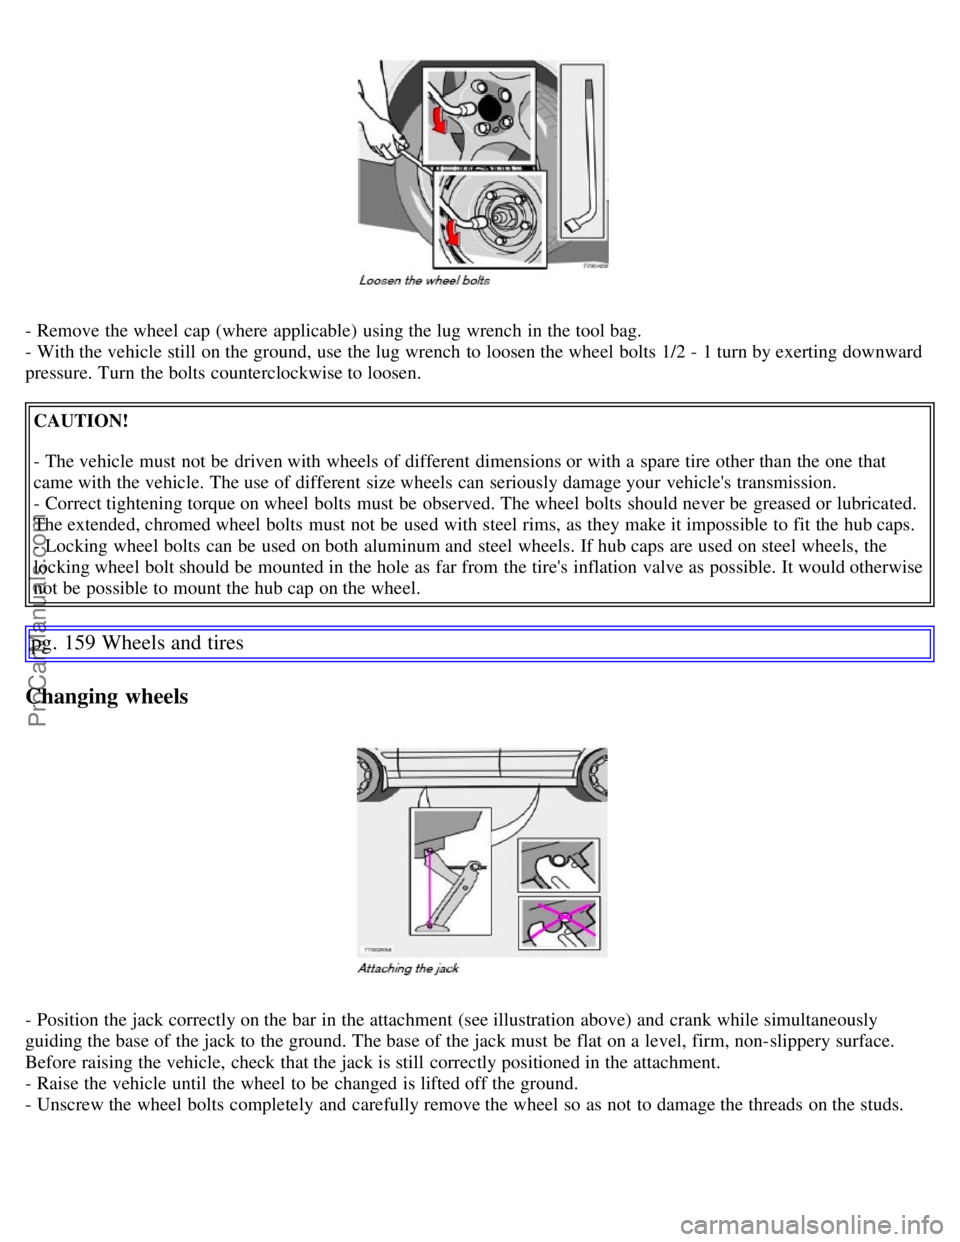
- Remove the wheel cap (where applicable) using the lug wrench in the tool bag.
- With the vehicle still on the ground, use the lug wrench to loosen the wheel bolts 1/2 - 1 turn by exerting downward
pressure. Turn the bolts counterclockwise to loosen.CAUTION!
- The vehicle must not be driven with wheels of different dimensions or with a spare tire other than the one that
came with the vehicle. The use of different size wheels can seriously damage your vehicle's transmission.
- Correct tightening torque on wheel bolts must be observed. The wheel bolts should never be greased or lubricated.
The extended, chromed wheel bolts must not be used with steel rims, as they make it impossible to fit the hub caps.
- Locking wheel bolts can be used on both aluminum and steel wheels. If hub caps are used on steel wheels, the
locking wheel bolt should be mounted in the hole as far from the tire's inflation valve as possible. It would otherwise
not be possible to mount the hub cap on the wheel.
pg. 159 Wheels and tires
Changing wheels
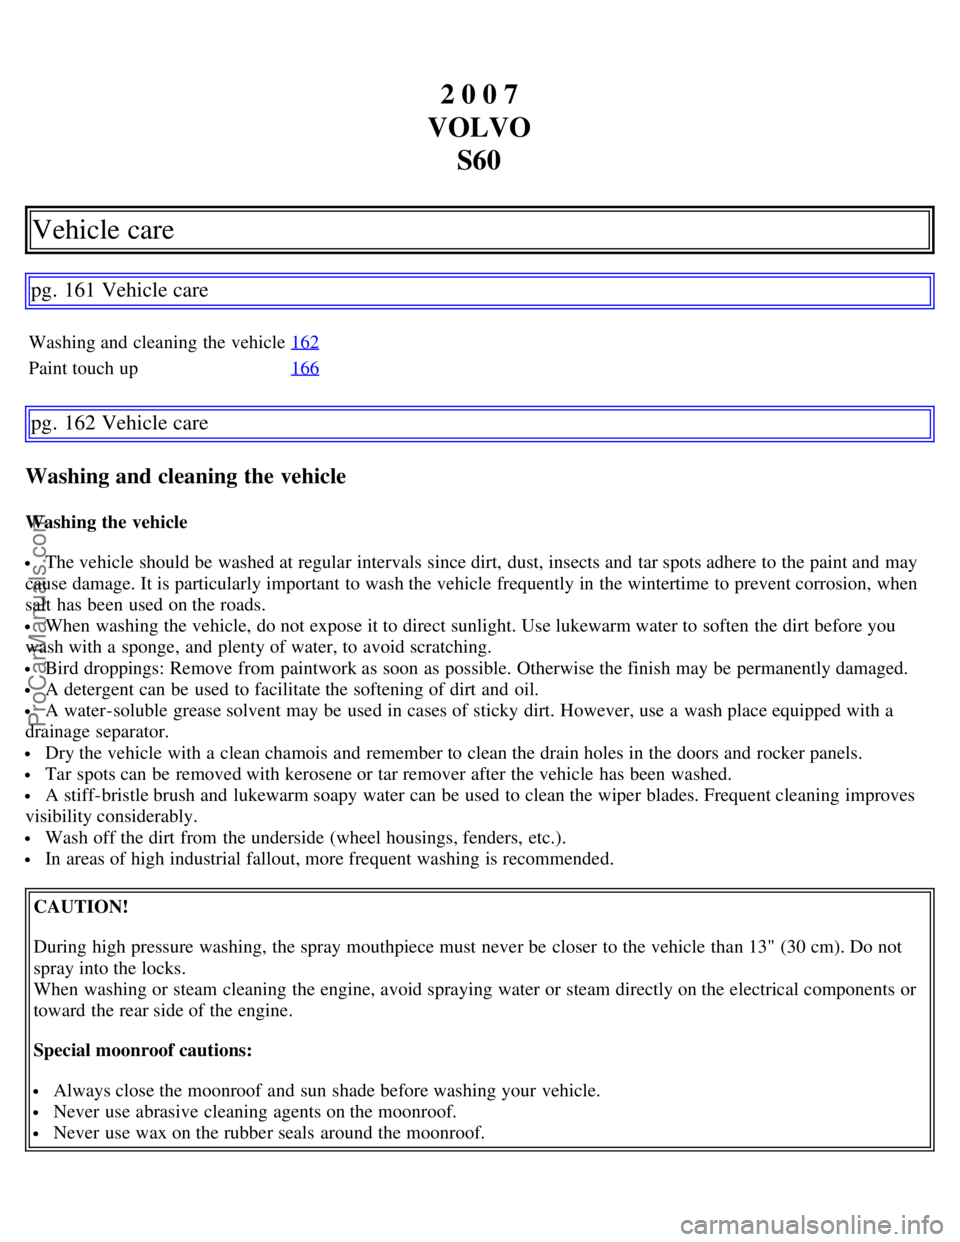
- Position the jack correctly on the bar in the attachment (see illustration above) and crank while simultaneously
guiding the base of the jack to the ground. The base of the jack must be flat on a level, firm, non-slippery surface.
Before raising the vehicle, check that the jack is still correctly positioned in the attachment.
- Raise the vehicle until the wheel to be changed is lifted off the ground.
- Unscrew the wheel bolts completely and carefully remove the wheel so as not to damage the threads on the studs.
ProCarManuals.com
Page 135 of 200
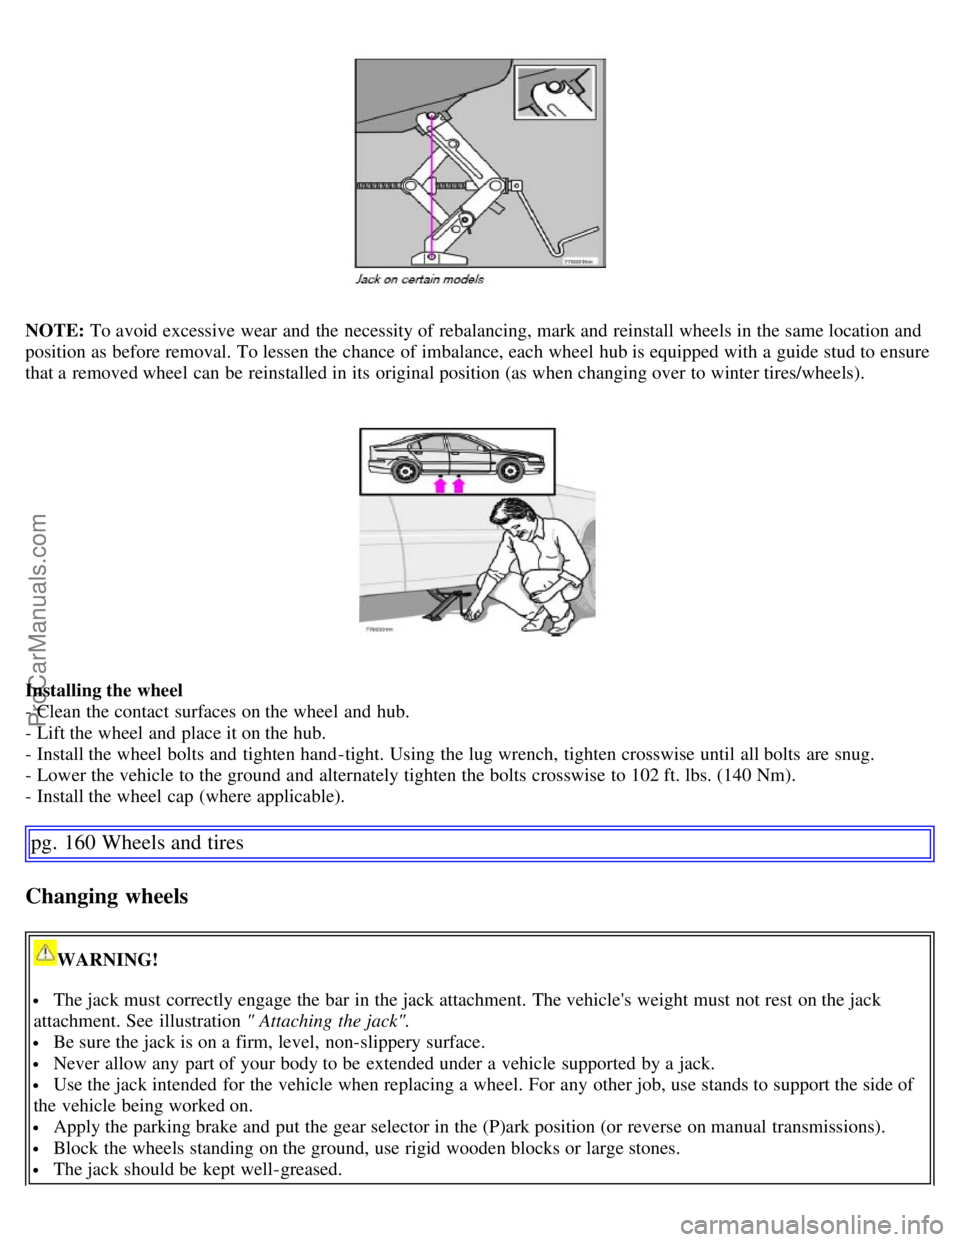
NOTE: To avoid excessive wear and the necessity of rebalancing, mark and reinstall wheels in the same location and
position as before removal. To lessen the chance of imbalance, each wheel hub is equipped with a guide stud to ensure
that a removed wheel can be reinstalled in its original position (as when changing over to winter tires/wheels).
Installing the wheel
- Clean the contact surfaces on the wheel and hub.
- Lift the wheel and place it on the hub.
- Install the wheel bolts and tighten hand -tight. Using the lug wrench, tighten crosswise until all bolts are snug.
- Lower the vehicle to the ground and alternately tighten the bolts crosswise to 102 ft. lbs. (140 Nm).
- Install the wheel cap (where applicable).
pg. 160 Wheels and tires
Changing wheels
WARNING!
The jack must correctly engage the bar in the jack attachment. The vehicle's weight must not rest on the jack
attachment. See illustration " Attaching the jack".
Be sure the jack is on a firm, level, non-slippery surface.
Never allow any part of your body to be extended under a vehicle supported by a jack.
Use the jack intended for the vehicle when replacing a wheel. For any other job, use stands to support the side of
the vehicle being worked on.
Apply the parking brake and put the gear selector in the (P)ark position (or reverse on manual transmissions).
Block the wheels standing on the ground, use rigid wooden blocks or large stones.
The jack should be kept well-greased.
ProCarManuals.com
Page 137 of 200
2 0 0 7
VOLVO S60
Vehicle care
pg. 161 Vehicle care
Washing and cleaning the vehicle 162
Paint touch up166
pg. 162 Vehicle care
Washing and cleaning the vehicle
Washing the vehicle
The vehicle should be washed at regular intervals since dirt, dust, insects and tar spots adhere to the paint and may
cause damage. It is particularly important to wash the vehicle frequently in the wintertime to prevent corrosion, when
salt has been used on the roads.
When washing the vehicle, do not expose it to direct sunlight. Use lukewarm water to soften the dirt before you
wash with a sponge, and plenty of water, to avoid scratching.
Bird droppings: Remove from paintwork as soon as possible. Otherwise the finish may be permanently damaged.
A detergent can be used to facilitate the softening of dirt and oil.
A water-soluble grease solvent may be used in cases of sticky dirt. However, use a wash place equipped with a
drainage separator.
Dry the vehicle with a clean chamois and remember to clean the drain holes in the doors and rocker panels.
Tar spots can be removed with kerosene or tar remover after the vehicle has been washed.
A stiff-bristle brush and lukewarm soapy water can be used to clean the wiper blades. Frequent cleaning improves
visibility considerably.
Wash off the dirt from the underside (wheel housings, fenders, etc.).
In areas of high industrial fallout, more frequent washing is recommended.
CAUTION!
During high pressure washing, the spray mouthpiece must never be closer to the vehicle than 13" (30 cm). Do not
spray into the locks.
When washing or steam cleaning the engine, avoid spraying water or steam directly on the electrical components or
toward the rear side of the engine.
Special moonroof cautions:
Always close the moonroof and sun shade before washing your vehicle.
Never use abrasive cleaning agents on the moonroof.
Never use wax on the rubber seals around the moonroof.
ProCarManuals.com
Page 151 of 200
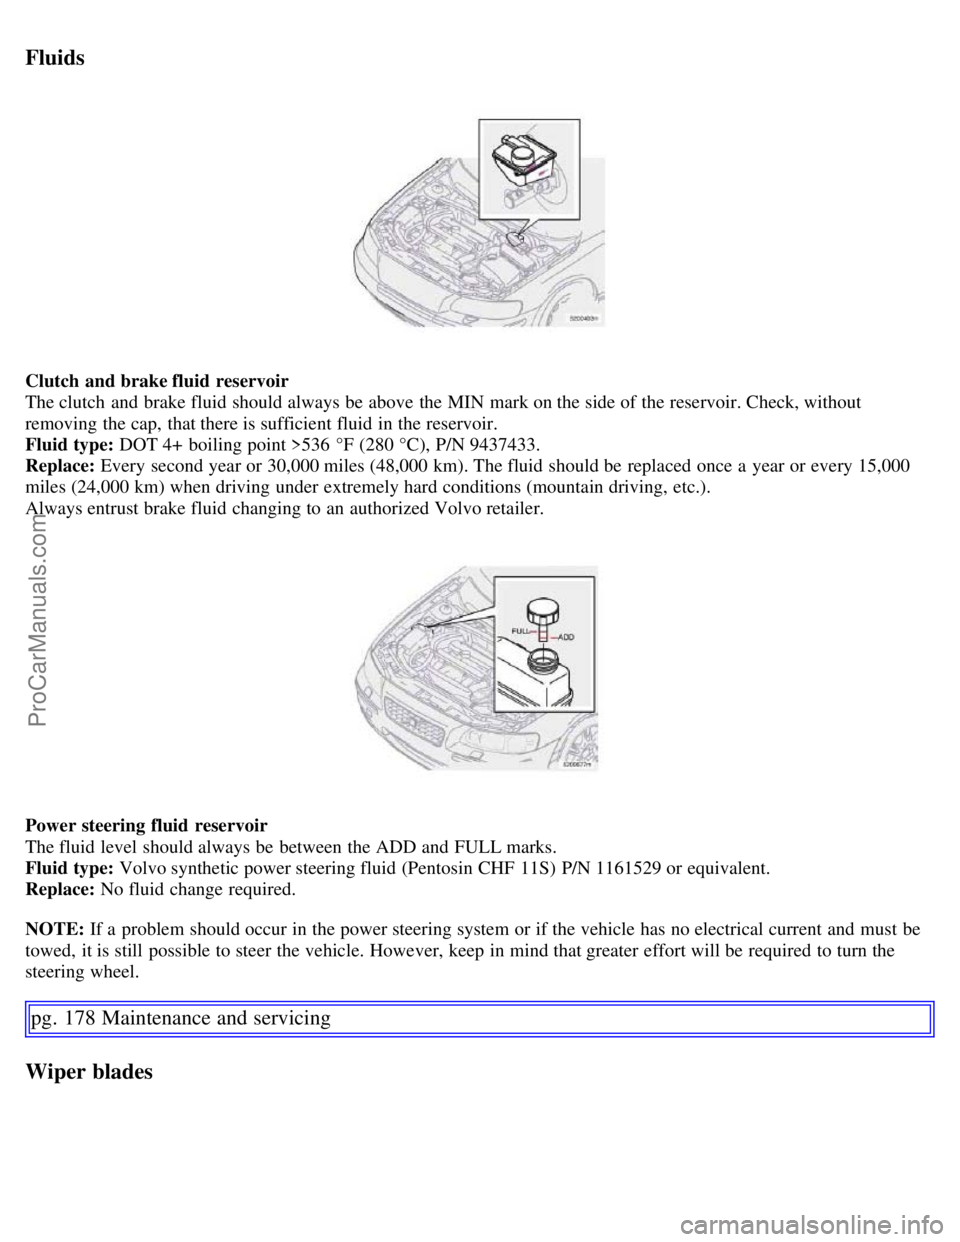
Fluids
Clutch and brake fluid reservoir
The clutch and brake fluid should always be above the MIN mark on the side of the reservoir. Check, without
removing the cap, that there is sufficient fluid in the reservoir.
Fluid type: DOT 4+ boiling point >536 °F (280 °C), P/N 9437433.
Replace: Every second year or 30,000 miles (48,000 km). The fluid should be replaced once a year or every 15,000
miles (24,000 km) when driving under extremely hard conditions (mountain driving, etc.).
Always entrust brake fluid changing to an authorized Volvo retailer.
Power steering fluid reservoir
The fluid level should always be between the ADD and FULL marks.
Fluid type: Volvo synthetic power steering fluid (Pentosin CHF 11S) P/N 1161529 or equivalent.
Replace: No fluid change required.
NOTE: If a problem should occur in the power steering system or if the vehicle has no electrical current and must be
towed, it is still possible to steer the vehicle. However, keep in mind that greater effort will be required to turn the
steering wheel.
pg. 178 Maintenance and servicing
Wiper blades
ProCarManuals.com
Page 165 of 200
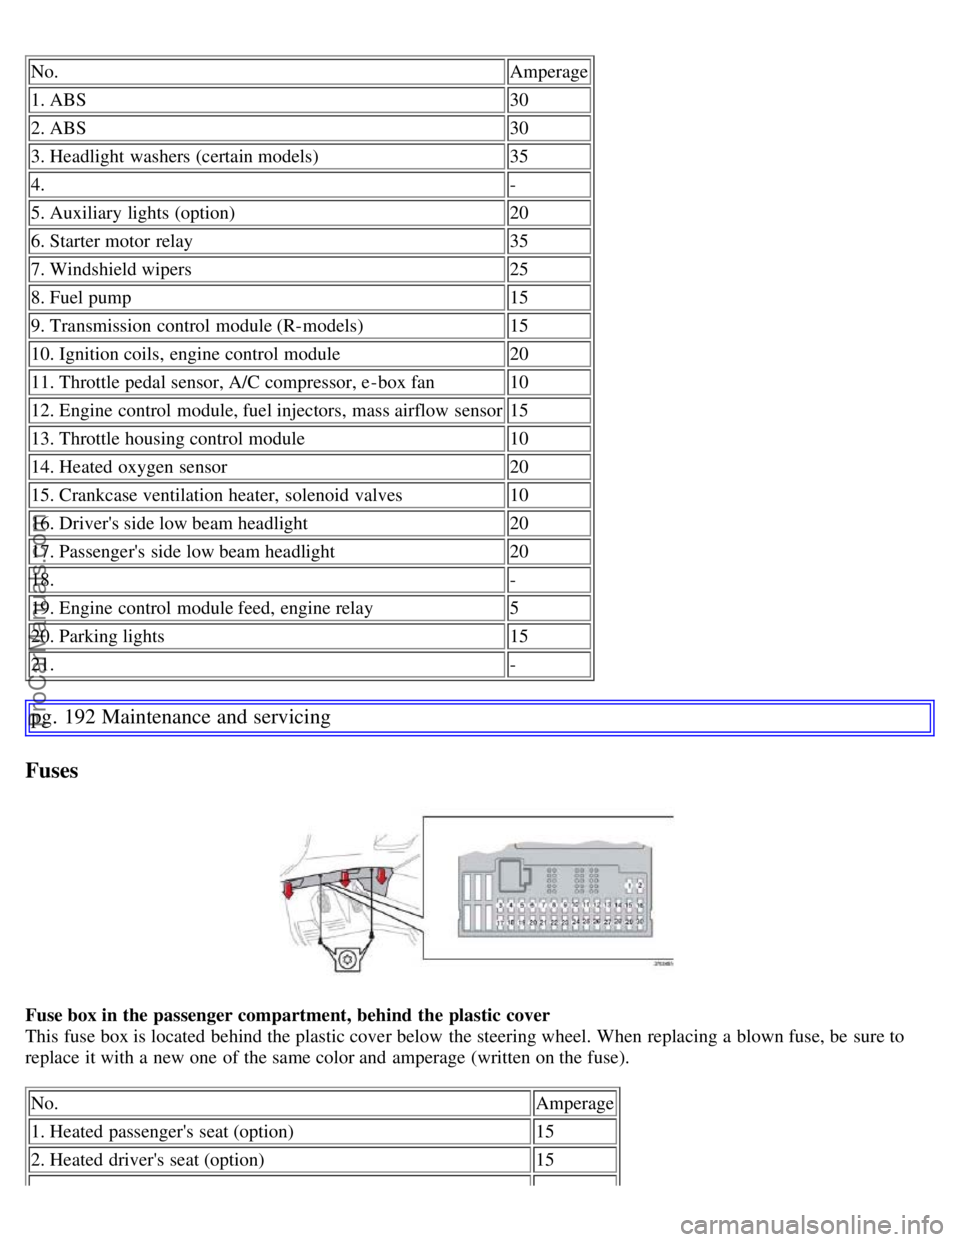
No.Amperage
1. ABS 30
2. ABS 30
3. Headlight washers (certain models) 35
4. -
5. Auxiliary lights (option) 20
6. Starter motor relay 35
7. Windshield wipers 25
8. Fuel pump 15
9. Transmission control module (R-models) 15
10. Ignition coils, engine control module 20
11. Throttle pedal sensor, A/C compressor, e -box fan 10
12. Engine control module, fuel injectors, mass airflow sensor 15
13. Throttle housing control module 10
14. Heated oxygen sensor 20
15. Crankcase ventilation heater, solenoid valves 10
16. Driver's side low beam headlight 20
17. Passenger's side low beam headlight 20
18. -
19. Engine control module feed, engine relay 5
20. Parking lights 15
21. -
pg. 192 Maintenance and servicing
Fuses
Fuse box in the passenger compartment, behind the plastic cover
This fuse box is located behind the plastic cover below the steering wheel. When replacing a blown fuse, be sure to
replace it with a new one of the same color and amperage (written on the fuse).
No. Amperage
1. Heated passenger's seat (option) 15
2. Heated driver's seat (option) 15
ProCarManuals.com
Page 167 of 200
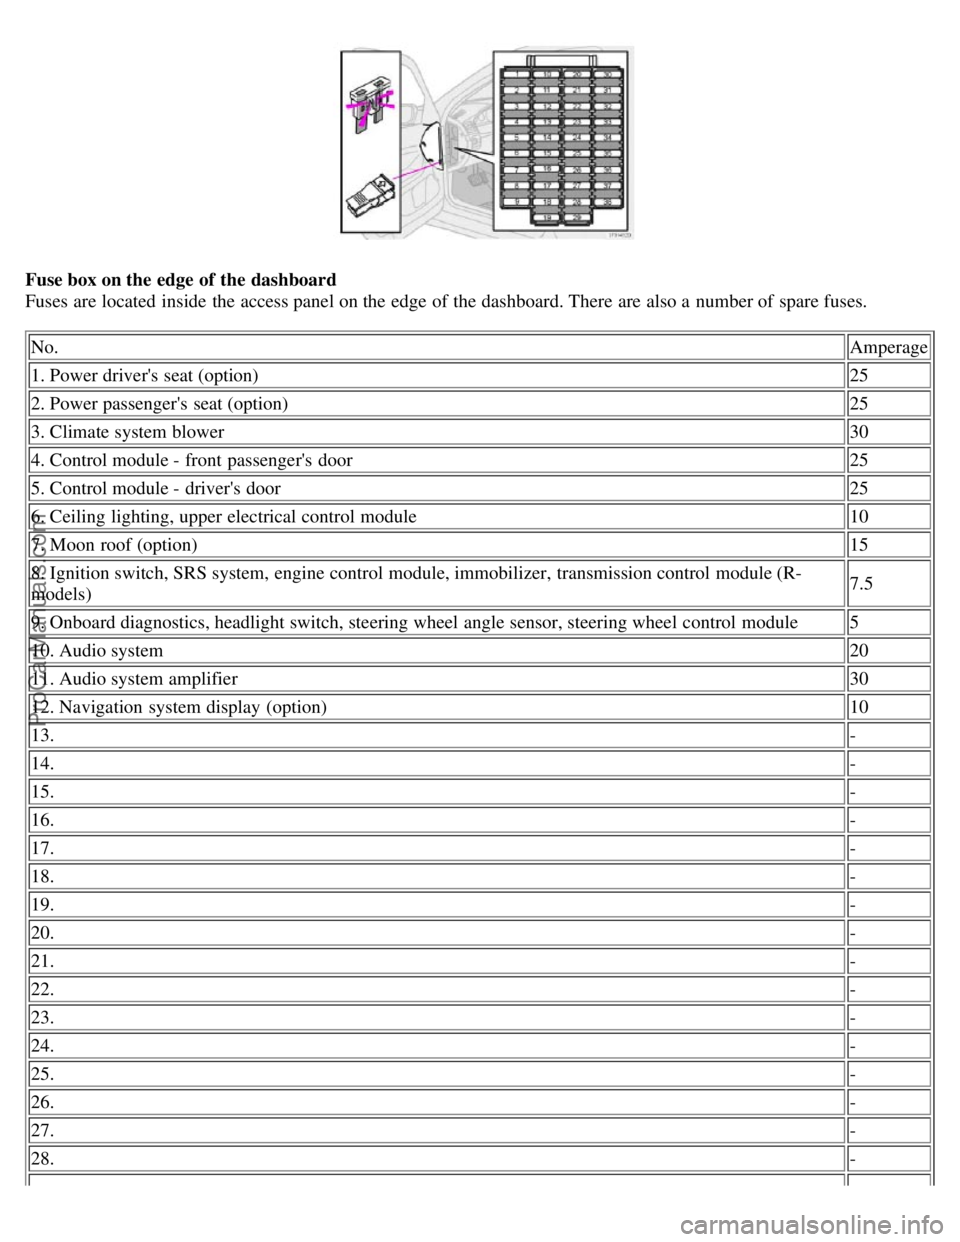
Fuse box on the edge of the dashboard
Fuses are located inside the access panel on the edge of the dashboard. There are also a number of spare fuses.No. Amperage
1. Power driver's seat (option) 25
2. Power passenger's seat (option) 25
3. Climate system blower 30
4. Control module - front passenger's door 25
5. Control module - driver's door 25
6. Ceiling lighting, upper electrical control module 10
7. Moon roof (option) 15
8. Ignition switch, SRS system, engine control module, immobilizer, transmission control module (R-
models) 7.5
9. Onboard diagnostics, headlight switch, steering wheel angle sensor, steering wheel control module 5
10. Audio system 20
11. Audio system amplifier 30
12. Navigation system display (option) 10
13. -
14. -
15. -
16. -
17. -
18. -
19. -
20. -
21. -
22. -
23. -
24. -
25. -
26. -
27. -
28. -
ProCarManuals.com
Page 169 of 200
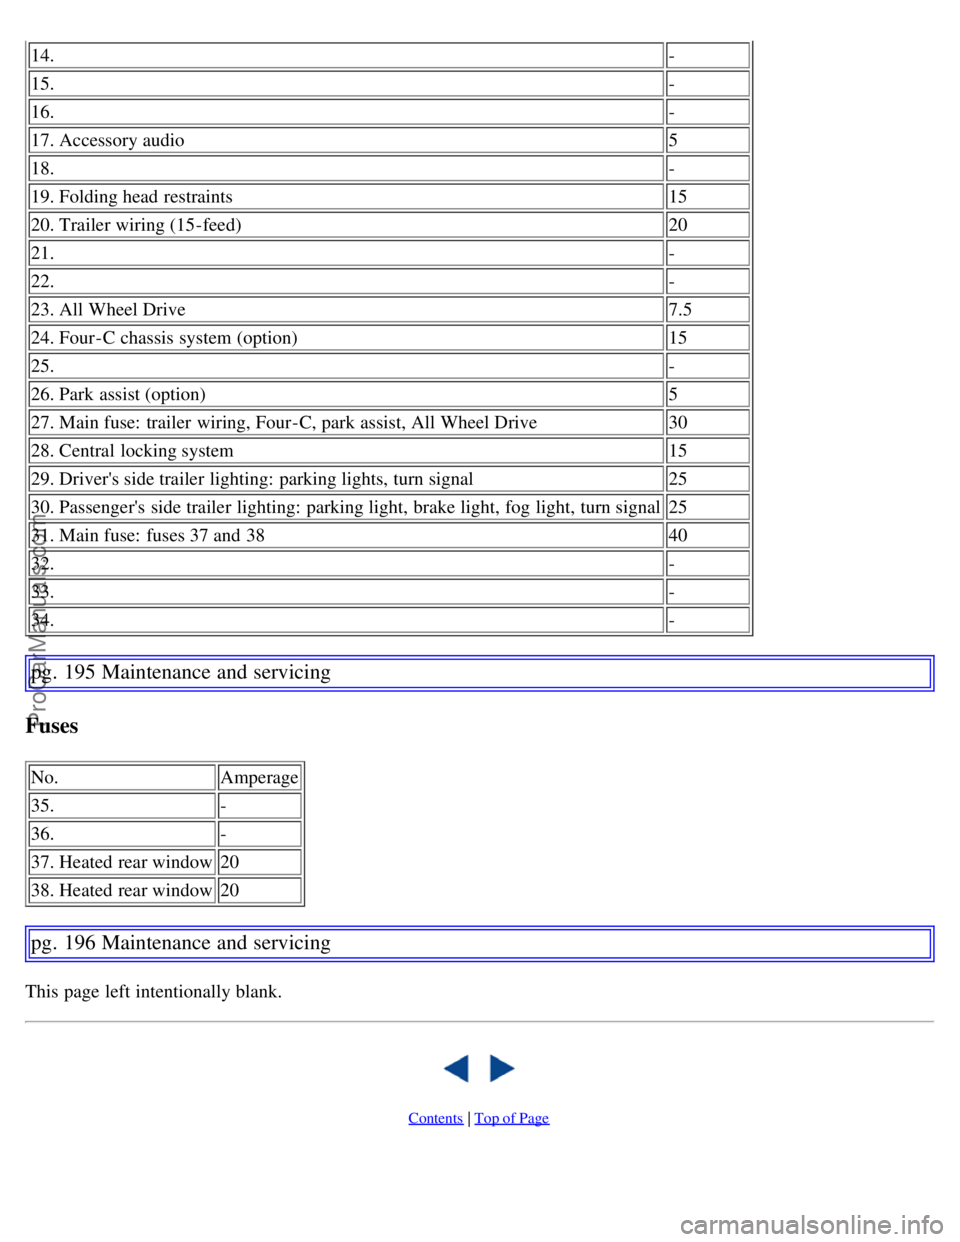
14.-
15.-
16. -
17. Accessory audio 5
18. -
19. Folding head restraints 15
20. Trailer wiring (15-feed) 20
21. -
22. -
23. All Wheel Drive 7.5
24. Four-C chassis system (option) 15
25. -
26. Park assist (option) 5
27. Main fuse: trailer wiring, Four-C, park assist, All Wheel Drive 30
28. Central locking system 15
29. Driver's side trailer lighting: parking lights, turn signal 25
30. Passenger's side trailer lighting: parking light, brake light, fog light, turn signal 25
31. Main fuse: fuses 37 and 38 40
32. -
33. -
34. -
pg. 195 Maintenance and servicing
Fuses
No.Amperage
35. -
36. -
37. Heated rear window 20
38. Heated rear window 20
pg. 196 Maintenance and servicing
This page left intentionally blank.
Contents | Top of Page
ProCarManuals.com
Page 171 of 200

Label information
1. Model plate
Vehicle Identification Number (VIN). Codes for color and upholstery, etc.
2. Child safety lock labels
1
3. Federal Motor Vehicle Safety Standards (FMVSS) specifications (USA) and Ministry of Transport (CMVSS)
standards (Canada)
Your Volvo is designed to meet all applicable safety standards, as evidenced by the certification label on the facing
side of the driver's door. For further information regarding these regulations, please consult your Volvo retailer.
4. Loads and Tire Pressures
The appearance of the decal will vary, depending on the market for which the vehicle is intended.
Canadian models: upper decal
U.S. models: lower decal
5. Vehicle Identification Number (VIN)
The VIN plate is located on the top left surface of the dashboard. The VIN is also stamped on the right hand door
pillar.
The Vehicle Identification Number (VIN) should always be quoted in all correspondence concerning your vehicle with
the retailer and when ordering parts.
6. Vehicle Emission Control Information/ Vacuum hose routing
Your Volvo is designed to meet all applicable emission standards, as evidenced by the certification label on the
underside of the hood. For further information regarding these regulations, please consult your Volvo retailer.
1. Not on vehicles equipped with the optional power child safety locks.
pg. 200 Specifications
Dimensions and weights
Dimensions Length 180 in. (458 cm)
S60R - 181.7 in. (462 cm)
Width 71 in. (180 cm)
S60R - 71 in. (180 cm)
Height 56.2 in. (143 cm)
S60R - 55.7 in. (142 cm)
Wheelbase 107 in. (272 cm)
Front track 61.5 in. (156 cm)
Rear track 61.4 in. (156 cm)
Turning circle 35.4-38.7 ft.
(10.8-11.8 m)
S60R: 42.7 ft (13 m)
Cargo capacity, trunk SAE V1 - 13.9 (394)
Max. loads
ProCarManuals.com