VOLVO S60 2008 Owners Manual
Manufacturer: VOLVO, Model Year: 2008, Model line: S60, Model: VOLVO S60 2008Pages: 230, PDF Size: 5.33 MB
Page 131 of 230
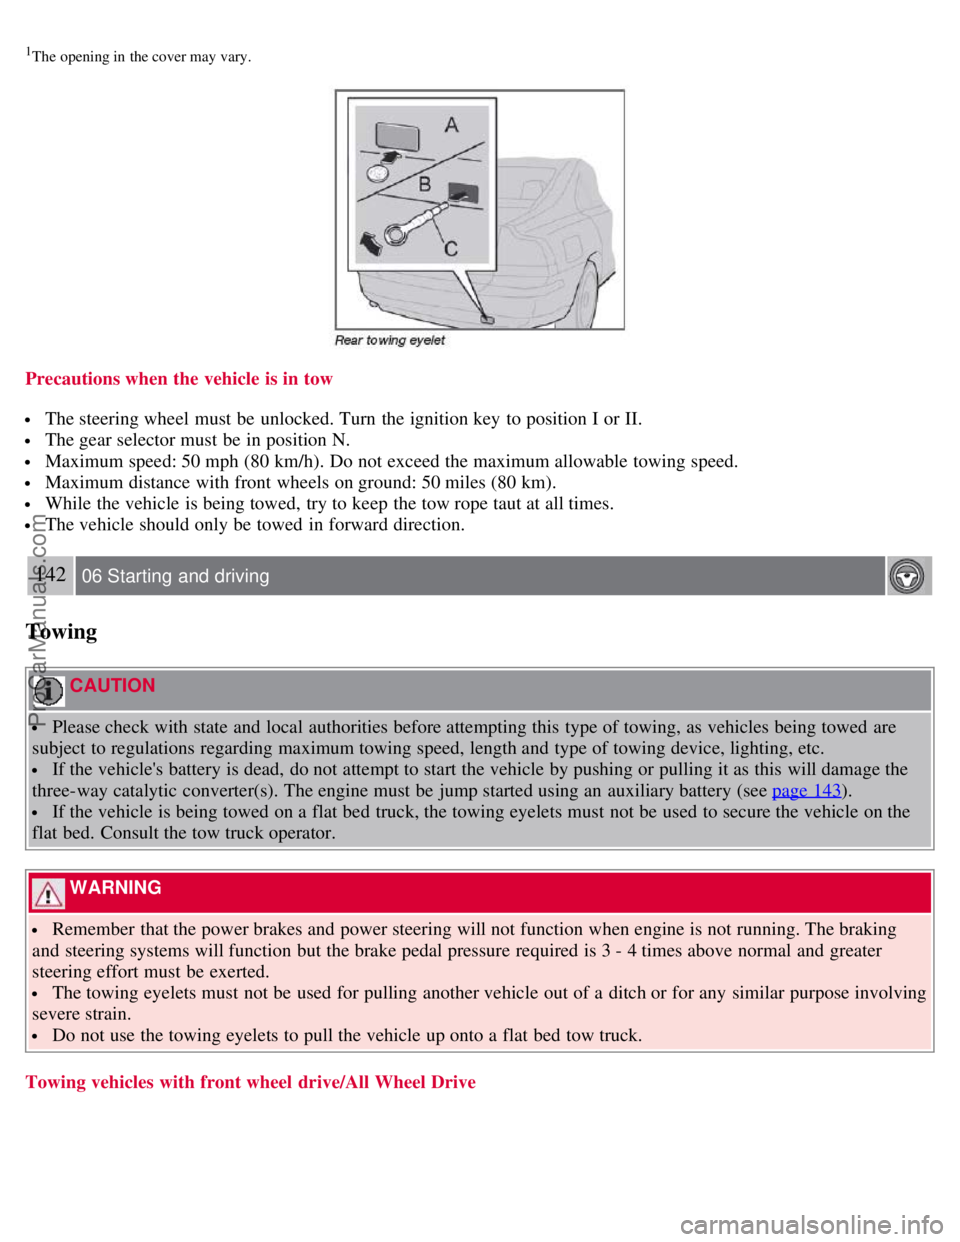
1The opening in the cover may vary.
Precautions when the vehicle is in tow
The steering wheel must be unlocked. Turn the ignition key to position I or II.
The gear selector must be in position N.
Maximum speed: 50 mph (80 km/h). Do not exceed the maximum allowable towing speed.
Maximum distance with front wheels on ground: 50 miles (80 km).
While the vehicle is being towed, try to keep the tow rope taut at all times.
The vehicle should only be towed in forward direction.
142 06 Starting and driving
Towing
CAUTION
Please check with state and local authorities before attempting this type of towing, as vehicles being towed are
subject to regulations regarding maximum towing speed, length and type of towing device, lighting, etc.
If the vehicle's battery is dead, do not attempt to start the vehicle by pushing or pulling it as this will damage the
three-way catalytic converter(s). The engine must be jump started using an auxiliary battery (see page 143
).
If the vehicle is being towed on a flat bed truck, the towing eyelets must not be used to secure the vehicle on the
flat bed. Consult the tow truck operator.
WARNING
Remember that the power brakes and power steering will not function when engine is not running. The braking
and steering systems will function but the brake pedal pressure required is 3 - 4 times above normal and greater
steering effort must be exerted.
The towing eyelets must not be used for pulling another vehicle out of a ditch or for any similar purpose involving
severe strain.
Do not use the towing eyelets to pull the vehicle up onto a flat bed tow truck.
Towing vehicles with front wheel drive/All Wheel Drive
ProCarManuals.com
Page 132 of 230
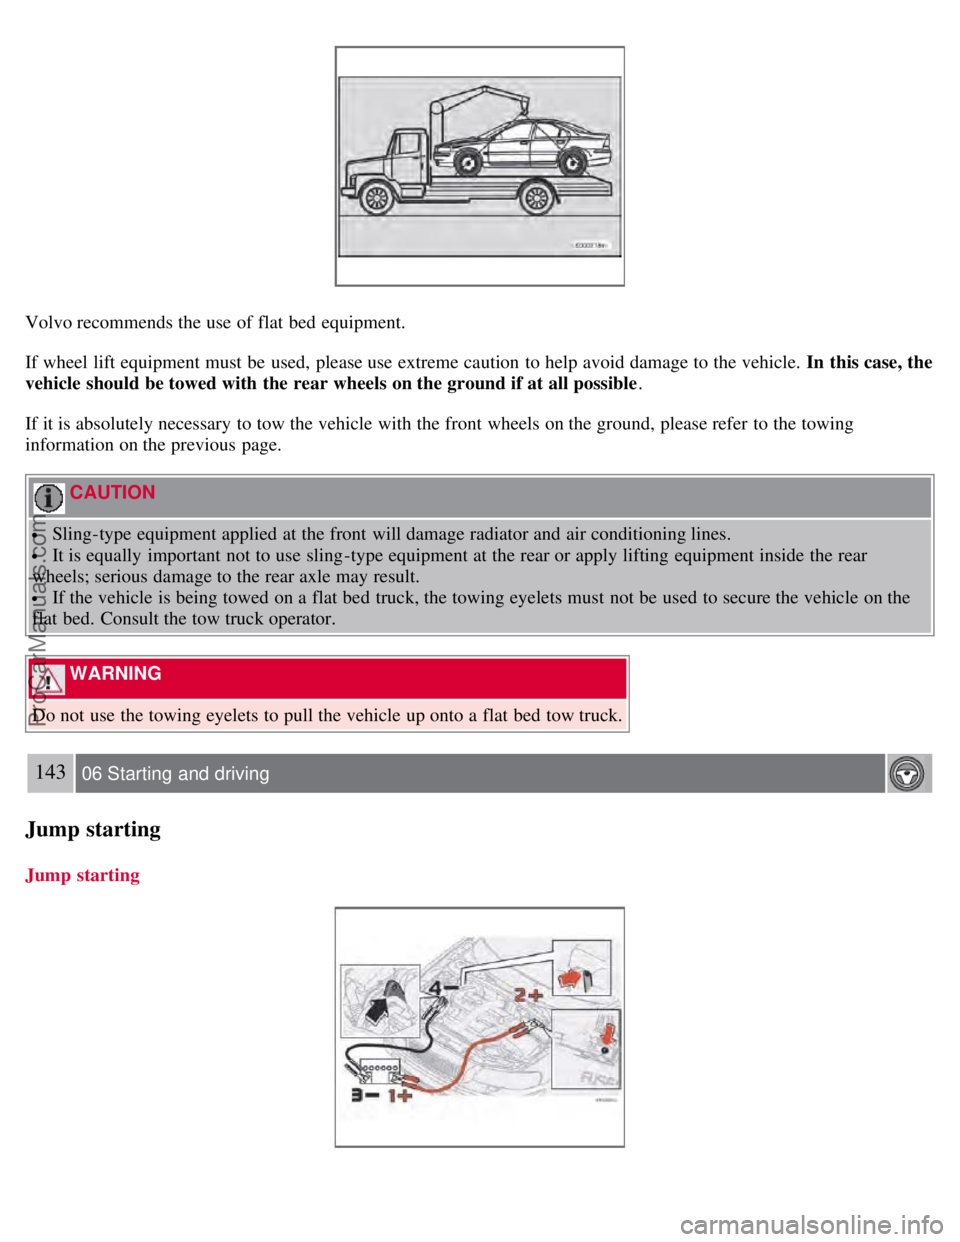
Volvo recommends the use of flat bed equipment.
If wheel lift equipment must be used, please use extreme caution to help avoid damage to the vehicle. In this case, the
vehicle should be towed with the rear wheels on the ground if at all possible.
If it is absolutely necessary to tow the vehicle with the front wheels on the ground, please refer to the towing
information on the previous page.
CAUTION
Sling-type equipment applied at the front will damage radiator and air conditioning lines.
It is equally important not to use sling -type equipment at the rear or apply lifting equipment inside the rear
wheels; serious damage to the rear axle may result.
If the vehicle is being towed on a flat bed truck, the towing eyelets must not be used to secure the vehicle on the
flat bed. Consult the tow truck operator.
WARNING
Do not use the towing eyelets to pull the vehicle up onto a flat bed tow truck.
143 06 Starting and driving
Jump starting
Jump starting
ProCarManuals.com
Page 133 of 230
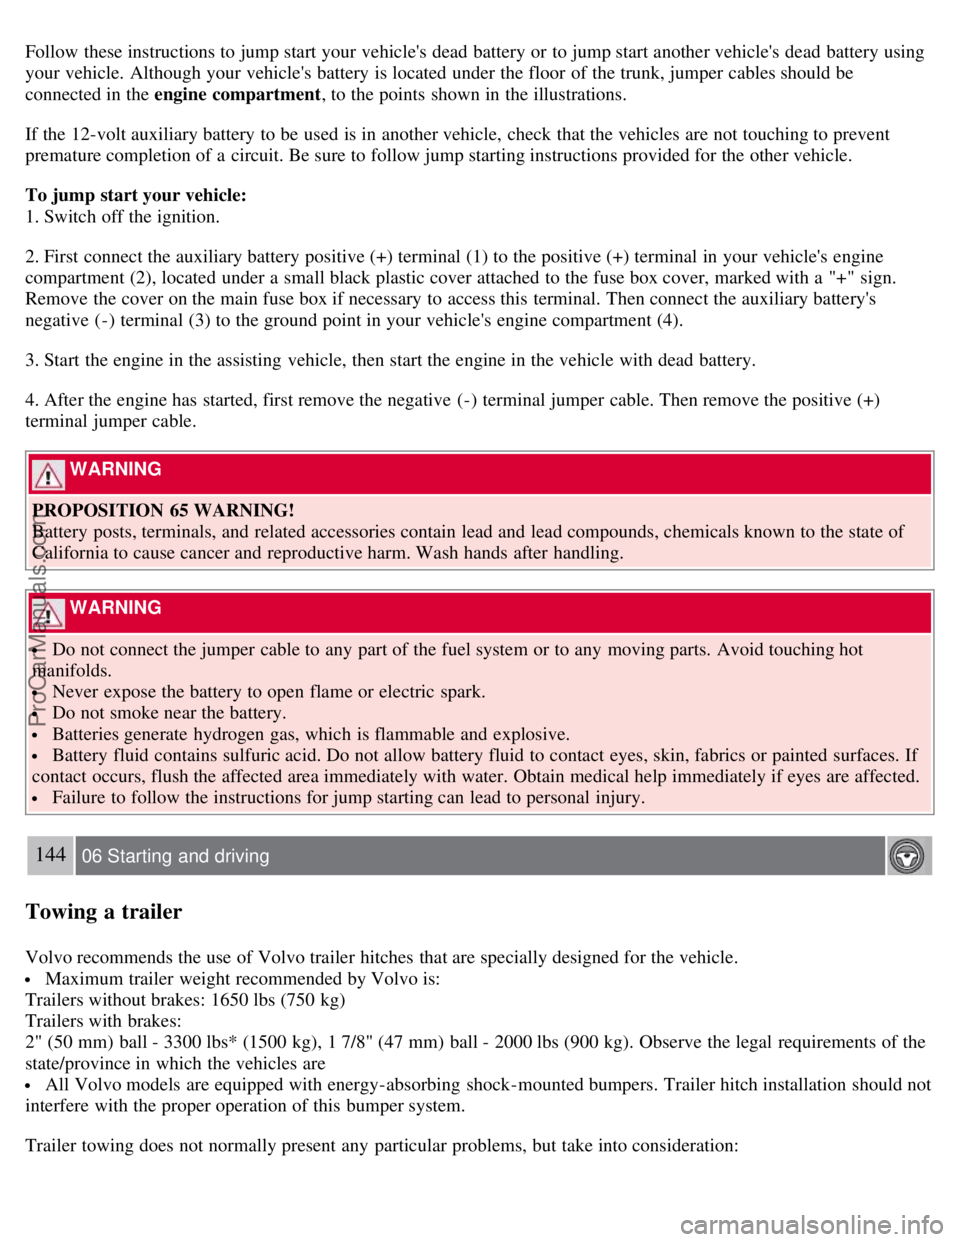
Follow these instructions to jump start your vehicle's dead battery or to jump start another vehicle's dead battery using
your vehicle. Although your vehicle's battery is located under the floor of the trunk, jumper cables should be
connected in the engine compartment, to the points shown in the illustrations.
If the 12-volt auxiliary battery to be used is in another vehicle, check that the vehicles are not touching to prevent
premature completion of a circuit. Be sure to follow jump starting instructions provided for the other vehicle.
To jump start your vehicle:
1. Switch off the ignition.
2. First connect the auxiliary battery positive (+) terminal (1) to the positive (+) terminal in your vehicle's engine
compartment (2), located under a small black plastic cover attached to the fuse box cover, marked with a "+" sign.
Remove the cover on the main fuse box if necessary to access this terminal. Then connect the auxiliary battery's
negative (-) terminal (3) to the ground point in your vehicle's engine compartment (4).
3. Start the engine in the assisting vehicle, then start the engine in the vehicle with dead battery.
4. After the engine has started, first remove the negative (-) terminal jumper cable. Then remove the positive (+)
terminal jumper cable.
WARNING
PROPOSITION 65 WARNING!
Battery posts, terminals, and related accessories contain lead and lead compounds, chemicals known to the state of
California to cause cancer and reproductive harm. Wash hands after handling.
WARNING
Do not connect the jumper cable to any part of the fuel system or to any moving parts. Avoid touching hot
manifolds.
Never expose the battery to open flame or electric spark.
Do not smoke near the battery.
Batteries generate hydrogen gas, which is flammable and explosive.
Battery fluid contains sulfuric acid. Do not allow battery fluid to contact eyes, skin, fabrics or painted surfaces. If
contact occurs, flush the affected area immediately with water. Obtain medical help immediately if eyes are affected.
Failure to follow the instructions for jump starting can lead to personal injury.
144 06 Starting and driving
Towing a trailer
Volvo recommends the use of Volvo trailer hitches that are specially designed for the vehicle.
Maximum trailer weight recommended by Volvo is:
Trailers without brakes: 1650 lbs (750 kg)
Trailers with brakes:
2" (50 mm) ball - 3300 lbs* (1500 kg), 1 7/8" (47 mm) ball - 2000 lbs (900 kg). Observe the legal requirements of the
state/province in which the vehicles are
All Volvo models are equipped with energy-absorbing shock-mounted bumpers. Trailer hitch installation should not
interfere with the proper operation of this bumper system.
Trailer towing does not normally present any particular problems, but take into consideration:
ProCarManuals.com
Page 134 of 230
Increase tire pressure to recommended full. See section "Wheels and tires."
When your vehicle is new, avoid towing heavy trailers during the first 620 miles (1000 km).
Recommended hitch tongue load is:
Trailer weights below 2,650 lbs (1,200 kg) - 110lbs (50kg)
Trailer weights above 2,650 lbs (1,200 kg) - 165lbs (75kg)
Maximum speed when towing a trailer: 50 mph (80 km/h).
Engine and transmission are subject to increased loads. Therefore, engine coolant temperature should be closely
watched when driving in hot climates or hilly terrain. Use a lower gear and turn off the air conditioner if the
temperature gauge needle enters the red range.
If the automatic transmission begins to overheat, a message will be displayed in the text window.
Avoid overload and other abusive operation.
Hauling a trailer affects handling, durability, and economy.
It is necessary to balance trailer brakes with the towing vehicle brakes to provide a safe stop (check and observe
state/local regulations).
Do not connect the trailer's brake system directly to the vehicle's brake system.
More frequent vehicle maintenance is required.
Remove the ball and drawbar assembly when the hitch is not being used.
Volvo recommends the use of synthetic engine oil when towing a trailer over long distances or in mountainous
areas.
WARNING
Bumper-attached trailer hitches must not be used on Volvos, nor should safety chains be attached to the bumper.
Trailer hitches attaching to the vehicle rear axle must not be used.
Never connect a trailer's hydraulic brake system directly to the vehicle brake system, nor a trailer's lighting system
directly to the vehicle lighting system. Consult your nearest trained and qualified Volvo service technician for correct
installation.
When towing a trailer, the trailer's safety wire must be correctly fastened to the hole or hook provided in the
trailer hitch on the vehicle. The safety wire should never be fastened to or wound around the drawbar ball.
NOTE
When parking the vehicle with a trailer on a hill, apply the parking brake before putting the gear selector in P
(first/reverse gear on manual transmissions). Always follow the trailer manufacturer's recommendations for wheel
chocking.
When starting on a hill, put the gear selector in D before releasing the parking brake.
If you use the manual (Geartronic) shift positions while towing a trailer, make sure
145 06 Starting and driving
Towing a trailer
the gear you select does not put too much strain on the engine (using too high a gear).
The drawbar assembly/trailer hitch may be rated for trailers heavier than the vehicle is designed to tow. Please
adhere to Volvo's recommended trailer weights.
Leveling
ProCarManuals.com
Page 135 of 230
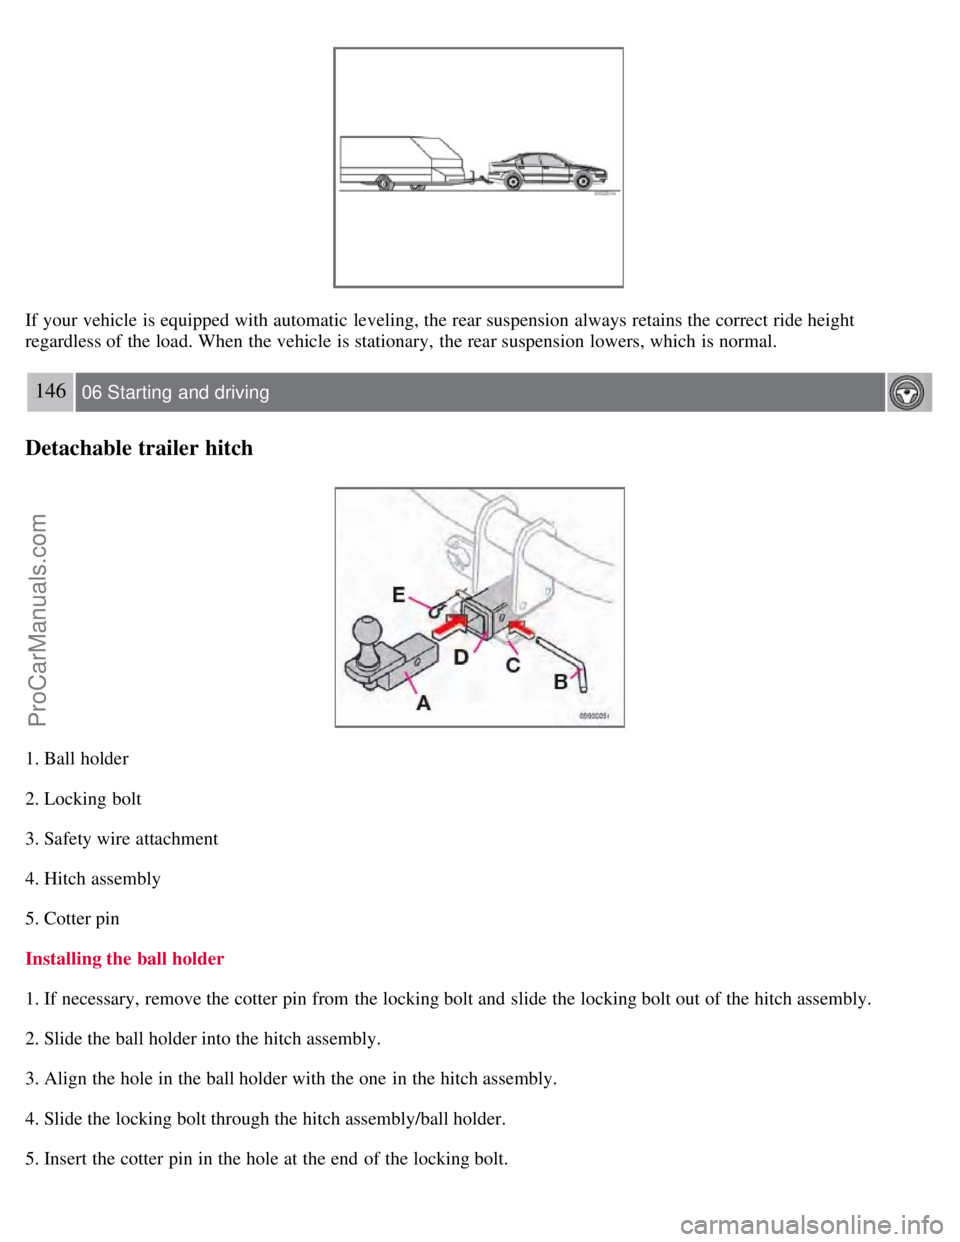
If your vehicle is equipped with automatic leveling, the rear suspension always retains the correct ride height
regardless of the load. When the vehicle is stationary, the rear suspension lowers, which is normal.
146 06 Starting and driving
Detachable trailer hitch
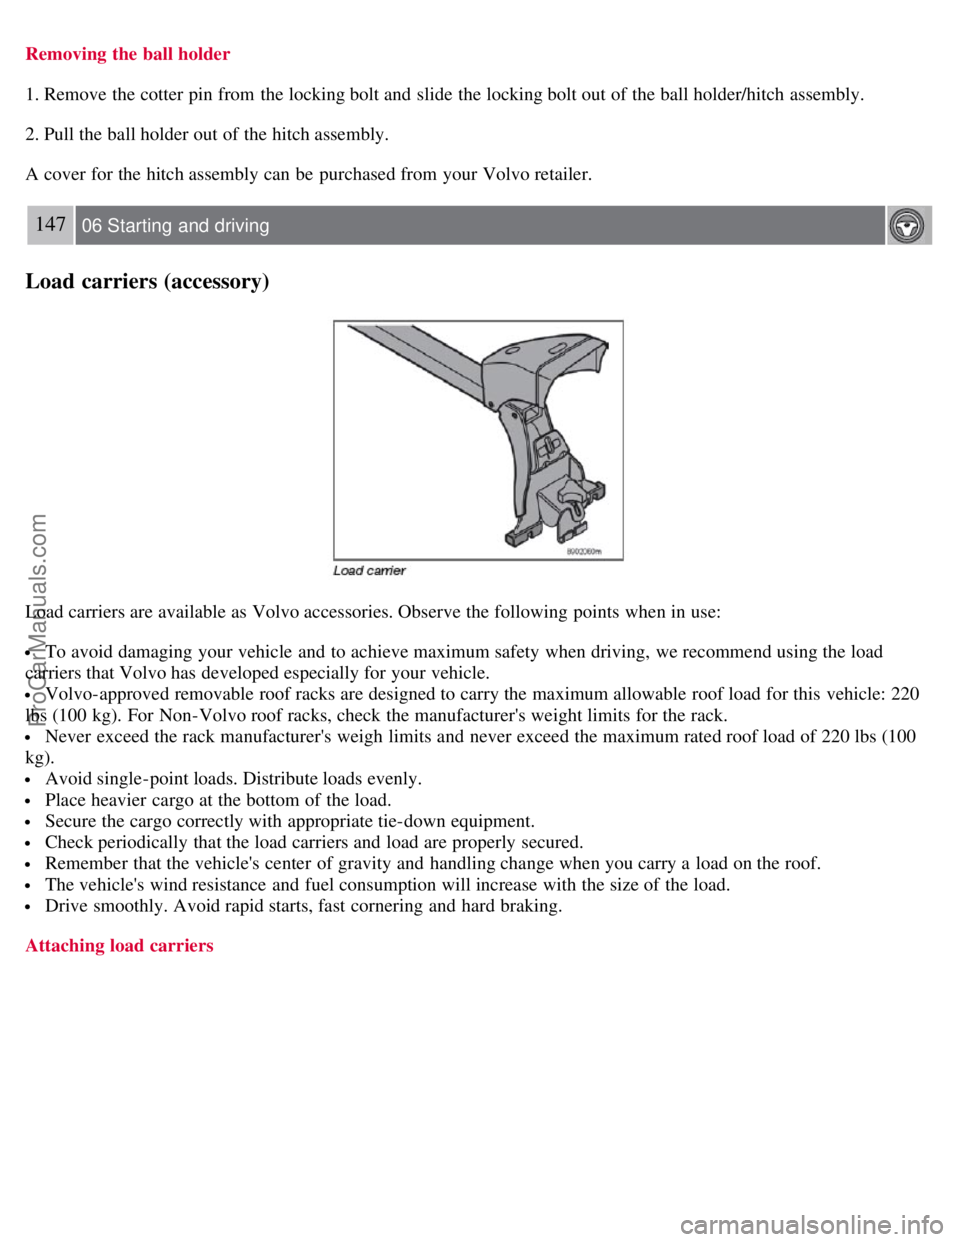
1. Ball holder
2. Locking bolt
3. Safety wire attachment
4. Hitch assembly
5. Cotter pin
Installing the ball holder
1. If necessary, remove the cotter pin from the locking bolt and slide the locking bolt out of the hitch assembly.
2. Slide the ball holder into the hitch assembly.
3. Align the hole in the ball holder with the one in the hitch assembly.
4. Slide the locking bolt through the hitch assembly/ball holder.
5. Insert the cotter pin in the hole at the end of the locking bolt.
ProCarManuals.com
Page 136 of 230
Removing the ball holder
1. Remove the cotter pin from the locking bolt and slide the locking bolt out of the ball holder/hitch assembly.
2. Pull the ball holder out of the hitch assembly.
A cover for the hitch assembly can be purchased from your Volvo retailer.
147 06 Starting and driving
Load carriers (accessory)
Load carriers are available as Volvo accessories. Observe the following points when in use:
To avoid damaging your vehicle and to achieve maximum safety when driving, we recommend using the load
carriers that Volvo has developed especially for your vehicle.
Volvo-approved removable roof racks are designed to carry the maximum allowable roof load for this vehicle: 220
lbs (100 kg). For Non-Volvo roof racks, check the manufacturer's weight limits for the rack.
Never exceed the rack manufacturer's weigh limits and never exceed the maximum rated roof load of 220 lbs (100
kg).
Avoid single-point loads. Distribute loads evenly.
Place heavier cargo at the bottom of the load.
Secure the cargo correctly with appropriate tie-down equipment.
Check periodically that the load carriers and load are properly secured.
Remember that the vehicle's center of gravity and handling change when you carry a load on the roof.
The vehicle's wind resistance and fuel consumption will increase with the size of the load.
Drive smoothly. Avoid rapid starts, fast cornering and hard braking.
Attaching load carriers
ProCarManuals.com
Page 137 of 230
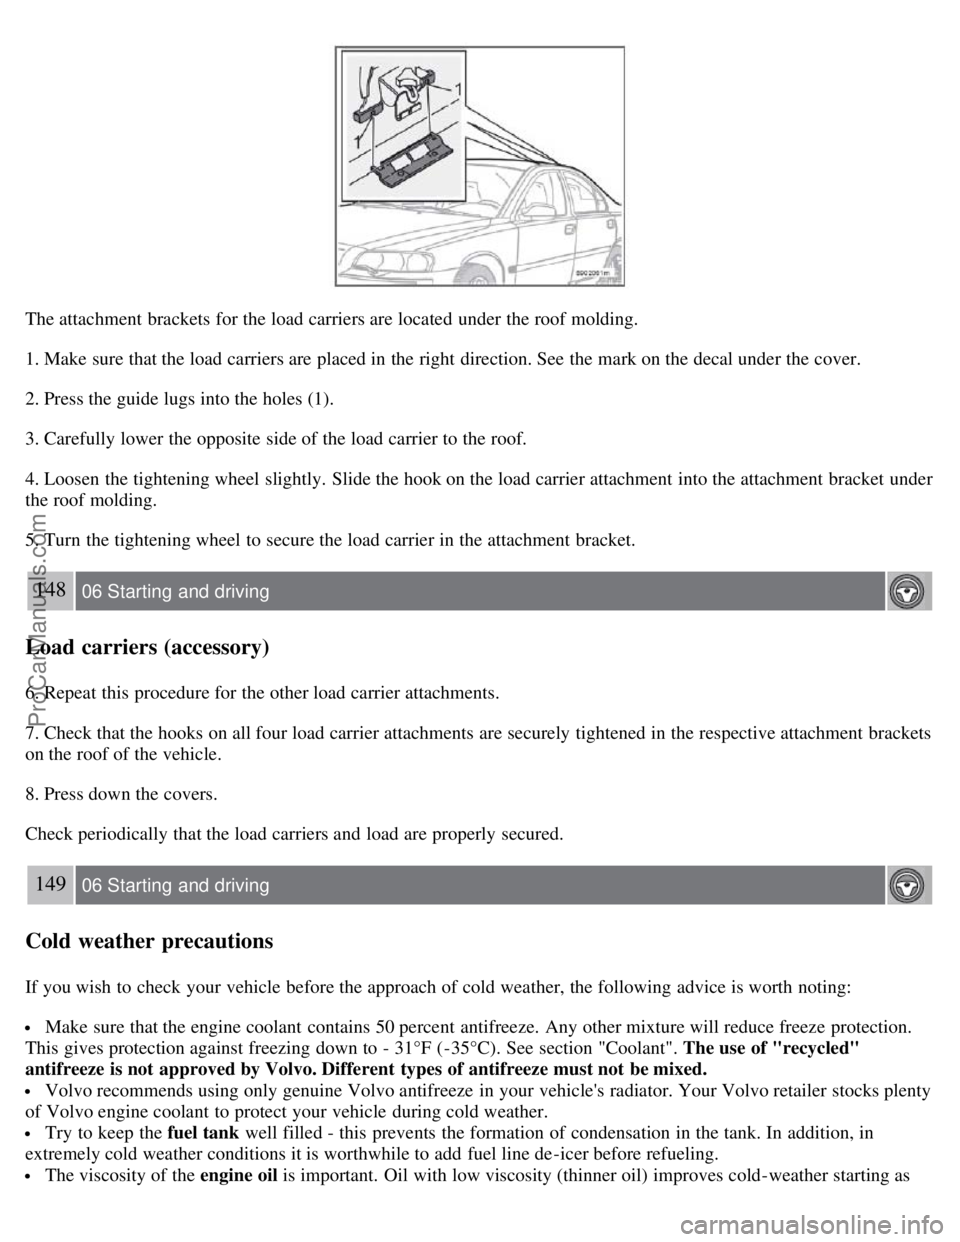
The attachment brackets for the load carriers are located under the roof molding.
1. Make sure that the load carriers are placed in the right direction. See the mark on the decal under the cover.
2. Press the guide lugs into the holes (1).
3. Carefully lower the opposite side of the load carrier to the roof.
4. Loosen the tightening wheel slightly. Slide the hook on the load carrier attachment into the attachment bracket under
the roof molding.
5. Turn the tightening wheel to secure the load carrier in the attachment bracket.
148 06 Starting and driving
Load carriers (accessory)
6. Repeat this procedure for the other load carrier attachments.
7. Check that the hooks on all four load carrier attachments are securely tightened in the respective attachment brackets
on the roof of the vehicle.
8. Press down the covers.
Check periodically that the load carriers and load are properly secured.
149 06 Starting and driving
Cold weather precautions
If you wish to check your vehicle before the approach of cold weather, the following advice is worth noting:
Make sure that the engine coolant contains 50 percent antifreeze. Any other mixture will reduce freeze protection.
This gives protection against freezing down to - 31°F (-35°C). See section "Coolant". The use of "recycled"
antifreeze is not approved by Volvo. Different types of antifreeze must not be mixed.
Volvo recommends using only genuine Volvo antifreeze in your vehicle's radiator. Your Volvo retailer stocks plenty
of Volvo engine coolant to protect your vehicle during cold weather.
Try to keep the fuel tank well filled - this prevents the formation of condensation in the tank. In addition, in
extremely cold weather conditions it is worthwhile to add fuel line de -icer before refueling.
The viscosity of the engine oil is important. Oil with low viscosity (thinner oil) improves cold-weather starting as
ProCarManuals.com
Page 138 of 230
well as decreasing fuel consumption while the engine is warming up. For winter use, 5W - 30 oil, particularly the
synthetic type1, is recommended. Be sure to use good quality oil but do not use cold-weather oil for hard driving or in
warm weather. See section "Engine oil" for more information.
The load placed on the battery is greater during the winter since the windshield wipers, lighting, etc. are used more
often. Moreover, the capacity of the battery decreases as the temperature drops. In very cold weather, a poorly charged
battery can freeze and be damaged. It is therefore advisable to check the state of charge more frequently and spray an
antirust oil on the battery posts.
Volvo recommends the use of snow tires on all four wheels for winter driving - see section "Wheels and tires."
To prevent the washer fluid reservoir from freezing, add washer solvents containing antifreeze (see page 195 for
the location of the washer fluid reservoir). This is important since dirt is often splashed on the windshield during
winter driving, requiring the frequent use of the washers and wipers. Volvo Washer Solvent should be diluted as
follows:
- Down to 14° F (-10° C): 1 part washer solvent and 4 parts water
- Down to 5° F (-15° C): 1 part washer solvent and 3 parts water
- Down to 0° F (-18° C): 1 part washer solvent and 2 parts water
- Down to -18° F (-28° C): 1 part washer solvent and 1 part water
Use Volvo Teflon Lock Spray in the locks.
1Synthetic oil is not used when the oil is changed at the normal maintenance service intervals.
NOTE
Avoid the use of de -icing sprays as they can cause damage to the locks.
W - Winter/Wet driving mode - enhanced vehicle traction (automatic transmission)
Mode W will only function if the gear selector is in the D position.
Press the button at the base of the gear selector to engage/disengage this driving mode.
An LED in the button will light up to indicate that W is engaged and this will also be displayed in the instrument
panel (see page 48
).
This mode may be selected for starting/moving off on slippery roads.
150 06 Starting and driving
Before a long distance trip
It is always worthwhile to have your vehicle checked by a trained and qualified Volvo service technician before
driving long distances. Your retailer or service technician will also be able to supply you with bulbs, fuses, spark plugs
and wiper blades for your use in the event that problems occur.
As a minimum, the following items should be checked before any long trip:
Check that engine runs smoothly and that fuel consumption is normal.
Check for fuel, oil, and fluid leakage.
Check transmission oil level1.
Check condition of drive belts.
Check state of the battery's charge.
Examine tires carefully (the spare tire as well), and replace those that are worn. Check tire pressures.
The brakes, front wheel alignment, and steering gear should be checked by a trained and qualified Volvo service
technician only.
Check all lights, including high beams.
Reflective warning triangles are legal requirement in some countries.
ProCarManuals.com
Page 139 of 230
Have a word with your Volvo retailer if you intend to drive in countries where it may be difficult to obtain the
correct fuel.
Consider your destination. If you will be driving through an area where snow or ice are likely to occur, consider
snow tires.
1To prevent injury from contact with hot surfaces, do not inspect your vehicle's transmission fluid yourself. Have your vehicle's transmission fluid
level inspected by a qualified Volvo service technician.
151 06 Starting and driving
Front/rear park assist (option/accessory)
Front/rear park assist
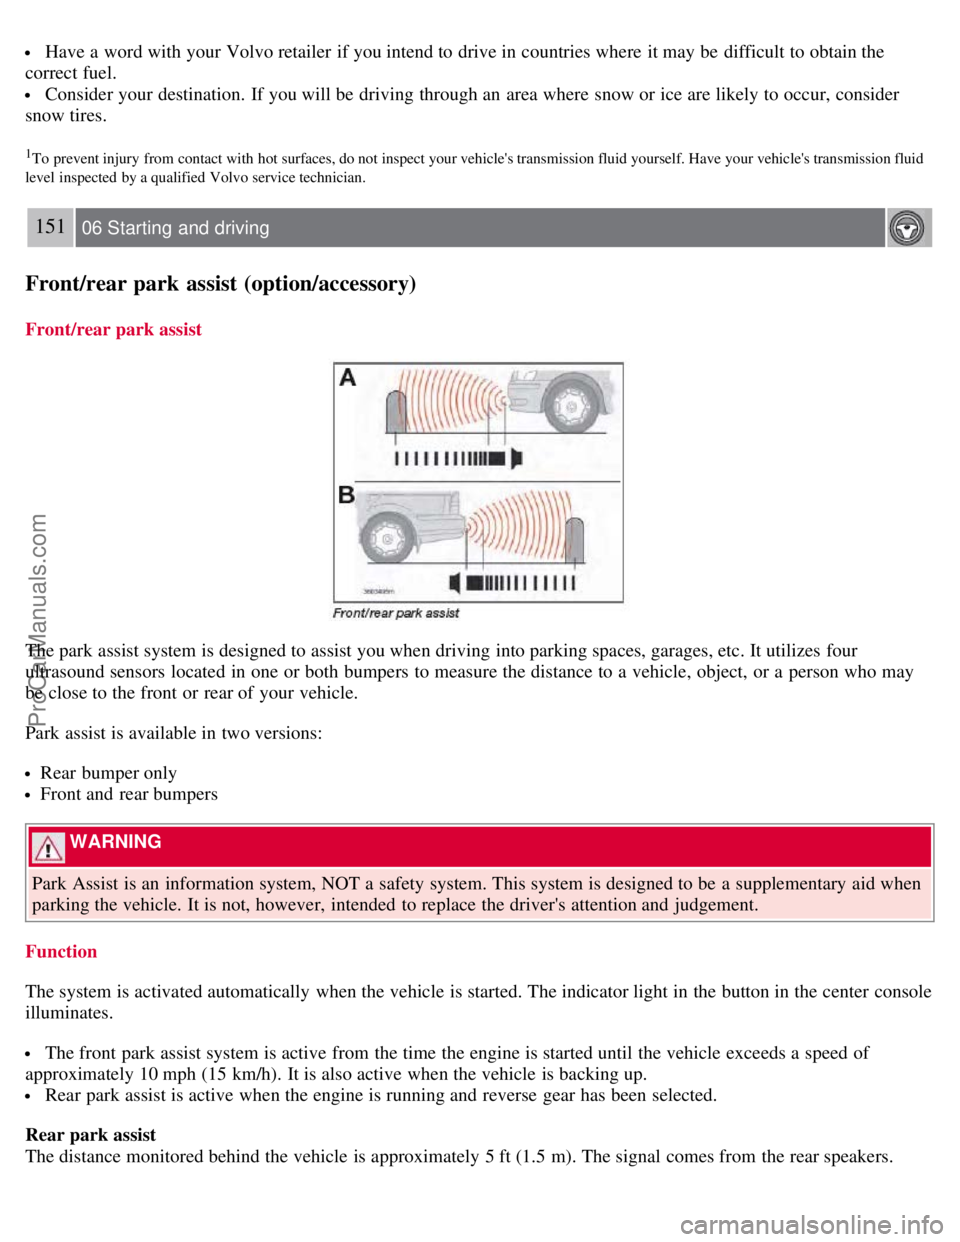
The park assist system is designed to assist you when driving into parking spaces, garages, etc. It utilizes four
ultrasound sensors located in one or both bumpers to measure the distance to a vehicle, object, or a person who may
be close to the front or rear of your vehicle.
Park assist is available in two versions:
Rear bumper only
Front and rear bumpers
WARNING
Park Assist is an information system, NOT a safety system. This system is designed to be a supplementary aid when
parking the vehicle. It is not, however, intended to replace the driver's attention and judgement.
Function
The system is activated automatically when the vehicle is started. The indicator light in the button in the center console
illuminates.
The front park assist system is active from the time the engine is started until the vehicle exceeds a speed of
approximately 10 mph (15 km/h). It is also active when the vehicle is backing up.
Rear park assist is active when the engine is running and reverse gear has been selected.
Rear park assist
The distance monitored behind the vehicle is approximately 5 ft (1.5 m). The signal comes from the rear speakers.
ProCarManuals.com
Page 140 of 230
The system must be deactivated when towing a trailer, carrying bicycles in a rear-mounted carrier, etc, which could
trigger the rear park assist system's sensors.
NOTE
Rear park assist is deactivated automatically when towing a trailer if Volvo genuine trailer wiring is used.
Front park assist
The distance monitored in front of the vehicle is approximately 2.5 ft (0.8 m). The audible signal comes from the audio
system's front speakers.
It may not be possible to combine auxiliary headlights and front park assist since these lights could trigger the
system's sensors.
152 06 Starting and driving
Front/rear park assist (option/accessory)
Activating/deactivating park assist
The system is activated automatically when the vehicle is started.
Press the Park assist button on the center console (see page 55) to temporarily deactivate the system(s). The
indicator light in the button will go out when the system has been deactivated.
Park assist will be automatically reactivated the next time the engine is started, or if the button is pressed (the
indicator light in the button will illuminate).
NOTE
Front park assist is disengaged automatically when the parking brake is applied.
If the vehicle is equipped with front and rear park assist, both systems will be deactivated by pressing the button.
Audible signals from the park assist system
The Park Assist system uses an intermittent tone that pulses faster as you come close to an object, and becomes
constant when you are within approximately 1 ft (30 cm) of an object in front of or behind the vehicle. If the volume
of another source from the audio system is high, this will be automatically lowered.
If there are objects within this distance both behind and in front of the vehicle, the signal alternates between front and
rear speakers.
Faults in the system
If the yellow warning symbol illuminates and PARK ASSIST SERVICE REQUIRED is shown on the
information display, this indicates that the system is not functioning properly and has been disengaged. Consult a
trained and qualified Volvo service technician.
CAUTION
In certain circumstances, the park assist system may give unexpected warning signals that can be caused by external
ProCarManuals.com