clock VOLVO S60 INSCRIPTION 2016 Owner´s Manual
[x] Cancel search | Manufacturer: VOLVO, Model Year: 2016, Model line: S60 INSCRIPTION, Model: VOLVO S60 INSCRIPTION 2016Pages: 344, PDF Size: 7.24 MB
Page 5 of 344
Contents
* Option/accessory, for more information, see Introduction.3
03
03 Instruments and controls
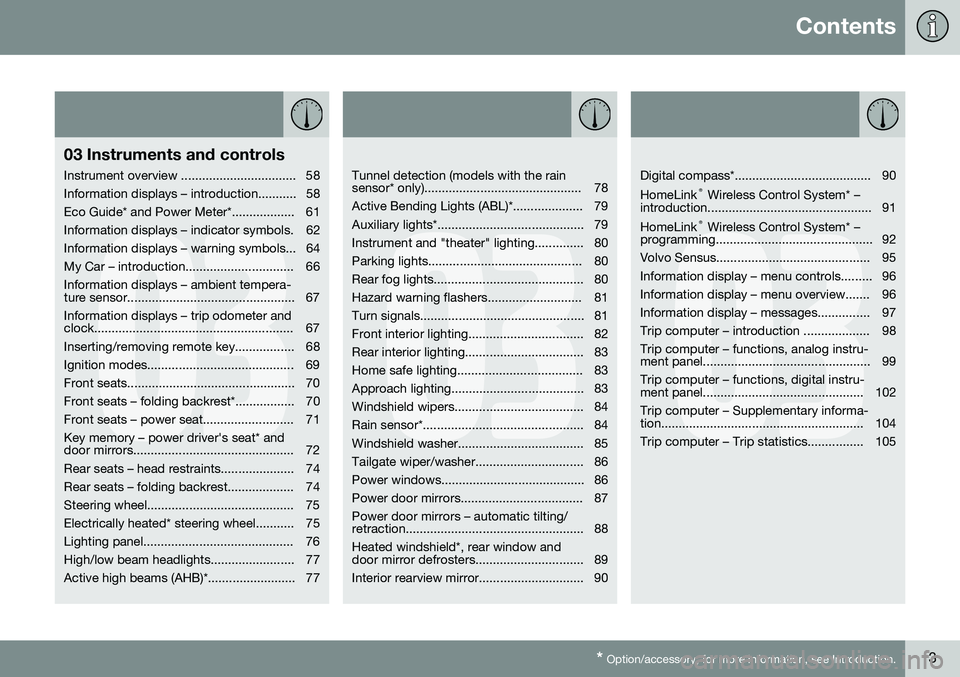
Instrument overview ................................. 58
Information displays – introduction........... 58
Eco Guide* and Power Meter*.................. 61
Information displays – indicator symbols. 62
Information displays – warning symbols... 64
My Car – introduction............................... 66Information displays – ambient tempera-
ture sensor................................................ 67 Information displays – trip odometer and
clock......................................................... 67
Inserting/removing remote key................. 68
Ignition modes.......................................... 69
Front seats................................................ 70
Front seats – folding backrest*................. 70
Front seats – power seat.......................... 71Key memory – power driver's seat* and
door mirrors.............................................. 72
Rear seats – head restraints..................... 74
Rear seats – folding backrest................... 74
Steering wheel.......................................... 75
Electrically heated* steering wheel........... 75
Lighting panel........................................... 76
High/low beam headlights........................ 77
Active high beams (AHB)*......................... 77
03
Tunnel detection (models with the rain
sensor* only)............................................. 78
Active Bending Lights (ABL)*.................... 79
Auxiliary lights*.......................................... 79
Instrument and "theater" lighting.............. 80
Parking lights............................................ 80
Rear fog lights........................................... 80
Hazard warning flashers........................... 81
Turn signals............................................... 81
Front interior lighting................................. 82
Rear interior lighting.................................. 83
Home safe lighting.................................... 83
Approach lighting...................................... 83
Windshield wipers..................................... 84
Rain sensor*.............................................. 84
Windshield washer.................................... 85
Tailgate wiper/washer............................... 86
Power windows......................................... 86
Power door mirrors................................... 87Power door mirrors – automatic tilting/
retraction................................................... 88 Heated windshield*, rear window and
door mirror defrosters............................... 89
Interior rearview mirror.............................. 90
03
Digital compass*....................................... 90 HomeLink ®
Wireless Control System* –
introduction............................................... 91HomeLink ®
Wireless Control System* –
programming............................................. 92
Volvo Sensus............................................ 95
Information display – menu controls......... 96
Information display – menu overview....... 96
Information display – messages............... 97
Trip computer – introduction ................... 98Trip computer – functions, analog instru-
ment panel................................................ 99 Trip computer – functions, digital instru-
ment panel.............................................. 102 Trip computer – Supplementary informa-
tion.......................................................... 104
Trip computer – Trip statistics................ 105
Page 41 of 344
02 Safety
02
}}
39
WARNING
•Do not place any type of object on the front passenger's seat in such a waythat jamming, pressing, or squeezingoccurs between the object and thefront seat, other than as a direct resultof the correct use of the AutomaticLocking Retractor/Emergency LockingRetractor (ALR/ELR) seat belt (Childrestraints (p. 47)).
• No objects should be placed under thefront passenger's seat. This couldinterfere with the OWS system's func-tion.
Related information
•
Supplemental Restraint System (SRS) (p. 31)
Side impact protection (SIPS) airbags
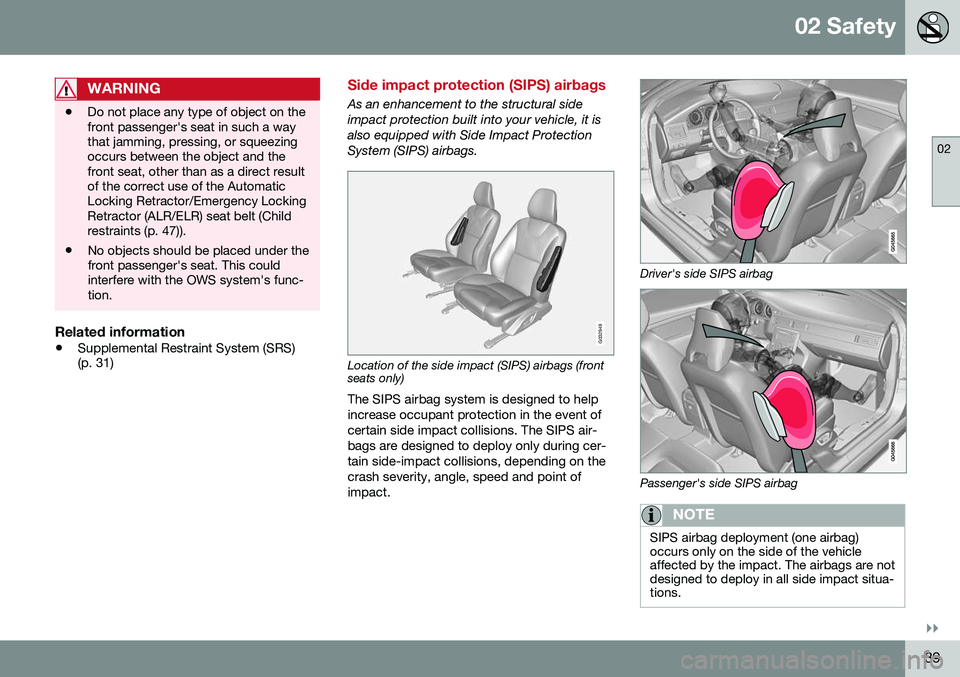
As an enhancement to the structural side impact protection built into your vehicle, it isalso equipped with Side Impact ProtectionSystem (SIPS) airbags.
G032949
Location of the side impact (SIPS) airbags (front seats only) The SIPS airbag system is designed to help increase occupant protection in the event ofcertain side impact collisions. The SIPS air-bags are designed to deploy only during cer-tain side-impact collisions, depending on thecrash severity, angle, speed and point ofimpact.
Driver's side SIPS airbag
Passenger's side SIPS airbag
NOTE
SIPS airbag deployment (one airbag) occurs only on the side of the vehicleaffected by the impact. The airbags are notdesigned to deploy in all side impact situa-tions.
Page 60 of 344
03 Instruments and controls
03
58* Option/accessory, for more information, see Introduction.
Instrument overview
This overview shows the location of the instrument panel and center console displays,and controls/buttons/switches.
Related information
• Information displays – ambient tempera- ture sensor (p. 67)
• Information displays – trip odometer andclock (p. 67)
Information displays – introduction
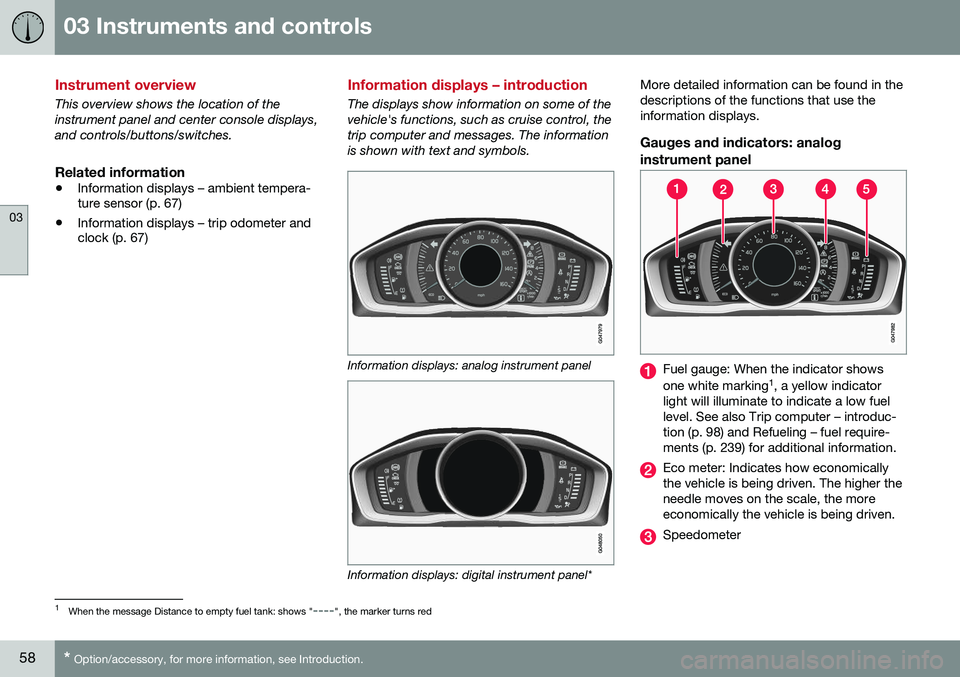
The displays show information on some of the vehicle's functions, such as cruise control, thetrip computer and messages. The informationis shown with text and symbols.
Information displays: analog instrument panel
Information displays: digital instrument panel* More detailed information can be found in the descriptions of the functions that use theinformation displays.
Gauges and indicators: analog
instrument panel
Fuel gauge: When the indicator shows one white marking 1
, a yellow indicator
light will illuminate to indicate a low fuel level. See also Trip computer – introduc-tion (p. 98) and Refueling – fuel require-ments (p. 239) for additional information.
Eco meter: Indicates how economically the vehicle is being driven. The higher theneedle moves on the scale, the moreeconomically the vehicle is being driven.
Speedometer
1 When the message Distance to empty fuel tank: shows "----", the marker turns red
Page 68 of 344
||
03 Instruments and controls
03
66
Reminder – doors not closedIf one of the doors is not closed properly, the
information or warning symbol illuminates
(depending on the vehicle's speed), a graphic will be displayed in instrument panel and an explanatory text message 3
will also be dis-
played in the instrument panel. Stop the vehi- cle in a safe place as soon as possible andclose the door.
If the vehicle is driven at a speedlower than approximately 5 mph(7 km/h), the information symbol illu-
minates.
If the vehicle is driven at a speed higher than approximately 5 mph(7 km/h), the warning symbol illumi-
nates.
If the hood is not closed properly, the warn-
ing symbol illuminates, a graphic will be dis-
played in instrument panel and an explana- tory text message 3
will also be displayed in
the instrument panel. Stop the vehicle in a safe place as soon as possible and close thehood.
Related information
• Information displays – introduction (p. 58)
• Information displays – indicator symbols (p. 62)
My Car – introduction
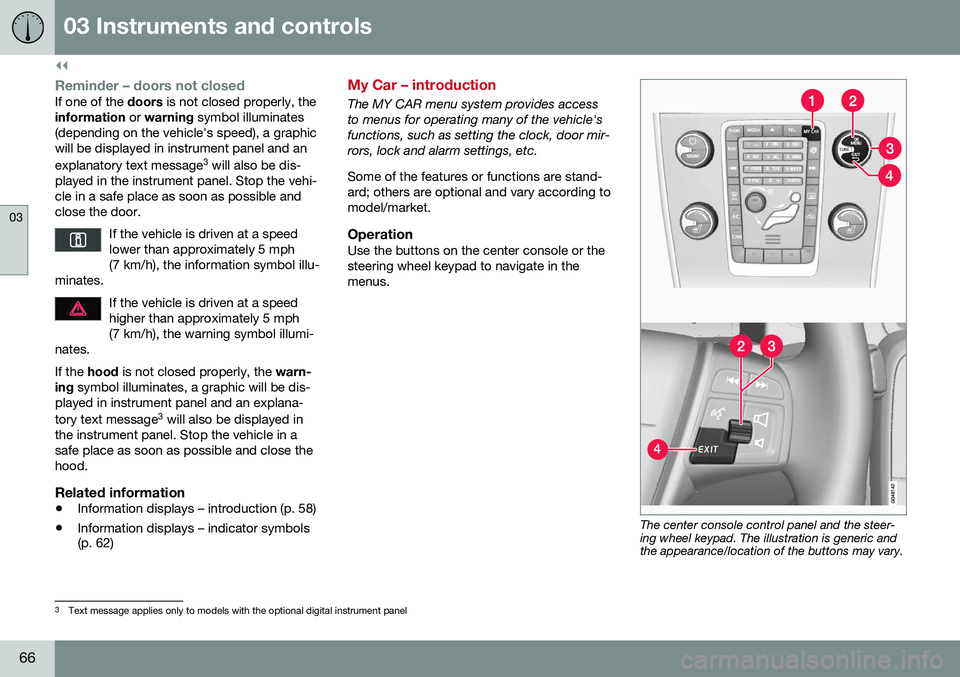
The MY CAR menu system provides access to menus for operating many of the vehicle'sfunctions, such as setting the clock, door mir-rors, lock and alarm settings, etc. Some of the features or functions are stand- ard; others are optional and vary according tomodel/market.
OperationUse the buttons on the center console or thesteering wheel keypad to navigate in themenus.
The center console control panel and the steer- ing wheel keypad. The illustration is generic andthe appearance/location of the buttons may vary.
3
Text message applies only to models with the optional digital instrument panel
Page 69 of 344
03 Instruments and controls
03
}}
* Option/accessory, for more information, see Introduction.67
MY CAR : opens the MY CAR menu sys-
tem.
OK/MENU : Press the button on the cen-
ter console or the thumb wheel on the steering wheel keypad to select a menualternative or to store a selected functionin the system's memory.
TUNE : Turn this control on the center
console or the thumb wheel on the steer- ing wheel keypad to navigate up/down ina menu.
EXIT
EXIT functionsDepending on which function the cursor is pointing to and the menu level, briefly press-ing EXIT will result in:
• An in-coming phone call will be rejected
• The current function will be cancelled
• Characters entered will be erased
• The most recent selection will be cancel- led
• Go back/up in the menu system
Pressing and holding EXIT takes you to the
normal view for MY CAR. If you are already in normal view, this will take you to the mainsource menu.
Menu selections and pathsPlease consult your Sensus Infotainment sup-plement for a description of the MY CARmenu selections and paths.
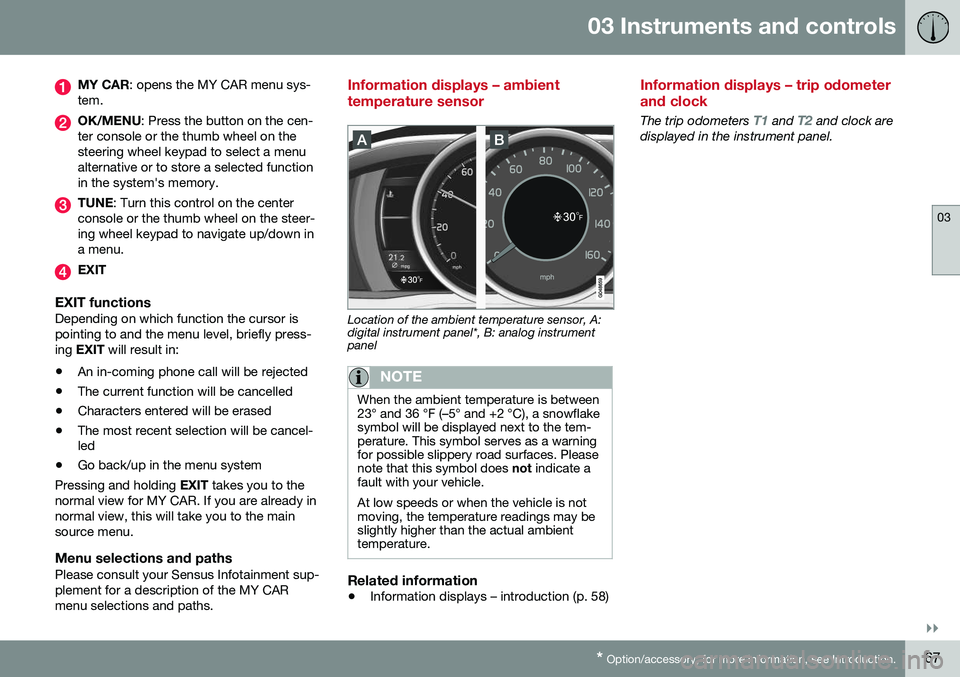
Information displays – ambient temperature sensor
Location of the ambient temperature sensor, A: digital instrument panel*, B: analog instrumentpanel
NOTE
When the ambient temperature is between 23° and 36 °F (–5° and +2 °C), a snowflakesymbol will be displayed next to the tem-perature. This symbol serves as a warningfor possible slippery road surfaces. Pleasenote that this symbol does not indicate a
fault with your vehicle. At low speeds or when the vehicle is not moving, the temperature readings may beslightly higher than the actual ambienttemperature.
Related information
• Information displays – introduction (p. 58)
Information displays – trip odometer and clock
The trip odometers T1 and T2 and clock are
displayed in the instrument panel.
Page 70 of 344
||
03 Instruments and controls
03
68* Option/accessory, for more information, see Introduction.
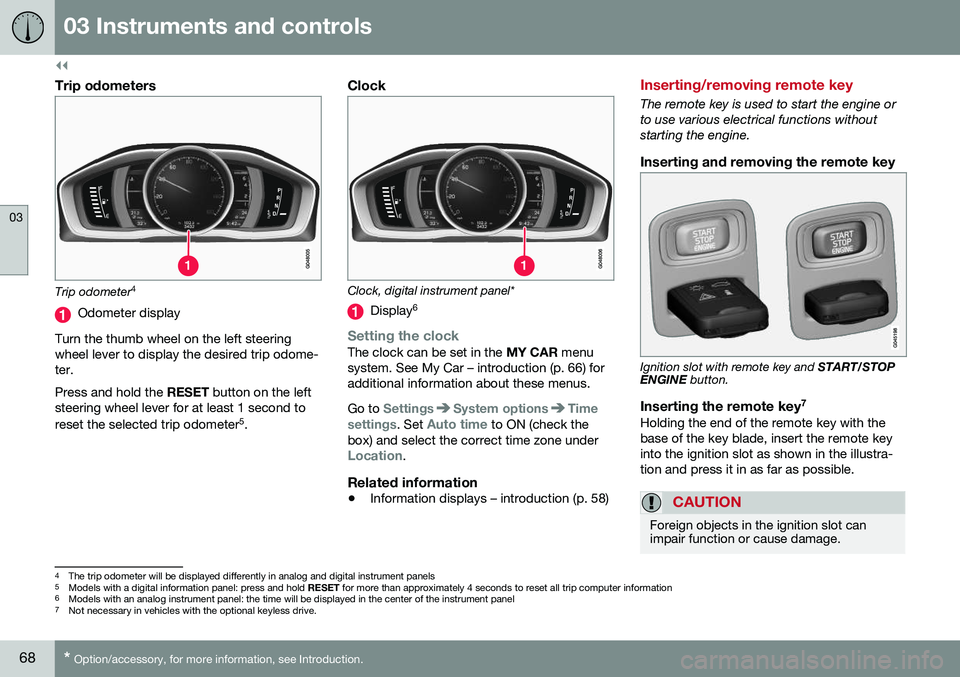
Trip odometers
Trip odometer 4
Odometer display
Turn the thumb wheel on the left steering wheel lever to display the desired trip odome-ter. Press and hold the RESET button on the left
steering wheel lever for at least 1 second to reset the selected trip odometer 5
.
Clock
Clock, digital instrument panel*
Display 6
Setting the clockThe clock can be set in the
MY CAR menu
system. See My Car – introduction (p. 66) for additional information about these menus. Go to
SettingsSystem optionsTime
settings
. Set Auto time to ON (check the
box) and select the correct time zone under
Location.
Related information
• Information displays – introduction (p. 58)
Inserting/removing remote key
The remote key is used to start the engine or to use various electrical functions withoutstarting the engine.
Inserting and removing the remote key
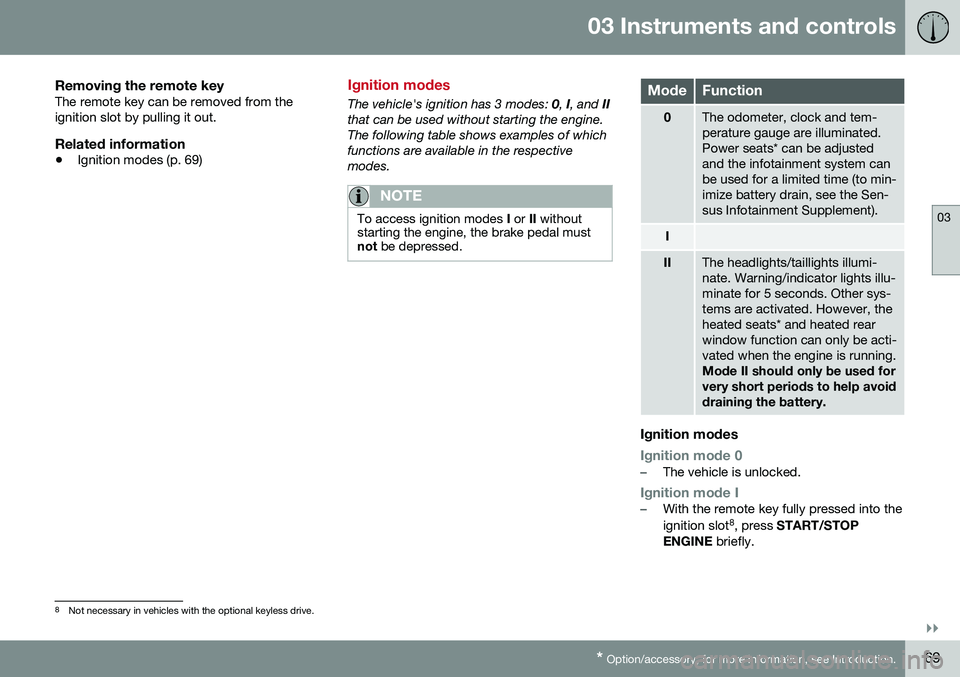
Ignition slot with remote key and
START/STOP
ENGINE button.
Inserting the remote key 7Holding the end of the remote key with the base of the key blade, insert the remote keyinto the ignition slot as shown in the illustra-tion and press it in as far as possible.
CAUTION
Foreign objects in the ignition slot can impair function or cause damage.
4
The trip odometer will be displayed differently in analog and digital instrument panels
5 Models with a digital information panel: press and hold RESET for more than approximately 4 seconds to reset all trip computer information
6 Models with an analog instrument panel: the time will be displayed in the center of the instrument panel
7
Not necessary in vehicles with the optional keyless drive.
Page 71 of 344
03 Instruments and controls
03
}}
* Option/accessory, for more information, see Introduction.69
Removing the remote keyThe remote key can be removed from the ignition slot by pulling it out.
Related information
• Ignition modes (p. 69)
Ignition modes
The vehicle's ignition has 3 modes:
0, I, and II
that can be used without starting the engine. The following table shows examples of whichfunctions are available in the respectivemodes.
NOTE
To access ignition modes I or II without
starting the engine, the brake pedal must not be depressed.
ModeFunction
0The odometer, clock and tem- perature gauge are illuminated.Power seats* can be adjustedand the infotainment system canbe used for a limited time (to min-imize battery drain, see the Sen-sus Infotainment Supplement).
I
IIThe headlights/taillights illumi- nate. Warning/indicator lights illu-minate for 5 seconds. Other sys-tems are activated. However, theheated seats* and heated rearwindow function can only be acti-vated when the engine is running. Mode II should only be used for very short periods to help avoiddraining the battery.
Ignition modes
Ignition mode 0–The vehicle is unlocked.
Ignition mode I–With the remote key fully pressed into the ignition slot 8
, press START/STOP
ENGINE briefly.
8
Not necessary in vehicles with the optional keyless drive.
Page 97 of 344
03 Instruments and controls
03
* Option/accessory, for more information, see Introduction.95
Volvo Sensus
Volvo Sensus is the core of the contact inter- face with your vehicle. Sensus provides infor-mation, entertainment and offers access tofunctions that make owning and operating aVolvo easier.
Volvo Sensus is the operating system in your vehicle and it enables you to interact intui-tively with the vehicle’s various features andfunctions, including accessing the Internet,when it suits you. Volvo Sensus uses the center console screen to display information and menus, and tooffer a user interface that enables you tomake personalized settings for e.g., vehicle,infotainment and climate system functions. The buttons on the center console or the steering wheel keypad are used to activate/deactivate functions and change numeroussettings. Pressing the MY CAR button on the center
console displays all of the settings related to driving and operating the vehicle, such as City Safety, lock and alarm functions, auto-matic blower speed, setting the clock, etc. Pressing the source buttons on the center console (
RADIO, MEDIA , TEL ,
, NAV * and
CAM *, etc.) make it possible to select e.g.,
AM or FM radio, play a CD or DVD, use the Bluetooth ®
hands-free feature, the navigation
system* or the park assist camera*. See your on-board owner’s manual or the separate printed supplements for detailedinformation about the functionality offered byVolvo Sensus.
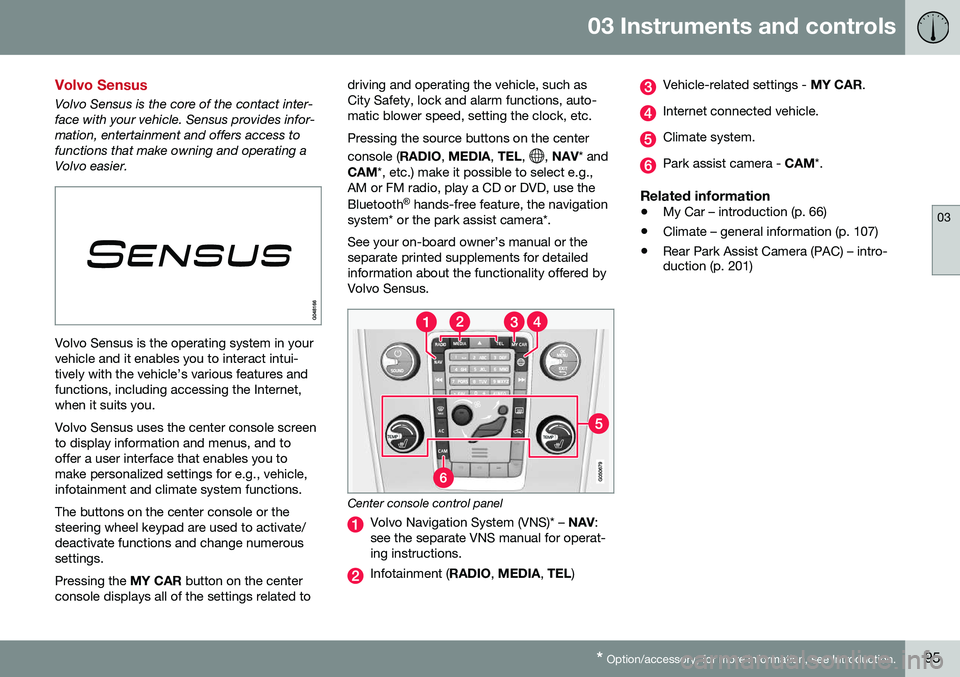
Center console control panel
Volvo Navigation System (VNS)* – NAV:
see the separate VNS manual for operat- ing instructions.
Infotainment ( RADIO, MEDIA , TEL )
Vehicle-related settings - MY CAR.
Internet connected vehicle.
Climate system.
Park assist camera - CAM*.
Related information
•My Car – introduction (p. 66)
• Climate – general information (p. 107)
• Rear Park Assist Camera (PAC) – intro- duction (p. 201)
Page 113 of 344
04 Climate
04
111
Related information
•Climate – general information (p. 107)
• Electronic climate control (ECC) (p. 110)
Temperature and blower control
When the vehicle is started, the most recent setting is resumed. The blower should always be activated to help avoid condensation and fogging on thewindows.
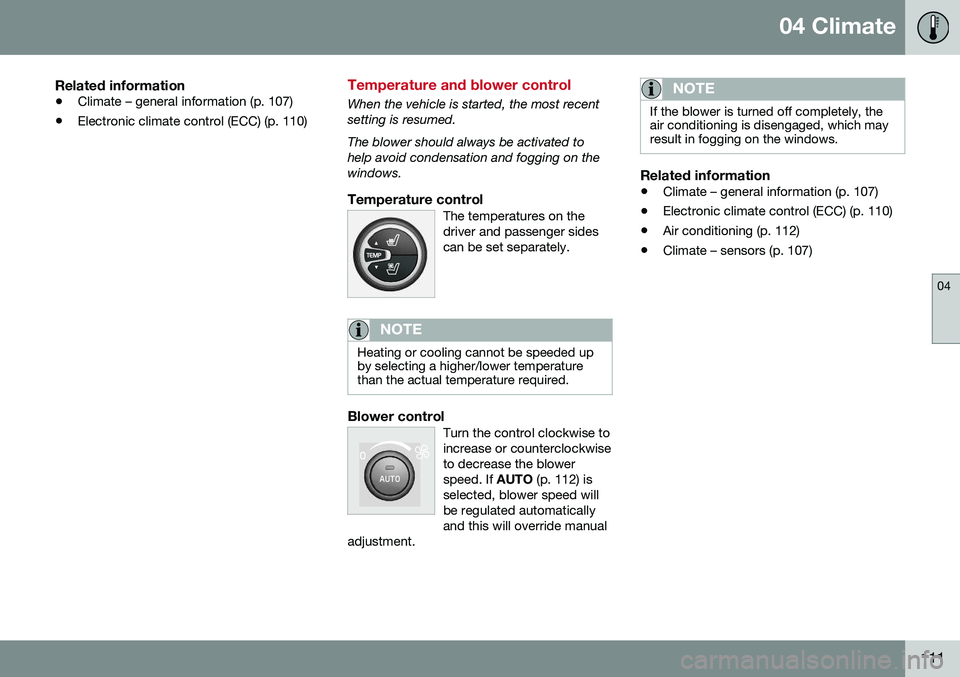
Temperature controlThe temperatures on thedriver and passenger sidescan be set separately.
NOTE
Heating or cooling cannot be speeded up by selecting a higher/lower temperaturethan the actual temperature required.
Blower controlTurn the control clockwise to increase or counterclockwiseto decrease the blowerspeed. If
AUTO (p. 112) is
selected, blower speed willbe regulated automaticallyand this will override manual
adjustment.
NOTE
If the blower is turned off completely, the air conditioning is disengaged, which mayresult in fogging on the windows.
Related information
• Climate – general information (p. 107)
• Electronic climate control (ECC) (p. 110)
• Air conditioning (p. 112)
• Climate – sensors (p. 107)
Page 138 of 344
06 Locks and alarm
06
136
Locking/unlocking – glove compartment
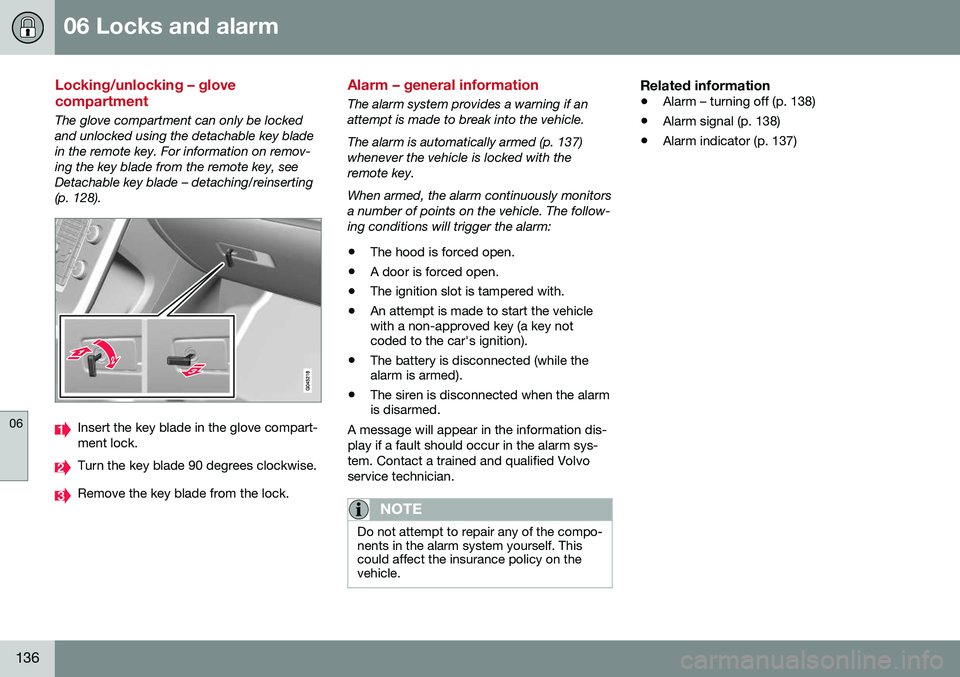
The glove compartment can only be locked and unlocked using the detachable key bladein the remote key. For information on remov-ing the key blade from the remote key, seeDetachable key blade – detaching/reinserting(p. 128).
Insert the key blade in the glove compart- ment lock.
Turn the key blade 90 degrees clockwise.
Remove the key blade from the lock.
Alarm – general information
The alarm system provides a warning if an attempt is made to break into the vehicle. The alarm is automatically armed (p. 137) whenever the vehicle is locked with theremote key. When armed, the alarm continuously monitors a number of points on the vehicle. The follow-ing conditions will trigger the alarm:• The hood is forced open.
• A door is forced open.
• The ignition slot is tampered with.
• An attempt is made to start the vehicle with a non-approved key (a key notcoded to the car's ignition).
• The battery is disconnected (while thealarm is armed).
• The siren is disconnected when the alarmis disarmed.
A message will appear in the information dis- play if a fault should occur in the alarm sys-tem. Contact a trained and qualified Volvoservice technician.
NOTE
Do not attempt to repair any of the compo- nents in the alarm system yourself. Thiscould affect the insurance policy on thevehicle.
Related information
• Alarm – turning off (p. 138)
• Alarm signal (p. 138)
• Alarm indicator (p. 137)