warning light VOLVO S60 TWIN ENGINE 2019 Owner's Manual
[x] Cancel search | Manufacturer: VOLVO, Model Year: 2019, Model line: S60 TWIN ENGINE, Model: VOLVO S60 TWIN ENGINE 2019Pages: 645, PDF Size: 13.96 MB
Page 195 of 645

SEATS AND STEERING WHEEL
* Option/accessory.193
Adjusting the steering wheel
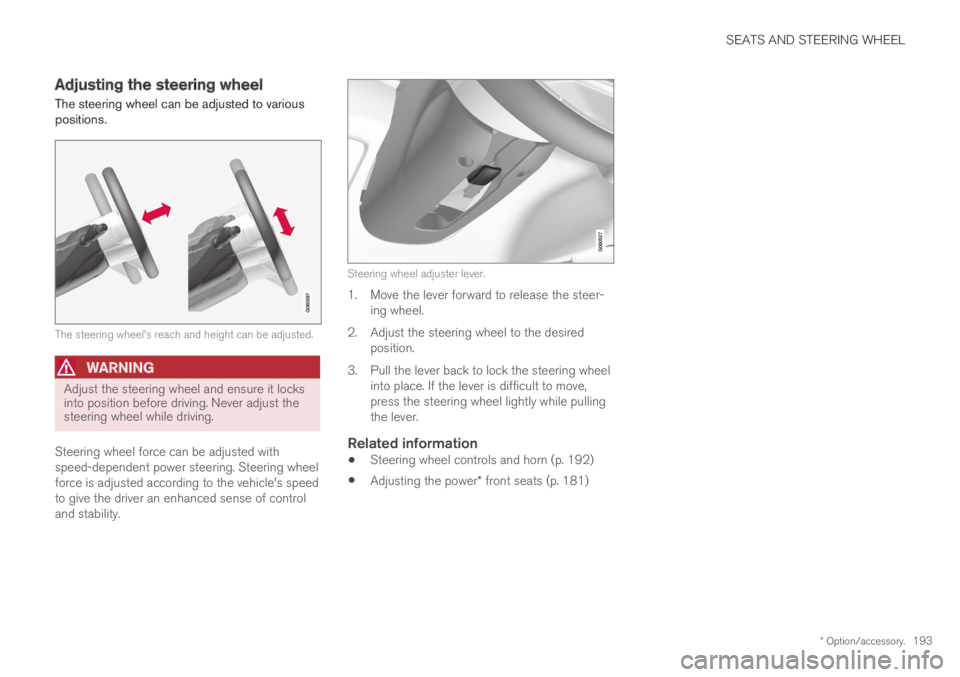
The steering wheel can be adjusted to variouspositions.
The steering wheel's reach and height can be adjusted.
WARNING
Adjust the steering wheel and ensure it locksinto position before driving. Never adjust thesteering wheel while driving.
Steering wheel force can be adjusted withspeed-dependent power steering. Steering wheelforce is adjusted according to the vehicle's speedto give the driver an enhanced sense of controland stability.
Steering wheel adjuster lever.
1. Move the lever forward to release the steer-ing wheel.
2.Adjust the steering wheel to the desiredposition.
3. Pull the lever back to lock the steering wheelinto place. If the lever is difficult to move,press the steering wheel lightly while pullingthe lever.
Related information
Steering wheel controls and horn (p. 192)
Adjusting the power* front seats (p. 181)
Page 232 of 645

KEY, LOCKS AND ALARM
* Option/accessory.230
Remote key
The remote key is used to lock and unlock doorsand the trunk lid. The remote key must be in thevehicle in order to start the engine.
Remote key3 and button-less key (Key Tag)*.
The remote key is not physically used to start theignition because the vehicle is standard-equippedwith keyless start (Passive Start). The key onlyneeds to be in the front section of the passengercompartment.
For vehicles equipped with keyless locking andunlocking (Passive Entry)*, the engine can bestarted with the key anywhere in the vehicle. Asmaller, lighter and button-less key (Key Tag) isalso provided.
The remote keys can be linked to different driverprofiles to store personal settings in the vehicle.
Remote key buttons
The remote key has four buttons, one on the left sideand three on the right.
Locking - Press once to lock the doors,trunk lid and fuel filler door and arm thealarm.
Press and hold to close all windows.
Unlocking – Press once to unlock thedoors and trunk lid and disarm the alarm.
Press and hold to open all windows at thesame time. This total airing function can beused to e.g. quickly air out the vehicle in hotweather.
Trunk lid - Press to unlock and disarm thetrunk lid only. Pressing and holding will open
the trunk lid mechanically due to the preloa-ded springs.
Panic alarm - Used to attract attention inemergency situations. Press and hold thebutton for at least 3 seconds or press twicewithin 3 seconds to activate the turn signalsand horn. To deactivate, wait at least 5 sec-onds and press the button again. If no actionis taken, the panic alarm will deactivate auto-matically after 3 minutes.
WARNING
If anyone is left in the vehicle, make sure thatpower to the power windows and panoramicroof* is cut off by always taking the remotekey with you when you leave the vehicle.
3The illustration is generic - details may vary according to vehicle model.
Page 257 of 645

KEY, LOCKS AND ALARM
255
Alarm
The alarm emits sound and light signals if any-one without a valid remote key attempts to breakinto the vehicle or interferes with the start batteryor alarm siren.
When armed, the alarm will be triggered if:
the hood, trunk lid or any door is opened.
a battery cable is disconnected.
the alarm siren is disconnected.
Alarm signals
The following occurs if the alarm is triggered:
A siren will sound for 30 seconds or until thealarm is turned off.
The hazard warning flashers will flash for5 minutes or until the alarm is turned off.
If the reason the alarm was triggered is not recti-
fied, the alarm cycle will repeat up to 10 times14.
Alarm indicator
A red indicator light on the dashboard shows thestatus of the alarm:
Indicator off - the alarm is disarmed.
Indicator flashes once every two seconds -the alarm is armed.
The indicator flashes quickly after the alarmhas been disabled for up to 30 seconds oruntil the ignition is put in I mode – the alarmhas been triggered.
In the event of alarm system failure
If a problem is detected in the alarmsystem, a symbol and the messageAlarm system failure Servicerequired will appear in the instrumentpanel. Contact a workshop - an authorized Volvoworkshop is recommended.
NOTE
Do not attempt to repair or alter any of thecomponents in the alarm system yourself. Anysuch attempt could affect the terms and con-ditions of your insurance policy.
Related information
Arming and disarming the alarm (p. 256)
14Certain markets only.
Page 268 of 645

DRIVER SUPPORT
* Option/accessory.266
Cruise control
Cruise Control (CC10) can help the driver main-tain an even speed to provide a more relaxingdriving experience on highways and long,straight roads with even traffic flows.
Overview
Function buttons and symbols.
: Activates Cruise Control from standbymode and resumes the set speed
: Increases the set speed
: From standby mode – activatesCruise Control and sets the current speed
: From active mode – deactivates/putsCruise Control in standby mode
: Reduces the set speed
Marker for set speed
The vehicle's current speed
Set speed
NOTE
In vehicles equipped with Adaptive Cruise
Control*(ACC11), it is possible to switchbetween Cruise Control and Adaptive CruiseControl.
WARNING
The function is supplementary driver sup-port intended to facilitate driving and helpmake it safer – it cannot handle all situa-tions in all traffic, weather and road condi-tions.
The driver is advised to read all sectionsin the Owner's Manual about this functionto learn of its limitations, which the drivermust be aware of before using the func-tion.
Driver support functions are not a substi-tute for the driver's attention and judg-ment. The driver is always responsible forensuring the vehicle is driven in a safemanner, at the appropriate speed, with anappropriate distance to other vehicles,and in accordance with current trafficrules and regulations.
Using engine braking instead of
applying the brakes
Cruise Control regulates speed by lightly applyingthe brakes. On downgrades, it can sometimes bedesirable to roll a bit faster and let speed bereduced instead by engine braking alone. Thedriver can temporarily disengage the Cruise Con-trol braking function.
10Cruise Control11Adaptive Cruise Control
Page 272 of 645

||
DRIVER SUPPORT
* Option/accessory.270
3.Press the (2) button on the steeringwheel keypad again.
>Another function will be activated.
Related information
Cruise control (p. 266)
Switching between Cruise Control and Adap-tive Cruise Control* (p. 277)
Activating and starting Cruise Control(p. 267)
Reactivating Cruise Control from standbymode (p. 269)
Deactivating and putting Cruise Control instandby mode (p. 268)
Distance Alert*16
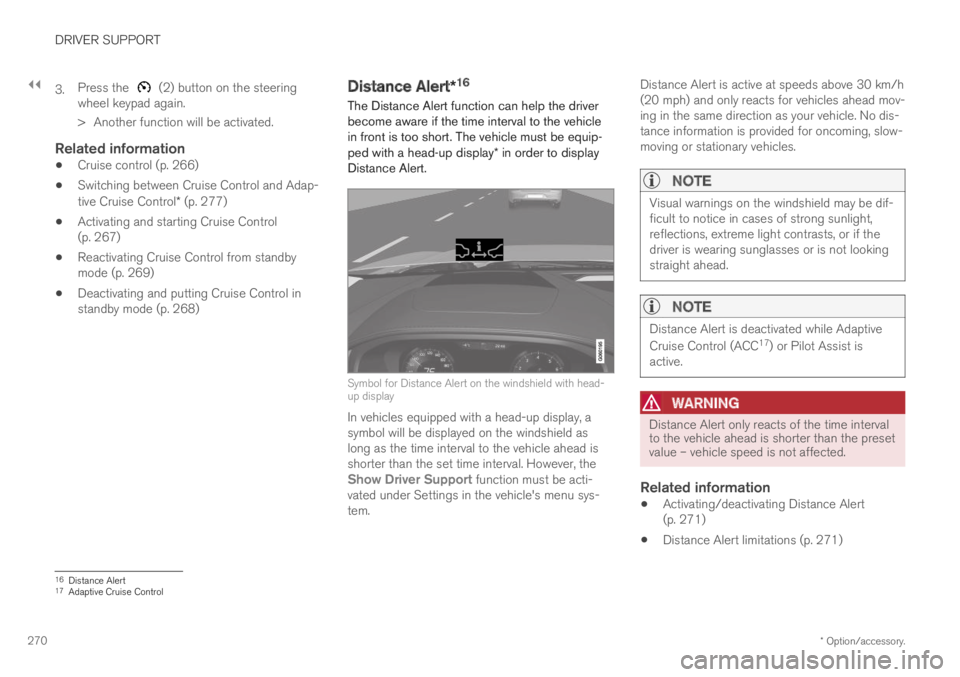
The Distance Alert function can help the driverbecome aware if the time interval to the vehiclein front is too short. The vehicle must be equip-ped with a head-up display* in order to displayDistance Alert.
Symbol for Distance Alert on the windshield with head-up display
In vehicles equipped with a head-up display, asymbol will be displayed on the windshield aslong as the time interval to the vehicle ahead isshorter than the set time interval. However, theShow Driver Support function must be acti-vated under Settings in the vehicle's menu sys-tem.
Distance Alert is active at speeds above 30 km/h(20 mph) and only reacts for vehicles ahead mov-ing in the same direction as your vehicle. No dis-tance information is provided for oncoming, slow-moving or stationary vehicles.
NOTE
Visual warnings on the windshield may be dif-ficult to notice in cases of strong sunlight,reflections, extreme light contrasts, or if thedriver is wearing sunglasses or is not lookingstraight ahead.
NOTE
Distance Alert is deactivated while Adaptive
Cruise Control (ACC17) or Pilot Assist isactive.
WARNING
Distance Alert only reacts of the time intervalto the vehicle ahead is shorter than the presetvalue – vehicle speed is not affected.
Related information
Activating/deactivating Distance Alert(p. 271)
Distance Alert limitations (p. 271)
16Distance Alert17Adaptive Cruise Control
Page 273 of 645

DRIVER SUPPORT
}}
* Option/accessory.271
Set time interval for driver support (p. 292)
Collision risk warning from driver support(p. 290)
Head-up display* (p. 140)
Activating/deactivating Distance
Alert18
Distance Alert can be turned off. The function isonly available in vehicles that can display infor-mation on the windshield with a head-up dis-play*.
Activate or deactivate the func-tion using this button in thecenter display's Function view.
GREEN button indicator light – the functionis activated.
GRAY button indicator light – the function isdeactivated.
Distance Alert is automatically activated eachtime the engine is started.
Related information
Distance Alert* (p. 270)
Distance Alert limitations (p. 271)
Distance Alert limitations19
Distance Alert functionality may be reduced incertain situations. The function is only availablein vehicles that can display information on thewindshield with a head-up display*.
WARNING
Detection ability may be affected by vehi-cle size, e.g. motorcycles, which cancause the warning light to come on at ashorter time interval than that set orcause the warning to be temporarilyabsent.
Very high speeds can cause the light tocome on at a shorter time interval thanthat set due to limitations in the range ofthe radar unit.
18Distance Alert19Distance Alert
Page 274 of 645

||
DRIVER SUPPORT
* Option/accessory.272
WARNING
The function is supplementary driver sup-port intended to facilitate driving and helpmake it safer – it cannot handle all situa-tions in all traffic, weather and road condi-tions.
The driver is advised to read all sectionsin the Owner's Manual about this functionto learn of its limitations, which the drivermust be aware of before using the func-tion.
Driver support functions are not a substi-tute for the driver's attention and judg-ment. The driver is always responsible forensuring the vehicle is driven in a safemanner, at the appropriate speed, with anappropriate distance to other vehicles,and in accordance with current trafficrules and regulations.
NOTE
The function uses the vehicle's camera andradar sensor, which has certain general limita-tions.
Related information
Distance Alert* (p. 270)
Camera/radar sensor limitations (p. 300)
Head-up display* (p. 140)
Adaptive Cruise Control*20
Adaptive Cruise Control (ACC21) helps thedriver maintain a constant speed with a set timeinterval to the vehicle ahead.
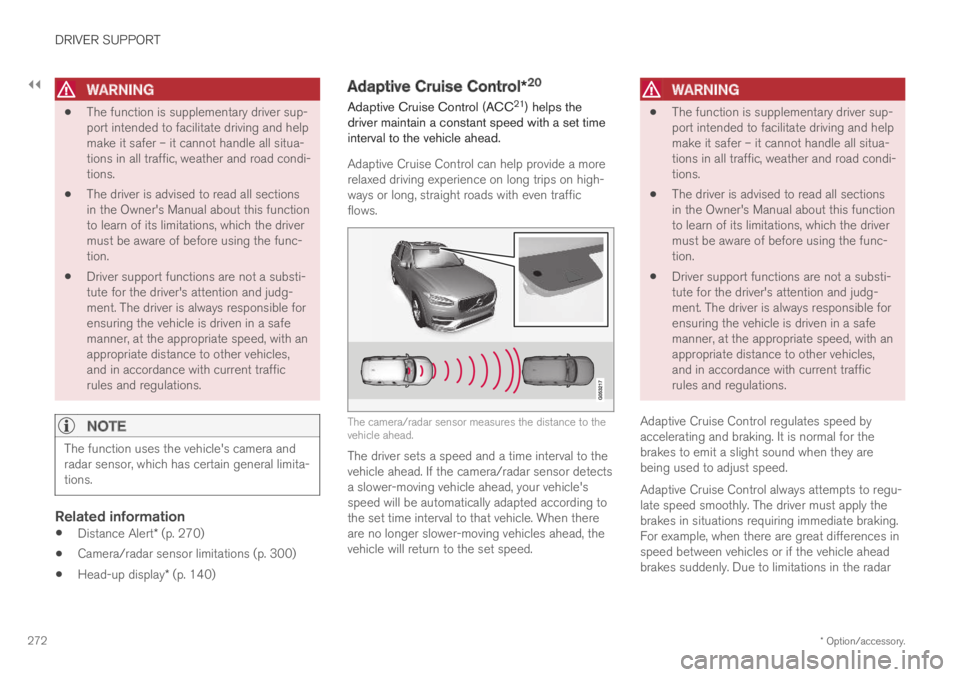
Adaptive Cruise Control can help provide a morerelaxed driving experience on long trips on high-ways or long, straight roads with even trafficflows.
The camera/radar sensor measures the distance to thevehicle ahead.
The driver sets a speed and a time interval to thevehicle ahead. If the camera/radar sensor detectsa slower-moving vehicle ahead, your vehicle'sspeed will be automatically adapted according tothe set time interval to that vehicle. When thereare no longer slower-moving vehicles ahead, thevehicle will return to the set speed.
WARNING
The function is supplementary driver sup-port intended to facilitate driving and helpmake it safer – it cannot handle all situa-tions in all traffic, weather and road condi-tions.
The driver is advised to read all sectionsin the Owner's Manual about this functionto learn of its limitations, which the drivermust be aware of before using the func-tion.
Driver support functions are not a substi-tute for the driver's attention and judg-ment. The driver is always responsible forensuring the vehicle is driven in a safemanner, at the appropriate speed, with anappropriate distance to other vehicles,and in accordance with current trafficrules and regulations.
Adaptive Cruise Control regulates speed byaccelerating and braking. It is normal for thebrakes to emit a slight sound when they arebeing used to adjust speed.
Adaptive Cruise Control always attempts to regu-late speed smoothly. The driver must apply thebrakes in situations requiring immediate braking.For example, when there are great differences inspeed between vehicles or if the vehicle aheadbrakes suddenly. Due to limitations in the radar
Page 284 of 645

||
DRIVER SUPPORT
282
WARNING
The function is supplementary driver sup-port intended to facilitate driving and helpmake it safer – it cannot handle all situa-tions in all traffic, weather and road condi-tions.
The driver is advised to read all sectionsin the Owner's Manual about this functionto learn of its limitations, which the drivermust be aware of before using the func-tion.
Driver support functions are not a substi-tute for the driver's attention and judg-ment. The driver is always responsible forensuring the vehicle is driven in a safemanner, at the appropriate speed, with anappropriate distance to other vehicles,and in accordance with current trafficrules and regulations.
Pilot Assist regulates speed by accelerating andbraking. It is normal for the brakes to emit a slightsound when they are being used to adjust speed.
Pilot Assist attempts to smoothly regulate speed.The driver must apply the brakes in situationsrequiring immediate braking. For example, whenthere are great differences in speed betweenvehicles or if the vehicle ahead brakes suddenly.
Due to limitations in the camera and radar sen-sor, braking may occur unexpectedly or not at all.
Pilot Assist is designed to follow a vehicle aheadin the same lane and maintain a time interval tothat vehicle set by the driver. If the radar sensordoes not detect a vehicle ahead, it will insteadmaintain the speed set by the driver. This will alsohappen if the speed of the vehicle aheadexceeds the set speed for your vehicle.
WARNING
This is not a collision avoidance system.The driver is always responsible and mustintervene if the system fails to detect avehicle ahead.
The function does not brake for people oranimals and does not brake for smallvehicles, such as bikes and motorcycles.Similarly, it does not brake for low trailers,oncoming, slow-moving or stationary vehi-cles and objects.
Do not use the function in demanding sit-uations, such as in city traffic, at intersec-tions, on slippery surfaces, with a lot ofwater or slush on the road, in heavy rain/snow, in poor visibility, on winding roads,or on on/off ramps.
CAUTION
Maintenance of driver support components
may only performed by a workshop31.
In curves and forks in the road
Pilot Assist is designed to interact with the driver.The driver should never wait for steering assis-tance from Pilot Assist, but instead should alwaysbe ready to increase his or her own steeringefforts, particularly in curves.
When the vehicle is approaching an off-rampor a fork in the road, the driver should steertoward the desired lane to indicate to PilotAssist the desired direction of travel.
Pilot Assist strives to keep the vehicle
in the center of the lane
When Pilot Assist provides steering assistance, itstrives to position the vehicle in the center of thelane between the lane markings. For the smooth-est driving experience possible, the driver shouldpermit the vehicle to find the optimal positioning.The driver should check that the vehicle is posi-tioned safely in the lane and can always adjustthe vehicle's position by applying more force tothe steering wheel.
If Pilot Assist does not position the vehicleappropriately in the lane, the driver should
31An authorized Volvo workshop is recommended.
Page 289 of 645

DRIVER SUPPORT
}}}}
287
WARNING
A noticeable increase in speed may follow
when the speed is resumed with the steering wheel button.
Related information
Pilot Assist (p. 281)
Activating and starting Pilot Assist (p. 284)
Pilot Assist limitations
Pilot Assist functionality may be reduced in cer-tain situations.
Pilot Assist is a driver support function designedto simplify driving and assist the driver in manysituations. However, the driver is always responsi-ble for maintaining a suitable distance to vehiclesor objects around it and ensuring that the vehicleis correctly positioned in the traffic lane.
WARNING
In some situations, Pilot Assist may have trou-ble helping the driver properly or may bedeactivated automatically – we advise againstusing Pilot Assist in such cases. Examples ofsuch situations include:
the lane markings are worn, missing orcross each other.
lane division is unclear, for example, whenthe lanes divide or merge or at exits orwhen there are multiple sets of markings.
edges or other lines than lane markingsare present on or near the road, e.g.curbs, joints or repairs to the road sur-face, edges of barriers, roadside edges orstrong shadows.
the lane is narrow or winding.
the lane contains ridges or holes.
weather conditions are poor, e.g. rain,snow or fog or slush or reduced visibilitywith poor light conditions, backlighting,wet road surface, etc.
The driver should also note that Pilot Assisthas the following limitations:
High curbs, roadside barriers, temporaryobstacles (traffic cones, safety barriers,etc.) are not detected. Alternatively, theymay be detected incorrectly as lane mark-ings, with a subsequent risk of contactbetween the vehicle and such obstacles.
Page 292 of 645

||
DRIVER SUPPORT
* Option/accessory.290
The previous illustration34 shows that Pilot Assistis set to maintain a speed of 110 km/h (68 mph)and that there is no target vehicle ahead to fol-low.
Pilot Assist will provide steering assistancebecause it can detect the lane's side markinglines.
Related information
Pilot Assist (p. 281)
Collision risk warning from driversupport
The driver support systems Pilot Assist and
Adaptive Cruise Control*35 can help alert thedriver if the distance to the vehicle ahead sud-denly decreases to an unsafe distance.
Collision warning audible signal and symbol.
Acoustic collision warning signal
Collision warning symbol
Camera/radar sensor distance monitoring
Driver support uses approx. 40% of the vehicle'sbraking capacity. If a situation requires morebraking force than driver support can provide, andif the driver does not apply the brakes, a warning
light and audible warning signal will be activatedto alert the driver that immediate action isrequired.
WARNING
The driver support system only issues a warn-ing for vehicles detected by its radar unit –thus, a warning may come after a delay or notat all. Never wait for a warning. Apply thebrakes when necessary.
Collision warning symbol on the windshield.
In vehicles equipped with a head-up display*, aflashing warning symbol will be displayed on thewindshield.
34Note: This illustration is general and details may vary depending on model.35Adaptive Cruise Control