power steering VOLVO S90 2020 Quick Guide
[x] Cancel search | Manufacturer: VOLVO, Model Year: 2020, Model line: S90, Model: VOLVO S90 2020Pages: 643, PDF Size: 13.68 MB
Page 7 of 643
5
SEATS AND STEERING WHEEL
Manual front seats182
Power * front seats
183
Adjusting the power * front seats
183
Storing positions for seats, mir- rors and head-up display *184
Using stored positions for seats,mirrors and head-up display *185
Front seat massage * settings
186
Adjusting front seat massage set-tings * 187
Adjusting * front seat cushion length
188
Adjusting front seat side bolstersettings * 189
Adjusting front seat lumbar support *
189
Adjusting the passenger seat fromthe driver's seat * 191
Adjusting the passenger seat from the rear seat 192
Steering wheel controls and horn 192
Adjusting the steering wheel 193
CLIMATE CONTROL
Climate 196
Climate zones 196
Climate control sensors 197
Perceived temperature 197
Climate control system voice commands 198
Air quality 199
Clean Zone *
199
Clean Zone Interior Package *
200
Interior Air Quality System *
200
Activating and deactivating the air quality sensor * 201
Passenger compartment air filter 201
Air distribution 201
Adjusting air distribution 202
Opening, closing and directing air vents 203
Air distribution options 204
Climate system controls 207
Activating and deactivating power front seats * 209
Activating and deactivating theheated front seat * 210
Activating and deactivating theheated rear seats * 210
Activating and deactivating frontseat ventilation * 211
Activating and deactivating the ventilated rear seats
* 212
Activating and deactivating theheated steering wheel *213
Activating and deactivating auto-matic steering wheel heating *213
Activating auto climate control 214
Activating and deactivating recir- culation 214
Activating and deactivating therecirculation timer setting 215
Activating and deactivating maxdefroster 215
Activating and deactivating theheated rear window and door mirrors 216
Automatically activating and deac-tivating the heated rear windowand door mirrors 217
Setting the blower speed for thefront seats 217
Setting the blower speed for the rear seats * 218
Setting the temperature for the front seats 220
Setting the temperature for the rear seats * 221
Synchronize temperature 222
Activating and deactivating air conditioning 223
Page 34 of 643
||
YOUR VOLVO
* Option/accessory.
32
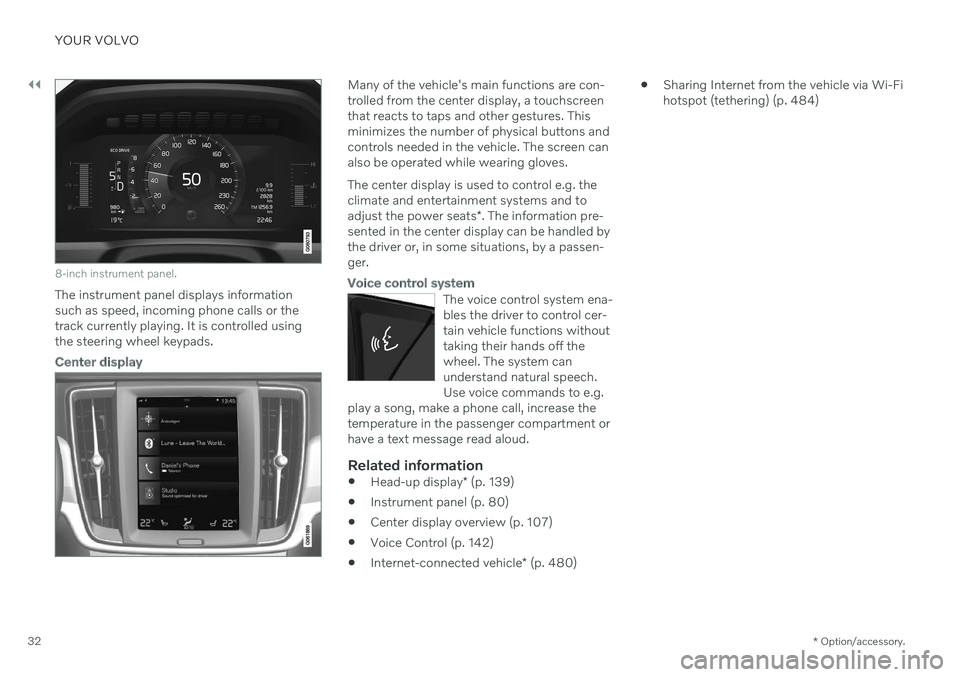
8-inch instrument panel.
The instrument panel displays information
such as speed, incoming phone calls or thetrack currently playing. It is controlled usingthe steering wheel keypads.
Center display
Many of the vehicle's main functions are con- trolled from the center display, a touchscreenthat reacts to taps and other gestures. Thisminimizes the number of physical buttons andcontrols needed in the vehicle. The screen canalso be operated while wearing gloves. The center display is used to control e.g. the climate and entertainment systems and to adjust the power seats *. The information pre-
sented in the center display can be handled by the driver or, in some situations, by a passen-ger.
Voice control system
The voice control system ena- bles the driver to control cer-tain vehicle functions withouttaking their hands off thewheel. The system canunderstand natural speech.Use voice commands to e.g.
play a song, make a phone call, increase thetemperature in the passenger compartment orhave a text message read aloud.
Related information
Head-up display
* (p. 139)
Instrument panel (p. 80)
Center display overview (p. 107)
Voice Control (p. 142)
Internet-connected vehicle
* (p. 480)
Sharing Internet from the vehicle via Wi-Fi hotspot (tethering) (p. 484)
Page 45 of 643

SAFETY
}}
* Option/accessory.43
Safety during pregnancy
It is important that seat belts are worn cor- rectly during pregnancy and that pregnantdrivers adjust their seating position accord-ingly.
Seat belt
The seat belt should fit closely against the shoulder, with the diagonal section betweenthe breasts and to the side of the stomach. The lap section of the seat belt should lie flat over the thighs and as far as possible underthe stomach. Never let it ride upward. Removeunnecessary slack and make sure the seat beltfits as close as possible to the body. Makesure there are no twists in the seat belt.
Seating positionAs pregnancy progresses, pregnant driversshould adjust the seat and steering wheel to a position that allows them to retain full controlof the vehicle (which means they should beable to easily reach the steering wheel andfoot pedals). Try to maintain as much distanceas possible between the stomach and thesteering wheel.
Related information
Safety (p. 42)
Seat belts (p. 47)
Manual front seats (p. 182)
Power
* front seats (p. 183)
Occupant safety
Safety is Volvo's cornerstone.
Volvo's concern for safetyOur concern for safety dates back to 1927 when the first Volvo rolled off the productionline. Three-point seat belts (a Volvo invention),safety cages, and energy-absorbing impactzones were designed into Volvo vehicles longbefore it was fashionable or required by gov-ernment regulation. We will not compromise our commitment to safety. We continue to seek out new safetyfeatures and to refine those already in ourvehicles. You can help. We would appreciatehearing your suggestions about improvingautomobile safety. We also want to know ifyou ever have a safety concern with your vehi-cle. Call us in the U.S. at: 1-800-458-1552 orin Canada at: 1-800-663-8255.
Page 56 of 643

||
SAFETY
54
The front airbag systemThe front airbag system includes gas genera- tors surrounded by the airbags, and decelera-tion sensors that activate the gas generators,causing the airbags to be inflated with nitro-gen gas. As the movement of the seats' occupants compresses the airbags, some of the gas isexpelled at a controlled rate to provide bettercushioning. The belt tensioners minimize slackin the seat belts and are activated for occu-pants wearing their seat belts. The entire proc-ess, from inflation to deflation of the airbag,occurs within tenths of a second. The location of the front airbags is indicated by SRS AIRBAG embossed on the steering
wheel pad and above the glove compartment,and by decals on both sun visors and on thefront and far right side of the dash. The driver's side front airbag is folded and
located in the steering wheel hub.The knee airbag is folded on the underside of
the dashboard on the driver's side. The text AIRBAG is embossed on the panel.
The passenger's side front airbag is folded
behind a panel located above the glove com-partment.WARNING
The airbags in the vehicle are designed to be a SUPPLEMENT to-not areplacement for-the three-point seatbelts. For maximum protection, wearseat belts at all times. Be aware that nosystem can prevent all possible injuriesthat may occur in an accident.
Never drive with your hands on thesteering wheel pad/airbag housing.
The front airbags are designed to helpprevent serious injury. Deploymentoccurs very quickly and with considera-ble force. During normal deploymentand depending on variables such asseating position, one may experienceabrasions, bruises, swellings, or otherinjuries as a result of deployment ofone or both of the airbags.
When installing any accessory equip-ment, make sure that the front airbagsystem is not damaged. Any interfer-ence in the system could cause mal-function.
Front airbag deployment
The front airbags are designed to deployduring certain frontal or front-angular colli-sions, impacts, or decelerations, depend-ing on the crash severity, angle, speed andobject impacted. The airbags may also deploy in certain non-frontal collisionswhere rapid deceleration occurs.
The airbag system's sensors, which triggerthe front airbags, are designed to deter-mine if the collision is powerful enough toactivate the belt tensioners and/or the air-bags.
However, not all frontal collisions activate thefront airbags. If the collision involves a nonrigid object (e.g., a snow drift or bush), or a rigid, fixedobject at a low speed, the front airbagswill not necessarily deploy.
Front airbags do not normally deploy in aside impact collision, in a collision fromthe rear or in a rollover situation.
The amount of damage to the bodyworkdoes not reliably indicate if the airbagsshould have deployed or not.
Page 81 of 643

DISPLAYS AND VOICE CONTROL
* Option/accessory.79
Driver's door
Memory for power front seat settings *,
door mirrors and head-up display *
Central locking
Power windows, door mirrors, electric child safety locks*
Controls for front seat
Related information
Manual front seats (p. 182)
Adjusting the power
* front seats (p. 183)
Adjusting the steering wheel (p. 193)
Lighting control and panel (p. 148)
Starting the vehicle (p. 378)
Instrument panel (p. 80)
Center display overview (p. 107)
Transmission (p. 391)
Page 82 of 643
DISPLAYS AND VOICE CONTROL
* Option/accessory.
80
Instrument panel The instrument panel displays information related to the vehicle and driving.
The instrument panel contains gauges, indica- tors and monitoring and warning symbols.What is shown in the instrument panel variesdepending on the equipment, settings andfunctions currently active. The instrument panel is activated as soon as a door is opened, i.e. in ignition mode 0. The
panel will power down after a short period oftime if it is not used. To reactivate it, do one ofthe following:
Depress the brake pedal.
Activate ignition mode
I.
Open one of the doors. The instrument panel is available in two ver- sions: 8" and 12"
*.WARNING
If the instrument panel turns off, does not activate when the ignition is switched on,or part/all of the panel cannot be read, donot drive the vehicle. Consult a workshopimmediately. Volvo recommends anauthorized Volvo workshop.
WARNING
If the instrument panel is not functioning properly, information about brakes, airbagsor other safety-related systems may not bedisplayed. The driver will then not be ableto check the status of the vehicle systemsor receive relevant warnings and informa-tion.
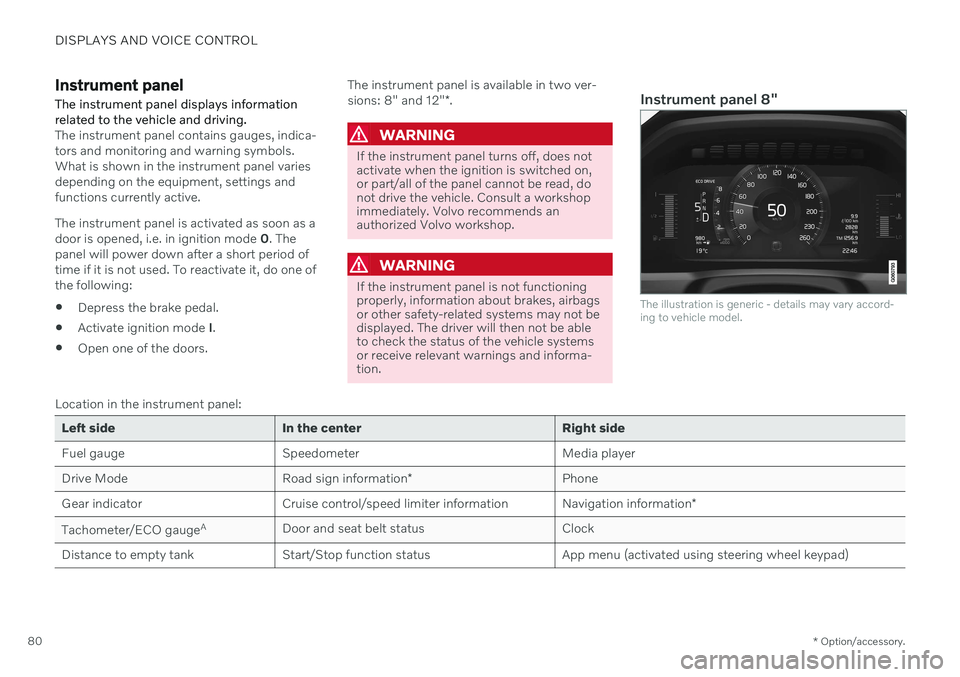
Instrument panel 8"
The illustration is generic - details may vary accord- ing to vehicle model.
Location in the instrument panel:
Left side In the center Right side
Fuel gauge Speedometer Media player Drive Mode
Road sign information* Phone
Gear indicator Cruise control/speed limiter information Navigation information*
Tachometer/ECO gauge A
Door and seat belt status Clock
Distance to empty tank Start/Stop function status App menu (activated using steering wheel keypad)
Page 143 of 643
DISPLAYS AND VOICE CONTROL
}}
* Option/accessory.141
Head-up display settings *
Adjusting settings for the head-up display.
Settings can be adjusted when the vehicle is started and a projected image is displayed onthe windshield.
Selecting display optionsSelect the functions to be shown in the head-up display. 1. Tap
Settings in the center display's Top
view.
2. Tap
My CarDisplaysHead-Up
Display Options.
3. Select one or more functions:
Show Navigation
Show Road Sign Information
Show Driver Support
Show Phone
This setting is stored as a personal setting in the driver profile.
Adjusting brightness and height position
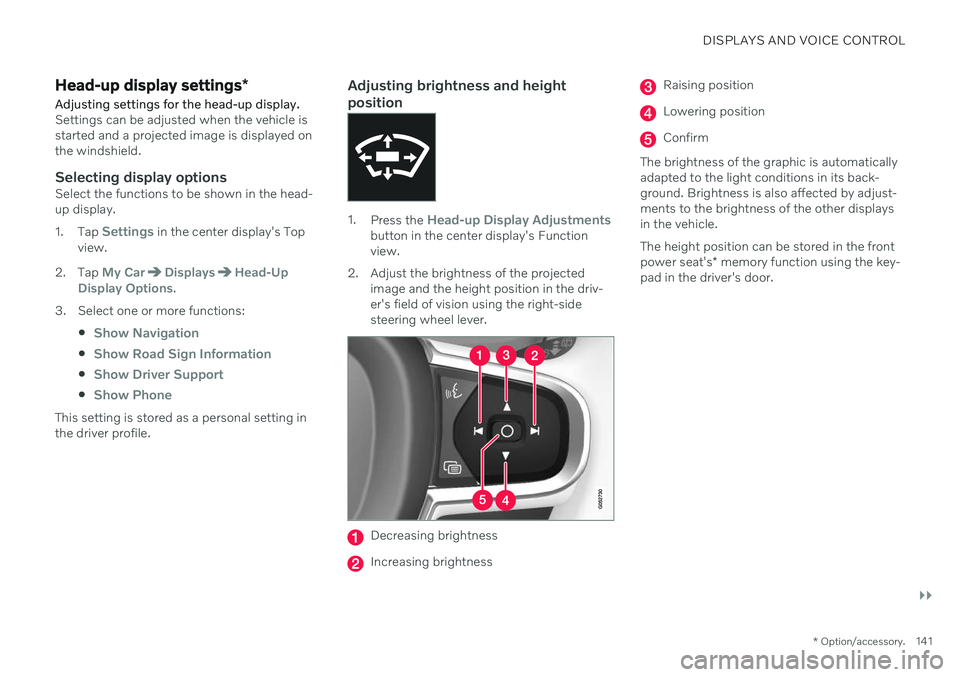
1.Press the Head-up Display Adjustmentsbutton in the center display's Function view.
2. Adjust the brightness of the projected image and the height position in the driv-er's field of vision using the right-sidesteering wheel lever.
Decreasing brightness
Increasing brightness
Raising position
Lowering position
Confirm
The brightness of the graphic is automatically adapted to the light conditions in its back-ground. Brightness is also affected by adjust-ments to the brightness of the other displaysin the vehicle. The height position can be stored in the front power seat's * memory function using the key-
pad in the driver's door.
Page 184 of 643
SEATS AND STEERING WHEEL
* Option/accessory.
182
Manual front seats
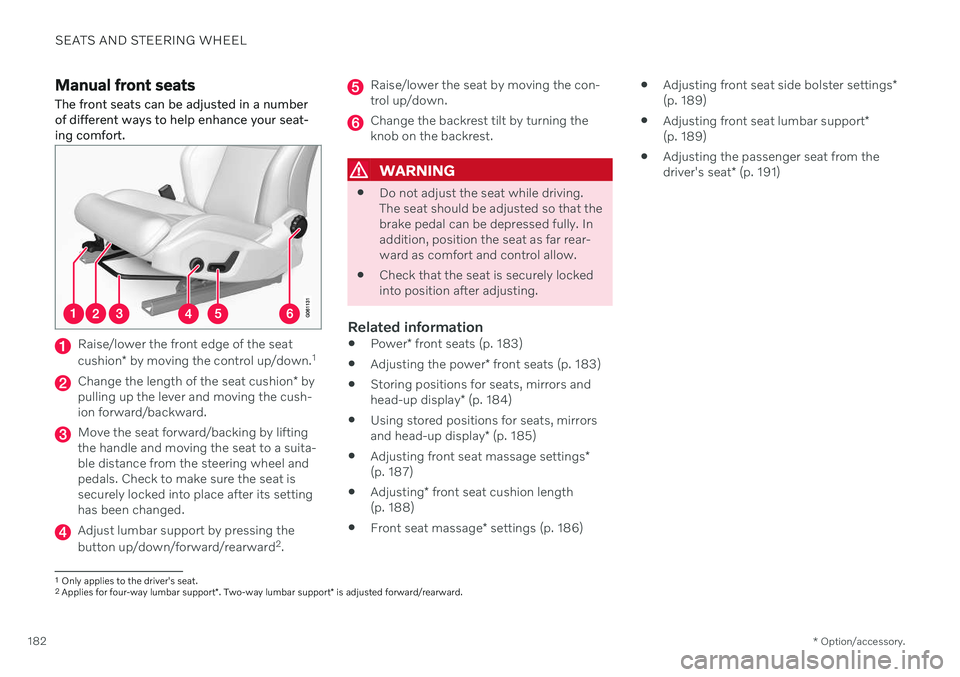
The front seats can be adjusted in a number of different ways to help enhance your seat-ing comfort.
Raise/lower the front edge of the seat cushion * by moving the control up/down. 1
Change the length of the seat cushion
* by
pulling up the lever and moving the cush- ion forward/backward.
Move the seat forward/backing by lifting the handle and moving the seat to a suita-ble distance from the steering wheel andpedals. Check to make sure the seat issecurely locked into place after its settinghas been changed.
Adjust lumbar support by pressing the button up/down/forward/rearward 2
.
Raise/lower the seat by moving the con- trol up/down.
Change the backrest tilt by turning the knob on the backrest.
WARNING
Do not adjust the seat while driving. The seat should be adjusted so that thebrake pedal can be depressed fully. Inaddition, position the seat as far rear-ward as comfort and control allow.
Check that the seat is securely lockedinto position after adjusting.
Related information
Power
* front seats (p. 183)
Adjusting the power
* front seats (p. 183)
Storing positions for seats, mirrors and head-up display
* (p. 184)
Using stored positions for seats, mirrorsand head-up display
* (p. 185)
Adjusting front seat massage settings
*
(p. 187)
Adjusting
* front seat cushion length
(p. 188)
Front seat massage
* settings (p. 186)
Adjusting front seat side bolster settings
*
(p. 189)
Adjusting front seat lumbar support
*
(p. 189)
Adjusting the passenger seat from thedriver's seat
* (p. 191)
1
Only applies to the driver's seat.
2 Applies for four-way lumbar support *. Two-way lumbar support * is adjusted forward/rearward.
Page 185 of 643

SEATS AND STEERING WHEEL
}}
* Option/accessory.183
Power* front seats
The front seats can be adjusted in a number of different ways to help enhance your seat-ing comfort. The power seat can be movedforward/backward and up/down. The height and length * of the seat cushion and the tilt of
the backrest can be adjusted. Lumbar sup-port * can be adjusted up, down, forward and
backward 3
.
The seats can be adjusted when the engine is running and for a certain period of time afterthe door has been unlocked without theengine running. They can also be adjusted fora short period after the engine is turned off.
CAUTION
The power seats have an overload protec- tor that is triggered if a seat is blocked byany object. If this occurs, remove theobject and attempt to adjust the seatagain.
Related information
Manual front seats (p. 182)
Adjusting the power
* front seats (p. 183)
Storing positions for seats, mirrors and head-up display
* (p. 184)
Using stored positions for seats, mirrorsand head-up display
* (p. 185)
Adjusting front seat massage settings
*
(p. 187)
Adjusting
* front seat cushion length
(p. 188)
Front seat massage
* settings (p. 186)
Adjusting front seat side bolster settings
*
(p. 189)
Adjusting front seat lumbar support
*
(p. 189)
Adjusting the passenger seat from thedriver's seat
* (p. 191)
Adjusting the power * front seats
Set the desired seating position using the controls on the front seat cushion. To set theconvenience functions, turn the multifunction control 4
upward/downward.
The illustration shows the controls in a vehicle with four-way lumbar support *. Vehicles with two-way
lumbar support * do not have the rotary multifunction
control.
In vehicles with four-way lumbar support *,
turn the multifunction control 4
up/down to
set the convenience functions. In vehicles with two-way lumbar support *, use the
round button to adjust the lumbar support forward/rearward.
Raise/lower the front edge of the seat cushion by moving the control up/down.
3 Applies for four-way lumbar support *. Two-way lumbar support * is adjusted forward/rearward.
Page 186 of 643
||
SEATS AND STEERING WHEEL
* Option/accessory.
184
Raise/lower the seat by moving the con- trol up/down.
Move the seat forward/rearward by mov- ing the control forward/rearward.
Change the backrest tilt by moving the control forward/backward.
Only one movement (forward/rearward/up/down) can be performed at a time. The front seat backrests cannot be folded down completely.
Related information
Manual front seats (p. 182)
Power
* front seats (p. 183)
Storing positions for seats, mirrors and head-up display
* (p. 184)
Using stored positions for seats, mirrorsand head-up display
* (p. 185)
Adjusting front seat massage settings
*
(p. 187)
Adjusting
* front seat cushion length
(p. 188)
Front seat massage
* settings (p. 186)
Adjusting front seat side bolster settings
*
(p. 189)
Adjusting front seat lumbar support
*
(p. 189)
Adjusting the passenger seat from thedriver's seat
* (p. 191)
Storing positions for seats, mirrors and head-up display *
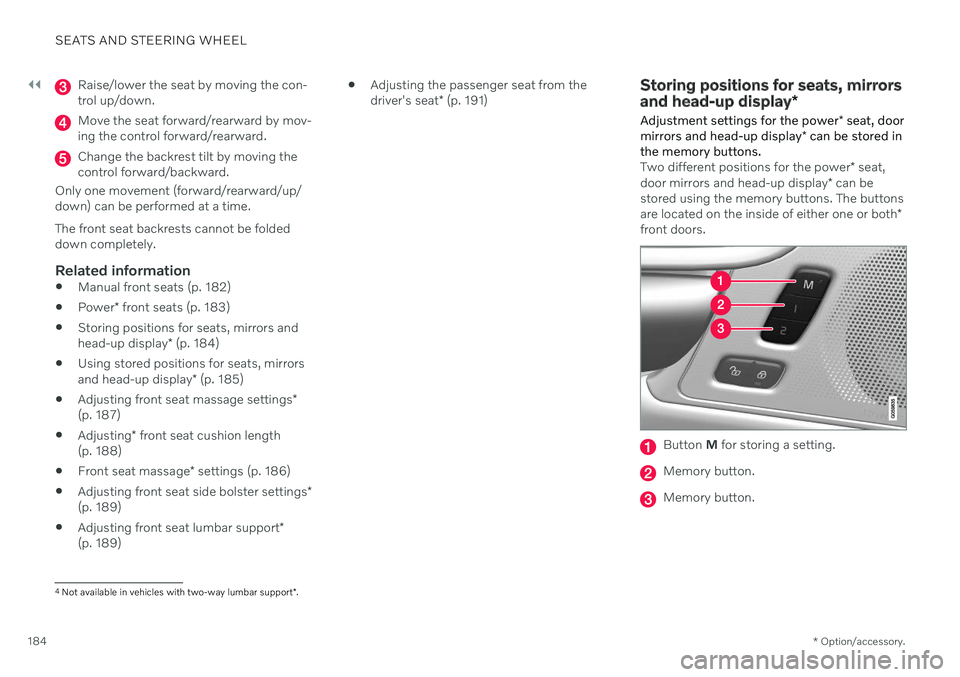
Adjustment settings for the power * seat, door
mirrors and head-up display * can be stored in
the memory buttons.
Two different positions for the power * seat,
door mirrors and head-up display * can be
stored using the memory buttons. The buttons are located on the inside of either one or both *
front doors.
Button M for storing a setting.
Memory button.
Memory button.
4
Not available in vehicles with two-way lumbar support *.