turn signal VOLVO S90 2020 Quick Guide
[x] Cancel search | Manufacturer: VOLVO, Model Year: 2020, Model line: S90, Model: VOLVO S90 2020Pages: 643, PDF Size: 13.68 MB
Page 6 of 643
4
Opening contextual setting in the center display130
Resetting user data when thevehicle changes owners 131
Resetting center display settings 131
Table of settings in the center display 132
Driver profiles 133
Selecting a driver profile 134
Changing a driver profile's name 134
Protecting a driver profile 135
Linking a remote key to a driver profile 135
Resetting driver profile settings 136
Messages in the center display 137
Handling messages in the centerdisplay 137
Handling messages saved fromthe center display 138
Head-up display *
139
Activating and deactivating the head-up display * 140
Head-up display settings *
141
Voice Control 142
Use voice recognition 143
Voice control for cellular phones 145
Voice control for radio and media 145
Voice control settings 146
LIGHTING
Lighting control and panel148
Adjusting light functions via the center display 149
Parking lights 150
Daytime running lights 150
Low beams 151
Using high beam 152
Active high beam 153
Using turn signals 154
Active Bending Lights *
154
Front fog lights/corner illumination *
155
Rear fog light 156
Brake lights 157
Emergency brake lights 157
Hazard warning flashers 157
Using home safe lighting 158
Welcome Light 158
Interior Lighting 158
Adjusting interior lighting 160
WINDOWS, GLASS AND MIRRORS
Windows, glass and mirrors 162
Pinch protection for windows and sun curtains 162
Reset procedure for pinch protection 163
Power windows 164
Operating the power windows 165
Using sun curtains *
166
Rearview/door mirrors 168
Adjusting the rearview mirror dim-ming function 168
Adjusting the door mirrors 169
Panoramic roof 170
Operating the panoramic roof 172
Auto closing the panoramic roofsun curtain 175
Wiper blades and washer fluid 176
Using the windshield wipers 176
Using the rain sensor 177
Using the rain sensor's memoryfunction 178
Using the windshield and head-light washers 178
Page 14 of 643
12
LOADING, STORAGE AND PASSENGER COMPARTMENT
Passenger compartment interior532
Tunnel console 533
Electrical outlets 534
Using the electrical outlets 534
Using the glove compartment 535
Sun visors 537
Folding down the armrest in the rear seat * 537
Cargo compartment 538
Loading recommendations 538
Roof loads and load carriers 539
Grocery bag holders 540
Load anchoring eyelets 540
Rear seat ski hatch *
540
MAINTENANCE AND SERVICE
Volvo's service program
542
Data transfer between vehicle and workshop over Wi-Fi 544
Download Center 545
Handling system updates viaDownload Center 545
Vehicle status 546
Scheduling service and repairs 547
Sending vehicle information to theworkshop 548
Hoisting the vehicle 549
Climate control system service 551
Replacing a windshield with head- up display * 551
Opening and closing the hood 552
Engine compartment overview 553
Engine oil 554
Checking and filling engine oil 555
Refilling coolant 556
Replacing bulbs 558
Removing the plastic cover to replace bulbs 559
Location of exterior lights 559
Replacing the low beam headlightbulbs 560
Replacing the high beam headlightbulbs 561
Replacing daytime running lights/ front parking light bulbs562
Replacing front turn signal bulbs 563
Replacing the rear fog light bulb 563
Bulb specifications 566
Start battery 567
Support battery 571
Battery symbols 572
Battery recycling 573
Fuses and fuseboxes 573
Replacing fuses 574
Fuses in the engine compartment 575
Fuses under the glove compartment 580
Fuses in the trunk 586
Cleaning the interior 591
Cleaning the center display 591
Cleaning the head-up display *
592
Cleaning fabric upholstery andceiling liner 593
Cleaning the seat belt 593
Cleaning floor mats and inlay mats 593
Cleaning leather upholstery *
594
Cleaning the leather steering wheel 595
Cleaning interior plastic, metal andwood surfaces 595
Page 80 of 643
DISPLAYS AND VOICE CONTROL
* Option/accessory.
78
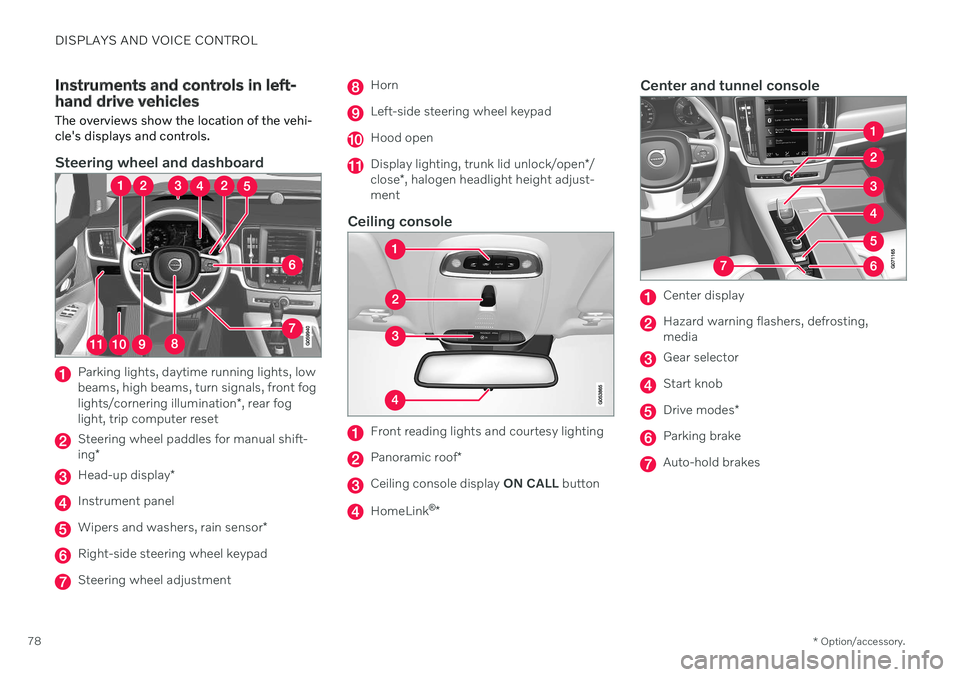
Instruments and controls in left- hand drive vehicles The overviews show the location of the vehi- cle's displays and controls.
Steering wheel and dashboard
Parking lights, daytime running lights, low beams, high beams, turn signals, front fog lights/cornering illumination *, rear fog
light, trip computer reset
Steering wheel paddles for manual shift- ing *
Head-up display *
Instrument panel
Wipers and washers, rain sensor *
Right-side steering wheel keypad
Steering wheel adjustment
Horn
Left-side steering wheel keypad
Hood open
Display lighting, trunk lid unlock/open */
close *, halogen headlight height adjust-
ment
Ceiling console
Front reading lights and courtesy lighting
Panoramic roof *
Ceiling console display ON CALL button
HomeLink ®
*
Center and tunnel console
Center display
Hazard warning flashers, defrosting, media
Gear selector
Start knob
Drive modes *
Parking brake
Auto-hold brakes
Page 94 of 643
||
DISPLAYS AND VOICE CONTROL
92
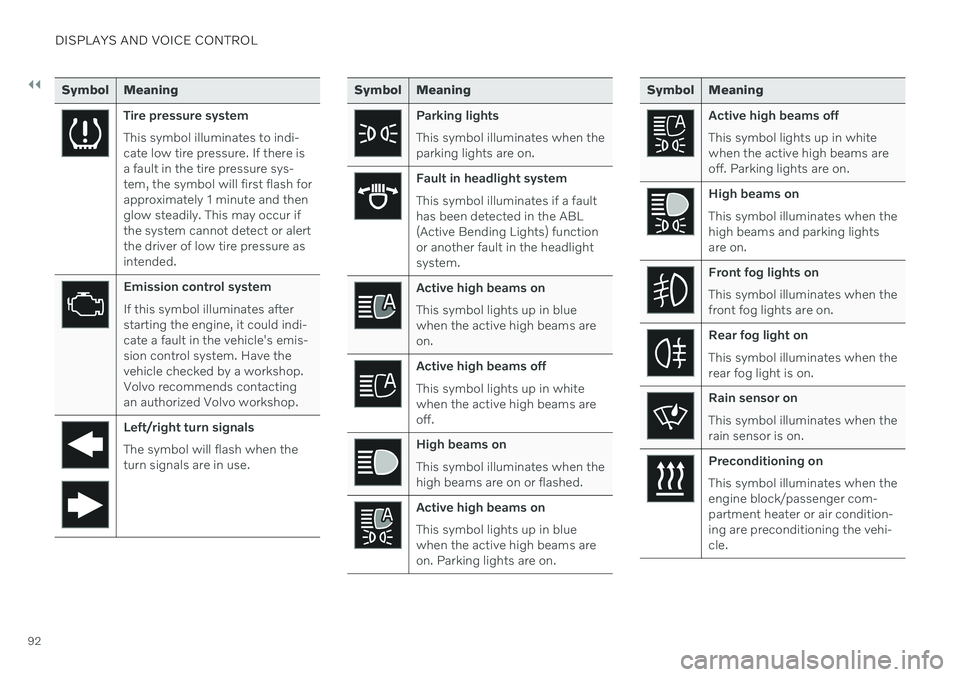
Symbol Meaning
Tire pressure system This symbol illuminates to indi- cate low tire pressure. If there isa fault in the tire pressure sys-tem, the symbol will first flash forapproximately 1 minute and thenglow steadily. This may occur ifthe system cannot detect or alertthe driver of low tire pressure asintended.
Emission control system If this symbol illuminates after starting the engine, it could indi-cate a fault in the vehicle's emis-sion control system. Have thevehicle checked by a workshop.Volvo recommends contactingan authorized Volvo workshop.
Left/right turn signals The symbol will flash when the turn signals are in use.
Symbol Meaning
Parking lights This symbol illuminates when the parking lights are on.
Fault in headlight system This symbol illuminates if a fault has been detected in the ABL(Active Bending Lights) functionor another fault in the headlightsystem.
Active high beams on This symbol lights up in blue when the active high beams areon.
Active high beams off This symbol lights up in white when the active high beams areoff.
High beams on This symbol illuminates when the high beams are on or flashed.
Active high beams on This symbol lights up in blue when the active high beams areon. Parking lights are on.
Symbol Meaning
Active high beams off This symbol lights up in white when the active high beams areoff. Parking lights are on.
High beams on This symbol illuminates when the high beams and parking lightsare on.
Front fog lights on This symbol illuminates when the front fog lights are on.
Rear fog light on This symbol illuminates when the rear fog light is on.
Rain sensor on This symbol illuminates when the rain sensor is on.
Preconditioning on This symbol illuminates when the engine block/passenger com-partment heater or air condition-ing are preconditioning the vehi-cle.
Page 142 of 643
||
DISPLAYS AND VOICE CONTROL
* Option/accessory.
140 The snowflake symbol will illuminate if there is a risk of slippery condi-tions.
NOTE
People with certain types of vision prob- lems may experience headaches or eyestrain when using the head-up display.
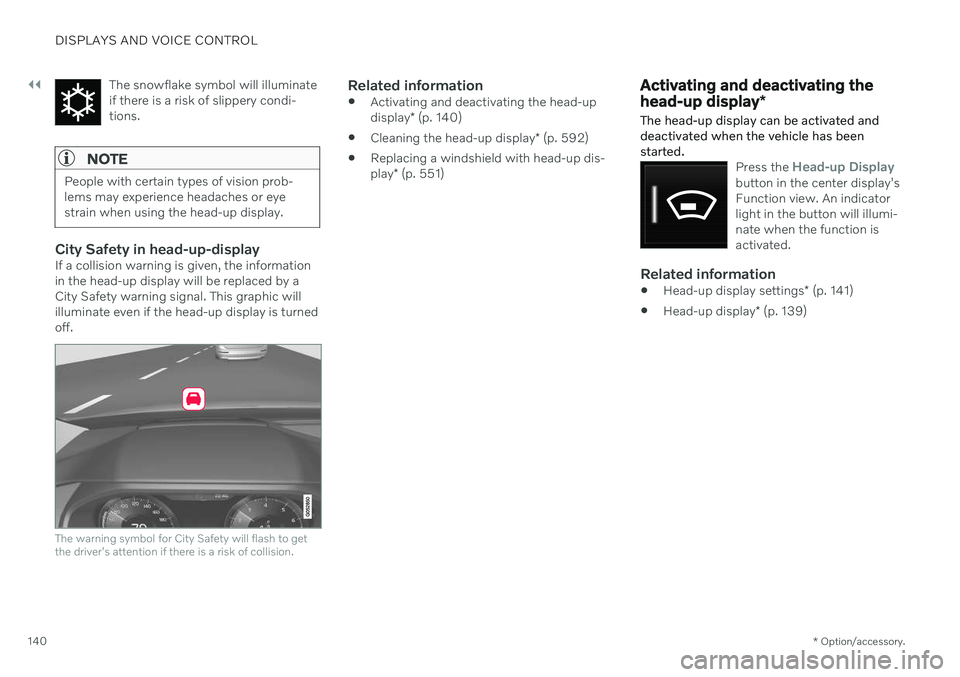
City Safety in head-up-displayIf a collision warning is given, the information in the head-up display will be replaced by aCity Safety warning signal. This graphic willilluminate even if the head-up display is turnedoff.
The warning symbol for City Safety will flash to get the driver's attention if there is a risk of collision.
Related information
Activating and deactivating the head-up display
* (p. 140)
Cleaning the head-up display
* (p. 592)
Replacing a windshield with head-up dis-play
* (p. 551)
Activating and deactivating the head-up display *
The head-up display can be activated and deactivated when the vehicle has beenstarted.
Press the Head-up Displaybutton in the center display's Function view. An indicatorlight in the button will illumi-nate when the function isactivated.
Related information
Head-up display settings
* (p. 141)
Head-up display
* (p. 139)
Page 145 of 643
DISPLAYS AND VOICE CONTROL
}}
* Option/accessory.143
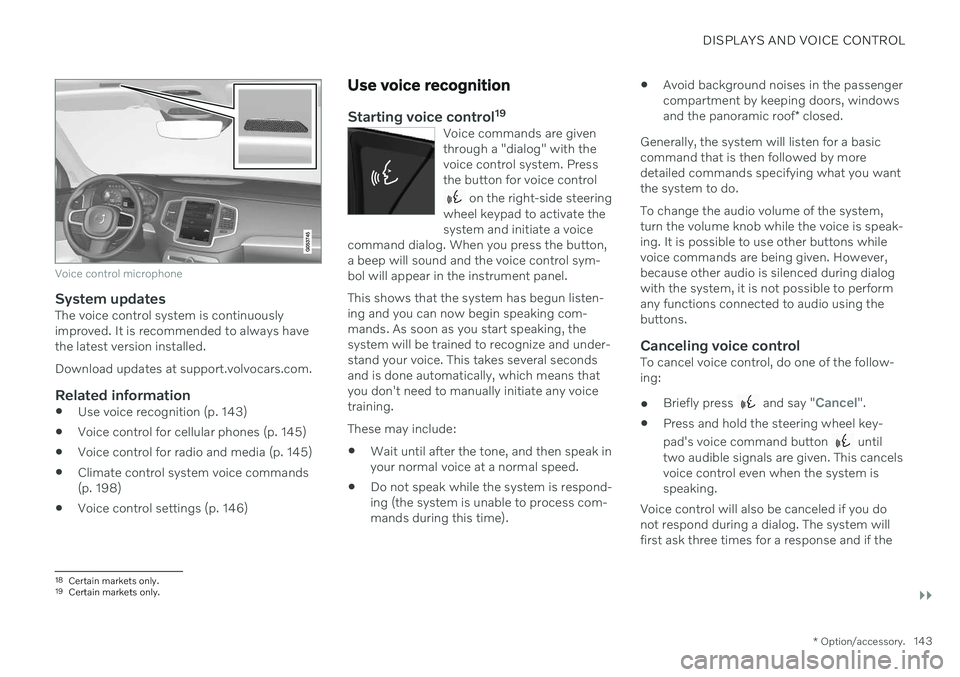
Voice control microphone
System updatesThe voice control system is continuously improved. It is recommended to always havethe latest version installed. Download updates at support.volvocars.com.
Related information
Use voice recognition (p. 143)
Voice control for cellular phones (p. 145)
Voice control for radio and media (p. 145)
Climate control system voice commands (p. 198)
Voice control settings (p. 146)
Use voice recognition
Starting voice control 19Voice commands are given through a "dialog" with thevoice control system. Pressthe button for voice control
on the right-side steering
wheel keypad to activate the system and initiate a voice
command dialog. When you press the button,a beep will sound and the voice control sym-bol will appear in the instrument panel. This shows that the system has begun listen- ing and you can now begin speaking com-mands. As soon as you start speaking, thesystem will be trained to recognize and under-stand your voice. This takes several secondsand is done automatically, which means thatyou don't need to manually initiate any voicetraining.
These may include: Wait until after the tone, and then speak in your normal voice at a normal speed.
Do not speak while the system is respond-ing (the system is unable to process com-mands during this time).
Avoid background noises in the passengercompartment by keeping doors, windows and the panoramic roof
* closed.
Generally, the system will listen for a basic command that is then followed by moredetailed commands specifying what you wantthe system to do. To change the audio volume of the system, turn the volume knob while the voice is speak-ing. It is possible to use other buttons whilevoice commands are being given. However,because other audio is silenced during dialogwith the system, it is not possible to performany functions connected to audio using thebuttons.
Canceling voice controlTo cancel voice control, do one of the follow-ing:
Briefly press
and say "Cancel".
Press and hold the steering wheel key- pad's voice command button
until
two audible signals are given. This cancels voice control even when the system isspeaking.
Voice control will also be canceled if you donot respond during a dialog. The system willfirst ask three times for a response and if the
18 Certain markets only.19Certain markets only.
Page 151 of 643
LIGHTING
* Option/accessory.149
WARNING
The vehicle lighting system cannot in all sit- uations determine when the daylight is tooweak or not strong enough, e.g. whenthere is fog or rain. The driver is always responsible for driving the vehicle with lighting that is safe for thetraffic conditions and as specified by appli-cable traffic regulations.
Thumbwheel in instrument panel
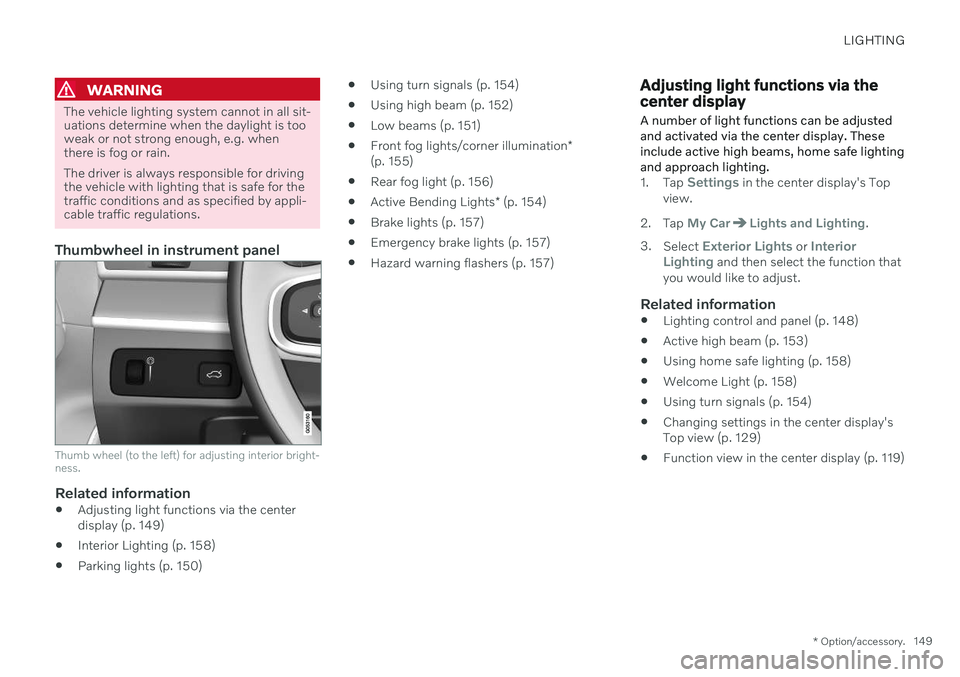
Thumb wheel (to the left) for adjusting interior bright- ness.
Related information
Adjusting light functions via the center display (p. 149)
Interior Lighting (p. 158)
Parking lights (p. 150)
Using turn signals (p. 154)
Using high beam (p. 152)
Low beams (p. 151)
Front fog lights/corner illumination
*
(p. 155)
Rear fog light (p. 156)
Active Bending Lights
* (p. 154)
Brake lights (p. 157)
Emergency brake lights (p. 157)
Hazard warning flashers (p. 157)
Adjusting light functions via the center display A number of light functions can be adjusted and activated via the center display. Theseinclude active high beams, home safe lightingand approach lighting.
1.
Tap Settings in the center display's Top
view.
2. Tap
My CarLights and Lighting.
3. Select
Exterior Lights or Interior
Lighting and then select the function that
you would like to adjust.
Related information
Lighting control and panel (p. 148)
Active high beam (p. 153)
Using home safe lighting (p. 158)
Welcome Light (p. 158)
Using turn signals (p. 154)
Changing settings in the center display's Top view (p. 129)
Function view in the center display (p. 119)
Page 156 of 643

LIGHTING
* Option/accessory.
154
Using turn signals
The vehicle's turn signals are controlled using the left-side steering wheel lever. The turnsignals flash three times or continuously,depending on how far up or down the lever ismoved.
Turn signals.
Triple flash indicatorMove the steering wheel lever up or down to the first position and release. The turnsignals will flash three times. If the func-tion is deactivated via the center display,the signals will flash once.
NOTE
This automatic flashing sequence can be interrupted by immediately movingthe lever in the opposite direction.
If the turn signal indicator flashes morequickly than normal, refer to the mes-sage in the instrument panel.
Continuous flashing sequenceMove the lever up or down as far as possi- ble.
The lever will stop in its end position and canbe moved back manually or automatically bymoving the steering wheel.
Related information
Hazard warning flashers (p. 157)
Adjusting light functions via the centerdisplay (p. 149)
Replacing front turn signal bulbs (p. 563)
Active Bending Lights
*
Active Bending Lights (ABL) are designed to help provide extra illumination in curves andintersections. Depending on equipment level, vehicles with LED 3
headlights * may be equip-
ped with Active Bending Lights.
Headlight pattern with function deactivated (left) and activated (right).
Active Bending Lights follow the movement of the steering wheel to help provide extra illumi-nation in curves and intersections, helping toimprove visibility for the driver. The function is automatically activated when the engine is started. If a fault is detected in the system, the
symbol will illuminate in
the instrument panel and a message will be displayed.
3 LED (Light Emitting Diode)
Page 159 of 643

LIGHTING
157
Brake lights
The brake lights are automatically illuminated when braking.
The brake lights are illuminated when the brake pedal is depressed and when the brakesare automatically applied by a driver supportsystem.
Related information
Emergency brake lights (p. 157)
Brake functions (p. 382)
Driver support systems (p. 266)
Emergency brake lights
The emergency brake lights are activated to warn following vehicles of hard braking. This function causes an additional taillight on each side of the vehicle to illuminate.
The emergency brake lights are activated in the event of hard braking or if the ABS systemis activated and the vehicle is traveling at ahigh speed. After the driver decelerates to a low speed and then releases the brake, the brake lightsresume their normal brightness.
Related information
Brake lights (p. 157)
Brakes (p. 383)
Hazard warning flashers (p. 157)
Hazard warning flashers
Hazard warning flashers warn other road users by all of the vehicle's turn signals beingactivated at the same time. The function canbe used to warn about a traffic hazard.
Hazard warning flashers button.
Press the button to activate the hazard warn- ing flashers.
NOTE
Regulations concerning the use of hazard warning flashers may vary from country tocountry.
Related information
Emergency brake lights (p. 157)
Using turn signals (p. 154)
Page 234 of 643

KEY, LOCKS AND ALARM
* Option/accessory.
232
Lock indication
The turn signals will flash when the vehicle is locked or unlocked.
Exterior confirmationLocking
The turn signals will flash once and the door mirrors will fold in 1
to confirm the
vehicle is locked.
Unlocking
The turn signals will flash twice and thedoor mirrors will fold out 1
to confirm the
vehicle is unlocked.
The trunk lid, hood and all doors must be closed for confirmation to be given. If only thedriver's door is closed when the vehicle is locked 2
, the vehicle will be locked but the turn
signals will only flash to indicate locking when all doors and the trunk and hood have beenclosed.
Lock and alarm indicators on the dashboard
The locks and alarm indicator will display the status of the locking system:
One long flash indicates locking.
When the vehicle is locked, this will beindicated by short, pulsating flashes.
Rapid flashing after disabling the alarmindicates that the alarm has been trig-gered.
Lock button indicators
Front door
Lock buttons with indicator lights in front door.
Illuminated indicator lights in both front door lock buttons indicate that all doors are locked.If any door is opened, the lights in both doorswill go out.
1
Only vehicles with power folding mirrors.
2 Does not apply to vehicles equipped with keyless locking/unlocking *.