ECO mode VOLVO S90 TWIN ENGINE 2019 Owners Manual
[x] Cancel search | Manufacturer: VOLVO, Model Year: 2019, Model line: S90 TWIN ENGINE, Model: VOLVO S90 TWIN ENGINE 2019Pages: 669, PDF Size: 14.33 MB
Page 560 of 669

||
WHEELS AND TIRES
* Option/accessory.558
Related information
Removing a wheel (p. 558)
Installing a wheel (p. 560)
Removing a wheel
Instructions for removing a wheel when chang-ing wheels. Wheel changes must always be car-ried out correctly.
CAUTION
When not in use, the jack* should be keptin its storage compartment under thecargo compartment floor.
The jack provided with your vehicle isintended to be used only in temporary sit-uations such as changing wheels in theevent of a flat tire. Only the jack thatcame with your particular model shouldbe used to lift the vehicle. If the vehicleneeds to be lifted more frequently or for aprolonged period, using a garage jack orhoist is recommended. Always follow thisdevice's instructions for use.
WARNING
Apply the parking brake and put the gearselector in the Park (P) position.
Block the wheels standing on the ground,use rigid wooden blocks or large stones.
Check that the jack is not damaged, thethreads are properly lubricated and it isfree from dirt.
Be sure the jack is on a firm, level, non-slippery surface and that it is upright andnot leaning.
The jack must correctly engage in thejack attachment.
No objects should be placed between thebase of the jack and the ground, orbetween the jack and the attachment baron the vehicle.
Never let anyone remain in the vehiclewhen it is raised on a jack.
If a tire must be changed near passingtraffic, make sure all passengers move toa safe location.
Use a jack intended for the vehicle whenchanging a tire. For any other job, usestands to support the vehicle.
Never crawl under or allow any part ofyour body to be extended under a vehiclesupported by a jack.
Page 562 of 669

||
WHEELS AND TIRES
* Option/accessory.560
10. Crank it up until it is properly aligned and it isin contact with the vehicle's jack attachmentpoint. Make sure the top of the jack (or thegarage lift arms) is correctly positioned in theattachment point, with the bump on the topof the jack in the recess in the attachmentpoint and the base positioned vertically underthe attachment point.
11. Turn the jack so that the crank is as far aspossible from the side of the vehicle, whichwill position the jack's arms perpendicular tothe vehicle's direction of movement.
12. Raise the vehicle until the wheel to bechanged can move freely. Unscrew the wheelbolts and lift off the wheel.
Related information
Leveling control settings* (p. 453)
When changing wheels (p. 556)
Hoisting the vehicle (p. 592)
Jack* (p. 557)
Tool kit (p. 556)
Installing a wheel (p. 560)
Installing a wheel
Instructions for installing a wheel during a wheelchange.
NOTE
The jack provided with your vehicle isintended to be used only in temporary situa-tions such as changing wheels in the event ofa flat tire. Only the jack that came with yourparticular model should be used to lift thevehicle. If the vehicle needs to be lifted morefrequently or for a prolonged period, using agarage jack or hoist is recommended. Alwaysfollow this device's instructions for use.
WARNING
Apply the parking brake and put the gearselector in the Park (P) position.
Block the wheels standing on the ground,use rigid wooden blocks or large stones.
Check that the jack is not damaged, thethreads are properly lubricated and it isfree from dirt.
Be sure the jack is on a firm, level, non-slippery surface and that it is upright andnot leaning.
The jack must correctly engage in thejack attachment.
No objects should be placed between thebase of the jack and the ground, orbetween the jack and the attachment baron the vehicle.
Never let anyone remain in the vehiclewhen it is raised on a jack.
If a tire must be changed near passingtraffic, make sure all passengers move toa safe location.
Use a jack intended for the vehicle whenchanging a tire. For any other job, usestands to support the vehicle.
Never crawl under or allow any part ofyour body to be extended under a vehiclesupported by a jack.
Page 563 of 669

WHEELS AND TIRES
}}
* Option/accessory.561
1.Clean the contact surfaces between thewheel and the wheel hub.
2.Lift the wheel into place. Tighten the wheelbolts securely.
Do not grease the wheel bolt threads.
3. Lower the vehicle so that the wheel cannotrotate.
4. Tighten the wheel bolts in a crisscross pat-tern (as shown in illustration). It is importantthat the wheel bolts are securely tightened.Tighten to a torque of 140 Nm (103 ft.lbs.).Use a torque wrench to check torque.
5. Press the plastic covers onto the wheel bolts.
WARNING
The wheel bolts may need to be tightenedagain several days after a wheel change.Temperature fluctuations and vibrations cancause them to loosen slightly.
NOTE
After inflating a tire, always replace thevalve cap to help prevent valve damagecaused by gravel, dirt, etc.
Use plastic valve caps only. Metal capscould corrode and become difficult toremove.
Related information
Leveling control settings* (p. 453)
When changing wheels (p. 556)
Hoisting the vehicle (p. 592)
Jack* (p. 557)
Tool kit (p. 556)
Removing a wheel (p. 558)
Spare wheel15
The spare wheel is a Temporary Spare and canbe used to temporarily replace a punctured tireon one of the vehicle's regular wheels.
The spare tire is only intended for temporary use.Replace it with a normal wheel as soon as possi-ble.
The driving characteristics of the vehicle changeand ground clearance reduces when the sparewheel is used. Do not wash the vehicle in anautomatic car wash while using the TemporarySpare.
The recommended tire pressure must be main-tained regardless of at which position the tempo-rary spare wheel is used on the vehicle.
If the spare wheel is damaged, a new one can bepurchased from a Volvo retailer.
WARNING
Current legislation prohibits the use of the"Temporary Spare" tire other than as a tem-porary replacement for a punctured tire. Itmust be replaced as soon as possible by astandard tire. Road holding and handling maybe affected with the "Temporary Spare" inuse. Do not drive faster than 80 km/h(50 mph).
15Not available on all models.
Page 565 of 669

WHEELS AND TIRES
}}
563
Snow tires
Snow tires are designed for winter driving.
Volvo recommends snow tires with specificdimensions. The tire dimensions vary dependingon engine type. When driving with snow tires, thecorrect type of tires must be mounted on all fourwheels.
NOTE
Contact a Volvo dealer for advice on the bestchoice of rims and tires.
Tips for changing snow tires
When switching between regular tires and snowtires, mark the tires according to which side theywere mounted on, e.g. L for left and R for right.
Studded tires
Studded tires should be broken in by driving500–1000 km (300–600 miles) slowly and gen-tly to help the studs settle properly in the tires.This gives the tire, and especially the studs, alonger service life.
NOTE
Regulations regarding the use of studdedtires vary from country to country.
Tread depth
Road conditions with ice, slush and low tempera-tures place considerably higher demands on tiresthan summer conditions. Volvo therefore recom-mends not driving on snow tires that have a treaddepth of less than 4 mm (0.15 inch).
Related information
When changing wheels (p. 556)
Winter driving (p. 458)
Tread wear indicator (p. 545)
Snow chains
Using snow chains and/or snow tires can helpimprove traction in winter driving conditions.
WARNING
Use Volvo genuine snow chains or equivalentsnow chains that are suitable for the vehiclemodel and the tire and wheel sizes. Only one-sided snow chains are permitted.
If uncertain about snow chains, Volvo recom-mends contacting an authorized Volvo work-shop. Use of the wrong snow chains couldcause serious damage to the vehicle andresult in an accident.
Page 566 of 669

||
WHEELS AND TIRES
564
CAUTION
Snow chains can be used on the vehicle, withthe following restrictions:
Volvo recommends not using snowchains on wheel dimensions larger than18 inches.
Always follow the manufacturer's installa-tion instructions carefully. Install chainsas tightly as possible and retighten peri-odically.
Only put snow chains on the front wheels(also applies to all-wheel drive vehicles).
If accessory, aftermarket or "custom"tires and wheels with different dimen-sions than the original tires and wheelsare used, snow chains in some casesmay NOT be used. Sufficient distancebetween the chains and brakes, suspen-sion and body components must bemaintained.
Check local regulations regarding the useof snow chains before installing.
Never exceed the snow chain manufac-turer's specified maximum speed limit.Under no circumstances should youexceed 50 km/h (30 mph).
Avoid bumps, holes or sharp turns whendriving with snow chains.
Avoid driving on surfaces without snow asthis wears out both the snow chains andthe tires.
The handling of the vehicle can beadversely affected when driving withchains. Avoid fast or sharp turns as wellas locked wheel braking.
Some types of strap-on chains affectbrake components and therefore mustNOT be used.
Consult a Volvo retailer for more informationabout snow chains.
Related information
Winter driving (p. 458)
Tire sealing system16
The temporary tire sealing system can be usedto seal a puncture in a tire or to check andadjust the pressure in the tire.
Models equipped with a spare wheel17 do nothave the tire sealing system.
WARNING
California Proposition 65
Operating, servicing and maintaining a pas-senger vehicle can expose you to chemicalsincluding engine exhaust, carbon monoxide,phthalates, and lead, which are known to theState of California to cause cancer and birthdefects or other reproductive harm. To mini-mize exposure, avoid breathing exhaust, donot idle the engine except as necessary, serv-ice your vehicle in a well ventilated area andwear gloves or wash your hands frequentlywhen servicing your vehicle. For more infor-mation go to www.P65Warnings.ca.gov/passenger-vehicle.
The tire sealing system consists of a compressorand a bottle containing sealing compound. Thesealing functions as a temporary repair.
Page 578 of 669

||
LOADING, STORAGE AND PASSENGER COMPARTMENT
* Option/accessory.576
12 V outlet in the tunnel console, rear seat.
12 V outlet in trunk/cargo compartment*.
Related information
Passenger compartment interior (p. 574)
Using the electrical outlets (p. 576)
Using the electrical outlets
The 12 V outlet can be used for devicesintended for this such as MP3 players, coolersand cellular phones.
The ignition must be in at least mode I for theoutlets to supply current. The outlets will then beactive as long as there is sufficient charge in thestart battery.
If the engine is turned off and the vehicle islocked, the outlets will be deactivated. If theengine is turned off and the vehicle remainsunlocked, the sockets will remain active for up to7 minutes.
NOTE
Bear in mind that using the electrical outletswhen the engine is off could cause the starterbattery to have too low of a charge level,which could limit other functionality.
Accessories connected to the electrical out-lets can be activated even when the vehicleelectrical system is off or if preconditioning isused. For this reason, disconnect plugs whenthey are not in use to prevent the starter bat-tery from becoming discharged.
WARNING
Do not use accessories with large orheavy plugs – they could damage the out-let or come loose while you are driving.
Do not use accessories that could causedisruptions to e.g. the vehicle's radioreceiver or electrical system.
Position the accessory so that there is norisk of it injuring the driver or passengersin the event of heavy braking or a colli-sion.
Pay attention to connected accessoriesas they can generate heat that could burnpassengers or the interior.
Using 12 V outlets
1. Remove the stopper (tunnel console) or folddown the cover (trunk/cargo compartment)over the socket and plug in the device.
2. Unplug the device and put the stopper backin (tunnel console) or fold up the cover(trunk/cargo compartment) when the socketis not in use or left unattended.
CAUTION
The maximum power is 120 W (10 A) peroutlet.
Page 580 of 669

||
LOADING, STORAGE AND PASSENGER COMPARTMENT
* Option/accessory.578
The illustration is generic – the design may vary.
To lock the glove compartment:
Insert the key into the lock on the glove com-partment.
Turn the key 90 degrees clockwise.
Remove the key from the lock.
–To unlock, perform the above steps inreverse.
Using the glove box as a cooled area
The glove compartment can be used to cool e.g.drinks or food. Cooling is possible when the cli-mate system is active (i.e. when the ignition is inmode II or when the engine is running).
The illustration is generic – the design may vary.
Activate cooling
Deactivate cooling
–Activate or deactivate cooling by moving thecontrol as far as possible toward the passen-ger compartment/glove compartment.
Related information
Passenger compartment interior (p. 574)
Private Locking (p. 264)
Sun visors
In the ceiling in front of the driver and front pas-senger, there are sun visors that can be loweredand angled to the side as necessary.
The illustration is generic – the design may vary.
The mirror lighting* comes on automatically whenthe cover is lifted up.
The mirror frame has a holder for e.g. cards ortickets.
Related information
Passenger compartment interior (p. 574)
Page 583 of 669

LOADING, STORAGE AND PASSENGER COMPARTMENT
581
Roof loads and load carriers
Volvo-developed load carriers are recommendedfor carrying loads on the roof of the vehicle.
Volvo load carriers are specially designed to helpprevent damage to your vehicle and help ensuremaximum safety while driving. Volvo load carriersare available from authorized Volvo retailers.
Carefully follow the installation instructions provi-ded with the load carriers.
Distribute the load evenly throughout theload carriers. Place heavier cargo at the bot-tom of the load.
Check periodically to ensure that the loadcarriers and load are properly secured.Secure the load firmly using tie straps orsimilar.
If the load is longer than the vehicle, such asa canoe or kayak, attach the towing eyelet inits front outlet and secure the tie straps in it.
The vehicle's wind resistance and fuel con-sumption increase with the size of the load.
Drive smoothly. Avoid rapid acceleration, hardbraking and fast cornering.
WARNING
The vehicle's center of gravity and drivingcharacteristics are altered by roof loads.
Follow the vehicle's specifications regardingweights and maximum permitted load.
Related information
Loading recommendations (p. 580)
Weights (p. 643)
Grocery bag holders
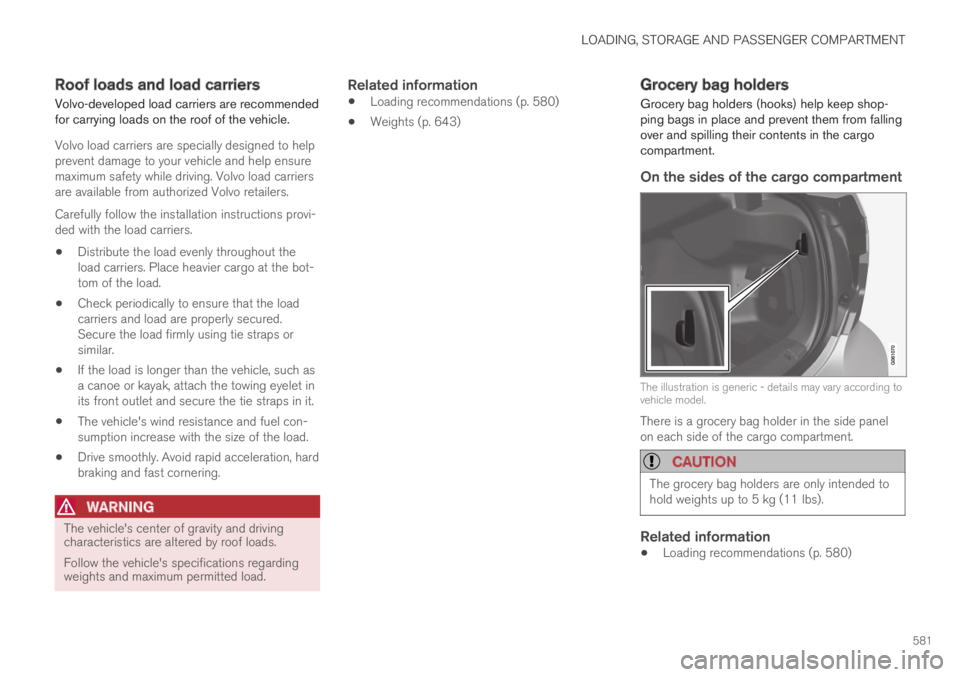
Grocery bag holders (hooks) help keep shop-ping bags in place and prevent them from fallingover and spilling their contents in the cargocompartment.
On the sides of the cargo compartment
The illustration is generic - details may vary according tovehicle model.
There is a grocery bag holder in the side panelon each side of the cargo compartment.
CAUTION
The grocery bag holders are only intended tohold weights up to 5 kg (11 lbs).
Related information
Loading recommendations (p. 580)
Page 584 of 669

LOADING, STORAGE AND PASSENGER COMPARTMENT
* Option/accessory.582
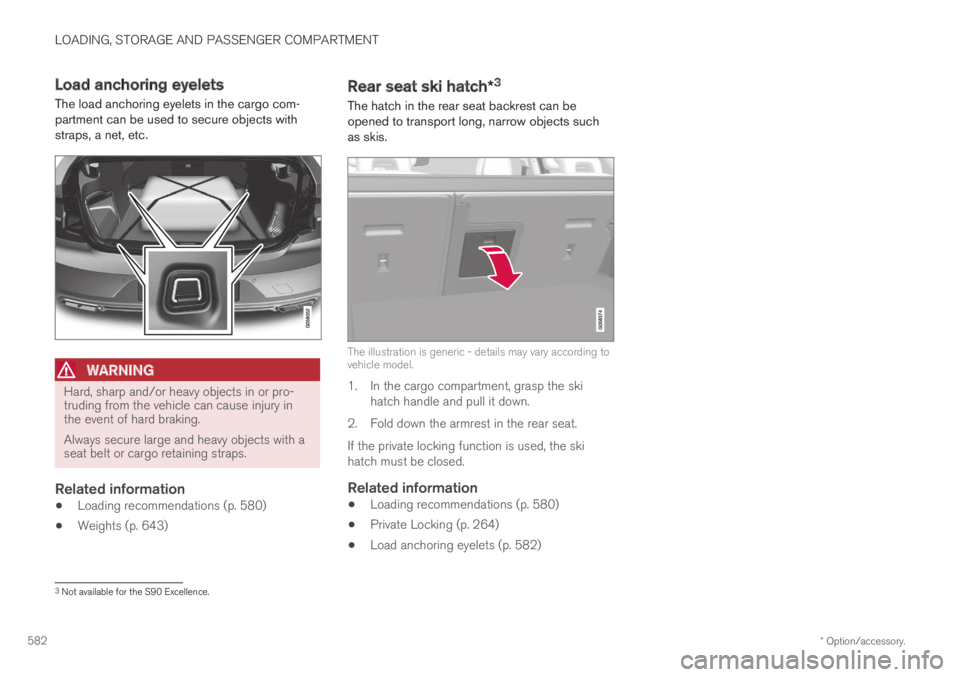
Load anchoring eyelets
The load anchoring eyelets in the cargo com-partment can be used to secure objects withstraps, a net, etc.
WARNING
Hard, sharp and/or heavy objects in or pro-truding from the vehicle can cause injury inthe event of hard braking.
Always secure large and heavy objects with aseat belt or cargo retaining straps.
Related information
Loading recommendations (p. 580)
Weights (p. 643)
Rear seat ski hatch*3
The hatch in the rear seat backrest can beopened to transport long, narrow objects suchas skis.
The illustration is generic - details may vary according tovehicle model.
1. In the cargo compartment, grasp the skihatch handle and pull it down.
2. Fold down the armrest in the rear seat.
If the private locking function is used, the skihatch must be closed.
Related information
Loading recommendations (p. 580)
Private Locking (p. 264)
Load anchoring eyelets (p. 582)
3Not available for the S90 Excellence.
Page 594 of 669

MAINTENANCE AND SERVICE
* Option/accessory.592
Hoisting the vehicle
When hoisting the vehicle, it is important toensure the jack/vehicle hoist is correctlyengaged in the designated attachment pointsunder the vehicle.
For vehicles with self-leveling*, pneumatic sus-pension (if installed) must be turned off beforethe vehicle is lifted. Turning off the function in thecenter display.
WARNING
If the vehicle is lifted on a garage jack, thejack must be placed under one of the four lift-ing points. Make sure that the vehicle is cor-rectly positioned on the jack and that it can-not slide off. Make sure the jack plate has arubber pad to help keep the vehicle stableand prevent damage. Always use axle standsor similar.
NOTE
Volvo recommends only using the jackintended for your specific vehicle model. If ajack other than that recommended by Volvo isused, follow the instructions included with theequipment.
The vehicle's ordinary jack is only intended tobe used in temporary situations for short peri-ods of time, such as when changing wheels inthe event of a flat tire. If the vehicle needs tobe lifted more frequently, or for a longerperiod of time than for a wheel change, agarage jack or hoist is recommended. Alwaysfollow the instructions for use provided withthe equipment.