warning light VOLVO V60 2021 Repair Manual
[x] Cancel search | Manufacturer: VOLVO, Model Year: 2021, Model line: V60, Model: VOLVO V60 2021Pages: 661, PDF Size: 12.68 MB
Page 400 of 661
||
STARTING AND DRIVING
398
Symbols in the instrument panel
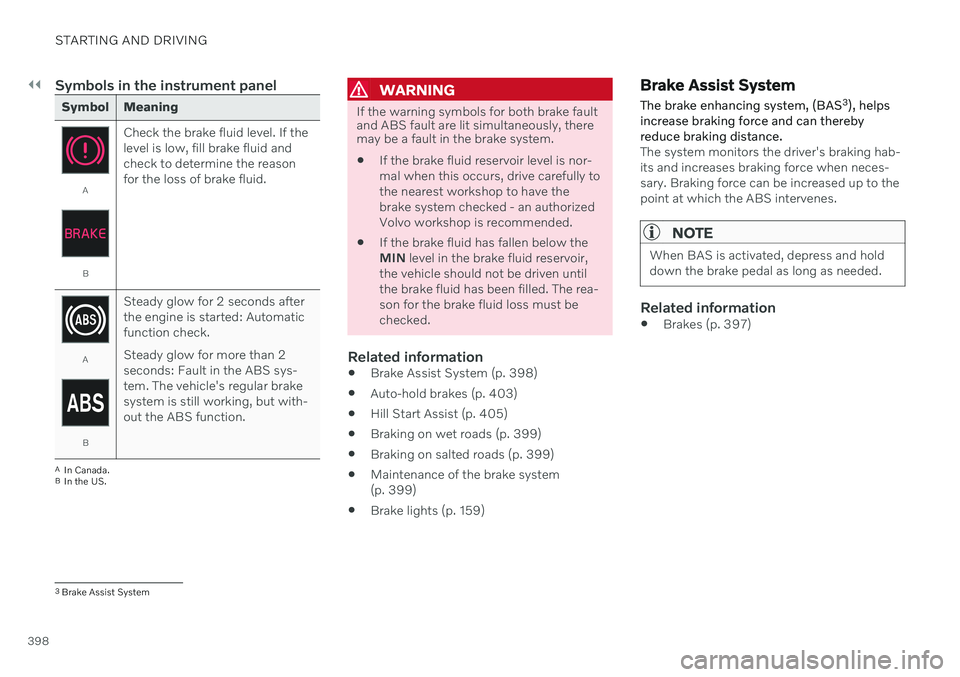
Symbol Meaning
A
BCheck the brake fluid level. If the level is low, fill brake fluid andcheck to determine the reasonfor the loss of brake fluid.
A
BSteady glow for 2 seconds after the engine is started: Automaticfunction check. Steady glow for more than 2 seconds: Fault in the ABS sys-tem. The vehicle's regular brakesystem is still working, but with-out the ABS function.
A
In Canada.
B In the US.
WARNING
If the warning symbols for both brake fault and ABS fault are lit simultaneously, theremay be a fault in the brake system.
If the brake fluid reservoir level is nor- mal when this occurs, drive carefully tothe nearest workshop to have thebrake system checked - an authorizedVolvo workshop is recommended.
If the brake fluid has fallen below theMIN
level in the brake fluid reservoir,
the vehicle should not be driven untilthe brake fluid has been filled. The rea-son for the brake fluid loss must bechecked.
Related information
Brake Assist System (p. 398)
Auto-hold brakes (p. 403)
Hill Start Assist (p. 405)
Braking on wet roads (p. 399)
Braking on salted roads (p. 399)
Maintenance of the brake system(p. 399)
Brake lights (p. 159)
Brake Assist System The brake enhancing system, (BAS 3
), helps
increase braking force and can thereby reduce braking distance.
The system monitors the driver's braking hab- its and increases braking force when neces-sary. Braking force can be increased up to thepoint at which the ABS intervenes.
NOTE
When BAS is activated, depress and hold down the brake pedal as long as needed.
Related information
Brakes (p. 397)
3
Brake Assist System
Page 423 of 661
STARTING AND DRIVING
421
The engine auto-starts while the brake pedal is depressed
In the following situations, the engine will auto-start even if the brake pedal isdepressed: High levels of condensation on the insideof the windows.
The climate system settings and theactual climate in the passenger compart-ment differ.
The brake pedal is pumped repeatedly.
The hood is open.
The vehicle begins to roll or increasesspeed slightly if the engine auto-stoppedbefore the vehicle was at a standstill.
The driver's seat belt is unbuckled with thegear selector in the
D or N positions.
The gear selector is moved from
D to R or
M (± ).
The driver's door is opened with the gearselector in
D. An audible signal and a text
message informs the driver that the igni-tion is on.
WARNING
Do not open the hood if the engine has auto-stopped. Turn off the engine byswitching off the ignition before lifting thehood.
Related information
Start/Stop function (p. 418)
Driving with the Start/Stop function (p. 418)
Deactivating the Start/Stop function(p. 420)
Page 432 of 661
||
STARTING AND DRIVING
430heating. This includes: altering fuel injec- tion settings or components, alteringemission system components or locationor removing components, and/or repeateduse of leaded fuel.
NOTE
Unleaded fuel is required for vehicles with three-way catalytic converters.
Heated oxygen sensorsThe heated oxygen sensors monitor the oxy- gen content of the exhaust gases. Readingsare fed into a control module that continuouslymonitors engine functions and controls fuelinjection. The ratio of fuel to air into the engineis continuously adjusted for efficient combus-tion to help reduce harmful emissions.
Related information
Octane rating (p. 428)
Fuel (p. 427)
Overheating of engine and transmission
In certain driving conditions, such as driving in mountainous areas or hot weather, there isa risk of the engine or transmission overheat-ing, especially when carrying heavy loads.
Engine power may be temporarily limited.
Remove any auxiliary lights mounted in front of the grille when driving in hotweather.
If the temperature in the engine's coolingsystem becomes too high, a warning sym-bol will appear in the instrument panel along with the message
Engine
temperature High temperature Stop
safely. Pull over to a safe location and let
the engine idle for a few minutes to cool down.
If the message
Engine temperature
High temperature Turn off engine orEngine coolant Level low, turn off
engine is displayed, stop the vehicle and
turn off the engine.
If the transmission begins to overheat, an alternative gear shifting program will beselected. An integrated protective functionwill also be activated, the warning symbolwill illuminate and the message
Transmission warm Reduce speed to
lower temperature or Transmission hot
Stop safely, wait for cooling will be dis- played in the instrument panel. Follow the recommendations given by reducingspeed or stopping the vehicle safely andletting the engine idle for a few minutes tolet the transmission cool.
If the vehicle begins to overheat, the airconditioning may be temporarily switchedoff.
After a prolonged period of driving indemanding conditions, do not turn off theengine immediately after stopping.
NOTE
It is normal for the engine's cooling fan to operate for a short time after the engine isswitched off.
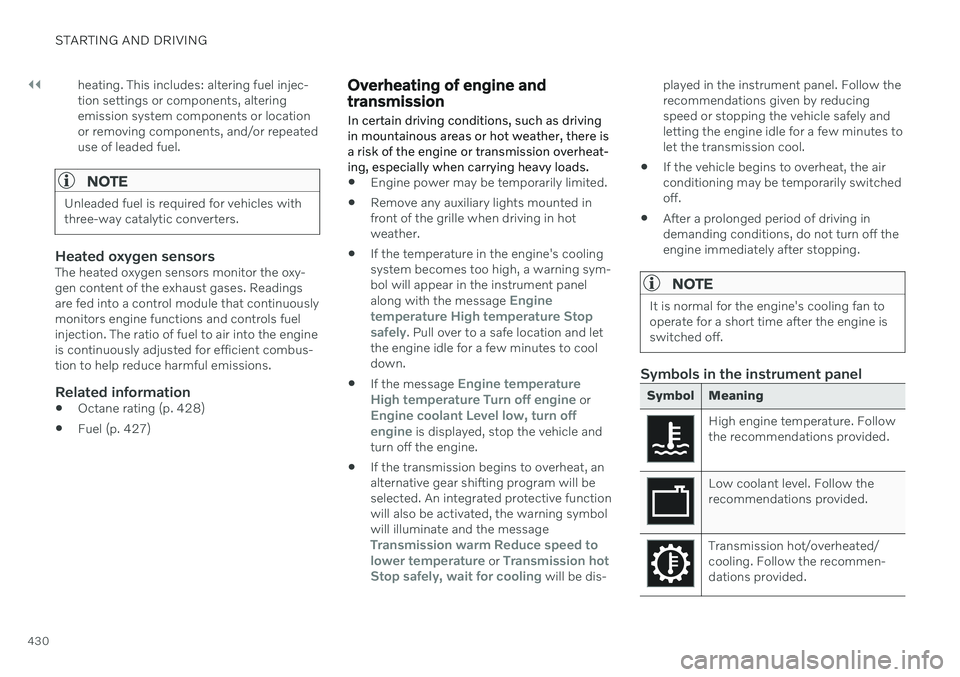
Symbols in the instrument panel
Symbol Meaning
High engine temperature. Follow the recommendations provided.
Low coolant level. Follow the recommendations provided.
Transmission hot/overheated/ cooling. Follow the recommen-dations provided.
Page 437 of 661
STARTING AND DRIVING
* Option/accessory.435
NOTE
Extreme weather conditions, towing a trailer, high altitude and lower fuel gradethan recommended are factors that cansignificantly increase the vehicle's fuel con-sumption.
Trailer weights
WARNING
Please adhere to the recommendations provided for trailer weight. If the recom-mendations are not followed, the vehicleand trailer may be difficult to control duringevasive maneuvers and braking.
NOTE
The specified maximum trailer weights are those permitted by Volvo. National vehicleregulations may set additional restrictionson trailer weight and speed. The trailerhitches may be certified for higher towingweights than the vehicle is permitted totow.
Self-leveling suspension *The vehicle's self-leveling system attempts to keep the vehicle at a constant level, regardlessof load (up to the maximum permitted weight).When the vehicle is stationary, the rear end of the vehicle will be slightly lowered, which isnormal.
Driving in hilly terrain or hot weatherIn certain conditions, there is a risk of over-heating when driving with a trailer. If overheat-ing of the engine and drive system is detected,a warning symbol will illuminate in the instru-ment panel and a message will appear. The automatic transmission adapts the gear for the current load and engine speed.
Steep inclines
Do not lock the automatic transmission into a higher gear than what the engine can handle
‒
it is not always preferable to drive in highgears at low rpm.
Parking on a hill
1. Depress the brake pedal.
2. Apply the parking brake.
3. Put the gear selector in P.
4. Release the brake pedal.Put chocks behind the wheels when the vehi- cle is parked on a hill with a trailer attached.
Starting on a hill
1. Depress the brake pedal.
2. Put the gear selector in D.
3. Release the parking brake.
4. Release the brake pedal and start driving.
Related information
Trailer Stability Assist
* (p. 436)
Checking trailer lights (p. 437)
Towing capacity and tongue weight (p. 634)
Overheating of engine and transmission(p. 430)
Page 440 of 661
STARTING AND DRIVING
438
Towing using a towline
This section refers to one vehicle being towed behind another using a towline.
Before towing another vehicle, check applica- ble speed limit regulations.
Preparations and towing
CAUTION
For some transmission variants, it is not possible to shift from P position if theengine is switched off. Contact an author-ized Volvo workshop for assistance towingor call a professional towing service.
CAUTION
Note that the vehicle must always be towed with the wheels rolling forward.
Do not tow a vehicle with automatictransmission at a speed greater than80 km/h (50 mph) or for a distancegreater than 80 km (50 miles).
WARNING
Ignition mode
II must be active – all
airbags are deactivated in ignition mode I.
Always have the remote key in thevehicle when it is towed.
WARNING
The brake and steering servos do not work when the engine is off – it takesabout 5 times more pressure on the brakepedal and steering requires much moreeffort than normal.
1. Turn on the hazard warning flashers.
2. Attach the towline to the towing eyelet.
3. Put the vehicle in ignition mode II – with-
out pressing the brake pedal, turn the start knob clockwise and hold it there for about4 seconds. Release the knob, which willautomatically return to its original position.
4. Move the gear selector to neutral (N) and release the parking brake. If the battery charge level is too low, it may not be possible to release the parkingbrake. Connect an auxiliary battery to thevehicle if the battery is discharged.
> The towing vehicle can now start driv-ing. 5. Keep the towline taut when the towing
vehicle slows down by applying light pres- sure to the brake pedal. This will helpavoid jarring movements.
6. Be prepared to apply the brakes to stop the vehicle.
Jump startingDo not tow the vehicle to start the engine. Usean auxiliary battery if the start battery's chargelevel is so low that the engine cannot bestarted.
CAUTION
Attempting to tow with the engine running could result in damage to the three-waycatalytic converter.
Related information
Attaching and removing the towing eyelet (p. 439)
Hazard warning flashers (p. 159)
Recovery (p. 440)
Jump starting using another battery(p. 431)
Selecting ignition mode (p. 396)
Transmission (p. 406)
Page 444 of 661
STARTING AND DRIVING
* Option/accessory.
442
Programming HomeLink ®
*22
Follow these instructions to program HomeLink ®
, reset all programming, or pro-
gram individual buttons.
NOTE
In some vehicles, the ignition must be on or in the "accessory position" before HomeLink ®
can be programmed or used. It
can be a good idea to put new batteries in the remote control being replaced by HomeLink ®
for faster programming and
better radio signal transmission. TheHomeLink ®
buttons should be reset before
programming.
WARNING
While HomeLink ®
is being programmed,
the garage door or gate being programmed may be activated. Make sure that no one isnear the door or gate during programming.When programming a garage door opener,it is advised to park outside of the garage. 1. Point the remote control at the
HomeLink ®
button to be programmed and
hold it about 2-8 cm (1-3 inches) from the button. Do not obstruct the HomeLink ®
indicator light. Note: Some remote controls are more
effective at programming HomeLink ®
from
a distance of about 15-20 cm (6-12 inches). Keep this in mind if you experi-ence any programming difficulties.
2. Press and hold both the remote control button and the HomeLink ®
button to be
programmed. 3. Do not release the buttons until the indica-
tor light has stopped flashing slowly(about once a second) and either flashesquickly (about 10 times a second) orglows steadily. >If the indicator light glows steadily: Indication that programming is com-plete. Press the programmed buttontwice to activate. If the indicator light flashes quickly: The device being programmed with HomeLink ®
may have a security func-
tion that requires an extra step. Try pressing the programmed button twiceto see whether the programmingworks. Otherwise, continue with thefollowing steps.
22 Certain markets only.
Page 538 of 661
||
WHEELS AND TIRES
* Option/accessory.
536
WARNING
The wheel bolts may need to be tightened again several days after a wheel change.Temperature fluctuations and vibrationscan cause them to loosen slightly.
NOTE
After inflating a tire, always replace the valve cap to help prevent valve damagecaused by gravel, dirt, etc.
Use plastic valve caps only. Metal capscould corrode and become difficult toremove.
Related information
Hoisting the vehicle (p. 573)
Tool kit (p. 536)
Saving new reference values for tire infla- tion pressure monitoring
* (p. 531)
Tool kit
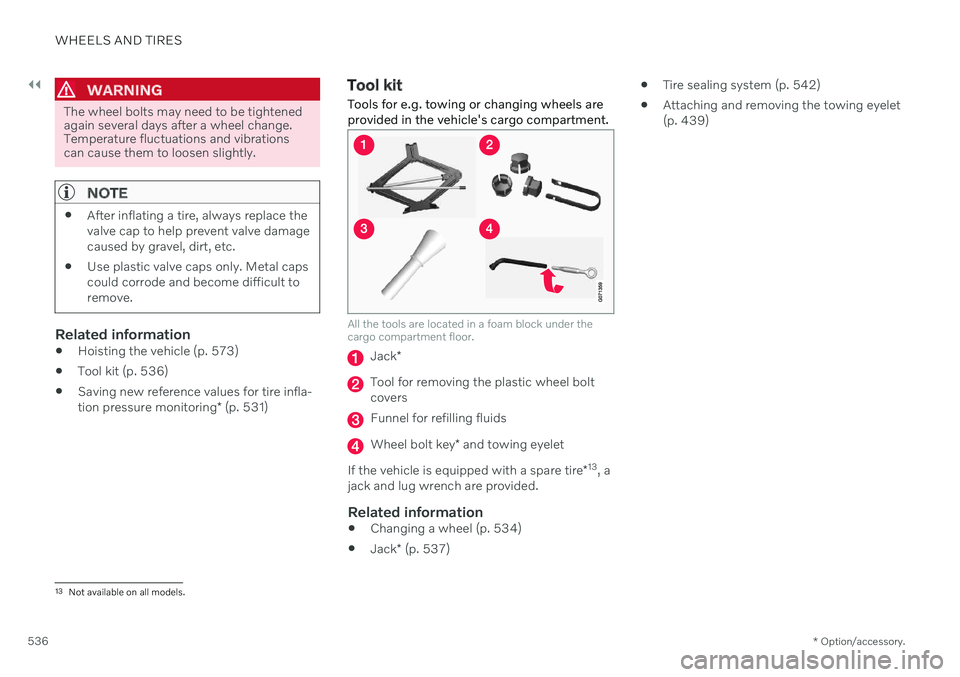
Tools for e.g. towing or changing wheels are provided in the vehicle's cargo compartment.
All the tools are located in a foam block under the cargo compartment floor.
Jack *
Tool for removing the plastic wheel bolt covers
Funnel for refilling fluids
Wheel bolt key * and towing eyelet
If the vehicle is equipped with a spare tire *13
, a
jack and lug wrench are provided.
Related information
Changing a wheel (p. 534)
Jack
* (p. 537)
Tire sealing system (p. 542)
Attaching and removing the towing eyelet (p. 439)
13
Not available on all models.
Page 539 of 661
WHEELS AND TIRES
}}
* Option/accessory.537
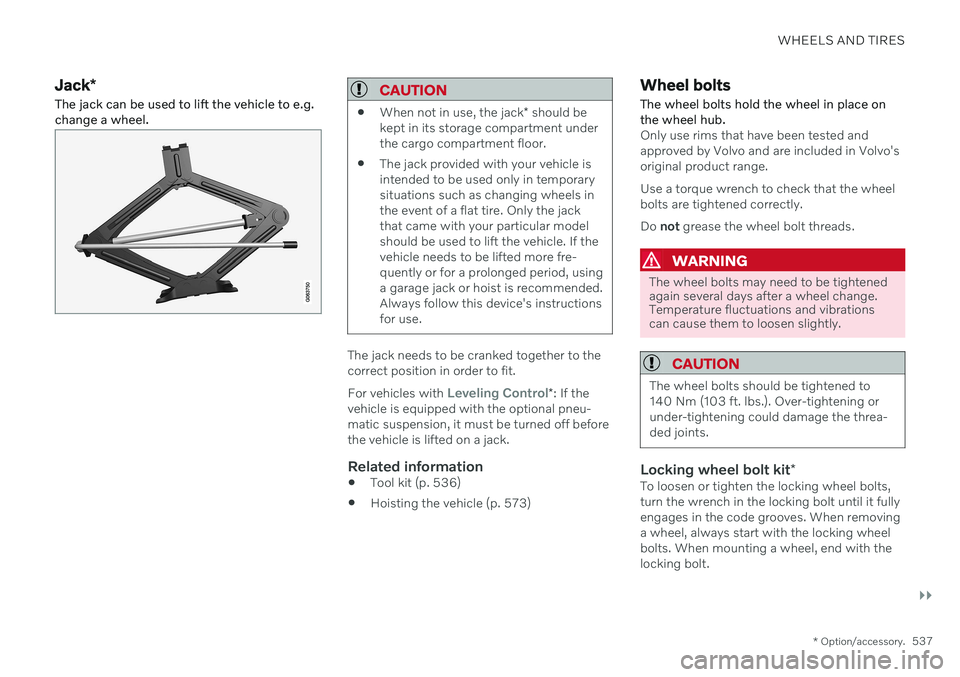
Jack*
The jack can be used to lift the vehicle to e.g. change a wheel.CAUTION
When not in use, the jack
* should be
kept in its storage compartment under the cargo compartment floor.
The jack provided with your vehicle isintended to be used only in temporarysituations such as changing wheels inthe event of a flat tire. Only the jackthat came with your particular modelshould be used to lift the vehicle. If thevehicle needs to be lifted more fre-quently or for a prolonged period, usinga garage jack or hoist is recommended.Always follow this device's instructionsfor use.
The jack needs to be cranked together to the correct position in order to fit. For vehicles with
Leveling Control*
: If the
vehicle is equipped with the optional pneu- matic suspension, it must be turned off beforethe vehicle is lifted on a jack.
Related information
Tool kit (p. 536)
Hoisting the vehicle (p. 573)
Wheel bolts
The wheel bolts hold the wheel in place on the wheel hub.
Only use rims that have been tested and approved by Volvo and are included in Volvo'soriginal product range. Use a torque wrench to check that the wheel bolts are tightened correctly. Do not grease the wheel bolt threads.
WARNING
The wheel bolts may need to be tightened again several days after a wheel change.Temperature fluctuations and vibrationscan cause them to loosen slightly.
CAUTION
The wheel bolts should be tightened to 140 Nm (103 ft. lbs.). Over-tightening orunder-tightening could damage the threa-ded joints.
Locking wheel bolt kit *To loosen or tighten the locking wheel bolts, turn the wrench in the locking bolt until it fullyengages in the code grooves. When removinga wheel, always start with the locking wheelbolts. When mounting a wheel, end with thelocking bolt.
Page 578 of 661
MAINTENANCE AND SERVICE
* Option/accessory.
576
Climate control system service
Service and repairs on the air conditioning system should only be done by an authorizedworkshop.
Troubleshooting and repairsThe air conditioning system contains a fluores- cent tracer substance. Ultraviolet light is usedto search for leaks in the system. Volvo recommends contacting an authorized Volvo workshop. The climate system in the vehicle uses a freon- free R1234yf refrigerant. For informationregarding the refrigerant, refer to the decallocated on the inside of the hood.
WARNING
The air conditioning system contains the refrigerant R1234yf under pressure. Inaccordance with SAE J2845 (TechnicianTraining for Safe Service and Containmentof Refrigerants Used in Mobile A/C Sys-tem), service and repairs to the refrigerantsystem may only be performed by trainedand certified technicians in order to ensurethe safety of the system.
Related information
Volvo's service program (p. 566)
Replacing a windshield with head- up display
*
Vehicles with a head-up display have a spe- cial type of windshield that meets therequirements for displaying projected infor-mation.
Volvo recommends contacting an authorized Volvo workshop for assistance replacing thewindshield. The correct type of replacementwindshield must be used in order for the head-up display to function properly.
Related information
Head-up display
* (p. 140)
Cleaning the head-up display
* and instru-
ment panel (p. 609)
Opening and closing the hood
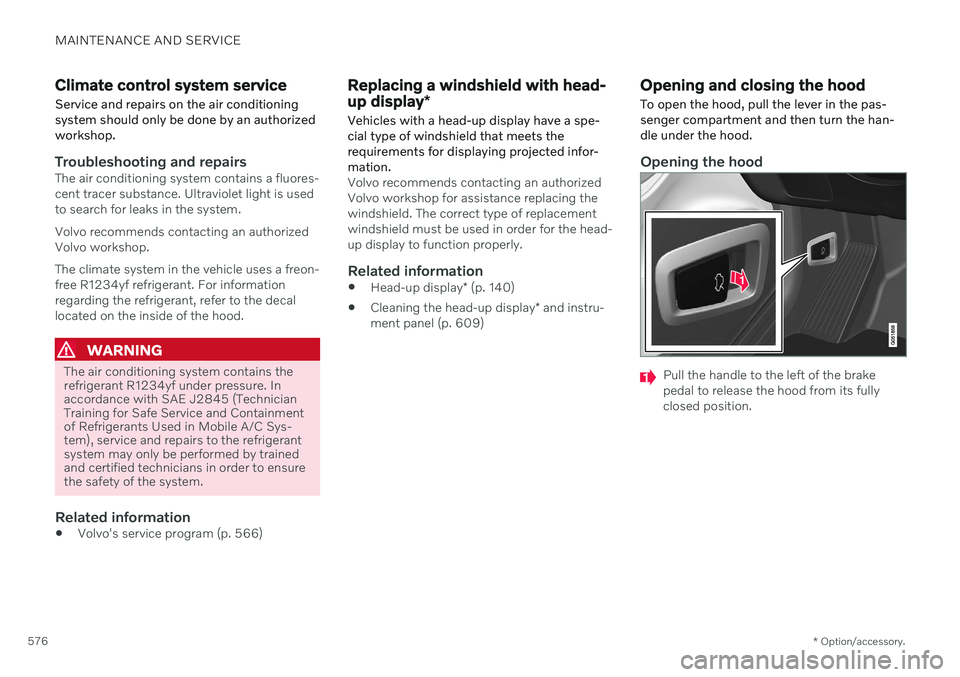
To open the hood, pull the lever in the pas- senger compartment and then turn the han-dle under the hood.
Opening the hood
Pull the handle to the left of the brake pedal to release the hood from its fullyclosed position.
Page 613 of 661
MAINTENANCE AND SERVICE
}}
* Option/accessory.611
Cleaning textile floor and inlay mats
Use of textile cleaner is recommended when cleaning textile mats. Clean regularly andtreat stains immediately. It is important tovacuum before using a cleaning agent.
Remove the inlay mats to clean the floor mats and inlay mats separately. Each inlay mat issecured into place with pins.
1. Remove the inlay mat by grasping the inlay mat at each pin and lifting the mat straight up.
2. Use a vacuum to remove dust and dirt.
NOTE
Do not swing or strike the inlay mats vio- lently against another object to remove dirtas this could damage the mats.
3. After vacuuming, a specially designed tex- tile cleaning agent should be used to remove stains on floor mats.
4. After cleaning, put the inlay mat back into place by pressing it in at each pin.
WARNING
Never use more than one inlay mat at a time on the driver's floor. If any othertype of floor mat is used, remove theoriginal mat from the driver's seat floorbefore driving. All types of mats mustbe securely anchored in the attach-ment points in the floor. Make sure thefloor mat does not impede the move-ment of the brake pedal or acceleratorpedal in any way, as this could be aserious safety hazard.
Volvo's floor mats are specially manu-factured for your vehicle. They must beproperly secured in the attachmentpoints in the floor to help ensure theycannot slide and become trappedunder the pedals.
Related information
Cleaning the interior (p. 607)
Cleaning the center display (p. 608)
Cleaning fabric upholstery and ceiling liner(p. 609)
Cleaning the seat belt (p. 610)
Cleaning leather upholstery
* (p. 611)
Cleaning the leather steering wheel(p. 612)
Cleaning interior plastic, metal and woodsurfaces (p. 613)
Cleaning leather upholstery
*
Use cleaning agents and car care products recommended by Volvo. Clean regularly andtreat stains immediately. It is important tovacuum before using a cleaning agent.
Volvo's leather upholstery * is treated to pro-
tect its original appearance. Over time, sun- light, grease, dirt, etc. could break down theprotective layer. This could result in scratchesand cracking. Leather upholstery * is a natural product that
changes and acquires a beautiful patina over time. Regular cleaning and treatments arerequired to preserve the qualities and color ofthe leather. Volvo offers a comprehensiveproduct, Volvo Leather Care KitWipes, forcleaning and treating leather upholstery.When used as directed, it helps preserve theleather's protective coating. For optimal results, Volvo recommends clean- ing and applying protective cream one to fourtimes a year (or more often as needed). VolvoLeather Care Kit 951 0251 and Volvo LeatherSoftener 943 7429 are available for purchaseat Volvo retailers.
Cleaning the leather upholstery1. Apply the leather cleaner to a damp sponge and squeeze it until the cleanerfoams.