brakes VOLVO V90 CROSS COUNTRY 2021 Service Manual
[x] Cancel search | Manufacturer: VOLVO, Model Year: 2021, Model line: V90 CROSS COUNTRY, Model: VOLVO V90 CROSS COUNTRY 2021Pages: 683, PDF Size: 14.19 MB
Page 412 of 683
||
STARTING AND DRIVING
410
Symbols in the instrument panel
Symbol Meaning
This symbol illuminates when the function is using the normalbrakes to keep the vehicle sta-tionary.
A
BThis symbol illuminates when the function is using the parkingbrake to keep the vehicle station-ary.
A
Canadian models.
B US models.
Related information
Activating and deactivating Auto-hold at a standstill (p. 410)
Brakes (p. 403)
Parking brake (p. 406)
Hill Start Assist (p. 411)
Activating and deactivating Auto- hold at a standstill
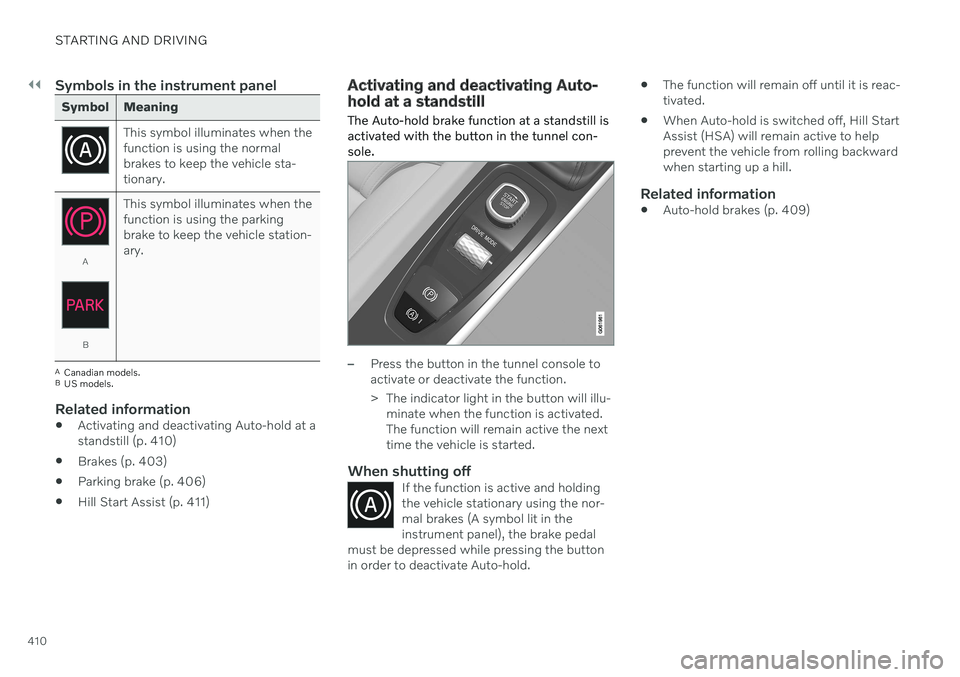
The Auto-hold brake function at a standstill is activated with the button in the tunnel con-sole.
–Press the button in the tunnel console to activate or deactivate the function.
> The indicator light in the button will illu- minate when the function is activated. The function will remain active the nexttime the vehicle is started.
When shutting offIf the function is active and holdingthe vehicle stationary using the nor-mal brakes (A symbol lit in theinstrument panel), the brake pedal
must be depressed while pressing the buttonin order to deactivate Auto-hold.
The function will remain off until it is reac- tivated.
When Auto-hold is switched off, Hill StartAssist (HSA) will remain active to helpprevent the vehicle from rolling backwardwhen starting up a hill.
Related information
Auto-hold brakes (p. 409)
Page 413 of 683
STARTING AND DRIVING
* Option/accessory.411
Hill Start Assist
The function for assisting when starting the vehicle on inclines (HSA 4
) helps prevent the
vehicle from rolling backward when starting on an uphill gradient. When backing up a hill,HSA helps prevent the vehicle from rollingforward.
The function retains pressure from the brake pedal in the brake system for several secondsafter the brake pedal has been released. This temporary braking effect is released after a few seconds or when the driver begins driv-ing. Hill Start Assist is activated when the vehicle is stopped on steep inclines. The function isavailable even when the Auto-hold brake func-tion is switched off.
Related information
Auto-hold brakes (p. 409)
Brakes (p. 403)
Braking assist after a collision
In a collision in which the activation level is reached for the pyrotechnic seat belt tension-ers or airbags, or if a collision with a large ani-mal is detected, the vehicle's brakes will beautomatically activated. This function isintended to help prevent or reduce the effectsof any subsequent collision.
After a serious collision, it may no longer be possible to control and steer the vehicle. Inorder to avoid or mitigate a possible furthercollision with a vehicle or an object in the vehi-cle's path, the brake assist system is activatedautomatically to help stop the vehicle safely. If braking is not appropriate, e.g. if there is a risk of being hit by passing traffic, the drivercan override the system by depressing theaccelerator pedal. This function assumes that the brake system is intact after a collision.
Related information
Rear Collision Warning
* (p. 351)
BLIS
* (p. 352)
Brake functions (p. 403)
Regenerative braking
*
The vehicle recovers kinetic energy during braking in order to reduce fuel consumptionand emissions.
The battery symbol is shown in the instrument panel when the vehicle is generating power for the battery 5
.
The function is available in all drive modes together with gear selector position D or M.
Activating brake regeneration
Brake regeneration is activated by gentle pres- sure on the brake pedal or during engine brak-ing. Regeneration increases during engine braking if manual gear selector position M is selected.
Related information
Drive modes
* (p. 419)
Shifting gears with automatic transmis-sion (p. 413)
4
Hill Start Assist
5 The symbol is used in vehicles with 48 V batteries.
Page 421 of 683
STARTING AND DRIVING
}}
* Option/accessory.419
Automatic transmission symbols and messages If a problem occurs with the transmission, a symbol and a message are displayed in theinstrument panel.
CAUTION
Check the operating temperature of the transmission to help avoid damage to anyof the drive system components. If there isa risk of overheating, a warning symbol willappear in the instrument panel and a textmessage will be displayed. Follow the rec-ommendations given.
Symbol Meaning
A fault has occurred in the trans- mission. Read the message in the instru- ment panel.
Hot or overheated transmission. Read the message in the instru- ment panel.
Temporary fault in driveline. Read the message in the instru- ment panel.
Related information
Automatic transmission (p. 412)
All Wheel Drive (AWD)
All-wheel drive (AWD 9
), also called four-
wheel drive, means that power is distributed to all four wheels, which improves traction.
To achieve the best traction, power is auto- matically directed to the wheels that have thebest grip. The system continuously calculatesthe need for torque to the rear wheels, andcan immediately redistribute up to half of theengine's torque to the rear wheels. All-wheel drive also has a stabilizing effect at higher speeds. In normal driving conditions,most of the engine's power is directed to thefront wheels. When the vehicle is stationary,all-wheel drive is always activated in prepara-tion for maximum traction during acceleration. All-wheel drive reacts differently depending on which drive mode is selected.
Related information
Drive modes
* (p. 419)
Low Speed Control (p. 432)
Transmission (p. 412)
Drive modes
*
Drive modes affect the vehicle's driving cha- racteristics in different ways to enhance andsimplify the driving experience in certaintypes of situations.
Drive modes enable easy access to the vehi- cle's many functions and settings in differentdriving situations. The following systems areadapted to help optimize driving characteris-tics in each drive mode: Steering
Engine/transmission/all-wheel drive
Brakes
Shock absorbers
Instrument panel
Start/Stop function
Climate control settings
Select the drive mode that is adapted to the current driving conditions. Keep in mind thatnot all drive modes are available in all situa-tions.
Available drive modesWhen the engine is started, the vehicle will be in Comfort mode and the start/stop function
will be activated. Drive mode can be changed once the vehicle is started, e.g. to
Individualmode. Once Individual mode is selected, you
can adjust settings to personal preferences, e.g. to show the tachometer.
Page 425 of 683
STARTING AND DRIVING
}}
* Option/accessory.423
Limitations
Eco Coast is not available if
the engine and/or transmission are not at normal working temperatures
the gear selector is moved from
D to man-
ual shifting mode
the vehicle's speed is not within the65-140 km/h (40-87 mph) range
the gradient of the downgrade is morethan approximately 6%
the steering wheel paddles
* are being
used for manual shifting.
Deactivating and turning off Eco Coast
In certain situations, it may be advisable to deactivate or turn off Eco Coast so that enginebraking can be used. These situations mightinclude driving down steep hills or beforepassing another vehicle to help ensure thiscan be done as safely as possible. Deactivate Eco Coast by
pressing the accelerator or brake pedal
moving the gear selector to manual mode
using the steering wheel paddles
* to shift.
Turn off Eco Coast by
switching to another drive mode
*
deactivating
Eco drive mode in Function
view. It is possible to roll short distances even with- out Eco Coast in order to help conserve fuel.However, for the best fuel economy, EcoCoast should be activated and used to rolllonger distances.
Cruise control Eco CruiseWhen cruise control is activated in the Ecodrive mode, the vehicle's acceleration and deceleration will be slower than in other drivemodes to help further conserve fuel. Becauseof this, the vehicle's actual speed may beslightly above or below the set speed.
On a level road, the vehicle's actual speedmay differ from the set speed when cruisecontrol is active and the vehicle is coast-ing.
On a steep uphill gradient, the vehicle'sspeed is reduced until the transmissiondownshifts. Reduced acceleration is theninitiated in order to reach the set speed.
On a downhill gradient in which the vehi- cle is coasting, the vehicle's actual speed may be slightly above or below the setspeed. The function uses engine brakingto keep the set speed. If necessary, thenormal brakes are also applied.
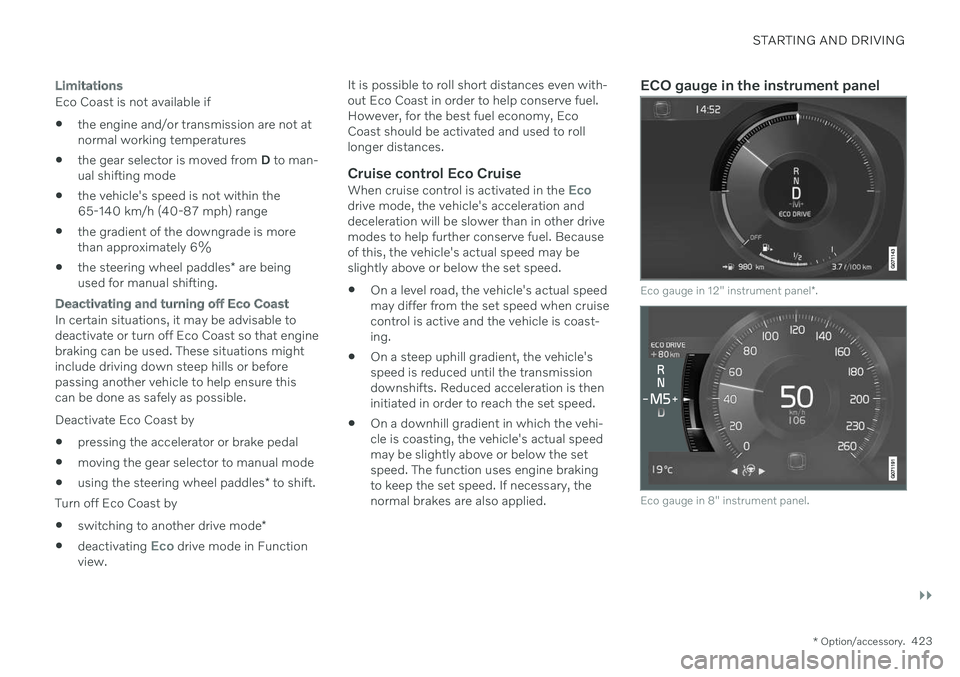
ECO gauge in the instrument panel
Eco gauge in 12" instrument panel
*.
Eco gauge in 8" instrument panel.
Page 427 of 683
STARTING AND DRIVING
}}
* Option/accessory.425
Start/Stop function Start/Stop is a function that temporarily switches off the engine when the vehicle hasstopped, e.g. at a traffic light or in heavy traf-fic, and then starts it again automaticallywhen needed.
The Start/Stop function reduces fuel con- sumption, which helps to reduce exhaustemissions. The system makes it possible to drive more economically and climate-smart by letting theengine auto-stop when appropriate.
Related information
Driving with the Start/Stop function(p. 425)
Conditions for the Start/Stop function(p. 427)
Drive modes
* (p. 419)
Driving with the Start/Stop function
Start/stop is a function that temporarily turns off the engine when the vehicle is stationaryand then automatically starts it when needed.
The Start/Stop function is available when the ignition is started and can be activated if cer-tain conditions are met. The instrument panel indicates when the func- tion is
Available
active
not available.
All of the vehicle's ordinary systems, such aslighting, radio, etc. function normally when theengine has been auto-stopped. Certain func-tions may be temporarily reduced howeversuch as the climate system's blower speed orextremely high audio system volume.
Auto-stopTo auto-stop the engine: Stop the vehicle by applying the brakes and keep the brake pedal depressed. Theengine will auto-stop.
In
Comfort or Eco drive mode, the engine
may auto-stop before the vehicle has com- pletely stopped. With Adaptive Cruise Control or Pilot Assistactivated, the engine will auto-stop aboutthree seconds after the vehicle has stopped.
Auto-startThe following conditions must be met for theengine to auto-start.
Release the brake pedal. The engine willauto-start and the vehicle can be driven.On an uphill gradient, Hill Start Assist (HSA 14
) will activate to help prevent the
vehicle from rolling backward.
When the Auto-hold function is activated, auto-start will be delayed until the acceler-ator is pressed.
When Adaptive Cruise Control or PilotAssist are activated, the engine will auto-start when the accelerator pedal is depressed or the
button on the left-
side steering wheel keypad is pressed.
Maintain pressure on the brake pedal and press the accelerator pedal. The enginewill auto-start.
On a downhill gradient: Release the brakepedal slightly so that the vehicle begins toroll. The engine will auto-start after a slightincrease in speed.
14
Hill Start Assist
Page 428 of 683

||
STARTING AND DRIVING
426
Symbols in the instrument panel
White – Displayed in the tachometer
when the function is available.
Green – Shown in the tachometer
when the function is active and the engine is auto-stopped.
Gray – When the symbol is grayed-
out with a line through it, the function is not available. If no symbol is shown, the function is switched off.
The function is active and the engine has auto-stop- ped.
On vehicles with the 8-inch instrument panel, the symbol will be shown at the bottom of thespeedometer.
Related information
Deactivating the Start/Stop function(p. 426)
Conditions for the Start/Stop function(p. 427)
Start/Stop function (p. 425)
Hill Start Assist (p. 411)
Auto-hold brakes (p. 409)
Deactivating the Start/Stop function
In certain situations, it may be advisable to turn the Start/Stop function off.
To turn off Start/Stop, tap theStart/Stop function button
in the center display's Func- tion view. The indicator lightin the button will go outwhen the function has beenturned off.
The function will remain turned off until:
it is reactivated
the drive mode is changed to
Eco.
Related information
Driving with the Start/Stop function (p. 425)
Conditions for the Start/Stop function(p. 427)
Page 435 of 683
STARTING AND DRIVING
}}
* Option/accessory.433
Activating and deactivating Low Speed Control using the functionbutton There is a function button for driving at low speeds with
Hill Descent Control in the cen-
ter display's Function view if the vehicle is not equipped with a drive mode control in thetunnel console.
Selecting Low Speed Control in the center display's Function view
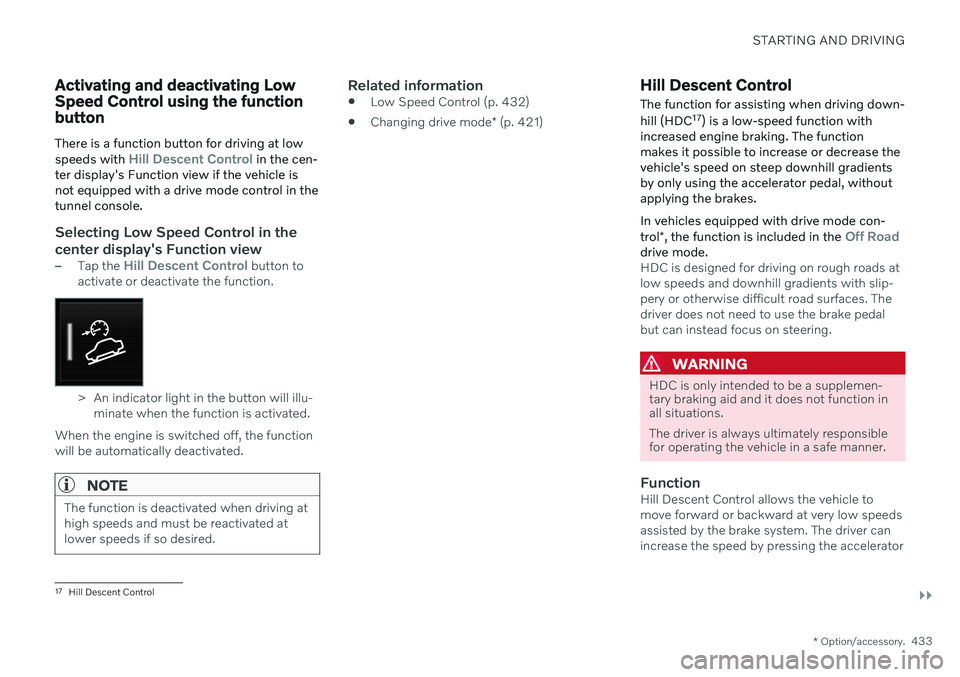
–Tap the Hill Descent Control button to
activate or deactivate the function.
> An indicator light in the button will illu- minate when the function is activated.
When the engine is switched off, the function will be automatically deactivated.
NOTE
The function is deactivated when driving at high speeds and must be reactivated atlower speeds if so desired.
Related information
Low Speed Control (p. 432)
Changing drive mode
* (p. 421)
Hill Descent Control
The function for assisting when driving down- hill (HDC 17
) is a low-speed function with
increased engine braking. The function makes it possible to increase or decrease thevehicle's speed on steep downhill gradientsby only using the accelerator pedal, withoutapplying the brakes. In vehicles equipped with drive mode con- trol *, the function is included in the
Off Roaddrive mode.HDC is designed for driving on rough roads at low speeds and downhill gradients with slip-pery or otherwise difficult road surfaces. Thedriver does not need to use the brake pedalbut can instead focus on steering.
WARNING
HDC is only intended to be a supplemen- tary braking aid and it does not function inall situations. The driver is always ultimately responsible for operating the vehicle in a safe manner.
FunctionHill Descent Control allows the vehicle to move forward or backward at very low speedsassisted by the brake system. The driver canincrease the speed by pressing the accelerator
17
Hill Descent Control
Page 436 of 683
||
STARTING AND DRIVING
* Option/accessory.
434 pedal. When the accelerator pedal is released, the vehicle will return to very low speedregardless of how steep the hill is and withoutthe brakes needing to be applied. The brakelights will illuminate when the function is acti-vated. The driver can brake to stop or slow the vehi- cle at any time by depressing the brake pedal. HDC is activated along with Low Speed Con- trol (LSC
18
), which facilitates and improves
traction and control on rough and slippery sur- faces. The system is intended to be used atlow speeds, up to approximately 40 km/h (25mph).
To keep in mind when using HDC
If the function is switched off while drivingon a steep downhill gradient, brakingeffect will be gradually reduced.
HDC can be used in gear positions
D and
R , and in manual gears 1 or 2.
It is not possible to manually shift to thirdgear or higher when HDC is active.
NOTE
When LSC with HDC is activated, the feel of the accelerator pedal and engineresponse will change.
NOTE
This drive mode is not designed to be used for normal street driving.
NOTE
The function is deactivated when driving at high speeds and must be reactivated atlower speeds if so desired.
Related information
Activating and deactivating Hill Descent Control using the function button (p. 434)
Changing drive mode
* (p. 421)
Low Speed Control (p. 432)
All Wheel Drive (AWD) (p. 419)
Activating and deactivating Hill Descent Control using the functionbutton There is a function button for assistance on steep gradients with
Hill Descent Control in
the center display's Function view if the vehi- cle is not equipped with a drive mode controlin the tunnel console.
Selecting Hill Descent Control in the center display's Function view
HDC only works at low speeds.
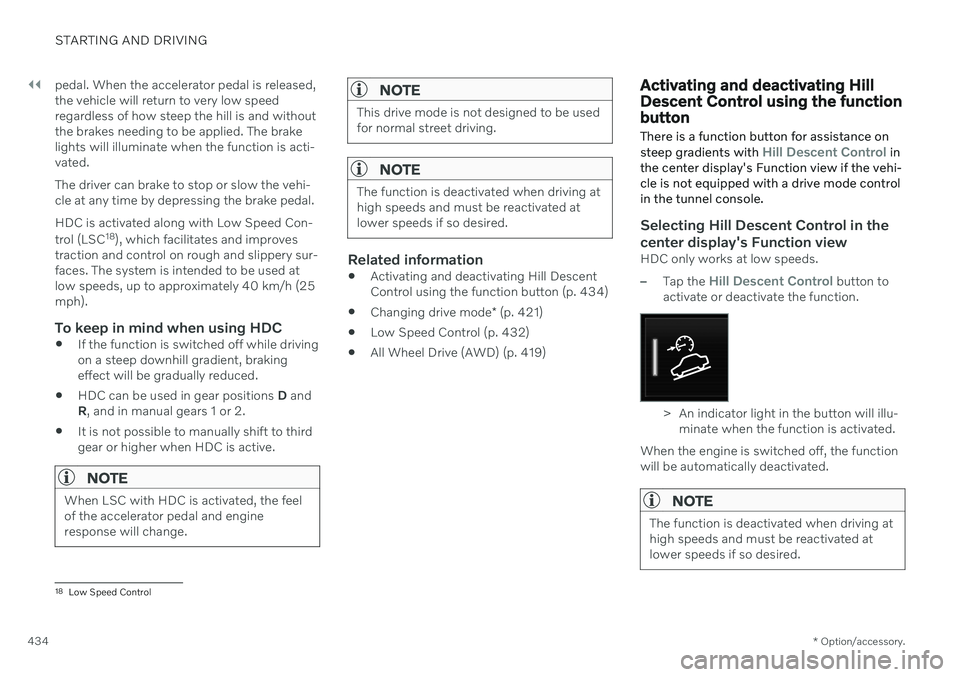
–Tap the Hill Descent Control button to
activate or deactivate the function.
> An indicator light in the button will illu- minate when the function is activated.
When the engine is switched off, the function will be automatically deactivated.
NOTE
The function is deactivated when driving at high speeds and must be reactivated atlower speeds if so desired.
18 Low Speed Control
Page 437 of 683
STARTING AND DRIVING
}}
* Option/accessory.435
Related information
Hill Descent Control (p. 433)
Changing drive mode
* (p. 421)
Economical driving
A more economical driving style can help lower fuel consumption.
Before driving
If possible, precondition the vehicle before driving.
If preconditioning is not possible when itis cold outside, use seat and steeringwheel heating first. Avoid heating theentire passenger compartment to reducethe amount of current being taken fromthe start battery.
Avoid using idling to warm up the vehiclebefore driving.
The type of tires and inflation pressureused could affect energy consumption –consult an authorized Volvo retailer foradvice on suitable tires.
Remove unnecessary items from the vehi-cle - the heavier the load, the higher thefuel consumption.
While driving
Activate Eco drive mode.
Use gear selector position
D as often as
possible.
When using manual gear shifting, drive using the highest possible gear. Use the gear indicator 19
.
Maintain a steady speed and a generous following distance to traffic ahead to mini-mize braking. Use engine braking if possi-ble.
Higher speeds increase energy consump-tion because air resistance increases withspeed.
In a cold climate, reduce heating of thewindshield/rear window, mirrors, seatsand the steering wheel.
Avoid driving with the windows open.
Do not use the accelerator pedal to keepthe vehicle stationary on an uphill gradi-ent. Instead, activate the auto-hold brakefunction at a standstill.
Use trip data to see current fuel consump-tion.
WARNING
Never turn off the engine while the vehicle is moving, e.g. when driving downhill. Thisdeactivates certain important systemssuch as power steering and brakes.
19
Only available in certain markets.
Page 439 of 683
STARTING AND DRIVING
437
Slippery driving conditionsTo help optimize traction and roadholding, Volvo recommends using snow tires on allwheels whenever there is a risk of snow or iceon the road.
NOTE
Certain countries require use of winter tires by law. Not all countries permit the use ofstudded tires.
Practice driving on slippery surfaces under controlled conditions to learn how the vehiclereacts.
Related information
Engine oil specifications (p. 658)
Snow tires (p. 554)
Snow chains (p. 555)
Braking on salted roads (p. 405)
Braking on wet roads (p. 405)
Filling washer fluid (p. 646)
Starter battery (p. 600)
Replacing windshield wiper blades(p. 644)
Changing rear window wipers (p. 643)
Refilling coolant (p. 598)
Driving through standing water
It may be necessary to drive the vehicle through standing water e.g. deep puddles orflooding on the road. This must be done withgreat caution.
The vehicle can be driven through water up to a depth of 30 cm (11 in) at no more than walk-ing speed. Be particularly careful when drivingthrough flowing water. When driving through standing water, drive slowly and do not stop the vehicle. When youhave passed the water, press lightly on thebrake pedal and check that the brakes arefunctioning properly. Water, mud, slush, etc.can make the brake linings slippery, resultingin delayed braking effect. If the vehicle is equipped with contacts for an electric heater or trailer coupling, cleanthese after driving in water or mud.
Do not allow the vehicle to stand in waterup to the sills any longer than absolutelynecessary. This could result in electricalmalfunctions.
CAUTION
Engine damage could occur if water enters the air cleaner.
If water enters the transmission, thelubricating ability of the oils is reducedand the service life of these systems isshortened.
Damage to any component, engine,transmission, turbocharger, differentialor its internal components caused byflooding, vapor lock or insufficient oil isnot covered under warranty.
If the engine stalls while the vehicle isin water, do not attempt to restart it.Have the vehicle towed out of thewater to a workshop. An authorizedVolvo workshop is recommended. Riskof engine failure.
CAUTION
Because it can be difficult to determine the water depth, Volvo recommends not driv-ing through standing or running water. Thedriver is always responsible for operatingthe vehicle in a safe manner and adheringto all applicable laws and regulations.
Related information
Recovery (p. 453)
Low Speed Control (p. 432)