lock VOLVO V90 CROSS COUNTRY 2021 Workshop Manual
[x] Cancel search | Manufacturer: VOLVO, Model Year: 2021, Model line: V90 CROSS COUNTRY, Model: VOLVO V90 CROSS COUNTRY 2021Pages: 683, PDF Size: 14.19 MB
Page 202 of 683
SEATS AND STEERING WHEEL
* Option/accessory.
200
Folding down the rear seat backrests The rear seat backrest is split into two sec- tions. The two sections can be folded forwardindividually.
WARNING
Adjust the seat and ensure it locks into position before driving. Use cautionwhen adjusting the seat. Uncontrolledor careless adjustments could lead toinjury.
Long objects must always be securelytied down to help prevent injury ordamage in the event of sudden brak-ing.
Always turn off the engine and applythe parking brake when loading orunloading the vehicle.
Put the gear selector in
P to help pre-
vent the gear selector from being inad-vertently moved.
CAUTION
When the backrest is folded down, make sure there are no objects in the rear seat,and the seat belts are not buckled. Other-wise there is a risk of damage to theupholstery.
CAUTION
The seat cushion of the integrated child restraint * must be in the stowed position
before the rear seat backrest can be folded down. The armrest * in the center seat must be
raised before the seat backrest is folded down. The ski hatch must be closed before the seat backrest is folded down.
NOTE
The front seats may need to be pushed for- ward and/or the backrest adjusted so thatthe rear seat backrests can be fully low-ered.
Folding down the backrestsThe vehicle must be stationary and at least one of the rear doors must be open before abackrest can be folded down.
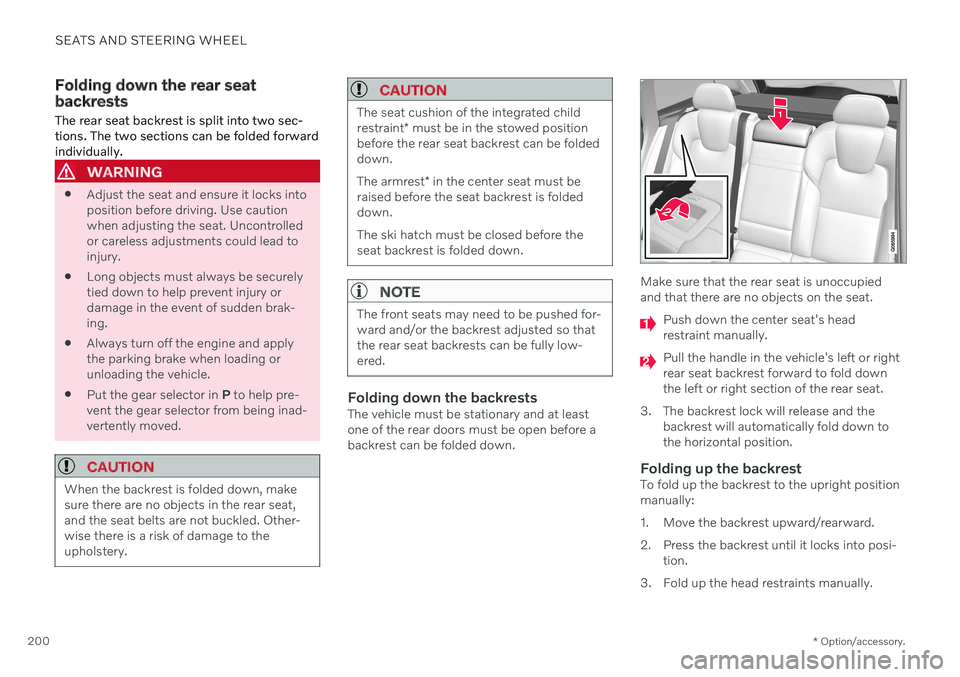
Make sure that the rear seat is unoccupied and that there are no objects on the seat.
Push down the center seat's head restraint manually.
Pull the handle in the vehicle's left or right rear seat backrest forward to fold downthe left or right section of the rear seat.
3. The backrest lock will release and the backrest will automatically fold down tothe horizontal position.
Folding up the backrestTo fold up the backrest to the upright positionmanually:
1. Move the backrest upward/rearward.
2. Press the backrest until it locks into posi-tion.
3. Fold up the head restraints manually.
Page 203 of 683

SEATS AND STEERING WHEEL
}}
* Option/accessory.201
4. Adjust the center head restraint if neces-
sary.
WARNING
When the backrest is restored to an upright position, the red indicator shouldno longer be visible. If it is still visible, thebackrest is not locked in place.
WARNING
Make sure that the rear seat backrest and head restraint are locked securely in placeafter the seat is folded up. The head restraints at the outer seats must always be raised when there is a passengerin one of these spots of the rear seat.
Related information
Adjusting the rear seat head restraints (p. 201)
Private Locking (p. 272)
Activating and deactivating private locking(p. 273)
Adjusting the rear seat head restraints
Adjust the center head restraint in the rear seat to the seat occupant's height. Fold down the outboard head restraints * to improve rear
visibility.
Adjusting the center seat head restraint
The center head restraint should be adjusted to suit the passenger's height. The entire backof the head should be covered if possible.Manually move the restraint up or down asneeded.
To lower the restraint, push and hold the but- ton (see illustration) while carefully loweringthe head restraint.
WARNING
The center seat head restraint must be in its lowest position when the seat is notoccupied. When the center seat is occu-pied, the head restraint must be correctlyadjusted to the passenger's height, cover-ing the entire back of the head if possible.
Folding the rear seat outboard head restraints using the center display *
The outer head restraints can be folded via the center display's function view. The headrestraint can be folded down when the vehicle is in ignition mode 0.
Page 204 of 683

||
SEATS AND STEERING WHEEL
* Option/accessory.
202
Tap the Headrest Fold but-
ton to activate/deactivate folding.
Manually push the head restraint until it clicks into position.
WARNING
Do not lower the head restraint if there are passengers in any of the rear seats.
WARNING
The head restraint must be locked in the upright position after it has been folded up.
Folding the rear seat outboard head restraints using the handle
For vehicles with the electric folding function *,
the outboard head restraints can be folded using the handle on the top of the seat (see illustration
.) Note that this method also
folds down the backrests. To fold down only the head restraints, e.g. to improve visibility, use the center display * instead. On models
without electrically folding backrests, the head restraints cannot be moved.
Related information
Folding down the rear seat backrests (p. 200)
Steering wheel controls and horn The steering wheel has a horn and controls for e.g. driver support systems and voice con-trol.
Steering wheel keypads and paddles
*.
Driver support system controls. 5
Paddle
* for manually shifting gears (auto-
matic transmission).
Controls for voice commands, accessing menus and messages, and handlingphone calls.
5 Cruise Control, Adaptive Cruise Control *, Distance Alert * and Pilot Assist.
Page 205 of 683
SEATS AND STEERING WHEEL
* Option/accessory.203
Horn
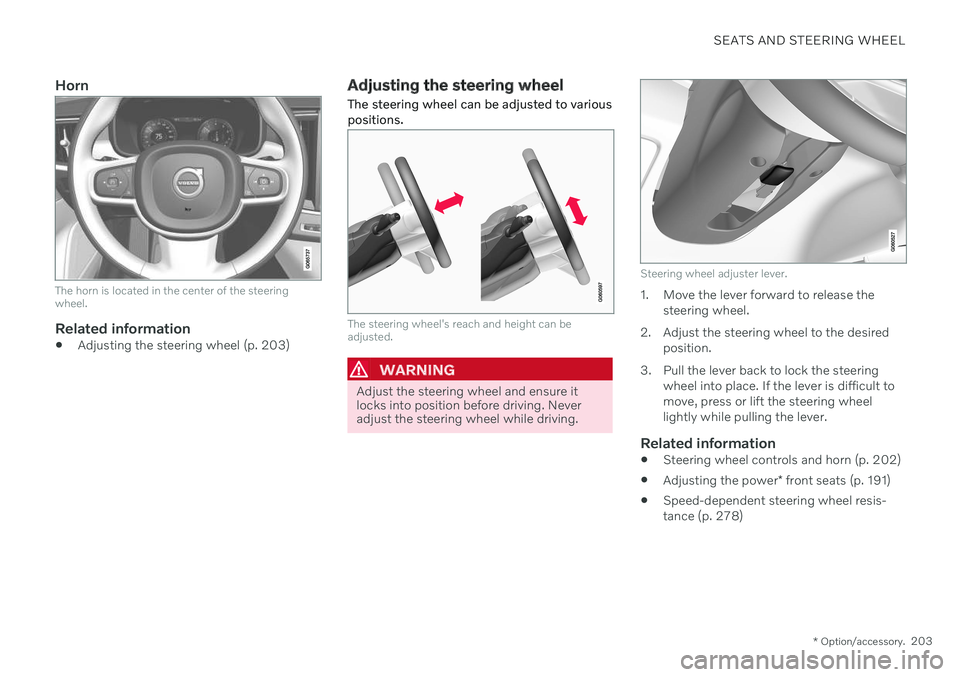
The horn is located in the center of the steering wheel.
Related information
Adjusting the steering wheel (p. 203)
Adjusting the steering wheel The steering wheel can be adjusted to various positions.
The steering wheel's reach and height can be adjusted.
WARNING
Adjust the steering wheel and ensure it locks into position before driving. Neveradjust the steering wheel while driving.
Steering wheel adjuster lever.
1. Move the lever forward to release the
steering wheel.
2. Adjust the steering wheel to the desired position.
3. Pull the lever back to lock the steering wheel into place. If the lever is difficult to move, press or lift the steering wheellightly while pulling the lever.
Related information
Steering wheel controls and horn (p. 202)
Adjusting the power
* front seats (p. 191)
Speed-dependent steering wheel resis-tance (p. 278)
Page 209 of 683
CLIMATE CONTROL
* Option/accessory.207
4-zone climate system *
Climate zones with 4-zone climate system.
In 4-zone climate systems, the passenger compartment temperature can be set sepa-rately for the left and right sides of the vehicle,and for the front and rear seats.
Related information
Climate (p. 206)
Climate control sensors
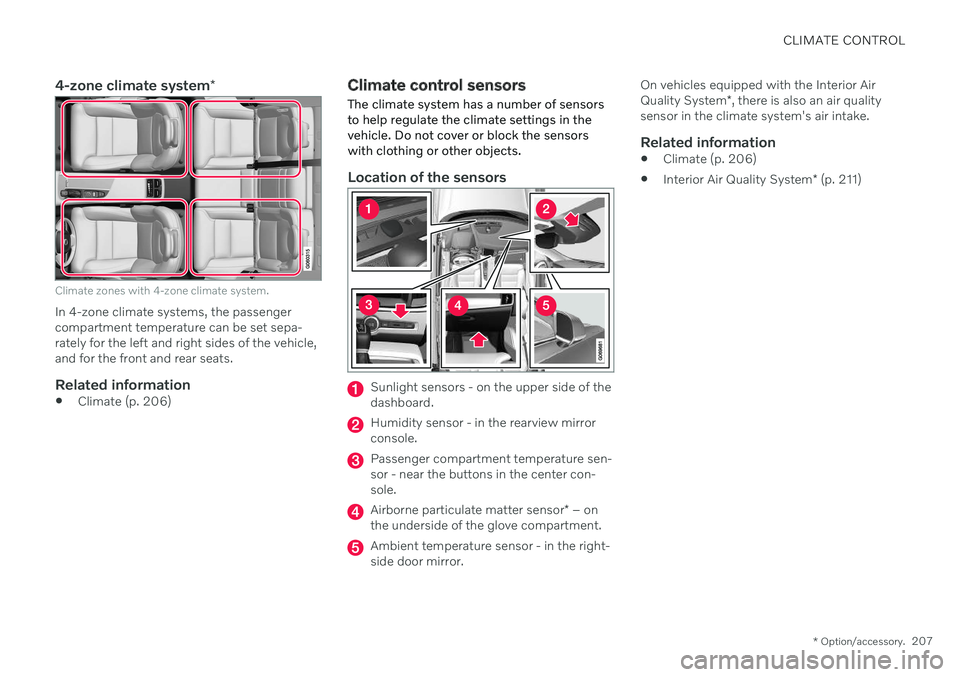
The climate system has a number of sensors to help regulate the climate settings in thevehicle. Do not cover or block the sensorswith clothing or other objects.
Location of the sensors
Sunlight sensors - on the upper side of the dashboard.
Humidity sensor - in the rearview mirror console.
Passenger compartment temperature sen- sor - near the buttons in the center con-sole.
Airborne particulate matter sensor * – on
the underside of the glove compartment.
Ambient temperature sensor - in the right- side door mirror. On vehicles equipped with the Interior Air Quality System
*, there is also an air quality
sensor in the climate system's air intake.
Related information
Climate (p. 206)
Interior Air Quality System
* (p. 211)
Page 212 of 683
CLIMATE CONTROL
* Option/accessory.
210
CleanZone *
The CleanZone function monitors the condi- tions affecting good air quality in the passen-ger compartment and indicates whether theyare fulfilled or not.
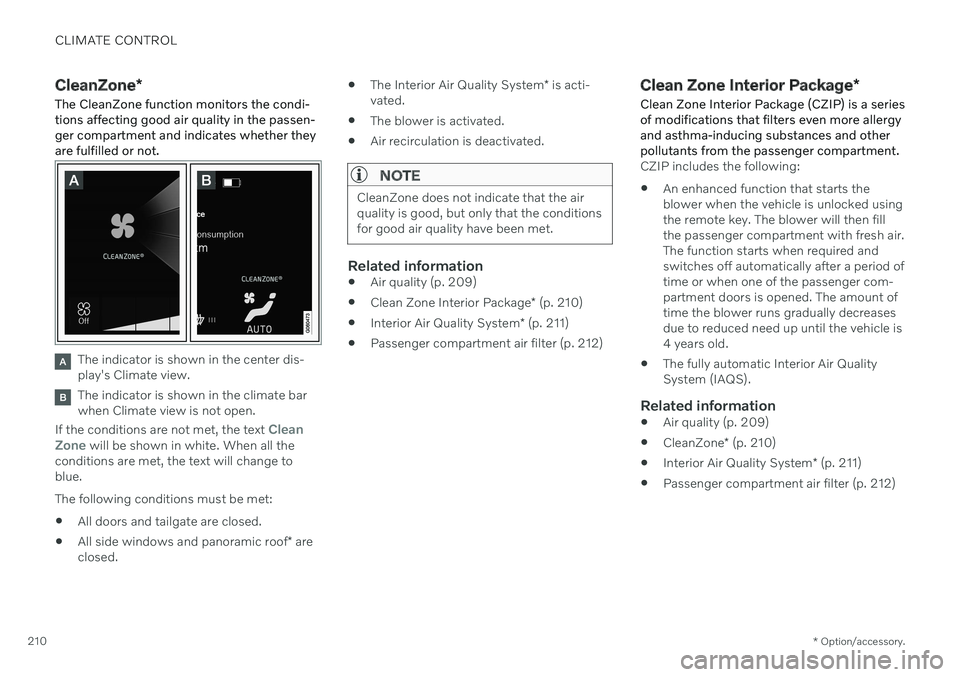
The indicator is shown in the center dis- play's Climate view.
The indicator is shown in the climate bar when Climate view is not open.
If the conditions are not met, the text
Clean
Zone will be shown in white. When all the
conditions are met, the text will change to blue. The following conditions must be met:
All doors and tailgate are closed.
All side windows and panoramic roof
* are
closed.
The Interior Air Quality System
* is acti-
vated.
The blower is activated.
Air recirculation is deactivated.
NOTE
CleanZone does not indicate that the air quality is good, but only that the conditionsfor good air quality have been met.
Related information
Air quality (p. 209)
Clean Zone Interior Package
* (p. 210)
Interior Air Quality System
* (p. 211)
Passenger compartment air filter (p. 212)
Clean Zone Interior Package
*
Clean Zone Interior Package (CZIP) is a series of modifications that filters even more allergyand asthma-inducing substances and otherpollutants from the passenger compartment.
CZIP includes the following:
An enhanced function that starts the blower when the vehicle is unlocked usingthe remote key. The blower will then fillthe passenger compartment with fresh air.The function starts when required andswitches off automatically after a period oftime or when one of the passenger com-partment doors is opened. The amount oftime the blower runs gradually decreasesdue to reduced need up until the vehicle is4 years old.
The fully automatic Interior Air QualitySystem (IAQS).
Related information
Air quality (p. 209)
CleanZone
* (p. 210)
Interior Air Quality System
* (p. 211)
Passenger compartment air filter (p. 212)
Page 221 of 683
CLIMATE CONTROL
}}
* Option/accessory.219
Air distribution controls.
Blower control for front seats. 2
AUTO - Automatic climate control.
Rear climate control
*
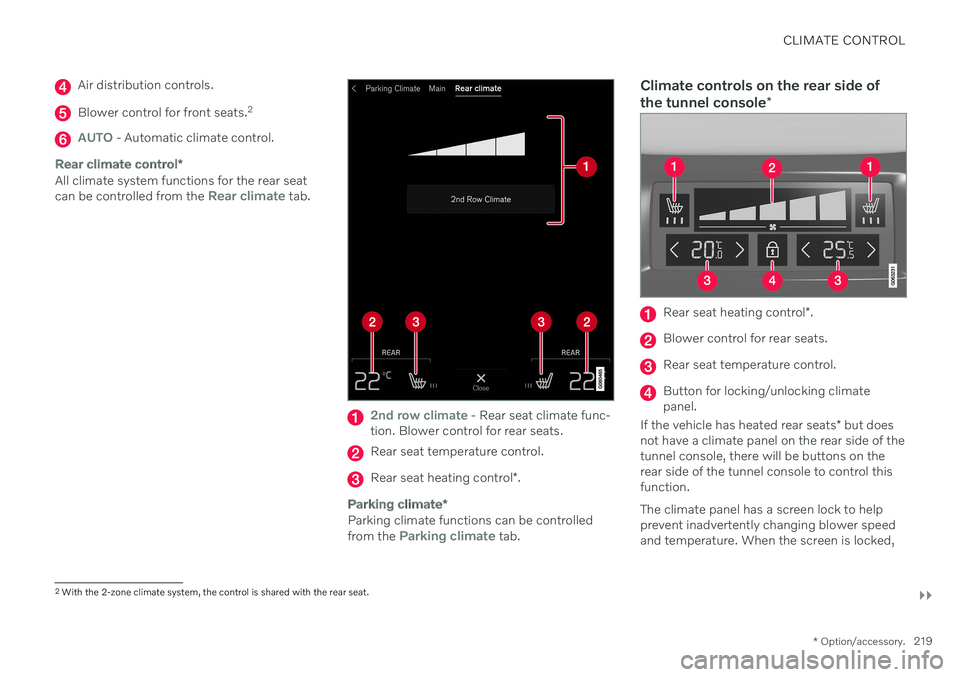
All climate system functions for the rear seat can be controlled from the Rear climate tab.
2nd row climate - Rear seat climate func-
tion. Blower control for rear seats.
Rear seat temperature control.
Rear seat heating control *.
Parking climate *
Parking climate functions can be controlled from the Parking climate tab.
Climate controls on the rear side of the tunnel console *
Rear seat heating control *.
Blower control for rear seats.
Rear seat temperature control.
Button for locking/unlocking climate panel.
If the vehicle has heated rear seats * but does
not have a climate panel on the rear side of thetunnel console, there will be buttons on therear side of the tunnel console to control thisfunction. The climate panel has a screen lock to help prevent inadvertently changing blower speedand temperature. When the screen is locked,
2 With the 2-zone climate system, the control is shared with the rear seat.
Page 222 of 683
||
CLIMATE CONTROL
* Option/accessory.
220 only the controls for seat adjustment
* and the
unlock button will be displayed. After unlocking, blower speed and tempera- ture can also be changed from the climatepanel and all selected climate settings will bedisplayed. The screen locks automatically aftera period of inactivity.
Related information
Climate (p. 206)
Activating and deactivating power front seats
* (p. 220)
Activating and deactivating the heatedrear seats
* (p. 221)
Activating and deactivating front seat ven-tilation
* (p. 223)
Activating and deactivating the heatedsteering wheel
* (p. 223)
Activating auto climate control (p. 224)
Activating and deactivating recirculation (p. 225)
Activating and deactivating max defroster(p. 226)
Activating and deactivating the heatedrear window and door mirrors (p. 227)
Setting the blower speed for the frontseats (p. 228)
Setting the blower speed for the rear seats
* (p. 229)
Synchronize temperature (p. 232)
Activating and deactivating air condition- ing (p. 233)
Activating and deactivating power front seats
*
The seats can be heated for added comfort for the driver and passengers in cold weather.
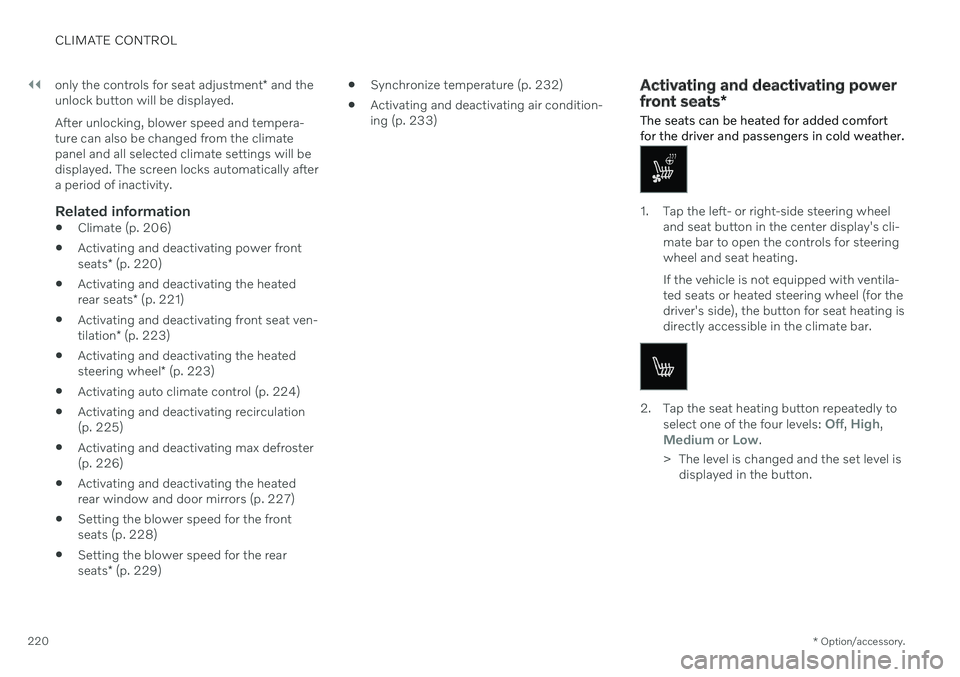
1. Tap the left- or right-side steering wheel and seat button in the center display's cli- mate bar to open the controls for steeringwheel and seat heating. If the vehicle is not equipped with ventila- ted seats or heated steering wheel (for thedriver's side), the button for seat heating isdirectly accessible in the climate bar.
2. Tap the seat heating button repeatedly to
select one of the four levels: Off, High,Medium or Low.
> The level is changed and the set level is displayed in the button.
Page 231 of 683
CLIMATE CONTROL
}}
* Option/accessory.229
Setting the blower speed for the rear seats*
The blower can be set to several different automatically controlled speeds for the rearseat.
Setting blower speed for the rear seats from the front seats
1. Tap the symbol in the center of the climate bar to open Climate view in the center dis- play.
2. Select the
Rear climate tab.
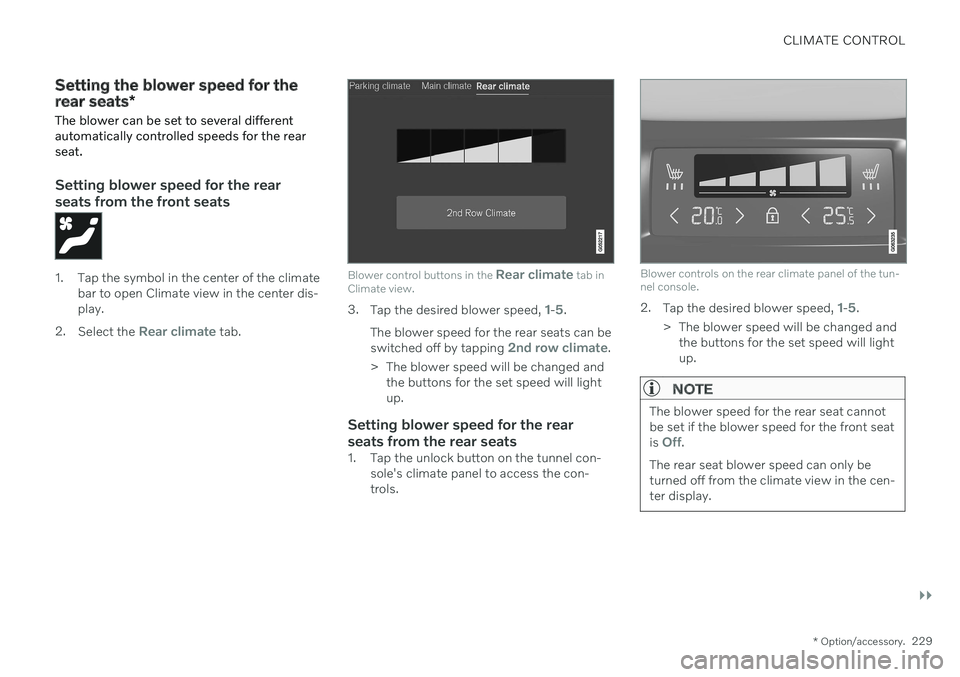
Blower control buttons in the Rear climate tab in
Climate view.
3. Tap the desired blower speed, 1-5.
The blower speed for the rear seats can be switched off by tapping
2nd row climate.
> The blower speed will be changed and the buttons for the set speed will light up.
Setting blower speed for the rear seats from the rear seats
1. Tap the unlock button on the tunnel con- sole's climate panel to access the con- trols.
Blower controls on the rear climate panel of the tun- nel console.
2.Tap the desired blower speed, 1-5.
> The blower speed will be changed and the buttons for the set speed will light up.
NOTE
The blower speed for the rear seat cannot be set if the blower speed for the front seat is
Off.
The rear seat blower speed can only be turned off from the climate view in the cen-ter display.
Page 234 of 683
||
CLIMATE CONTROL
232
Temperature control.
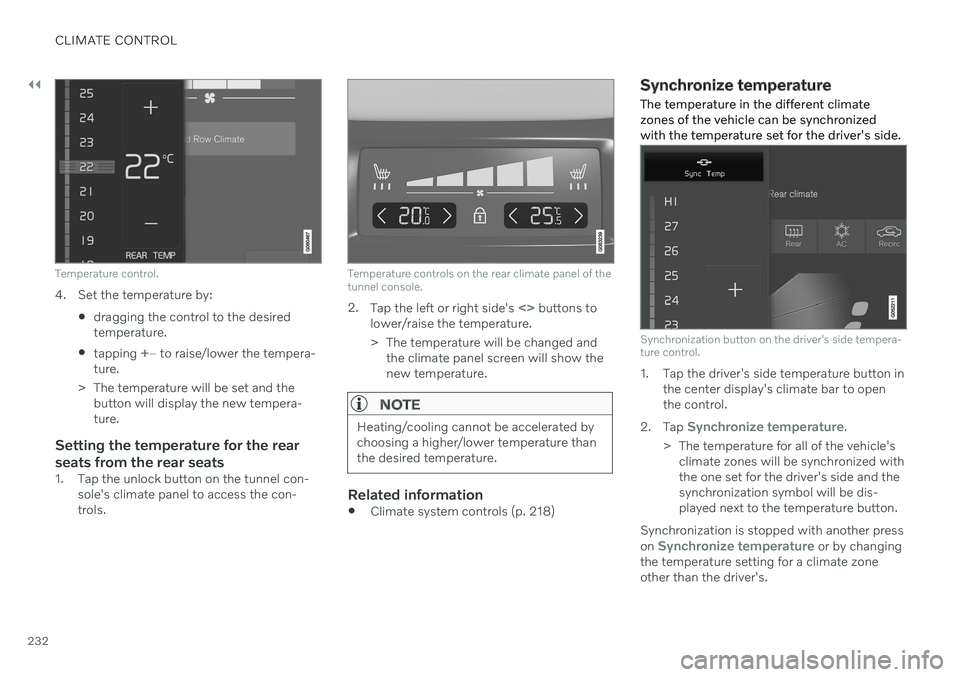
4. Set the temperature by:dragging the control to the desired temperature.
tapping
+
− to raise/lower the tempera-
ture.
> The temperature will be set and the button will display the new tempera- ture.
Setting the temperature for the rear seats from the rear seats
1. Tap the unlock button on the tunnel con- sole's climate panel to access the con- trols.
Temperature controls on the rear climate panel of the tunnel console.
2.Tap the left or right side's <> buttons to
lower/raise the temperature.
> The temperature will be changed and the climate panel screen will show the new temperature.
NOTE
Heating/cooling cannot be accelerated by choosing a higher/lower temperature thanthe desired temperature.
Related information
Climate system controls (p. 218)
Synchronize temperature
The temperature in the different climate zones of the vehicle can be synchronizedwith the temperature set for the driver's side.
Synchronization button on the driver's side tempera- ture control.
1. Tap the driver's side temperature button in the center display's climate bar to open the control.
2. Tap
Synchronize temperature.
> The temperature for all of the vehicle's climate zones will be synchronized with the one set for the driver's side and thesynchronization symbol will be dis-played next to the temperature button.
Synchronization is stopped with another press on
Synchronize temperature or by changing
the temperature setting for a climate zone other than the driver's.