VOLVO XC90 2014 Owner´s Manual
Manufacturer: VOLVO, Model Year: 2014, Model line: XC90, Model: VOLVO XC90 2014Pages: 308, PDF Size: 13.31 MB
Page 221 of 308
09 Maintenance and servicing
Working on your vehicle09
219
Note the following before you begin work- ing on your vehicle:
Battery
•
Ensure that the battery cables are cor- rectly connected and tightened.
• Never disconnect the battery when theengine is running (e.g., when replacingthe battery).
• Never use a fast charger to charge thebattery. The battery cables should be dis-connected when recharging.
• The battery contains acid that is both cor-rosive and poisonous. It is important thatthe battery is handled in an environmen-tally friendly way. See page 227 for moreinformation on handling the battery.
Hoisting the vehicle
G027001
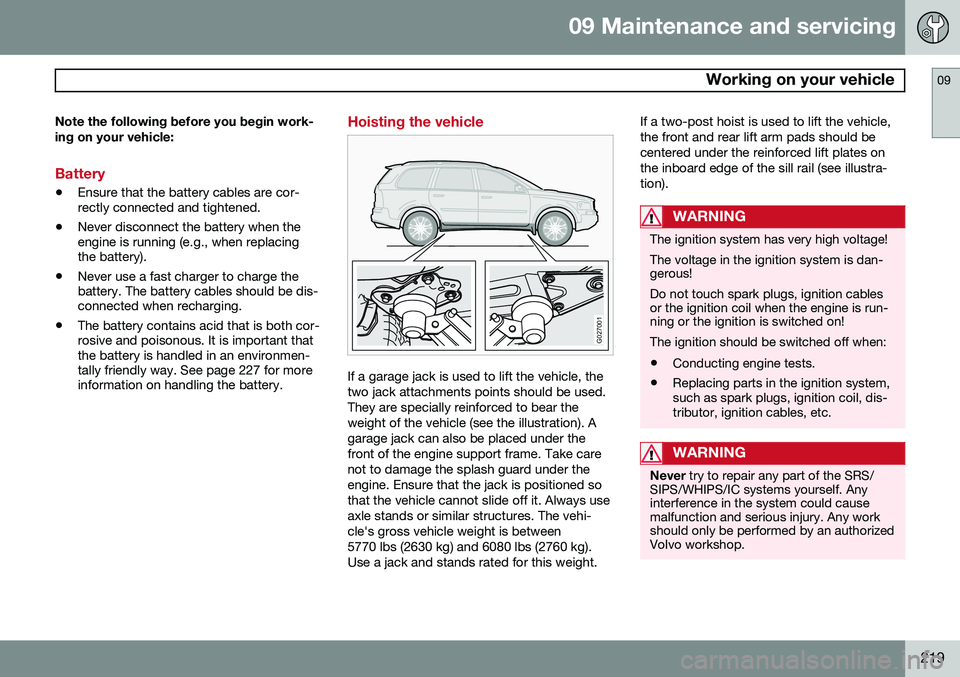
If a garage jack is used to lift the vehicle, the two jack attachments points should be used.They are specially reinforced to bear theweight of the vehicle (see the illustration). Agarage jack can also be placed under thefront of the engine support frame. Take carenot to damage the splash guard under theengine. Ensure that the jack is positioned sothat the vehicle cannot slide off it. Always useaxle stands or similar structures. The vehi-cle's gross vehicle weight is between5770 lbs (2630 kg) and 6080 lbs (2760 kg).Use a jack and stands rated for this weight. If a two-post hoist is used to lift the vehicle,the front and rear lift arm pads should becentered under the reinforced lift plates onthe inboard edge of the sill rail (see illustra-tion).
WARNING
The ignition system has very high voltage! The voltage in the ignition system is dan- gerous! Do not touch spark plugs, ignition cables or the ignition coil when the engine is run-ning or the ignition is switched on! The ignition should be switched off when: •
Conducting engine tests.
• Replacing parts in the ignition system, such as spark plugs, ignition coil, dis-tributor, ignition cables, etc.
WARNING
Never
try to repair any part of the SRS/
SIPS/WHIPS/IC systems yourself. Any interference in the system could causemalfunction and serious injury. Any workshould only be performed by an authorizedVolvo workshop.
Page 222 of 308
09 Maintenance and servicing
Working on your vehicle 09
220
Belt check
Check the belt regularly to make sure it is in good condition and is clean. A worn or dirtybelt can cause poor cooling and low alterna-tor output as well as impair the operation ofthe power steering and the air conditioningunit.
NOTE
The drive belt is equipped with a self-ten- sioning mechanism and requires noadjustment between changes.
WARNING
The engine must not be running when this check is performed.
Check coolant level
The cooling system must be filled with cool- ant and not leak to operate at maximum effi-ciency. Check the coolant level regularly. Thelevel should be between the MAX and MIN
marks on the expansion tank. The checkshould be made with particular thoroughnesswhen the engine is new or when the coolingsystem has been drained. Do not remove the filler cap other than for topping up with coolant. Frequent removalmay prevent coolant circulation between the engine and the expansion tank during enginewarm up and cooling.
Changing coolant
Normally, the coolant does not need to be changed. If the system must be drained, con-sult a trained and qualified Volvo servicetechnician. Do not top off with water only. This reduces the rust-protective and antifreeze qualities ofthe coolant and has a lower boiling point. Itcan also cause damage to the cooling systemif it should freeze. Top off with Volvo GenuineCoolant/Antifreeze only (a 50/50 mix of waterand antifreeze.
CAUTION
The cooling system must always be kept filled to the correct level. If it is not keptfilled, there can be high local temperaturesin the engine which could result in dam-age. Different types of antifreeze/coolantmay not be mixed.
WARNING
•
Never remove the expansion tank cap while the engine is warm. Wait until theengine cools.
• If it is necessary to top off the coolantwhen the engine is warm, unscrew theexpansion tank cap slowly so that theoverpressure dissipates.
Page 223 of 308
09 Maintenance and servicing
Engine compartment09
221
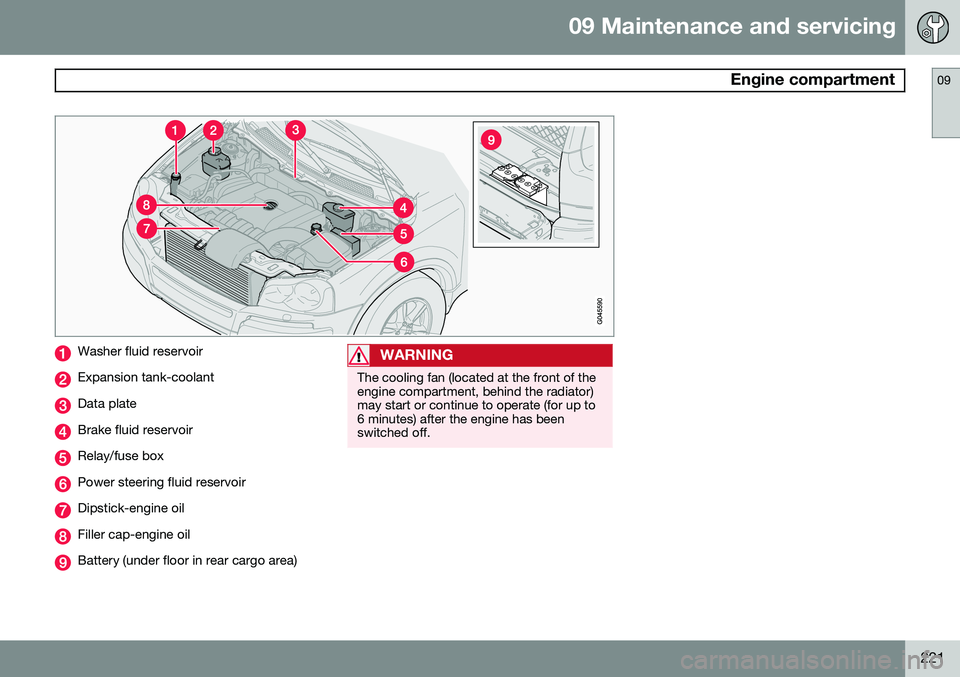
Washer fluid reservoir
Expansion tank-coolant
Data plate
Brake fluid reservoir
Relay/fuse box
Power steering fluid reservoir
Dipstick-engine oil
Filler cap-engine oil
Battery (under floor in rear cargo area)
WARNING
The cooling fan (located at the front of the engine compartment, behind the radiator)may start or continue to operate (for up to6 minutes) after the engine has beenswitched off.
Page 224 of 308
09 Maintenance and servicing
Engine oil 09
222
Oil specifications
Full synthetic engine oil meeting the minimum ACEA A5/B5 must be used. Lower quality oilsmay not offer the same fuel economy, engineperformance, or engine protection. Refer to the Warranty and Service Records information booklet for information on oilchange intervals and oil type requirements.
NOTE
This vehicle comes from the factory with synthetic oil.
Oil additives must not be used.
Oil viscosityIncorrect viscosity oil can shorten engine life under normal use. SAE 5W-30 will providegood fuel economy and engine protection.See the viscosity chart.
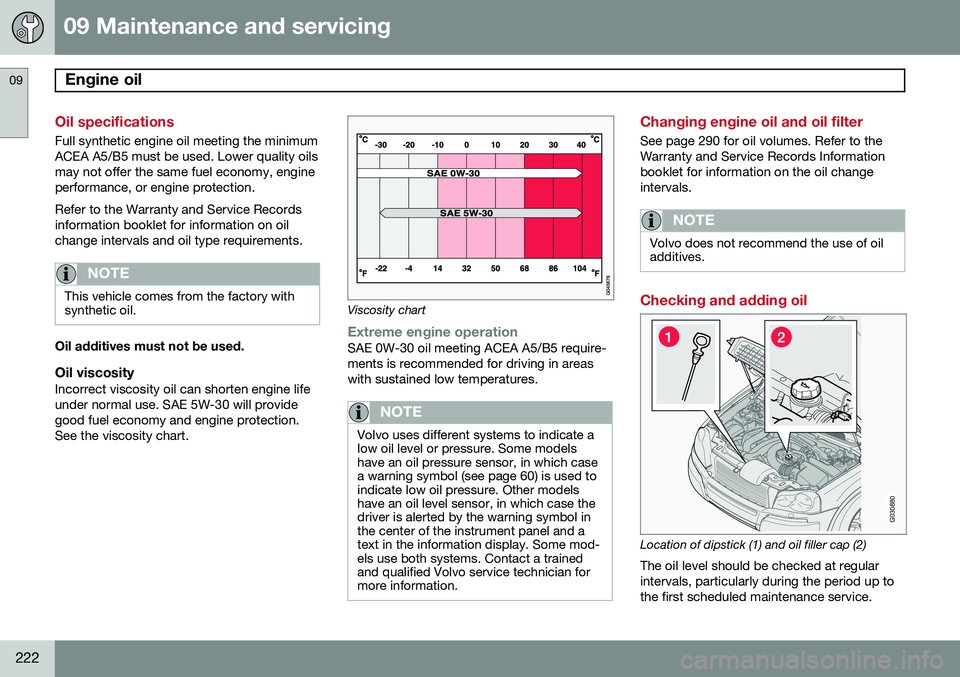
Viscosity chart
Extreme engine operationSAE 0W-30 oil meeting ACEA A5/B5 require- ments is recommended for driving in areaswith sustained low temperatures.
NOTE
Volvo uses different systems to indicate a low oil level or pressure. Some modelshave an oil pressure sensor, in which casea warning symbol (see page 60) is used toindicate low oil pressure. Other modelshave an oil level sensor, in which case thedriver is alerted by the warning symbol inthe center of the instrument panel and atext in the information display. Some mod-els use both systems. Contact a trainedand qualified Volvo service technician formore information.
Changing engine oil and oil filter
See page 290 for oil volumes. Refer to the Warranty and Service Records Informationbooklet for information on the oil changeintervals.
NOTE
Volvo does not recommend the use of oil additives.
Checking and adding oil
G030880
Location of dipstick (1) and oil filler cap (2)
The oil level should be checked at regular intervals, particularly during the period up tothe first scheduled maintenance service.
Page 225 of 308
09 Maintenance and servicing
Engine oil09
223
•
The vehicle should be parked on a level surface when the oil is checked.
• If the engine is warm
, wait for at least
10-15 minutes after the engine has beenswitched off before checking the oil.
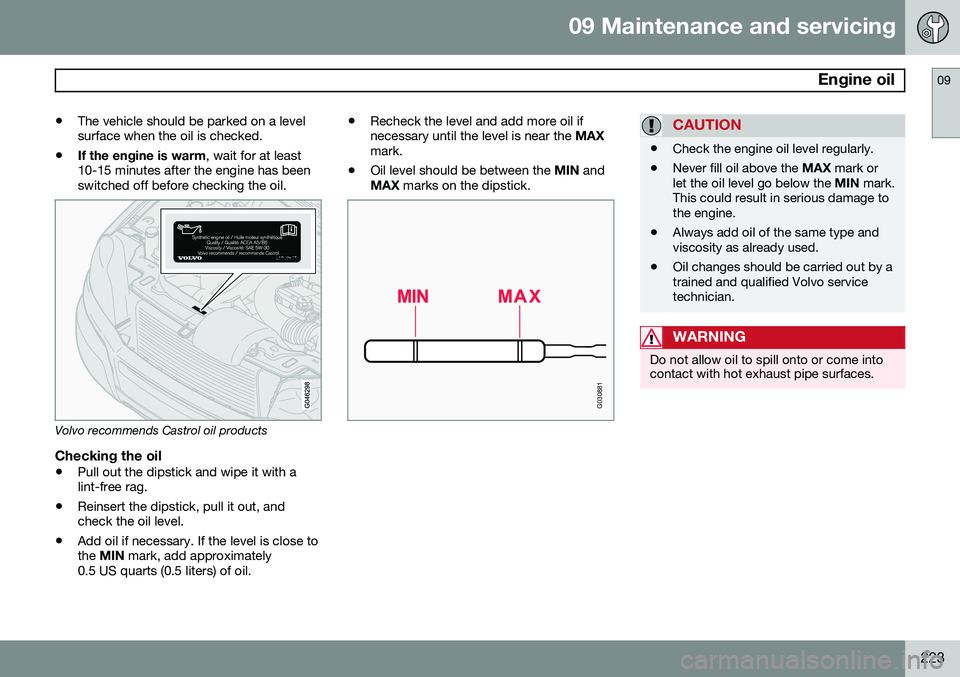
Volvo recommends Castrol oil products
Checking the oil
• Pull out the dipstick and wipe it with a lint-free rag.
• Reinsert the dipstick, pull it out, andcheck the oil level.
• Add oil if necessary. If the level is close tothe
MIN mark, add approximately
0.5 US quarts (0.5 liters) of oil. •
Recheck the level and add more oil ifnecessary until the level is near the
MAX
mark.
• Oil level should be between the
MIN and
MAX marks on the dipstick.
G030881
CAUTION
•Check the engine oil level regularly.
• Never fill oil above the
MAX mark or
let the oil level go below the MIN mark.
This could result in serious damage to the engine.
• Always add oil of the same type andviscosity as already used.
• Oil changes should be carried out by atrained and qualified Volvo servicetechnician.
WARNING
Do not allow oil to spill onto or come into contact with hot exhaust pipe surfaces.
Page 226 of 308
09 Maintenance and servicing
Fluids 09
224
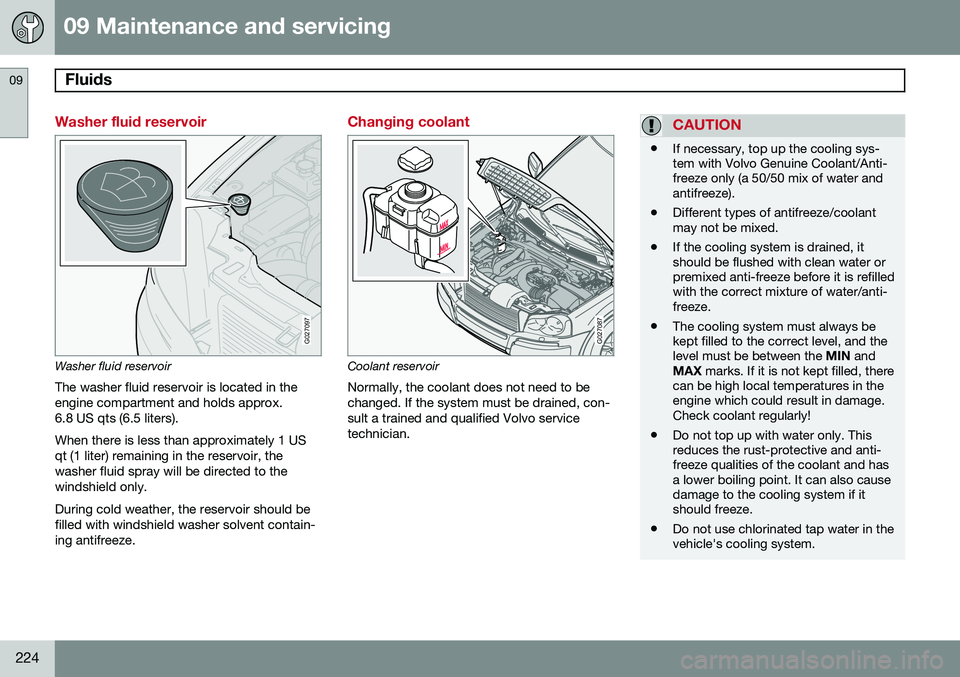
Washer fluid reservoir
G027097
Washer fluid reservoirThe washer fluid reservoir is located in the engine compartment and holds approx.6.8 US qts (6.5 liters). When there is less than approximately 1 US qt (1 liter) remaining in the reservoir, thewasher fluid spray will be directed to thewindshield only. During cold weather, the reservoir should be filled with windshield washer solvent contain-ing antifreeze.
Changing coolant
G027087
Coolant reservoir
Normally, the coolant does not need to be changed. If the system must be drained, con-sult a trained and qualified Volvo servicetechnician.
CAUTION
• If necessary, top up the cooling sys- tem with Volvo Genuine Coolant/Anti-freeze only (a 50/50 mix of water andantifreeze).
• Different types of antifreeze/coolantmay not be mixed.
• If the cooling system is drained, itshould be flushed with clean water orpremixed anti-freeze before it is refilledwith the correct mixture of water/anti-freeze.
• The cooling system must always bekept filled to the correct level, and thelevel must be between the
MIN and
MAX marks. If it is not kept filled, there
can be high local temperatures in theengine which could result in damage.Check coolant regularly!
• Do not top up with water only. Thisreduces the rust-protective and anti-freeze qualities of the coolant and hasa lower boiling point. It can also causedamage to the cooling system if itshould freeze.
• Do not use chlorinated tap water in thevehicle's cooling system.
Page 227 of 308
09 Maintenance and servicing
Fluids09
225
WARNING
•Never remove the coolant reservoir cap while the engine is warm. Waituntil the engine cools.
• If it is necessary to top up the coolantwhen the engine is warm, unscrew thecoolant reservoir cap slowly so thatthe overpressure dissipates.
Brake fluid reservoir
G000000
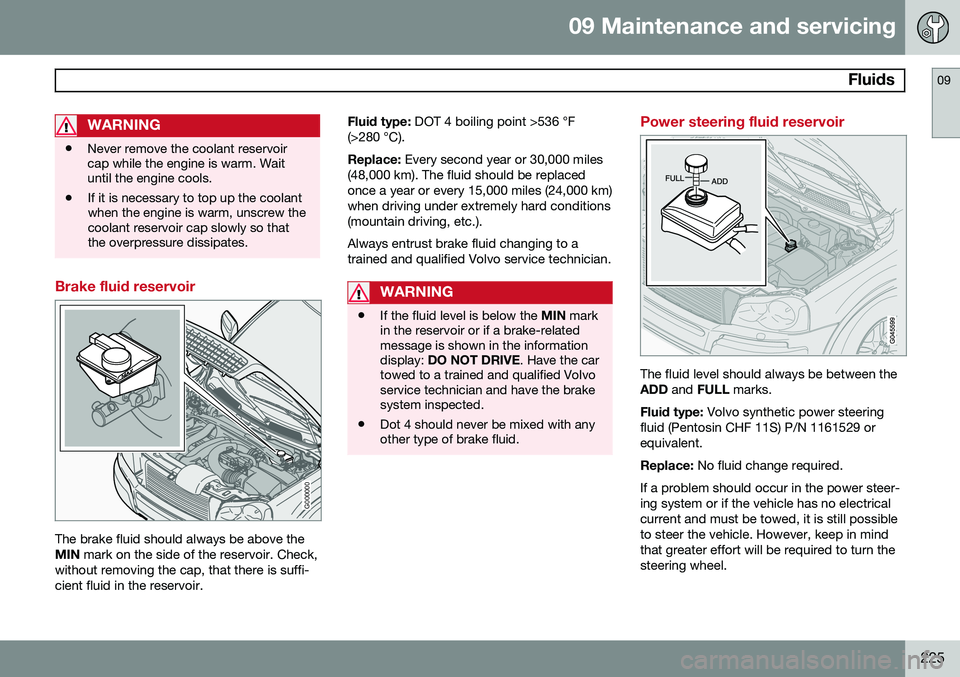
The brake fluid should always be above the MIN
mark on the side of the reservoir. Check,
without removing the cap, that there is suffi-cient fluid in the reservoir. Fluid type:
DOT 4 boiling point >536 °F
(>280 °C). Replace: Every second year or 30,000 miles
(48,000 km). The fluid should be replaced once a year or every 15,000 miles (24,000 km)when driving under extremely hard conditions(mountain driving, etc.). Always entrust brake fluid changing to a trained and qualified Volvo service technician.
WARNING
• If the fluid level is below the
MIN mark
in the reservoir or if a brake-related message is shown in the informationdisplay: DO NOT DRIVE . Have the car
towed to a trained and qualified Volvoservice technician and have the brakesystem inspected.
• Dot 4 should never be mixed with anyother type of brake fluid.
Power steering fluid reservoir
The fluid level should always be between the ADD
and FULL marks.
Fluid type: Volvo synthetic power steering
fluid (Pentosin CHF 11S) P/N 1161529 orequivalent. Replace: No fluid change required.
If a problem should occur in the power steer- ing system or if the vehicle has no electricalcurrent and must be towed, it is still possibleto steer the vehicle. However, keep in mindthat greater effort will be required to turn thesteering wheel.
Page 228 of 308
09 Maintenance and servicing
Wiper blades 09
226
Windshield wiper bladesTo change a windshield wiper blade:
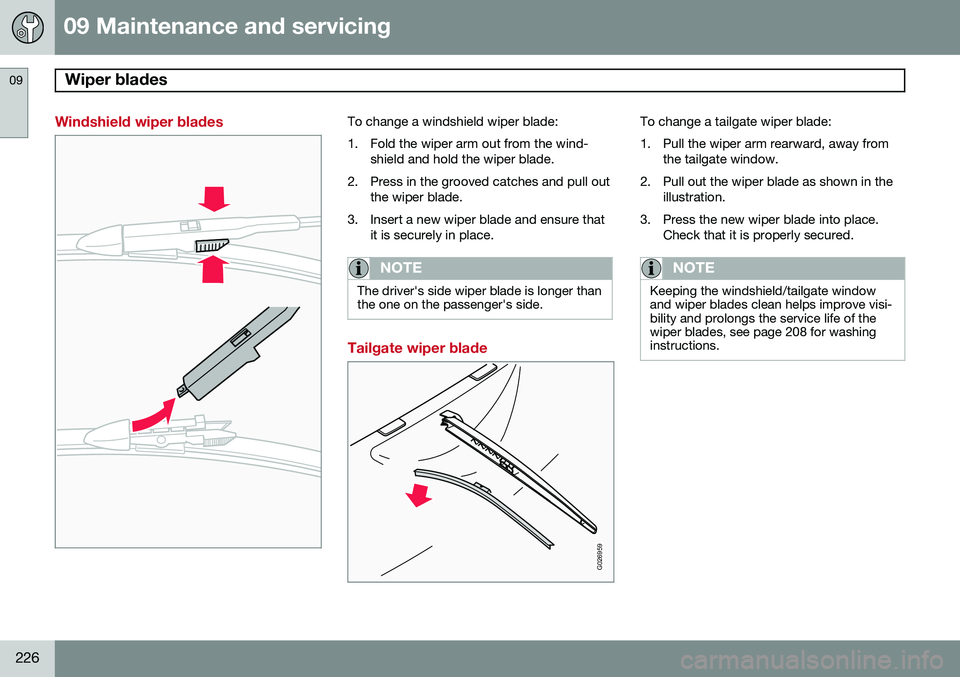
1. Fold the wiper arm out from the wind-shield and hold the wiper blade.
2. Press in the grooved catches and pull out the wiper blade.
3. Insert a new wiper blade and ensure that it is securely in place.
NOTE
The driver's side wiper blade is longer than the one on the passenger's side.
Tailgate wiper blade
G026959
To change a tailgate wiper blade:
1. Pull the wiper arm rearward, away from the tailgate window.
2. Pull out the wiper blade as shown in the illustration.
3. Press the new wiper blade into place. Check that it is properly secured.
NOTE
Keeping the windshield/tailgate window and wiper blades clean helps improve visi-bility and prolongs the service life of thewiper blades, see page 208 for washinginstructions.
Page 229 of 308
09 Maintenance and servicing
Battery09
227
Battery maintenance
The battery in your vehicle is located under the floor of the cargo compartment. Driving habits and conditions, climate, the number of starts, etc. all affect the service lifeand function of the battery. In order for yourbattery to perform satisfactorily, keep the fol-lowing in mind:
• Use a screw driver to open the caps or cover and a flashlight to inspect the level.
• If necessary, add distilled water. The levelshould never be above the indicator.
• The fluid level should be checked if thebattery has been recharged.
• After inspection, be sure the cap overeach battery cell or the cover is securelyin place.
• Check that the battery cables are cor-rectly connected and properly tightened.
• Never disconnect the battery when theengine is running, or when the key is inthe ignition. This could damage the vehi-cle's electrical system.
• The battery should be disconnected fromthe vehicle when a battery charger isused directly on the battery.
• To help keep the battery in good condi-tion, the vehicle should be driven for atleast 15 minutes a week or connected to a charger with an automatic chargingfunction.
• If the battery is fully discharged a numberof times, this may shorten its service life.Keeping the battery fully charged helpsprolong its service life.
• The service life of a battery is affected byfactors such as driving conditions and cli-mate. Extreme cold may also furtherdecrease the battery’s starting capacity.
• Because the battery’s starting capacitydecreases with time, it may be necessaryto recharge it if the vehicle is not drivenfor an extended period of time or if thevehicle is usually only driven short dis-tances.
•
WARNING
PROPOSITION 65 WARNING! Battery posts, terminals, and related accessories contain lead and lead com-pounds, chemicals known to the state ofCalifornia to cause cancer and reproduc-tive harm. Wash hands after handling.
WARNING
• Never expose the battery to open flame or electric spark.
• Do not smoke near the battery.
• Battery fluid contains sulfuric acid. Donot allow battery fluid to contact eyes,skin, fabrics or painted surfaces. Ifcontact occurs, flush the affected areaimmediately with water. Obtain medi-cal help immediately if eyes are affec-ted.
NOTE
Used batteries should be properly dis- posed of at a recycling station or similarfacility, or taken to your Volvo retailer.
Page 230 of 308
09 Maintenance and servicing
Battery 09
228
Symbols
Wear protection goggles
See owner’s manual for details
Keep away from children
Corrosive
No smoking, no open flames, no sparks
Explosion
Recycle properly
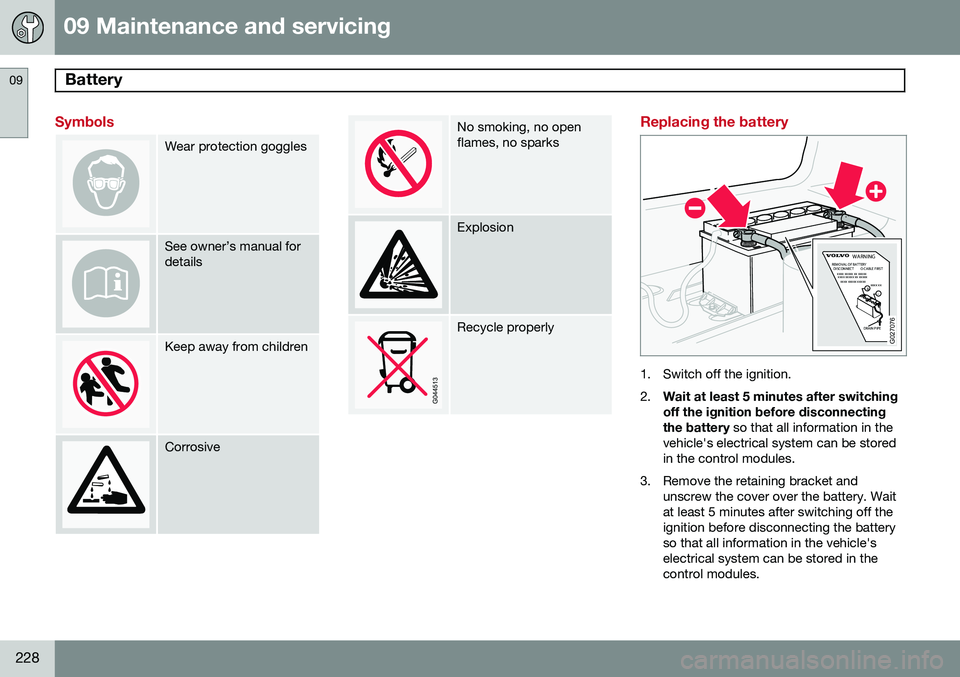
Replacing the battery
DRAIN PIPE
xxxx xxxxx xx xxxxx
DISCONNECT
REMOVAL OF BATTERYO CABLE FIRSTxxxx xxxxx xxxxxxxxx xx+-
WARNING
xxxx xxxxx xx xxxxx
G027076
1. Switch off the ignition. 2.
Wait at least 5 minutes after switching off the ignition before disconnecting the battery
so that all information in the
vehicle's electrical system can be stored in the control modules.
3. Remove the retaining bracket and unscrew the cover over the battery. Waitat least 5 minutes after switching off theignition before disconnecting the batteryso that all information in the vehicle'selectrical system can be stored in thecontrol modules.