VOLVO XC90 2015 Owners Manual
Manufacturer: VOLVO, Model Year: 2015, Model line: XC90, Model: VOLVO XC90 2015Pages: 570, PDF Size: 12.44 MB
Page 111 of 570
INSTRUMENTS AND CONTROLS
* Option/accessory, for more information, see Introduction.109
Related information
•Driver profiles (p. 112)
• Settings view (p. 106)
• Changing system settings in Settings view (p. 109)
Changing system settings in Settings view
Settings view's main category
System contains
general settings and information, such as lan- guage, units of measure, etc.
The system settings under Driver Profile, Date
& Time, Keyboard Layouts, Voice Control,Software Updates, Global Reset andServices are described in their respective arti-
cles in the owner's manual.
Changing system languages1. Pull down the center display's Top view and
tap Settings.
2. Tap
SystemLanguage.
3. Select a new system language. Languages that can be used for voice commands are indicated by a voice control symbol.
> This change affects the language used inthe instrument panel, center display and the head-up display *.
Changing units of measure
Changing length and volume units1. Pull down the center display's Top view and
tap Settings.
2. Tap
SystemUnitsUnits. 3. Select one of the following measurement
standards:
•
Metric: kilometers, liters and degrees Cel-
sius.
•
Imperial: miles, gallons and degrees Cel-
sius.
•
US: miles, gallons and degrees Fahren-
heit.
> This change affects the units of measure used in the instrument panel, center dis- play and the head-up display *
Changing tire inflation pressure units1. Pull down the center display's Top view and
tap Settings.
2. Tap
SystemUnitsTire Pressure.
3. Select a unit of measure for tire pressure. > This changes the tire inflation pressureunits used in the
Car status app in the
center display.
Viewing storage information1. Pull down the center display's Top view and
tap Settings.
2. Tap
SystemStorage.
> Storage information for the vehicle's hard drive will be displayed, including total capacity, available capacity and theamount of storage space used by theapps that have been installed.
Page 112 of 570
INSTRUMENTS AND CONTROLS
110
Viewing the VIN (Vehicle Identification Number)
1. Pull down the center display's Top view andtap Settings.
2. Tap
SystemVehicle Identification
Number.
> The vehicle's VIN will be displayed.
Linking a remote key to a driver profile A remote key can be linked to a driver profile, which means that all of the settings stored in thedriver profile will apply each time that particularremote key is used with the vehicle.
A remote key is not initially linked to a specific driver profile. When the key is used to unlock thevehicle/start the engine for the first time, the
Guest profile will be used.
A driver profile can be selected manually each time the vehicle is unlocked/started without aremote key being linked to that profile. If the keyhas previously been linked to a driver profile, it isnot necessary to manually select a profile whenthat particular key is used.
Linking a remote key to a driver profile for the first time
1. Pull down the center display's Top view and tap Settings.
2. Tap
SystemDriver Profile.
3. Tap the profile to be linked to the remote key. The
Guest profile cannot be linked to a
remote key.
4. Tap
Edit Profile. 5.
Select
Connect key to link the selected pro-
file to the key currently being used. A profile can only be linked to the remote key that iscurrently being used. If there are several keys in the vehicle at the same time,
More than
one key is found, put the key you want to connect on backup reader
will be dis-
played.
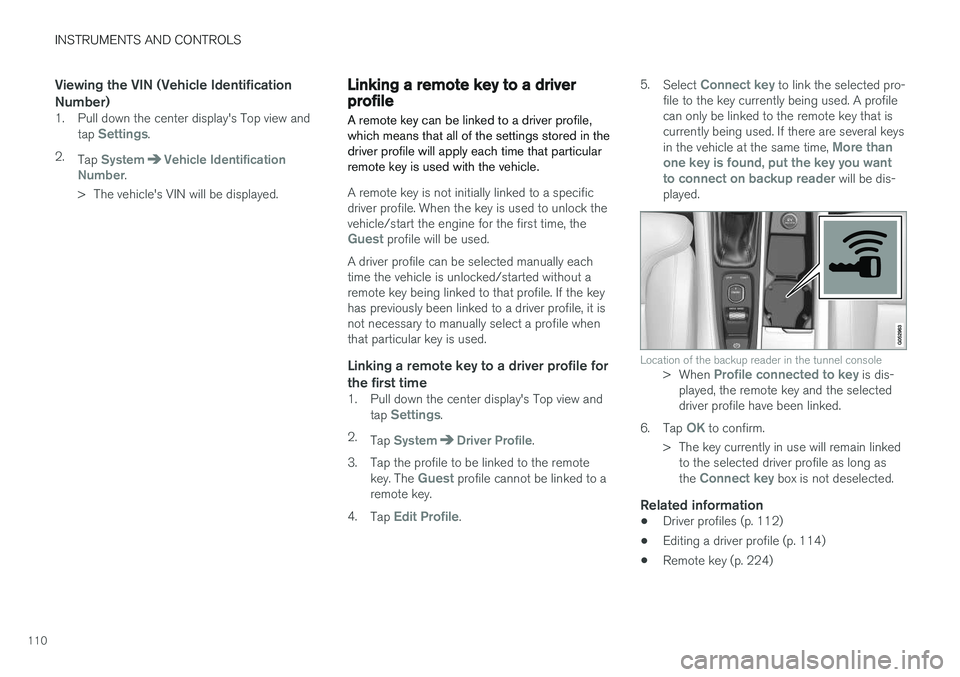
Location of the backup reader in the tunnel console> When Profile connected to key is dis-
played, the remote key and the selected driver profile have been linked.
6. Tap
OK to confirm.
> The key currently in use will remain linked to the selected driver profile as long as the
Connect key box is not deselected.
Related information
• Driver profiles (p. 112)
• Editing a driver profile (p. 114)
• Remote key (p. 224)
Page 113 of 570
INSTRUMENTS AND CONTROLS
111
Changing settings in apps
App view, which is one of the center display's basic views, contains all of the apps installed inthe vehicle. From Home view, navigate to Appview by swiping the screen from right to left.
Apps for integrated (basic) functionsCertain apps in your vehicle are factory-installed, such as FM, USB and CD and are part of Sen-
sus. Settings in these apps can be changed in the center display's Top view.
Changing settings for a basic app1. Tap one of the basic apps, for example FM
radio.
2. Pull down Top view. 3. Tap
FM Radio Settings.
4. Change the desired settings and confirm.
5. Press the Home button below the center dis- play or tap the screen outside of Top view or pull up Top view to return to your originalview. See also the article "Categories in Set-tings view."
Third party appsThird party apps have to be downloaded e.g.,Volvo ID. Settings for these apps are made in
the apps themselves, not in Top view.
Related information
• Settings view (p. 106)
• Navigating in the center display's views (p. 39)
• Categories in Settings view (p. 107)
Resetting the settings view
All of the changes made under Settings view can be reset to their default values at the sametime.
Different ways of resettingThere are three ways of resetting the Settings view.
•
Factory Reset: clears all data and media
and resets all settings to their default values.
•
Reset Vehicle Settings: resets global set-
tings to their default values.
•
Reset Personal Settings: clears personal
data and resets to default values.
Resetting1. Tap Settings in the center display's Top
view.
2. Tap
SystemGlobal Reset.
3. Select the desired alternative. > A popup window will appear.
4. Tap
OK to confirm your choice.
To confirm
Reset Personal Settings, tapReset for the active profile or Reset for
all profiles.
> The selected settings will be reset.
Page 114 of 570
INSTRUMENTS AND CONTROLS
112
Related information
•Settings view (p. 106)
• Driver profiles (p. 112)
• Resetting user data when the vehicle changes owners (p. 112)
Resetting user data when the vehicle changes owners
When the vehicle changes owners, all user set- tings should be reset to the factory defaults.
When the vehicle changes owners, it is essential to reset all user data and system settings to theirfactory defaults, including Volvo On Call.
Related information
• Resetting the settings view (p. 111)
• Volvo ID (p. 27)
• Changing ownership of a vehicle with Volvo On Call (p. 424)
Driver profiles
Many of the vehicle's settings can be adapted to the driver's personal preference and saved inone or more driver profiles.
Different settings can be saved and also linked to different remote keys. When a key with a certainprofile is used, the vehicle's settings are changedaccording to the specific driver profile linked tothat key.
Two types of profilesWhen the center display is activated, the name ofthe driver profile linked to the remote key used tounlock the vehicle will be shown at the top of thedisplay. No profiles are initially linked to the remote keys and the
Guest profile is selected automatically.
No settings can be saved in this profile; the
Guest profile is intended for use if the remote
key is lent to another driver. A driver profile can be created for each of the vehicle's remote keys. If a new key is purchased,a new profile is also added to the vehicle's sys-tem.
Page 115 of 570
INSTRUMENTS AND CONTROLS
113
Changing a driver profileThe driver profile to be used can be changed as soon as the center display is activated or at alater time using the display's Top view. A profilecan also be changed even if the current remotekey is linked to a different profile.
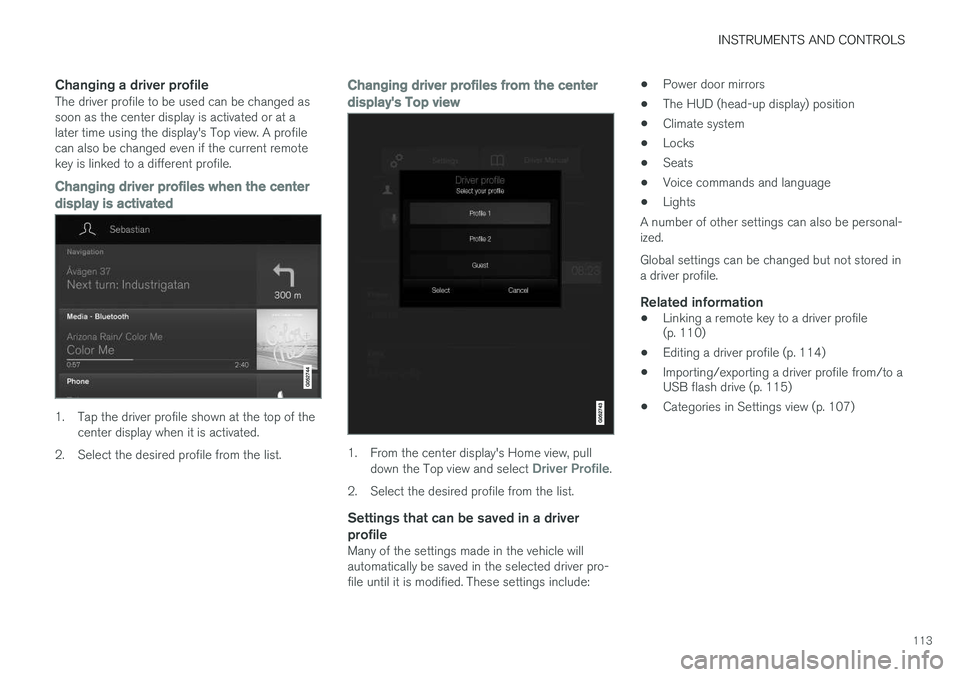
Changing driver profiles when the center
display is activated
1. Tap the driver profile shown at the top of the center display when it is activated.
2. Select the desired profile from the list.
Changing driver profiles from the center display's Top view
1. From the center display's Home view, pull down the Top view and select Driver Profile.
2. Select the desired profile from the list.
Settings that can be saved in a driver profile
Many of the settings made in the vehicle will automatically be saved in the selected driver pro-file until it is modified. These settings include: •
Power door mirrors
• The HUD (head-up display) position
• Climate system
• Locks
• Seats
• Voice commands and language
• Lights
A number of other settings can also be personal-ized. Global settings can be changed but not stored in a driver profile.
Related information
• Linking a remote key to a driver profile (p. 110)
• Editing a driver profile (p. 114)
• Importing/exporting a driver profile from/to aUSB flash drive (p. 115)
• Categories in Settings view (p. 107)
Page 116 of 570
INSTRUMENTS AND CONTROLS
114
Editing a driver profile
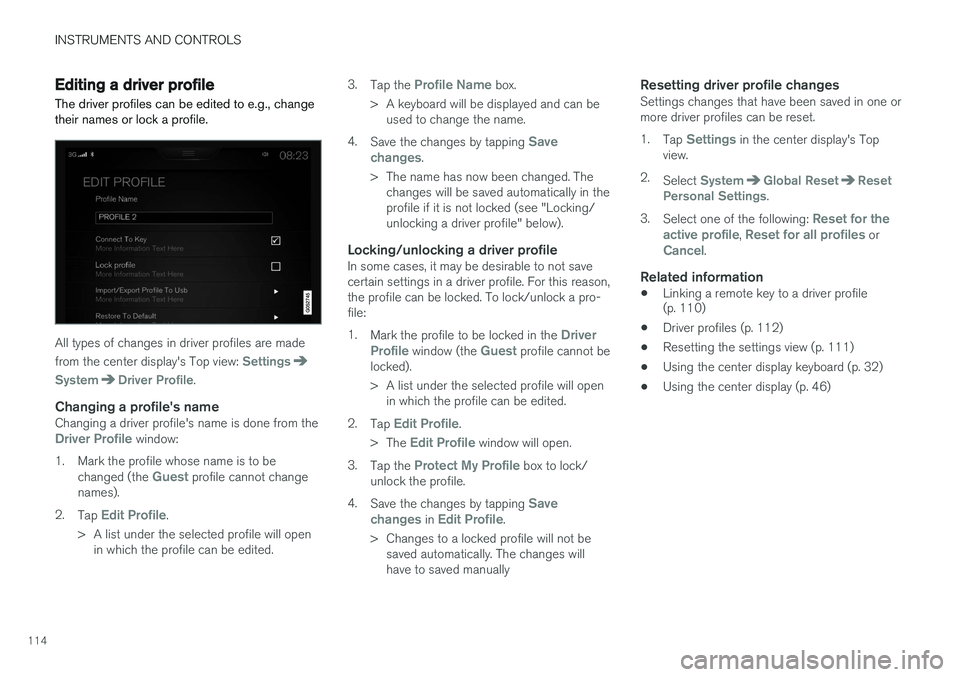
The driver profiles can be edited to e.g., change their names or lock a profile.
All types of changes in driver profiles are made from the center display's Top view:
Settings
SystemDriver Profile.
Changing a profile's nameChanging a driver profile's name is done from theDriver Profile window:
1. Mark the profile whose name is to be changed (the
Guest profile cannot change
names).
2. Tap
Edit Profile.
> A list under the selected profile will open in which the profile can be edited. 3.
Tap the
Profile Name box.
> A keyboard will be displayed and can be used to change the name.
4. Save the changes by tapping
Save
changes.
> The name has now been changed. The changes will be saved automatically in the profile if it is not locked (see "Locking/unlocking a driver profile" below).
Locking/unlocking a driver profileIn some cases, it may be desirable to not savecertain settings in a driver profile. For this reason,the profile can be locked. To lock/unlock a pro-file: 1. Mark the profile to be locked in the
Driver
Profile window (the Guest profile cannot be
locked).
> A list under the selected profile will open in which the profile can be edited.
2. Tap
Edit Profile.
> The
Edit Profile window will open.
3. Tap the
Protect My Profile box to lock/
unlock the profile.
4. Save the changes by tapping
Save
changes in Edit Profile.
> Changes to a locked profile will not be saved automatically. The changes will have to saved manually
Resetting driver profile changesSettings changes that have been saved in one ormore driver profiles can be reset. 1. Tap
Settings in the center display's Top
view.
2. Select
SystemGlobal ResetReset
Personal Settings.
3. Select one of the following:
Reset for the
active profile, Reset for all profiles orCancel.
Related information
• Linking a remote key to a driver profile (p. 110)
• Driver profiles (p. 112)
• Resetting the settings view (p. 111)
• Using the center display keyboard (p. 32)
• Using the center display (p. 46)
Page 117 of 570
INSTRUMENTS AND CONTROLS
115
Importing/exporting a driver profile from/to a USB flash drive A driver profile can be imported or exported to another vehicle using a USB flash drive.
The following steps describe the procedure for importing or exporting settings saved in a driverprofile to a USB flash drive: 1.Tap
Settings in the center display's Top
view.
2. Tap
SystemDriver Profile.
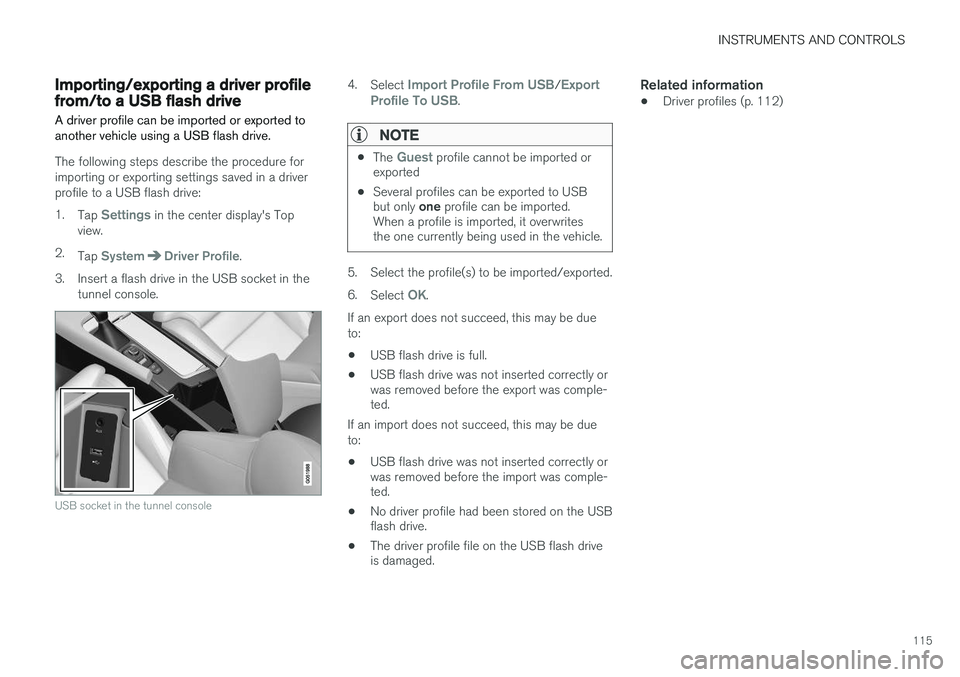
3. Insert a flash drive in the USB socket in the tunnel console.
USB socket in the tunnel console
4.Select Import Profile From USB/Export
Profile To USB.
NOTE
• The Guest profile cannot be imported or
exported
• Several profiles can be exported to USB but only
one profile can be imported.
When a profile is imported, it overwrites the one currently being used in the vehicle.
5. Select the profile(s) to be imported/exported. 6. Select
OK.
If an export does not succeed, this may be due to:
• USB flash drive is full.
• USB flash drive was not inserted correctly or was removed before the export was comple-ted.
If an import does not succeed, this may be due to:
• USB flash drive was not inserted correctly or was removed before the import was comple-ted.
• No driver profile had been stored on the USBflash drive.
• The driver profile file on the USB flash driveis damaged.
Related information
•Driver profiles (p. 112)
Page 118 of 570

INSTRUMENTS AND CONTROLS
116
Ambient temperature sensor
The ambient temperature sensor displays the temperature outside the vehicle in the instrumentpanel.
Location of the ambient temperature sensor (tempera- ture shown here in degrees Celsius)
NOTE
When the ambient temperature is between 23° and 36 °F (–5° and +2 °C), a snowflakesymbol will be displayed next to the tempera-ture. This symbol serves as a warning for pos-sible slippery road surfaces. Please note that this symbol does not indicate a fault with your
vehicle. At low speeds or when the vehicle is not mov- ing, the temperature readings may be slightlyhigher than the actual ambient temperature.
SettingsChanging measurement standard in the center display:
1. Pull down the center display's Top view and
tap
Settings.
2. Tap
SystemUnits.
3. Select measurement standard,
Metric,Imperial or US.
Related information
• Instrument panel (p. 128)
• Climate system sensors (p. 177)
Clock The clock is displayed in the instrument panel and in the center display.
Location of the clock in the instrument panel
Certain messages and other information in the instrument panel may temporarily obscure theclock. In the center display, the clock is located at the upper right of the status bar.
Settings for date and time
Select SettingsSystemDate & Time in
the center display's Top view to change the for- mat for displaying date or time. Set the date and time by tapping the up or down arrows on the center display.
Page 119 of 570
INSTRUMENTS AND CONTROLS
* Option/accessory, for more information, see Introduction.117
Automatic time
The function Automatic Time is also available,
which adjusts the time zone automatically, depending on the vehicle's location. If
Automatic
Time has not been selected, set the date and
time manually by tapping the up or down arrows on the center display.
Daylight savings timeIn certain countries, an automatic change to day- light savings time can be selected by activating
Auto. If the automatic change is not available,
change to daylight savings time by selecting Onor Off.
Related information
• Instrument panel (p. 128)
• Center display overview (p. 29)
• Using the center display (p. 46)
Head-up display (HUD)
*
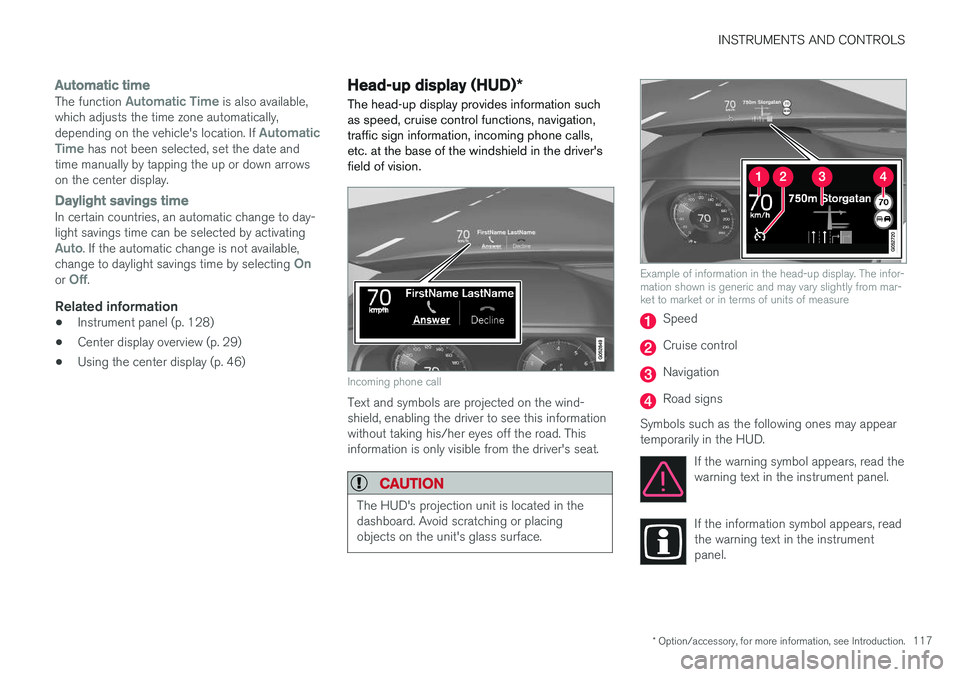
The head-up display provides information such as speed, cruise control functions, navigation,traffic sign information, incoming phone calls,etc. at the base of the windshield in the driver'sfield of vision.
Incoming phone call
Text and symbols are projected on the wind- shield, enabling the driver to see this informationwithout taking his/her eyes off the road. Thisinformation is only visible from the driver's seat.
CAUTION
The HUD's projection unit is located in the dashboard. Avoid scratching or placingobjects on the unit's glass surface.
Example of information in the head-up display. The infor- mation shown is generic and may vary slightly from mar-ket to market or in terms of units of measure
Speed
Cruise control
Navigation
Road signs
Symbols such as the following ones may appear temporarily in the HUD. If the warning symbol appears, read thewarning text in the instrument panel.
If the information symbol appears, read the warning text in the instrumentpanel.
Page 120 of 570
INSTRUMENTS AND CONTROLS
* Option/accessory, for more information, see Introduction.
118
NOTE
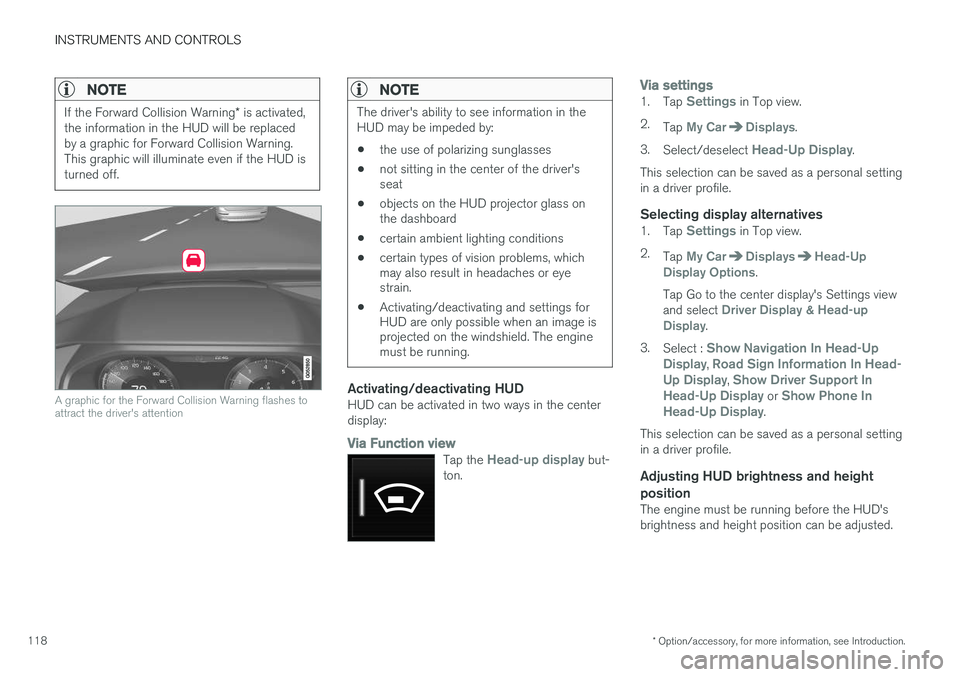
If the Forward Collision Warning * is activated,
the information in the HUD will be replaced by a graphic for Forward Collision Warning.This graphic will illuminate even if the HUD isturned off.
A graphic for the Forward Collision Warning flashes to attract the driver's attention
NOTE
The driver's ability to see information in the HUD may be impeded by: • the use of polarizing sunglasses
• not sitting in the center of the driver's seat
• objects on the HUD projector glass onthe dashboard
• certain ambient lighting conditions
• certain types of vision problems, whichmay also result in headaches or eyestrain.
• Activating/deactivating and settings forHUD are only possible when an image isprojected on the windshield. The enginemust be running.
Activating/deactivating HUDHUD can be activated in two ways in the center display:
Via Function view
Tap the Head-up display but-
ton.
Via settings1. Tap Settings in Top view.
2. Tap
My CarDisplays.
3. Select/deselect
Head-Up Display.
This selection can be saved as a personal setting in a driver profile.
Selecting display alternatives1. Tap Settings in Top view.
2. Tap
My CarDisplaysHead-Up
Display Options.
Tap Go to the center display's Settings view and select
Driver Display & Head-up
Display.
3. Select :
Show Navigation In Head-Up
Display, Road Sign Information In Head-
Up Display, Show Driver Support In
Head-Up Display or Show Phone In
Head-Up Display.
This selection can be saved as a personal setting in a driver profile.
Adjusting HUD brightness and height position
The engine must be running before the HUD'sbrightness and height position can be adjusted.