VOLVO XC90 2015 Owners Manual
Manufacturer: VOLVO, Model Year: 2015, Model line: XC90, Model: VOLVO XC90 2015Pages: 570, PDF Size: 12.44 MB
Page 201 of 570
L O A D I N G A N D S T O R A G E
Page 202 of 570
LOADING AND STORAGE
* Option/accessory, for more information, see Introduction.
200
Cargo space
The vehicle has flexible cargo capacity that makes it possible to load and secure largeobjects.
By folding down the backrests in the second and third rows * of seats, the cargo capacity of the
vehicle increases considerably. To make loading easier, the rear section of the vehicle can beraised and lowered using the pneumatic suspen- sion *. Use the load anchoring eyelets or the gro-
cery bag holder to secure objects and the cargo compartment cover helps conceal the load. The spare tire, jack and tools can be found under the cargo compartment's floor.
Related information
• Loading (p. 207)
• Cargo compartment cover
* (p. 213)
• Cargo net (p. 209)
• Grocery bag holder (p. 209)
• Load anchoring eyelets (p. 212)
• Steel cargo grid
* (p. 211)
Passenger compartment storage spaces
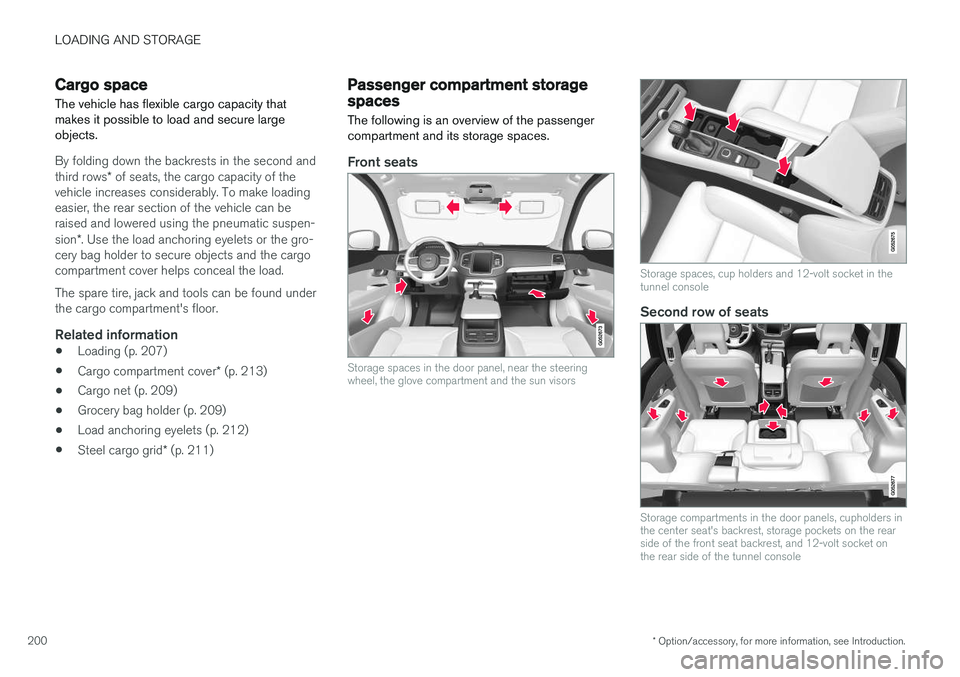
The following is an overview of the passenger compartment and its storage spaces.
Front seats
Storage spaces in the door panel, near the steering wheel, the glove compartment and the sun visors
Storage spaces, cup holders and 12-volt socket in the tunnel console
Second row of seats
Storage compartments in the door panels, cupholders in the center seat's backrest, storage pockets on the rearside of the front seat backrest, and 12-volt socket onthe rear side of the tunnel console
Page 203 of 570
LOADING AND STORAGE
* Option/accessory, for more information, see Introduction.201
Third row of seats*
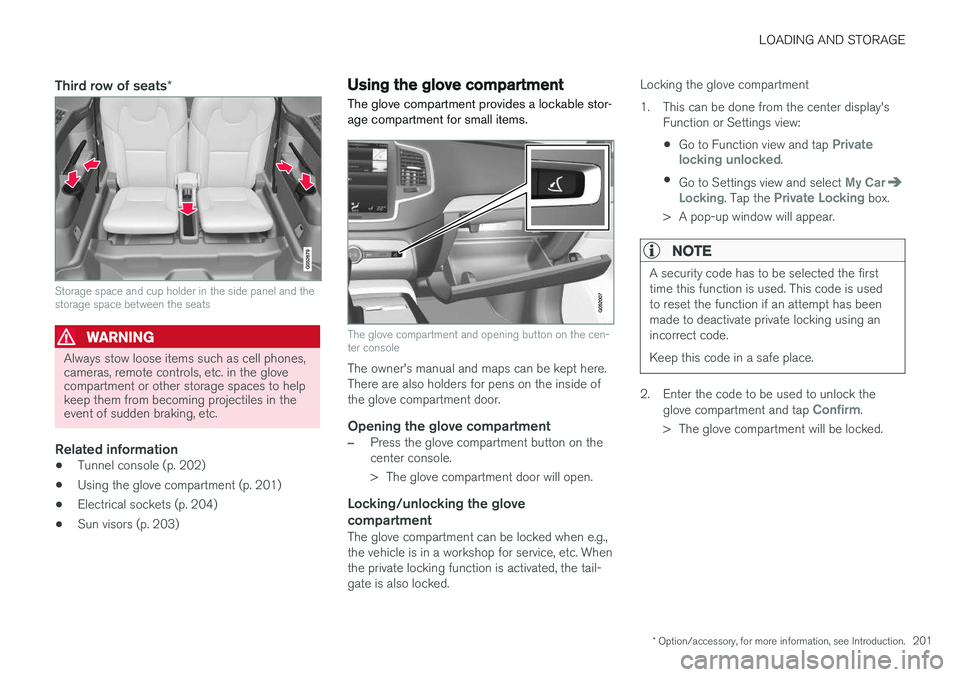
Storage space and cup holder in the side panel and the storage space between the seats
WARNING
Always stow loose items such as cell phones, cameras, remote controls, etc. in the glovecompartment or other storage spaces to helpkeep them from becoming projectiles in theevent of sudden braking, etc.
Related information
•Tunnel console (p. 202)
• Using the glove compartment (p. 201)
• Electrical sockets (p. 204)
• Sun visors (p. 203)
Using the glove compartment
The glove compartment provides a lockable stor- age compartment for small items.
The glove compartment and opening button on the cen- ter console
The owner's manual and maps can be kept here. There are also holders for pens on the inside ofthe glove compartment door.
Opening the glove compartment
–Press the glove compartment button on the center console.
> The glove compartment door will open.
Locking/unlocking the glove compartment
The glove compartment can be locked when e.g., the vehicle is in a workshop for service, etc. Whenthe private locking function is activated, the tail-gate is also locked. Locking the glove compartment
1. This can be done from the center display's
Function or Settings view:
• Go to Function view and tap
Private
locking unlocked.
• Go to Settings view and select
My CarLocking. Tap the Private Locking box.
> A pop-up window will appear.
NOTE
A security code has to be selected the first time this function is used. This code is usedto reset the function if an attempt has beenmade to deactivate private locking using anincorrect code. Keep this code in a safe place.
2. Enter the code to be used to unlock the glove compartment and tap Confirm.
> The glove compartment will be locked.
Page 204 of 570

LOADING AND STORAGE
* Option/accessory, for more information, see Introduction.
202 Unlocking the glove compartment
1. This function can be deactivated from the
center display's Function or Settings view:
• Go to Function view and tap
Private
locking locked.
• Go to settings and select
My CarLocking. Deselect the Private Lockingbox.
> A pop-up window will appear.
2. Specify the code to be used to lock the glove compartment and tap
Confirm.
> The glove compartment will be unlocked.
Using the glove compartment as a cooler *The glove compartment can be used to cool drinks or food and the cooling feature functionswhen the climate system is active (i.e., when the ignition is in mode II or when the engine is run-
ning).
Cooling activated
Cooling deactivated
–Activate/deactivate cooling by moving the control as far as possible toward the passen-ger compartment/glove compartment.
Related information
• Passenger compartment storage spaces (p. 200)
• Locking/unlocking the tailgate (p. 233)
Tunnel console The tunnel console, located between the front seats, contains a 12-volt electrical socket, cupholders and storage spaces, etc.
Storage space
Storage space with cup holders for the driver and passenger and a 12-volt socket
Storage space and USB/AUX sockets under the armrest
Climate control panel for the rear seats
*
NOTE
One of the alarm sensors, which is sensitive to metallic objects, is located under the tunnelconsole cup holders. Avoid leaving coins,keys, etc., in the cup holders because theymay inadvertently trigger the alarm.
Page 205 of 570
LOADING AND STORAGE
203
Related information
•Passenger compartment storage spaces (p. 200)
• Electrical sockets (p. 204)
• Alarm (p. 216)
• Rear climate system controls on the tunnelconsole (p. 182)
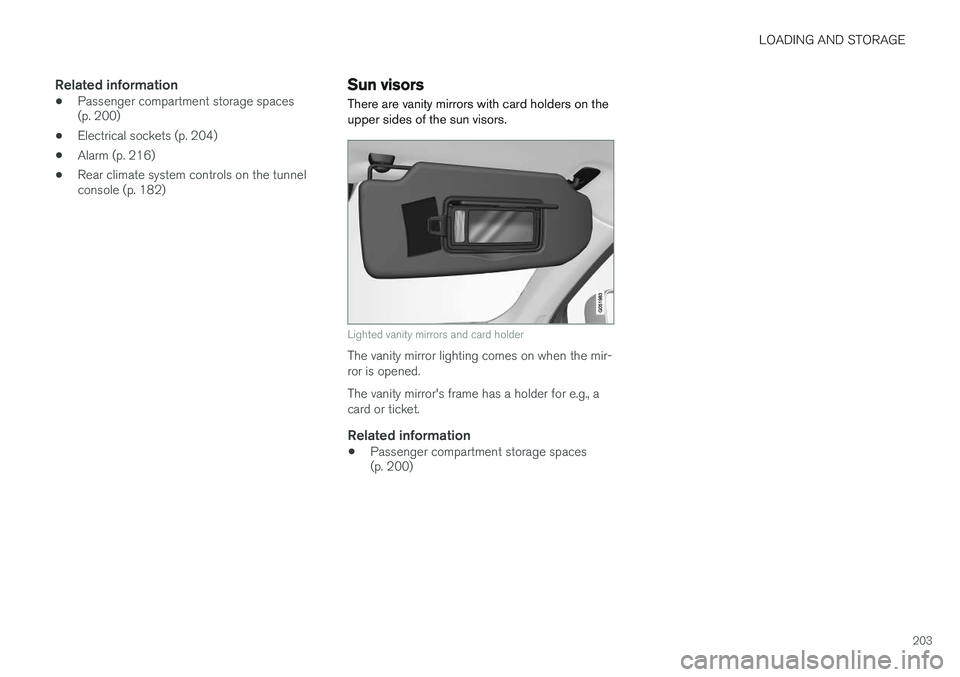
Sun visors There are vanity mirrors with card holders on the upper sides of the sun visors.
Lighted vanity mirrors and card holder
The vanity mirror lighting comes on when the mir- ror is opened. The vanity mirror's frame has a holder for e.g., a card or ticket.
Related information
• Passenger compartment storage spaces (p. 200)
Page 206 of 570
LOADING AND STORAGE
* Option/accessory, for more information, see Introduction.
204
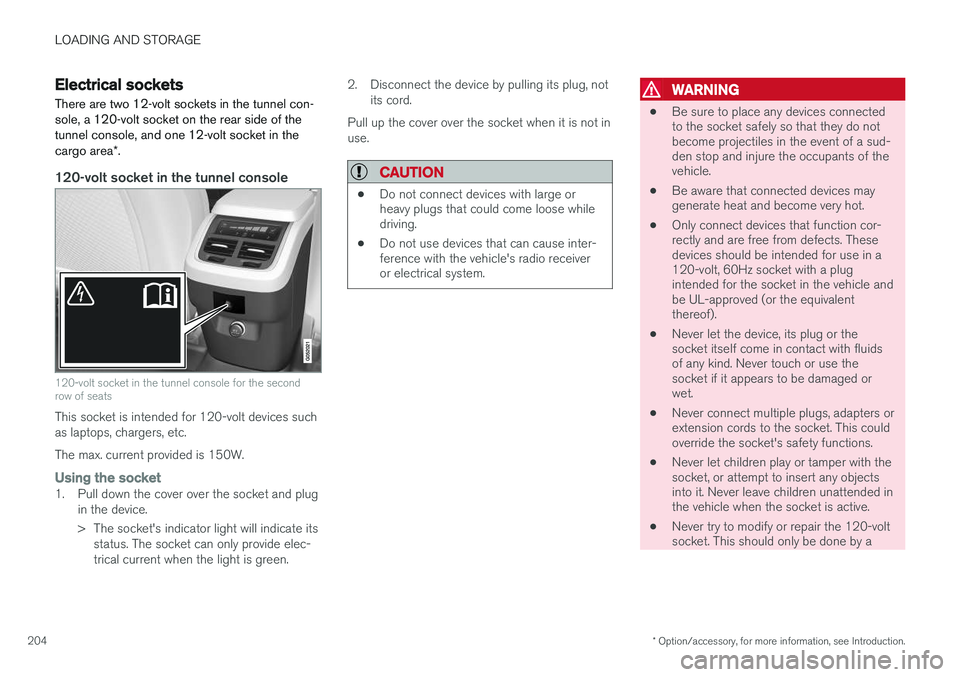
Electrical sockets There are two 12-volt sockets in the tunnel con- sole, a 120-volt socket on the rear side of thetunnel console, and one 12-volt socket in the cargo area *.
120-volt socket in the tunnel console
120-volt socket in the tunnel console for the second row of seats
This socket is intended for 120-volt devices such as laptops, chargers, etc. The max. current provided is 150W.
Using the socket1. Pull down the cover over the socket and plug
in the device.
> The socket's indicator light will indicate itsstatus. The socket can only provide elec- trical current when the light is green. 2. Disconnect the device by pulling its plug, not
its cord.
Pull up the cover over the socket when it is not inuse.
CAUTION
• Do not connect devices with large or heavy plugs that could come loose whiledriving.
• Do not use devices that can cause inter-ference with the vehicle's radio receiveror electrical system.
WARNING
•
Be sure to place any devices connected to the socket safely so that they do notbecome projectiles in the event of a sud-den stop and injure the occupants of thevehicle.
• Be aware that connected devices maygenerate heat and become very hot.
• Only connect devices that function cor-rectly and are free from defects. Thesedevices should be intended for use in a120-volt, 60Hz socket with a plugintended for the socket in the vehicle andbe UL-approved (or the equivalentthereof).
• Never let the device, its plug or thesocket itself come in contact with fluidsof any kind. Never touch or use thesocket if it appears to be damaged orwet.
• Never connect multiple plugs, adapters orextension cords to the socket. This couldoverride the socket's safety functions.
• Never let children play or tamper with thesocket, or attempt to insert any objectsinto it. Never leave children unattended inthe vehicle when the socket is active.
• Never try to modify or repair the 120-voltsocket. This should only be done by a
Page 207 of 570

LOADING AND STORAGE
205
trained and qualified Volvo service techni- cian.
Failure to follow the points above could result in electrical shock and/or serious injury.Status indicationAn LED (Light Emitting Diode) on the socket indicates its status:
Status indicator lightSocket statusAction
Steady green lightThe socket is providing current to a connected device.None.
Flashing orange lightThe socket's voltage converter is too hot (the connected device draws too much current, etc. or the temperature in the passenger compartment is very high).Unplug the device, let the converter cool down and plug in the device again.
The connected device draws too much current (constantly or currently) or is not functioning properly.None. The device should not be plugged into the socket.
Indicator light offThe socket has not detected a plugged in device.Be sure the device is correctly plugged into the socket.
The socket is not active.Put the vehicle's ignition in at least mode I.
The socket has been active but has been deactivated.Start the engine and/or charge the start battery.
If a problem persists, have the socket checked by a trained and qualified Volvo service technician.
Page 208 of 570
LOADING AND STORAGE
206
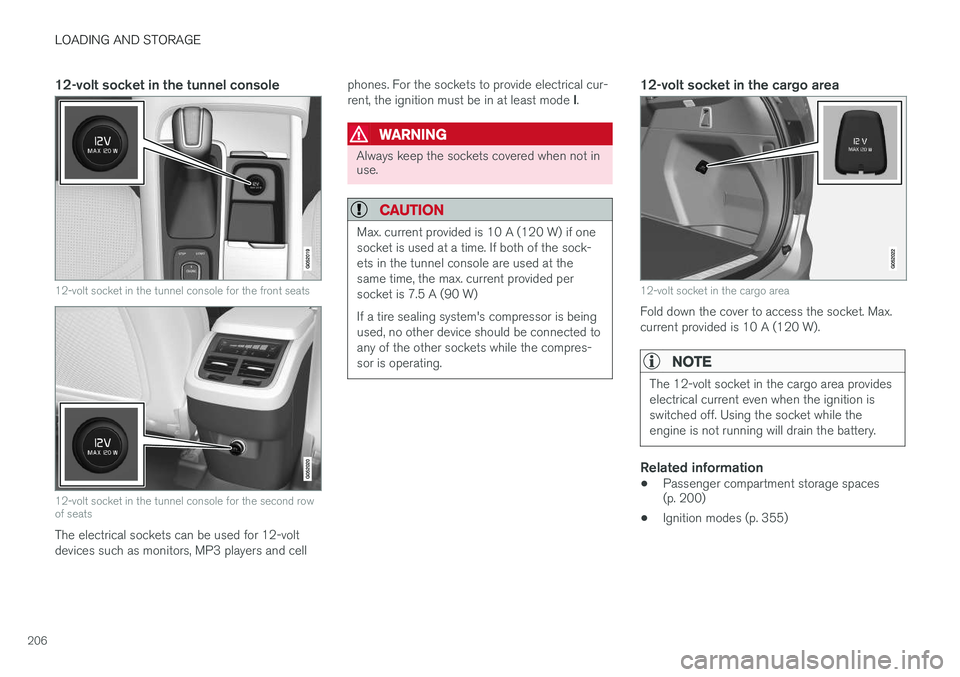
12-volt socket in the tunnel console
12-volt socket in the tunnel console for the front seats
12-volt socket in the tunnel console for the second row of seats
The electrical sockets can be used for 12-volt devices such as monitors, MP3 players and cellphones. For the sockets to provide electrical cur- rent, the ignition must be in at least mode
I.
WARNING
Always keep the sockets covered when not in use.
CAUTION
Max. current provided is 10 A (120 W) if one socket is used at a time. If both of the sock-ets in the tunnel console are used at thesame time, the max. current provided persocket is 7.5 A (90 W) If a tire sealing system's compressor is being used, no other device should be connected toany of the other sockets while the compres-sor is operating.
12-volt socket in the cargo area
12-volt socket in the cargo area
Fold down the cover to access the socket. Max. current provided is 10 A (120 W).
NOTE
The 12-volt socket in the cargo area provides electrical current even when the ignition isswitched off. Using the socket while theengine is not running will drain the battery.
Related information
• Passenger compartment storage spaces (p. 200)
• Ignition modes (p. 355)
Page 209 of 570

LOADING AND STORAGE
* Option/accessory, for more information, see Introduction.207
Loading
The load carrying capacity of your vehicle is determined by factors such as the number ofpassengers, the amount of cargo, the weight ofany accessories that may be installed, etc.
Tailgate opening button on the lighting panel
Open the tailgate by pressing the button on the lighting panel, pressing the
button on the
remote key or by using the optional foot move- ment sensor under the rear bumper.
Loading recommendations
• Load objects in the cargo compartment against the backrest whenever possible.
• If the backrests of the second row seats arefolded down, they should not be in contactthe front seat backrests. This could impede the function of the Whiplash ProtectionSystem (WHIPS).
• Unstable loads can be secured to the loadanchoring eyelets with straps or web lash-ings to help keep them from shifting.
• Stop the engine and apply the parking brakewhen loading or unloading long objects. Thegear selector can be knocked out of positionby long loads, which could set the vehicle inmotion.
WARNING
•
Stop the engine, put the gear selector in P
, and apply the parking brake when
loading or unloading long objects.
• The vehicle's driving characteristics may change depending on the weight and dis-tribution of the load.
• A 44-pound (20 kg) object produces aforce of 2,200 pounds (1,000 kg) in ahead-on collision at 30 mph (50 km/h).
• The cargo area and rear seat should notbe loaded to a level higher than 2 in.(5 cm) below the upper edge of the rearside windows. Objects placed higher thanthis level could impede the function ofthe Inflatable Curtain.
WARNING
•
Cover sharp edges on long loads to help prevent injury to occupants. Secure theload to help prevent shifting during sud-den stops.
• Always secure large and heavy objectswith a seat belt or cargo retaining straps.
• Always secure the load to help prevent itfrom moving in the event of sudden stops.
• Switch off the engine, apply the parking brake and put the gear selector in
P
when loading and unloading the vehicle.
Raising/lowering the rear-end of the vehicle *
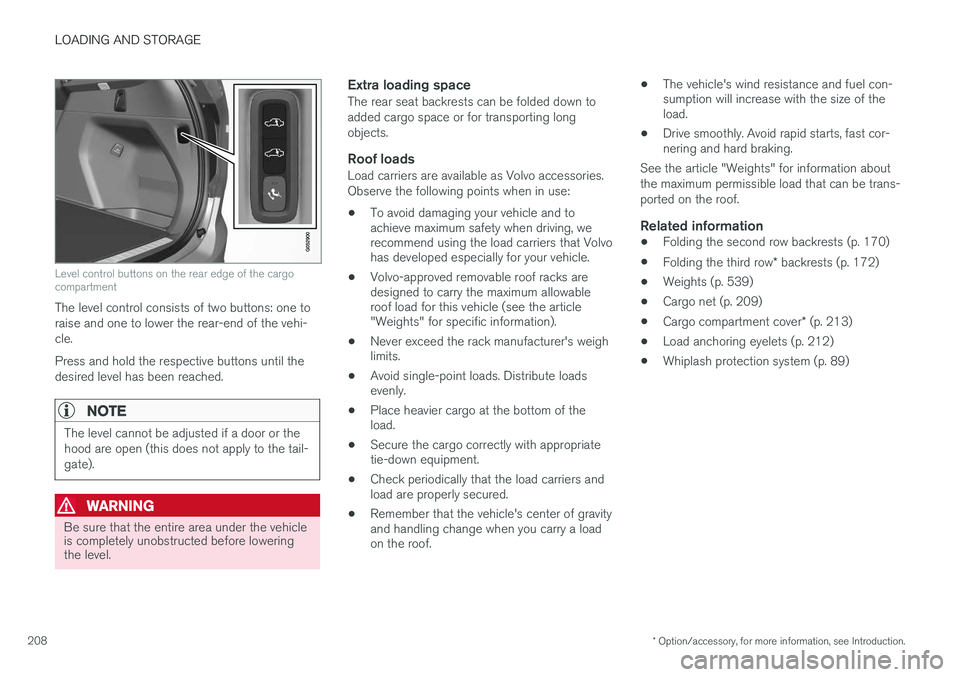
Using the buttons on the read edge of the cargo compartment, the rear-end of the vehicle (thelevel of the cargo compartment floor) can beraised or lowered for easier loading or to make attaching a trailer 1
simpler.
1 An accessory trailer hitch can be purchased from a Volvo retailer.
Page 210 of 570
LOADING AND STORAGE
* Option/accessory, for more information, see Introduction.
208
Level control buttons on the rear edge of the cargo compartment
The level control consists of two buttons: one to raise and one to lower the rear-end of the vehi-cle. Press and hold the respective buttons until the desired level has been reached.
NOTE
The level cannot be adjusted if a door or the hood are open (this does not apply to the tail-gate).
WARNING
Be sure that the entire area under the vehicle is completely unobstructed before loweringthe level.
Extra loading spaceThe rear seat backrests can be folded down to added cargo space or for transporting longobjects.
Roof loadsLoad carriers are available as Volvo accessories.Observe the following points when in use:
• To avoid damaging your vehicle and to achieve maximum safety when driving, werecommend using the load carriers that Volvohas developed especially for your vehicle.
• Volvo-approved removable roof racks aredesigned to carry the maximum allowableroof load for this vehicle (see the article"Weights" for specific information).
• Never exceed the rack manufacturer's weighlimits.
• Avoid single-point loads. Distribute loadsevenly.
• Place heavier cargo at the bottom of theload.
• Secure the cargo correctly with appropriatetie-down equipment.
• Check periodically that the load carriers andload are properly secured.
• Remember that the vehicle's center of gravityand handling change when you carry a loadon the roof. •
The vehicle's wind resistance and fuel con-sumption will increase with the size of theload.
• Drive smoothly. Avoid rapid starts, fast cor-nering and hard braking.
See the article "Weights" for information about the maximum permissible load that can be trans-ported on the roof.
Related information
• Folding the second row backrests (p. 170)
• Folding the third row
* backrests (p. 172)
• Weights (p. 539)
• Cargo net (p. 209)
• Cargo compartment cover
* (p. 213)
• Load anchoring eyelets (p. 212)
• Whiplash protection system (p. 89)