Socket VOLVO XC90 T8 2016 Owner´s Manual
[x] Cancel search | Manufacturer: VOLVO, Model Year: 2016, Model line: XC90 T8, Model: VOLVO XC90 T8 2016Pages: 546, PDF Size: 10.26 MB
Page 384 of 546
||
STARTING AND DRIVING
382
Related information
•Charging the hybrid battery (p. 383)
• Hybrid battery charge status (p. 385)
• Hybrid battery charging cable (p. 375)
Initiating hybrid battery charging
The hybrid battery is charged using a charging cable connected to a 120-/240-volt socket. Only use the cable provided with your vehicle or one purchased from a Volvo retailer.
CAUTION
Never connect the charging cable if there is a risk of thunderstorms/lightning.
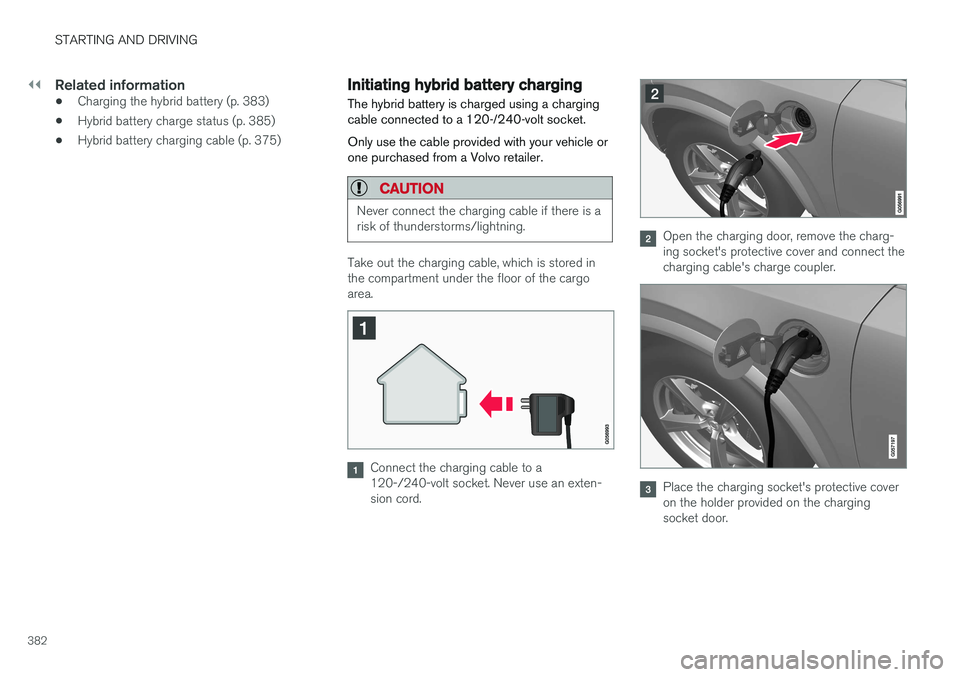
Take out the charging cable, which is stored in the compartment under the floor of the cargoarea.
Connect the charging cable to a 120-/240-volt socket. Never use an exten-sion cord.
Open the charging door, remove the charg- ing socket's protective cover and connect thecharging cable's charge coupler.
Place the charging socket's protective cover on the holder provided on the chargingsocket door.
Page 385 of 546
STARTING AND DRIVING
}}
383
4. The charging cable's coupler will lock onto
the charging socket and charging will begin within approx. 10 seconds. The approximateremaining charging time and charging statuswill be displayed in the instrument panel. Seealso the article "Hybrid battery charge sta-tus." Charging will be temporarily interrupted if the vehicle is unlocked: •If a door is opened, charging will restart within 2 minutes.
• if no door is opened, the vehicle will auto-matically relock and charging will restartafter 1 minute.
NOTE
Charging status is shown in the instrument panel, which goes dark after a period of time.Reactivate the instrument panel by: •pressing the brake pedal
• opening one of the doors
• putting the ignition in mode
I ( without
pressing the brake pedal , turn the start
knob to START and release it).
CAUTION
Never disconnect the charging cable from the 120-/240-volt socket while charging is inprogress. This could damage the socket. Always stop the charging process (by unlock- ing the vehicle) and disconnect the chargingcable from the vehicle's charging socket before disconnecting the other end from the
120-/240-volt socket being used.
During the charging process, condensation may form under the vehicle, which is normal and iscaused by cooling the hybrid battery.
Related information
• Hybrid battery charge status (p. 385)
• Charging the hybrid battery (p. 383)
• Hybrid battery charging cable (p. 375)
• Stopping hybrid battery charging (p. 381)
Charging the hybrid battery In addition to the conventional fuel tank, the XC90 T8 Twin Engine Plug-in Hybrid is alsoequipped with a rechargeable lithium-ion hybridbattery.
The hybrid battery is recharged using a charging cable located in a storage compartment underthe floor of the cargo area. See also the article"Charging cable."
WARNING
The hybrid electrical system in your vehicle uses high voltage electrical current. Any dam-age to this system or to the hybrid batterymay result in the danger of overheating, fire,or serious injury. If the vehicle is involved in acollision or is subjected to flooding, fires, etc.,have it inspected by a trained and qualifiedVolvo service technician. Prior to this inspec-tion, the vehicle should be parked outdoors ata safe distance from any building or poten-tially flammable materials.
The hybrid battery's charging time depends on the charging current used.
Page 386 of 546
||
STARTING AND DRIVING
384
NOTE
The capacity of the hybrid battery diminishes somewhat with age and use, which couldresult in increased use of the gasoline engineand consequently, slightly higher fuel con-sumption.
Charging is indicated in three ways: •Charge module (the unit that is plugged into the wall socket): The blue indicator light onthe cable's charge module will flash red sev-eral times when the unit is plugged into awall socket while a safety check is being per-formed and will then glow steadily blue toindicate that the charger is ready to use.
• A green indicator light in the vehicle's charg-ing socket will flash green while the batteryis charging and will glow steadily green whenthe hybrid battery is fully charged. The blueindicator light in the charge module will alsoflash while charging is underway and willglow steadily blue when charging is comple-ted.
• A gauge in the instrument panel will alsoindicate the battery's charge level.
The hybrid battery charging process also charges the vehicle's start battery. If the hybrid battery's temperature is below – 13 ºF (–10 ºC) or above +104 ºF (+40 ºC), some
of the vehicle's functions may be reduced or not be available at all (e.g., drive mode may not be available). The electric motor cannot be used if the hybrid battery's temperature is too low or too high. If thePURE drive mode is selected, the gasolineengine will be used.Temperature controlDuring charging, if the temperature in the charg-ing cable becomes too high and reaches a criticallimit, charging will be interrupted.
CAUTION
If charging is interrupted repeatedly, have the charging cable and the vehicle's chargingsystem inspected by a trained and qualifiedVolvo service technician.
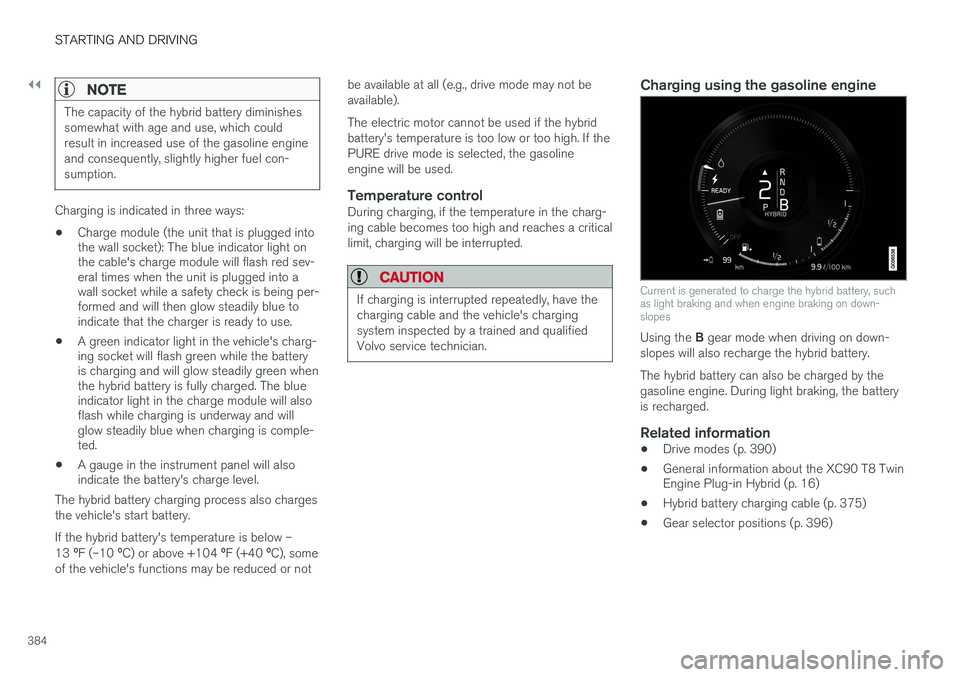
Charging using the gasoline engine
Current is generated to charge the hybrid battery, such as light braking and when engine braking on down-slopes
Using the
B gear mode when driving on down-
slopes will also recharge the hybrid battery. The hybrid battery can also be charged by the gasoline engine. During light braking, the batteryis recharged.
Related information
• Drive modes (p. 390)
• General information about the XC90 T8 Twin Engine Plug-in Hybrid (p. 16)
• Hybrid battery charging cable (p. 375)
• Gear selector positions (p. 396)
Page 387 of 546
STARTING AND DRIVING
}}
385
Hybrid battery charge status The hybrid battery's charge status (level) is indi- cated by an LED light in the vehicle's chargingsocket and in the instrument panel.
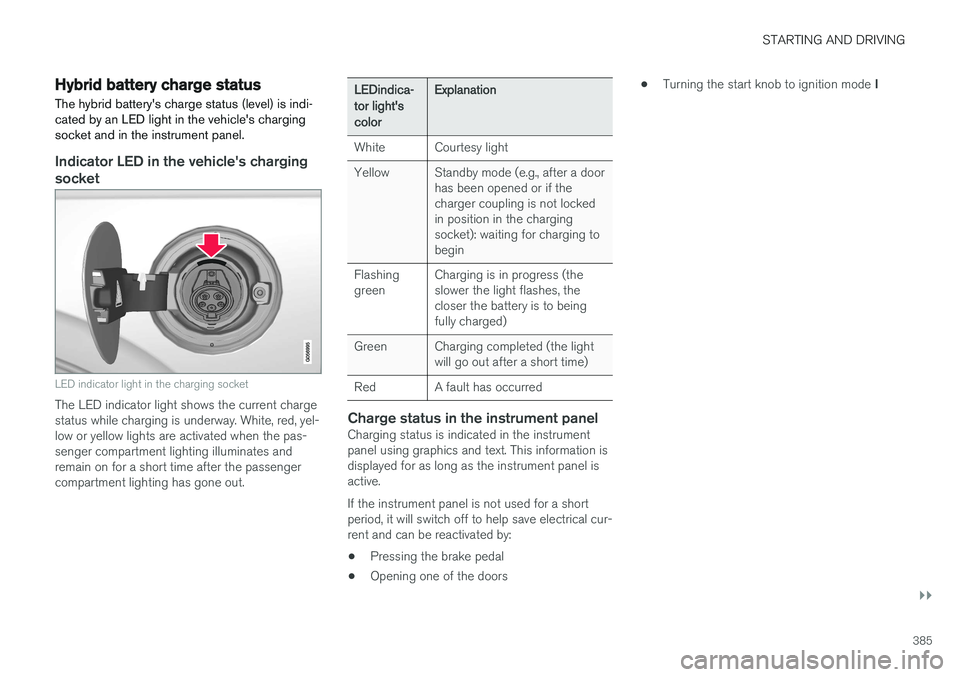
Indicator LED in the vehicle's charging socket
LED indicator light in the charging socket
The LED indicator light shows the current charge status while charging is underway. White, red, yel-low or yellow lights are activated when the pas-senger compartment lighting illuminates andremain on for a short time after the passengercompartment lighting has gone out.
LEDindica- tor light'scolorExplanation
WhiteCourtesy light
YellowStandby mode (e.g., after a door has been opened or if thecharger coupling is not lockedin position in the chargingsocket): waiting for charging tobegin
Flashing greenCharging is in progress (the slower the light flashes, thecloser the battery is to beingfully charged)
GreenCharging completed (the light will go out after a short time)
RedA fault has occurred
Charge status in the instrument panelCharging status is indicated in the instrument panel using graphics and text. This information isdisplayed for as long as the instrument panel isactive. If the instrument panel is not used for a short period, it will switch off to help save electrical cur-rent and can be reactivated by:
• Pressing the brake pedal
• Opening one of the doors •
Turning the start knob to ignition mode
I
Page 388 of 546
![VOLVO XC90 T8 2016 Owner´s Manual ||
STARTING AND DRIVING
386
GraphicMessageExplanation
Fully chargedat:[Time]
is
displayed with ananimatedblue puls-ing lightthroughthechargingcable.
Charging is in pro- gress and the approx-imate tim](/img/45/36400/w960_36400-387.png "VOLVO XC90 T8 2016 Owner´s Manual ||
STARTING AND DRIVING
386
GraphicMessageExplanation
Fully chargedat:[Time]
is
displayed with ananimatedblue puls-ing lightthroughthechargingcable.
Charging is in pro- gress and the approx-imate tim")
||
STARTING AND DRIVING
386
GraphicMessageExplanation
Fully chargedat:[Time]
is
displayed with ananimatedblue puls-ing lightthroughthechargingcable.
Charging is in pro- gress and the approx-imate time when thebattery will be fullycharged will be dis-played.
GraphicMessageExplanation
Charg- ing com-plete
is
displayed. An imagewill besuperim-posedover thegraphic ofthe vehi-cle with agreenLEDindicatorlight inthechargingsocket.
The battery is fully charged.
Charg- ing error
will be displayedand theLED indi-cator lightin thechargingsocketwill bered.
A fault has occurred. Check that the charg-ing cable is correctlyconnected to thevehicle's chargingsocket and the120-/240-volt socket.
Related information
• Hybrid battery charging cable (p. 375)
• Charging the hybrid battery (p. 383)
• Preparations for charging the hybrid battery (p. 380)
• Stopping hybrid battery charging (p. 381)
Page 389 of 546
STARTING AND DRIVING
}}
387
Charger status indicators
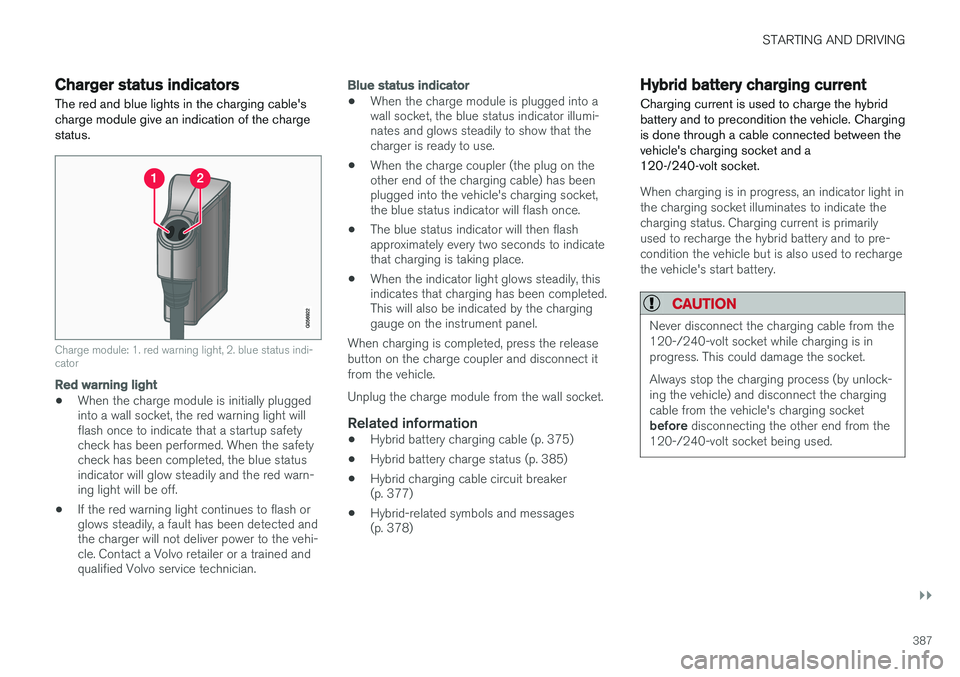
The red and blue lights in the charging cable's charge module give an indication of the chargestatus.
Charge module: 1. red warning light, 2. blue status indi- cator
Red warning light
• When the charge module is initially plugged into a wall socket, the red warning light willflash once to indicate that a startup safetycheck has been performed. When the safetycheck has been completed, the blue statusindicator will glow steadily and the red warn-ing light will be off.
• If the red warning light continues to flash orglows steadily, a fault has been detected andthe charger will not deliver power to the vehi-cle. Contact a Volvo retailer or a trained andqualified Volvo service technician.
Blue status indicator
• When the charge module is plugged into a wall socket, the blue status indicator illumi-nates and glows steadily to show that thecharger is ready to use.
• When the charge coupler (the plug on theother end of the charging cable) has beenplugged into the vehicle's charging socket,the blue status indicator will flash once.
• The blue status indicator will then flashapproximately every two seconds to indicatethat charging is taking place.
• When the indicator light glows steadily, thisindicates that charging has been completed.This will also be indicated by the charginggauge on the instrument panel.
When charging is completed, press the release button on the charge coupler and disconnect itfrom the vehicle. Unplug the charge module from the wall socket.
Related information
• Hybrid battery charging cable (p. 375)
• Hybrid battery charge status (p. 385)
• Hybrid charging cable circuit breaker (p. 377)
• Hybrid-related symbols and messages(p. 378)
Hybrid battery charging current
Charging current is used to charge the hybrid battery and to precondition the vehicle. Chargingis done through a cable connected between thevehicle's charging socket and a120-/240-volt socket.
When charging is in progress, an indicator light in the charging socket illuminates to indicate thecharging status. Charging current is primarilyused to recharge the hybrid battery and to pre-condition the vehicle but is also used to rechargethe vehicle's start battery.
CAUTION
Never disconnect the charging cable from the 120-/240-volt socket while charging is inprogress. This could damage the socket. Always stop the charging process (by unlock- ing the vehicle) and disconnect the chargingcable from the vehicle's charging socket before disconnecting the other end from the
120-/240-volt socket being used.
Page 390 of 546
STARTING AND DRIVING
388
NOTE
•At very low or high temperatures, some of the charging current is used to heat orcool the hybrid battery and the passengercompartment, which means that chargingmay take longer.
• Charging time is longer if preconditioninghas been selected. This time is primarilyaffected by the ambient temperature.
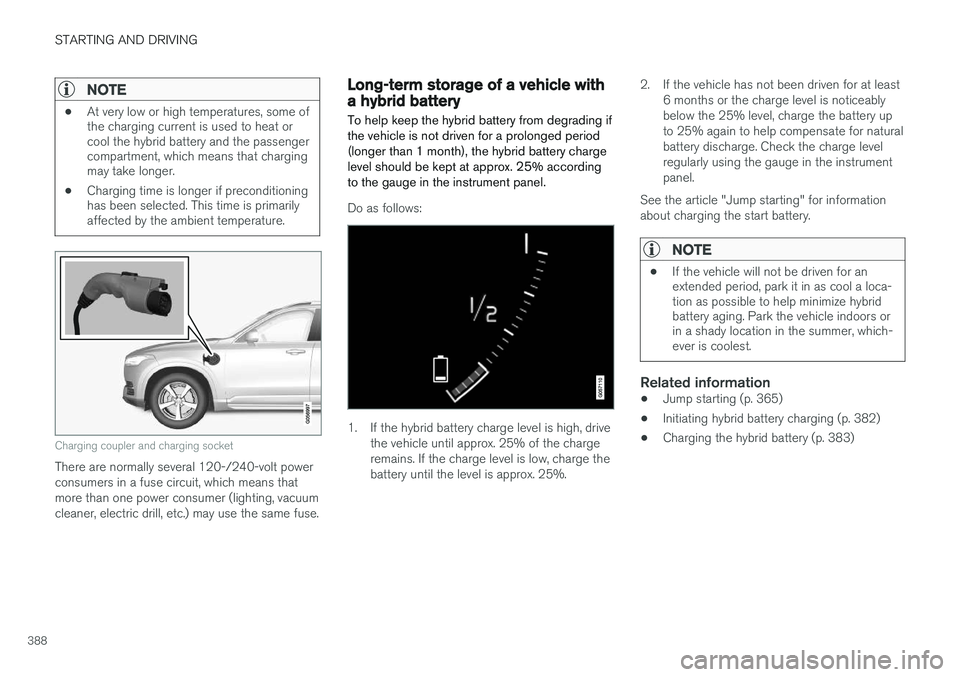
Charging coupler and charging socket
There are normally several 120-/240-volt power consumers in a fuse circuit, which means thatmore than one power consumer (lighting, vacuumcleaner, electric drill, etc.) may use the same fuse.
Long-term storage of a vehicle with a hybrid battery
To help keep the hybrid battery from degrading if the vehicle is not driven for a prolonged period
(longer than 1 month), the hybrid battery charge level should be kept at approx. 25% accordingto the gauge in the instrument panel.
Do as follows:
1. If the hybrid battery charge level is high, drive the vehicle until approx. 25% of the charge remains. If the charge level is low, charge thebattery until the level is approx. 25%. 2. If the vehicle has not been driven for at least
6 months or the charge level is noticeablybelow the 25% level, charge the battery upto 25% again to help compensate for naturalbattery discharge. Check the charge levelregularly using the gauge in the instrumentpanel.
See the article "Jump starting" for informationabout charging the start battery.
NOTE
• If the vehicle will not be driven for an extended period, park it in as cool a loca-tion as possible to help minimize hybridbattery aging. Park the vehicle indoors orin a shady location in the summer, which-ever is coolest.
Related information
•Jump starting (p. 365)
• Initiating hybrid battery charging (p. 382)
• Charging the hybrid battery (p. 383)
Page 415 of 546
INFOTAINMENT
}}
* Option/accessory, for more information, see Introduction.413
iTunes taggingFrom the center display's Top view, tapSiriusXM
Settings. Tap theiTunes Tagging menu. Tap
the iTunes Tagging box to activate/deactivate
this function and tap Close to return to Home
view. Tap List Of Tags to display a list of all tag-
ged songs. If the function is activated, the
iTunes tag button
will be displayed in Home view. If a song is played that you would like to buy in the iTunes store, tapthis button while the song is playing to tag it. If a song with
iTunes Tagging information is availa-
ble, the button will be selectable. Tap the button to tag the song. If you would like to buy a taggedsong via iTunes, Tap the iTunes tag button. To buy a song in iTunes, begin by connecting an iPhone/iPod/iPad to the USB socket in the tun-nel console. The iTunes tagging list will automati-cally be transferred to the device and removedfrom the list in the vehicle. If the device is con-nected when a song is tagged, the data will auto-matically be saved in the device. To purchase thesong, consult the iTunes support page.
Related information
• SiriusXM ®
Satellite radio * (p. 411)
• Using the center display keyboard (p. 35)
• SiriusXM ®
Satellite radio * settings (p. 413)
• Connecting a device via the AUX/USB socket (p. 420)
SiriusXM ®
Satellite radio * settings
There are numerous settings that can be made to enhance your SiriusXM ®
Satellite radio listen-
ing experience.
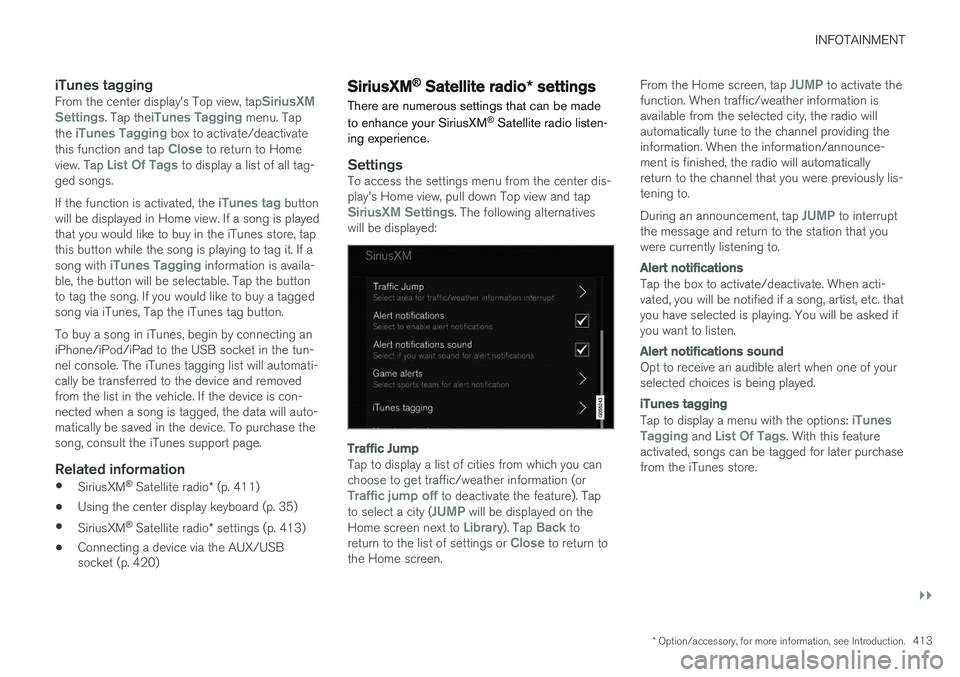
SettingsTo access the settings menu from the center dis- play's Home view, pull down Top view and tap
SiriusXM Settings. The following alternatives
will be displayed:
Traffic Jump
Tap to display a list of cities from which you can choose to get traffic/weather information (or
Traffic jump off to deactivate the feature). Tap
to select a city (JUMP will be displayed on the
Home screen next to Library). Tap Back to
return to the list of settings or Close to return to
the Home screen. From the Home screen, tap
JUMP to activate the
function. When traffic/weather information is available from the selected city, the radio willautomatically tune to the channel providing theinformation. When the information/announce-ment is finished, the radio will automaticallyreturn to the channel that you were previously lis-tening to. During an announcement, tap
JUMP to interrupt
the message and return to the station that you were currently listening to.
Alert notifications
Tap the box to activate/deactivate. When acti- vated, you will be notified if a song, artist, etc. thatyou have selected is playing. You will be asked ifyou want to listen.
Alert notifications sound
Opt to receive an audible alert when one of your selected choices is being played.
iTunes tagging
Tap to display a menu with the options: iTunes
Tagging and List Of Tags. With this feature
activated, songs can be tagged for later purchase from the iTunes store.
Page 422 of 546
INFOTAINMENT
420
Text message settings
The following settings can be made for text mes- sages received through a paired and connectedcell phone.
Text message settings
–Pull down the center display's Top view and tap
SettingsCommunicationText
Messages and choose among the following
settings:
•
Notification in center display: shows
text messages in the center display's sta- tus bar.
•
Notification in driver display: shows
text messages in the instrument panel. With this alternative active, incoming mes-sages can be handled from the right-sidesteering wheel keypad.
•
Text message tone: select an audible
signal for incoming text messages.
Related information
• Connecting/disconnecting a cell phone (p. 416)
• Pairing a cell phone (p. 415)
• Handling text messages (p. 418)
Connecting a Bluetooth ®
device
Bluetooth ®
-enabled devices can be paired and
connected to the infotainment system to stream media and in some cases connect to the Inter-net.
Many cell phones and other devices currently on the market offer wireless Bluetooth ®
technology.
Consult your Volvo retailer or go to support.volvocars.com for any questions regar-ding a device's compatibility with the vehicle'sinfotainment system. The procedure for pairing and connecting a Bluetooth ®
-enabled device is the same as for a
cell phone. See the articles "Pairing a cell phone" and "Connecting/disconnecting a cell phone" fordetails.
Related information
• Pairing a cell phone (p. 415)
• Connecting/disconnecting a cell phone (p. 416)
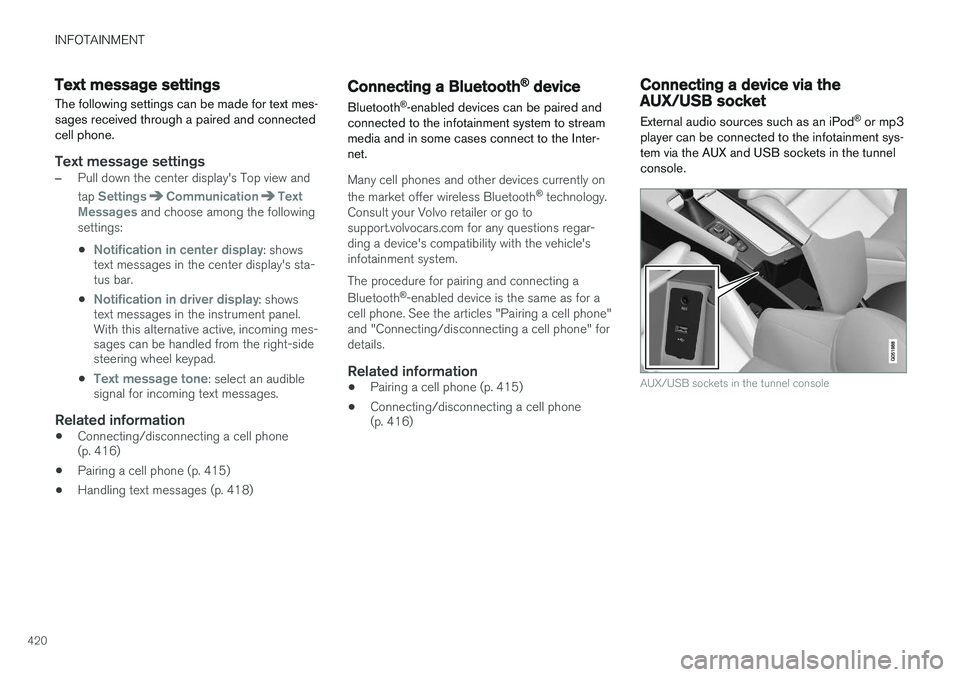
Connecting a device via the AUX/USB socket
External audio sources such as an iPod ®
or mp3
player can be connected to the infotainment sys- tem via the AUX and USB sockets in the tunnelconsole.
AUX/USB sockets in the tunnel console
Page 423 of 546
INFOTAINMENT
* Option/accessory, for more information, see Introduction.421
Media player
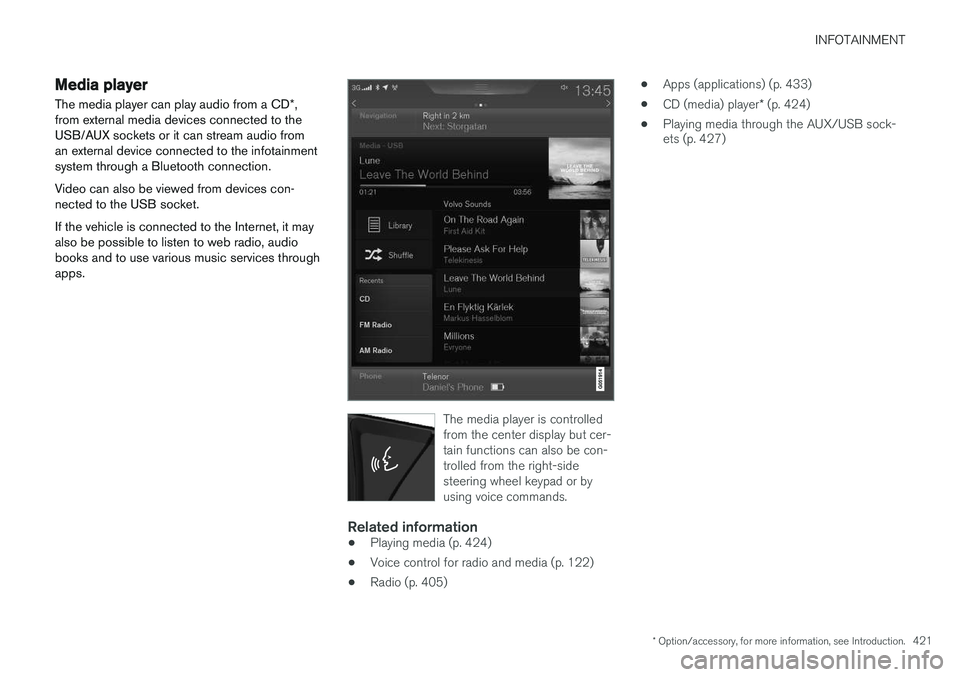
The media player can play audio from a CD *,
from external media devices connected to the USB/AUX sockets or it can stream audio froman external device connected to the infotainmentsystem through a Bluetooth connection. Video can also be viewed from devices con- nected to the USB socket. If the vehicle is connected to the Internet, it may also be possible to listen to web radio, audiobooks and to use various music services throughapps.
The media player is controlled from the center display but cer-tain functions can also be con-trolled from the right-sidesteering wheel keypad or byusing voice commands.
Related information
• Playing media (p. 424)
• Voice control for radio and media (p. 122)
• Radio (p. 405) •
Apps (applications) (p. 433)
• CD (media) player
* (p. 424)
• Playing media through the AUX/USB sock- ets (p. 427)