sensor VOLVO XC90 TWIN ENGINE 2018 Owner's Manual
[x] Cancel search | Manufacturer: VOLVO, Model Year: 2018, Model line: XC90 TWIN ENGINE, Model: VOLVO XC90 TWIN ENGINE 2018Pages: 686, PDF Size: 17 MB
Page 156 of 686

LIGHTING
154Parking lights
The parking lights can be used to help other
road users see the vehicle if it is stopped or
parked. Use the lighting ring on the steering
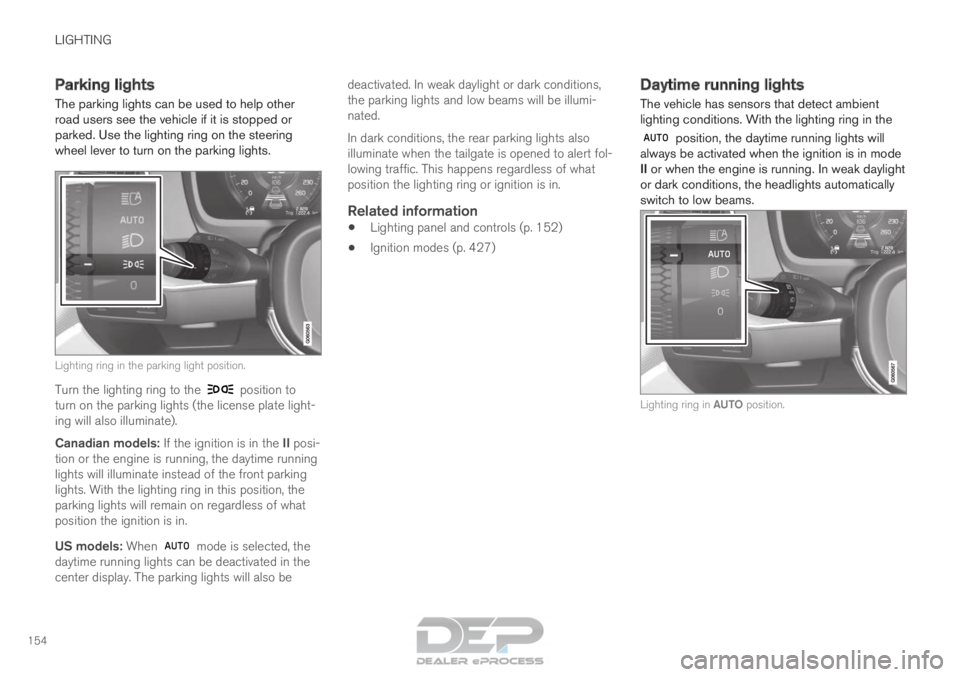
wheel lever to turn on the parking lights.
Lighting ring in the parking light position.
Turn the lighting ring to the position to
turn on the parking lights (the license plate light-
ing will also illuminate).
Canadian models: If the ignition is in the II posi-
tion or the engine is running, the daytime running
lights will illuminate instead of the front parking
lights. With the lighting ring in this position, the
parking lights will remain on regardless of what
position the ignition is in.
US models: When mode is selected, the
daytime running lights can be deactivated in the
center display. The parking lights will also be deactivated. In weak daylight or dark conditions,
the parking lights and low beams will be illumi-
nated.
In dark conditions, the rear parking lights also
illuminate when the tailgate is opened to alert fol-
lowing traffic. This happens regardless of what
position the lighting ring or ignition is in.
Related information
•
Lighting panel and controls (p. 152)
• Ignition modes (p. 427) Daytime running lights
The vehicle has sensors that detect ambient
lighting conditions. With the lighting ring in the position, the daytime running lights will
always be activated when the ignition is in mode
II or when the engine is running. In weak daylight
or dark conditions, the headlights automatically
switch to low beams. Lighting ring in AUTO position.
Page 159 of 686

LIGHTING
}}
* Option/accessory. 157
Active high beam
Active high beams is a function that uses cam-
era sensors in the upper edge of the windshield
to detect the headlights of approaching vehicles
or the taillights of the vehicle directly ahead.
When either of these is detected, the vehicle's
headlights will automatically switch from high
beams to low beams. Active high beam is enabled by moving the lighting ring
on the steering wheel lever to
.
The function can also detect street lighting.
When the camera sensor no longer detects an
approaching vehicle or a vehicle ahead, the head-
lights will return to high beams. This function can be used in dark conditions
when the vehicle's speed is approx. 20 km/h
(approx. 12 mph) or higher.
If active high beams are deactivated when the
high beams are on, the headlights will automati-
cally switch to low beams.
When active high beams are activated, a white symbol will be displayed in the instrument
panel.
When high beams are on, the symbol will be blue.
For LED headlights, this applies even if the high
beams are partially dimmed, i.e. if the headlights
are illuminated with slightly more than low beams.
Vehicles with LED 3
headlights*
If the active high beams are equipped with the
auto on/off function 4
, the headlights will return to
high beams a second or so after the camera sen-
sor no longer detects the headlights of approach-
ing vehicles or the taillights of a vehicle ahead.
Limitations for active high beams
The camera sensor on which the function is
based has limitations. If this symbol and the message Active
High Beam Temporarily unavailable is displayed in the instru-
ment panel, switching between high
and low beams must be done manually. The light-
ing ring on the steering wheel lever can remain in
the position. The symbol will go out
when the message is displayed. The same applies if this symbol along
with the message
Windscreen
sensor Sensor blocked, see Owner's manual is displayed. Active high beams may be temporarily unavailable
in certain situations, e.g. heavy fog or rain. When
active high beams become available again, or the
windshield sensors are no longer blocked, the
message will disappear and the
symbol will
be displayed.
WARNING Automatic high beam is an aid in using the
best possible light based on prevailing condi-
tions.
The driver is always responsible for manually
switching between high and low beam when
traffic situations or weather conditions require
this.
3
LED (Light Emitting Diode)4 Depends on the vehicle's equipment level.
Page 172 of 686

WINDOWS, GLASS AND MIRRORS
* Option/accessory.
170 •
Storing memory settings in power front
seats* (p. 186)
• Activating and deactivating the heated rear
window and door mirrors (p. 223) Adjusting the rearview mirror
dimming function
Bright light entering the vehicle from behind, e.g.
from the headlights of following vehicles, could
reflect in the rearview mirror and door mirrors
and cause a glare. Use the dimming function
when light from behind is distracting.
Auto-dimIf bright light enters the vehicle from behind, the
door mirrors will automatically dim. Auto-dim is
always active when the engine is running, except
when reverse gear is engaged.
NOTE When the level of sensitivity is changed, this
change will not be noticeable immediately but
will instead take effect after a short period of
time.
The sensitivity level for dimming will affect both
the rearview mirror and door mirrors.
1.
Tap Settings in the Top view in the center
display.
2.
Tap My Car Mirrors and Convenience
.
3. Under Rearview Mirror Auto Dimming ,
select
Normal, Dark or Light.
The rearview mirror instead has two sensors -
one pointing forward and one pointing rearward -
which work together to identify and eliminate glare. The forward-pointing sensor monitors
ambient light, while the rearward-pointing sensor
monitors light from the headlights of following
vehicles.
For the door mirrors to be equipped with auto-
dim, the rearview mirror must also be equipped
with auto-dim.
NOTE
If the sensors are obstructed by e.g. a parking
permit, transponder, sunshade or objects on
the seats or in the cargo compartment in a
way that prevents light from reaching the sen-
sors, the auto-dim function in the door and
rearview mirrors will be reduced.
Related information
•
Rearview/door mirrors (p. 169)
• Adjusting the door mirrors (p. 171)
Page 178 of 686

WINDOWS, GLASS AND MIRRORS
* Option/accessory.
176 •
Locking and unlocking using the remote key
(p. 241)
• Locking and unlocking from inside the vehi-
cle (p. 257) Using the windshield wipers
The windshield wipers clean the windshield. The
right-side steering wheel lever is used to adjust
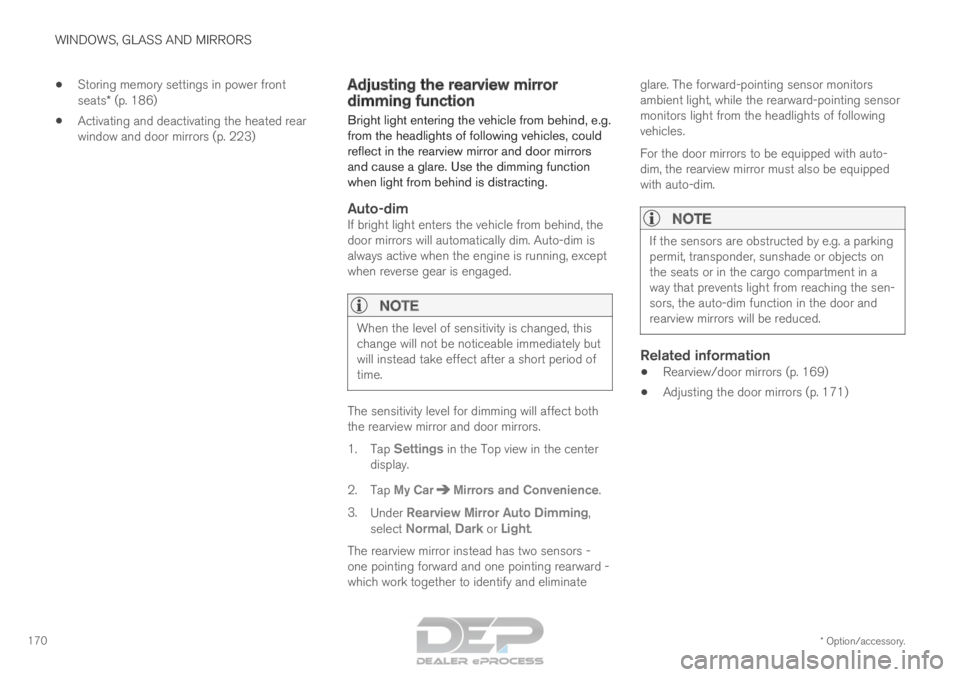
windshield wiper settings. Right-hand steering wheel lever.
Thumb wheel, used to set rain sensor sensi-
tivity and interval wiper speed.
Single sweepMove the lever down and release for a
single sweep.
Wipers offMove the lever to position 0 to turn off
the windshield wipers.
Interval wipersSet the number of sweeps per time unit
with the thumb wheel when interval wip-
ers are selected.
Continuous wipersMove the lever upward for the wipers to
operate at normal speed. Move the lever upward again for the wip-
ers to operate at high speed.
CAUTION
Before activating the wipers, make sure that
the wiper blades are not frozen in place and
that any snow or ice on the windshield and
rear window has been scraped away.
CAUTION
Use plenty of washer fluid when the wipers
clean the windshield. The windshield must be
wet when the windshield wipers are working.
Related information
•
Using the rain sensor (p. 177)
• Using the windshield and headlight washers
(p. 179)
• Using automatic rear window wiping when
backing up (p. 181)
• Heated windshield washer nozzles* (p. 177)
• Using the rain sensor's memory function
(p. 178)
• Using the rear window wiper/washer
(p. 180)
Page 179 of 686

WINDOWS, GLASS AND MIRRORS
}}
* Option/accessory. 177
•
Filling washer fluid (p. 650)
• Windshield wipers in the service position
(p. 649)
• Replacing windshield wiper blades (p. 648)
• Changing rear window wipers (p. 647) Heated windshield washer nozzles*
The washer nozzles are heated automatically in
cold weather to prevent the washer fluid from
freezing.
Related information
• Using the rain sensor (p. 177)
• Using the windshield and headlight washers
(p. 179)
• Using automatic rear window wiping when
backing up (p. 181)
• Using the rain sensor's memory function
(p. 178)
• Using the rear window wiper/washer
(p. 180)
• Filling washer fluid (p. 650)
• Windshield wipers in the service position
(p. 649)
• Replacing windshield wiper blades (p. 648)
• Changing rear window wipers (p. 647)
• Using the windshield wipers (p. 176) Using the rain sensor
The rain sensor monitors the amount of water on
the windshield and automatically starts the wind-
shield wipers. Rain sensor sensitivity can be
adjusted using the thumb wheel on the right-
hand steering wheel lever.
Right-hand steering wheel lever.
Rain sensor button
Thumb wheel, sensitivity/interval wiper speed
When the rain sensor is activated, the rain
sensor symbol will be displayed in the instrument
panel.
Activating the rain sensorWhen the rain sensor is activated, the engine
must be running or the ignition must be in mode I
or II. The windshield wiper lever must also be in
position 0 or in the single sweep position.
Page 180 of 686

||WINDOWS, GLASS AND MIRRORS
* Option/accessory.
178 Activate the rain sensor by pressing the rain sen-
sor button .
If the lever is pressed down, the wipers will make
additional sweeps across the windshield.
Turn the thumb wheel upward for increased sen-
sitivity and downward for decreased sensitivity.
The wipers will make one extra sweep when the
thumb wheel is turned upward.
Deactivate the rain sensor
Deactivate the rain sensor by pressing the rain sensor button or moving the lever upward to
another wiper mode.
The rain sensor is automatically deactivated in
ignition mode 0 or when the engine is switched
off.
The rain sensor is also automatically deactivated
when the wiper blades are put in the service
position. The rain sensor will reactivate when
service mode is switched off.
CAUTION The windshield wipers may start inadvertently
and be damaged in automatic car washes.
Deactivate the rain sensor when the engine is
running or when the ignition is in mode I or II.
The symbol in the instrument panel will go
out.
Related information
• Using the windshield and headlight washers
(p. 179)
• Using automatic rear window wiping when
backing up (p. 181)
• Heated windshield washer nozzles* (p. 177)
• Using the rain sensor's memory function
(p. 178)
• Using the rear window wiper/washer
(p. 180)
• Filling washer fluid (p. 650)
• Windshield wipers in the service position
(p. 649)
• Replacing windshield wiper blades (p. 648)
• Changing rear window wipers (p. 647)
• Using the windshield wipers (p. 176) Using the rain sensor's memory
function
The rain sensor monitors the amount of water on
the windshield and automatically starts the wind-
shield wipers.
Activating/deactivating memory
function
The rain sensor's memory function can be set to
activate so that the rain sensor button does not
need to be pressed each time the engine is
started:
1.
Tap Settings in the Top view in the center
display.
2.
Tap My Car Wipers
.
3. Select Rain Sensor Memory to activate/
deactivate the memory function.
Related information
• Using the rain sensor (p. 177)
• Using the windshield and headlight washers
(p. 179)
• Using automatic rear window wiping when
backing up (p. 181)
• Heated windshield washer nozzles* (p. 177)
• Using the rear window wiper/washer
(p. 180)
• Filling washer fluid (p. 650)
Page 181 of 686

WINDOWS, GLASS AND MIRRORS
}}
* Option/accessory. 179
•
Windshield wipers in the service position
(p. 649)
• Replacing windshield wiper blades (p. 648)
• Changing rear window wipers (p. 647)
• Using the windshield wipers (p. 176) Using the windshield and headlight
washers
The windshield and headlight washers clean the
windshield and headlights. Use the right-side
steering wheel lever to start the windshield and
headlight washers.
Starting the windshield and headlight
washers Washing function, right-hand steering wheel lever.
–
Move the right-hand steering wheel lever
toward the steering wheel to start the wind-
shield and headlight washers.
>
After the lever is released, the wipers
make several extra sweeps.
CAUTION Avoid activating the washer system when it is
frozen or the fluid reservoir is empty. Other-
wise, there is a risk of damaging the pump.
Headlight washer*To save washer fluid, the headlights are washed
automatically according to a defined interval
when the headlights are on.
Reduced washingWhen there is about 1 liter (1 qt) of washer fluid
left in the reservoir and the
Washer fluid Level
low, refill message is displayed in the instrument
panel together with the symbol, the washer
fluid supply to the headlights is cut off. This is to
prioritize windshield cleaning and visibility
through it. The headlights are only washed if high
or low beam is on.
Related information
• Using the rain sensor (p. 177)
• Using automatic rear window wiping when
backing up (p. 181)
• Heated windshield washer nozzles* (p. 177)
• Using the rain sensor's memory function
(p. 178)
• Using the rear window wiper/washer
(p. 180)
• Filling washer fluid (p. 650)
Page 182 of 686

WINDOWS, GLASS AND MIRRORS
* Option/accessory.
180 •
Windshield wipers in the service position
(p. 649)
• Replacing windshield wiper blades (p. 648)
• Changing rear window wipers (p. 647)
• Using the windshield wipers (p. 176) Using the rear window wiper/
washer
The rear window wiper/washer cleans the rear
window. Use the right-side steering wheel lever
to start and control the wiper/washer.
Activating the rear window wiper/
washer
NOTE The rear window wiper is equipped with over-
heating protection that switches off the motor
wiper if it becomes overheated. The rear win-
dow wiper can be operated again after a cool-
ing-down period.
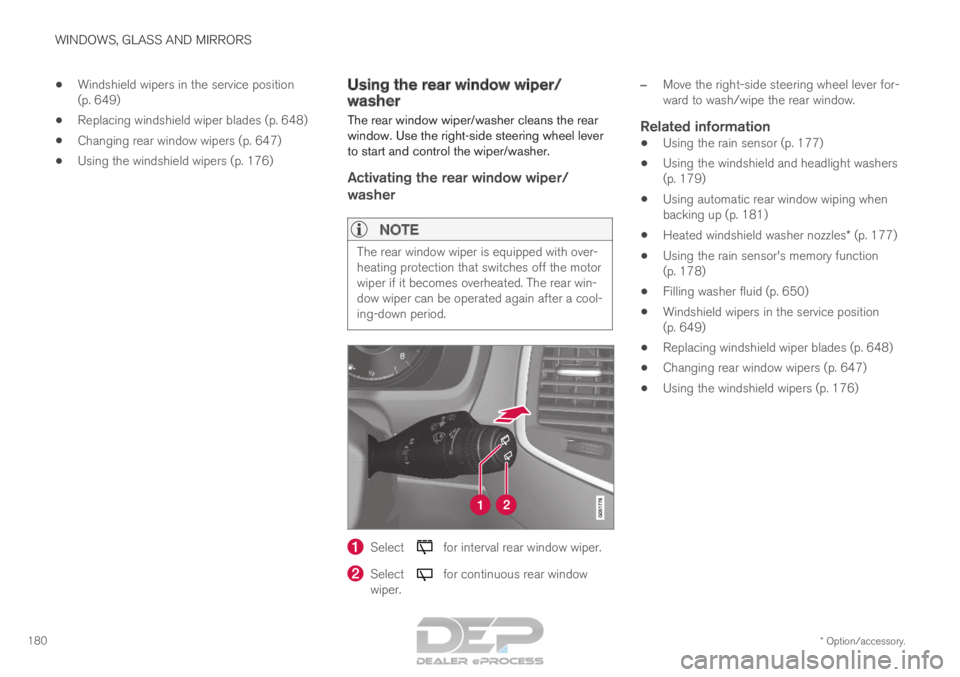
Select for interval rear window wiper.
Select for continuous rear window
wiper. –
Move the right-side steering wheel lever for-
ward to wash/wipe the rear window.
Related information
• Using the rain sensor (p. 177)
• Using the windshield and headlight washers
(p. 179)
• Using automatic rear window wiping when
backing up (p. 181)
• Heated windshield washer nozzles* (p. 177)
• Using the rain sensor's memory function
(p. 178)
• Filling washer fluid (p. 650)
• Windshield wipers in the service position
(p. 649)
• Replacing windshield wiper blades (p. 648)
• Changing rear window wipers (p. 647)
• Using the windshield wipers (p. 176)
Page 183 of 686

WINDOWS, GLASS AND MIRRORS
* Option/accessory.181
Using automatic rear window wiping
when backing up
If reverse gear is engaged while the windshield
wipers are on, the rear window wipers will start.
This function is deactivated when a different
gear is selected.
1. Tap Settings in the Top view in the center
display.
2.
Tap My Car Wipers
.
3. Select Auto Rear Wiper to activate/deacti-
vate automatic rear window wiping when
backing up.
If the rear window wipers are already in continu-
ous wiper mode, no change will be made.
Related information
• Using the rain sensor (p. 177)
• Using the windshield and headlight washers
(p. 179)
• Heated windshield washer nozzles* (p. 177)
• Using the rain sensor's memory function
(p. 178)
• Using the rear window wiper/washer
(p. 180)
• Filling washer fluid (p. 650)
• Windshield wipers in the service position
(p. 649)
• Replacing windshield wiper blades (p. 648) •
Changing rear window wipers (p. 647)
• Using the windshield wipers (p. 176)
Page 204 of 686

CLIMATE CONTROL
* Option/accessory.
202 Climate
The vehicle is equipped with electronic climate
control. The climate system cools, heats and
dehumidifies the air in the passenger compart-
ment. All of the climate system functions are controlled
from the center display and the buttons on the
center console.
Certain rear seat functions can also be controlled
from the climate controls* on the rear of the tun-
nel console.
Related information
• Climate zones (p. 202)
• Climate control sensors (p. 202)
• Perceived temperature (p. 203)
• Climate control system voice commands
(p. 203)
• Parking climate (p. 230)
• Air quality (p. 204)
• Air distribution (p. 207)
• Climate system controls (p. 213) Climate zones
The vehicle is divided into climate zones to make
it possible to set different temperatures for dif-
ferent parts of the passenger compartment.
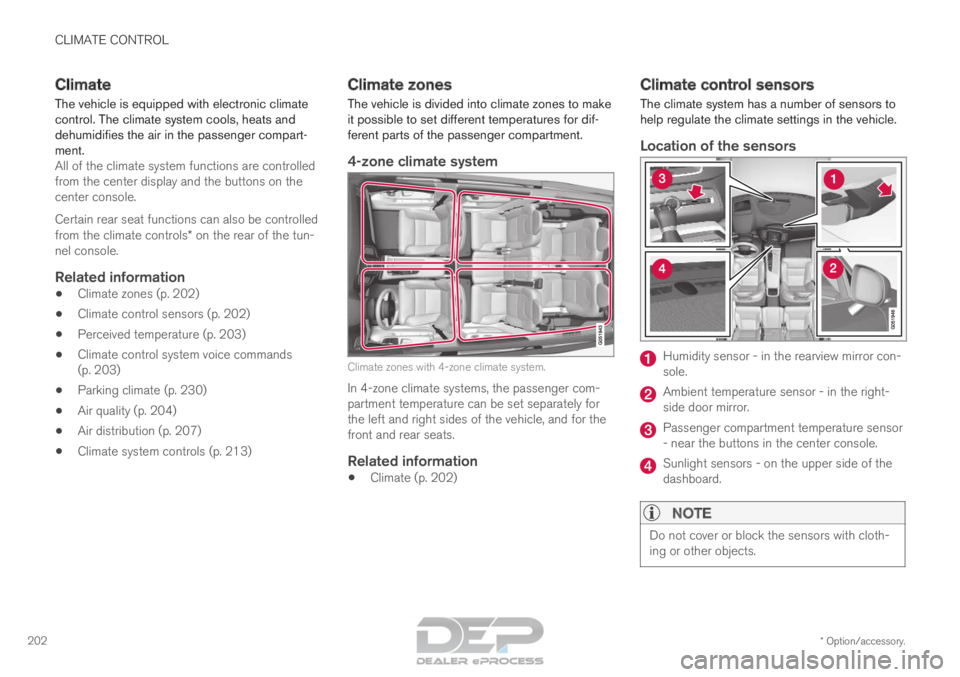
4-zone climate system Climate zones with 4-zone climate system.
In 4-zone climate systems, the passenger com-
partment temperature can be set separately for
the left and right sides of the vehicle, and for the
front and rear seats.
Related information
• Climate (p. 202) Climate control sensors
The climate system has a number of sensors to
help regulate the climate settings in the vehicle.
Location of the sensors Humidity sensor - in the rearview mirror con-
sole.
Ambient temperature sensor - in the right-
side door mirror.
Passenger compartment temperature sensor
- near the buttons in the center console.
Sunlight sensors - on the upper side of the
dashboard.
NOTE
Do not cover or block the sensors with cloth-
ing or other objects.