check engine light VOLVO XC90 TWIN ENGINE 2018 Owners Manual
[x] Cancel search | Manufacturer: VOLVO, Model Year: 2018, Model line: XC90 TWIN ENGINE, Model: VOLVO XC90 TWIN ENGINE 2018Pages: 686, PDF Size: 17 MB
Page 12 of 686
10
STARTING AND DRIVING
Starting the vehicle424
Switching off the vehicle426
Ignition modes427
Selecting ignition mode428
Brake functions429
Brakes429
Brake Assist System431
Braking on wet roads431
Braking on salted roads431
Maintenance of the brake system432
Parking brake432
Activating and deactivating the park-ing brake433
Settings for automatically activatingthe parking brake434
Parking on a hill434
Parking brake malfunction435
Auto-hold brakes436
Activating and deactivating Auto-hold at a standstill436
Hill Start Assist437
Braking assist after a collision437
Transmission438
Gear selector positions for automatictransmissions439
Using the steering wheel paddles* toshift441
Shiftlock442
The kickdown function442
Gear indicator*442
All Wheel Drive (AWD)443
Drive systems443
Starting and stopping the combus-tion engine in Twin Engine vehicles444
Drive modes445
Changing drive mode449
Leveling control* and suspension450
Leveling control settings*453
Low Speed Control453
Activating and deactivating LowSpeed Control using the function button454
Hill Descent Control454
Activating and deactivating HillDescent Control using the functionbutton
455
Economical driving456
Using the electric motor only457
Factors affecting electric motor range458
"Hold" and "Charge" functions459
Preparing for a long trip460
Winter driving461
Driving through standing water462
Opening/closing the fuel filler door462
Refueling463
Fuel464
Octane rating465
Emission controls467
Overheating of engine and transmission468
Battery drain469
Jump starting using another battery469
Detachable towbar*471
Driving with a trailer472
Trailer Stability Assist*474
Checking trailer lights475
Towing using a towline476
Attaching and removing the towing eyelet476
Recovery477
HomeLink®*478
Programming HomeLink®*479
Using HomeLink480
Type approval for HomeLink®*481
Compass481
Activating and deactivating the compass482
Calibrating the compass482
Page 30 of 686
||
YOUR VOLVO
* Option/accessory.28
goal. In addition to continuous environmentalrefinement of conventional gasoline-poweredinternal combustion engines, Volvo is activelylooking at advanced technology alternative-fuelvehicles.
When you drive a Volvo, you become our partnerin the work to lessen the vehicle's impact on theenvironment. To reduce your vehicle's environ-mental impact, you can:
•Maintain proper air pressure in your tires.Tests have shown decreased fuel economywith improperly inflated tires.
•Follow the recommended maintenanceschedule in your Warranty and ServiceRecords Information booklet.
•Drive at a constant speed whenever possible.
•See a trained and qualified Volvo servicetechnician as soon as possible for inspectionif the check engine (malfunction indicator)light illuminates, or stays on after the vehiclehas started.
•Properly dispose of any vehicle-related wastesuch as used motor oil, used batteries, brakepads, etc.
•When cleaning your vehicle, please use gen-uine Volvo car care products. All Volvo carcare products are formulated to be environ-mentally friendly.
Twin Engine vehicles
•If possible, precondition the vehicle with thecharging cable before driving.
•If preconditioning is not possible in coldweather, use the seat and steering wheelheating primarily. Avoid heating the entirepassenger compartment, which reduces thehybrid battery's charge level.
•Choose the Pure drive mode to help mini-mize electric power consumption.
•In hilly terrain, put the gear selector in modeB to utilize the electric motor's braking func-tion when the accelerator pedal is released.This helps charge the hybrid battery.
Related information
•Economical driving (p. 456)
•Starting and stopping preconditioning(p. 231)
•The Owner's Manual and the environment(p. 23)
•Air quality (p. 204)
IntelliSafe - driver support
IntelliSafe is Volvo Cars' philosophy regardingvehicle safety. IntelliSafe consists of a number ofsystems, both standard and optional, that aredesigned to help make driving safer, preventaccidents and protect passengers and otherroad users.
Support
IntelliSafe includes driver support functions suchas Adaptive cruise control* which helps the driverto maintain an even speed combined with a pre-selected time interval to the vehicle ahead.
Pilot Assist4 helps the driver keep the vehicle inthe current traffic lane by providing steeringassistance and maintaining an even speed and aset time interval to the vehicle ahead.
Park Assist Pilot* helps the driver pull into andout of parking spaces.
Other examples of systems that can help thedriver are the Active main beam, Cross TrafficAlert (CTA)* and Blind Spot Information (BLIS)*systems.
Prevention
City Safety is a function intended to help preventaccidents. The function can help prevent or miti-gate a collision with pedestrians, cyclists, largeanimals or other vehicles. Light, sound and pulsa-tions in the brake pedal are provided to alert of a
4Depending on market, this function can be either standard or optional.
Page 97 of 686
DISPLAYS AND VOICE CONTROL
}}95 Symbol
Meaning A
B
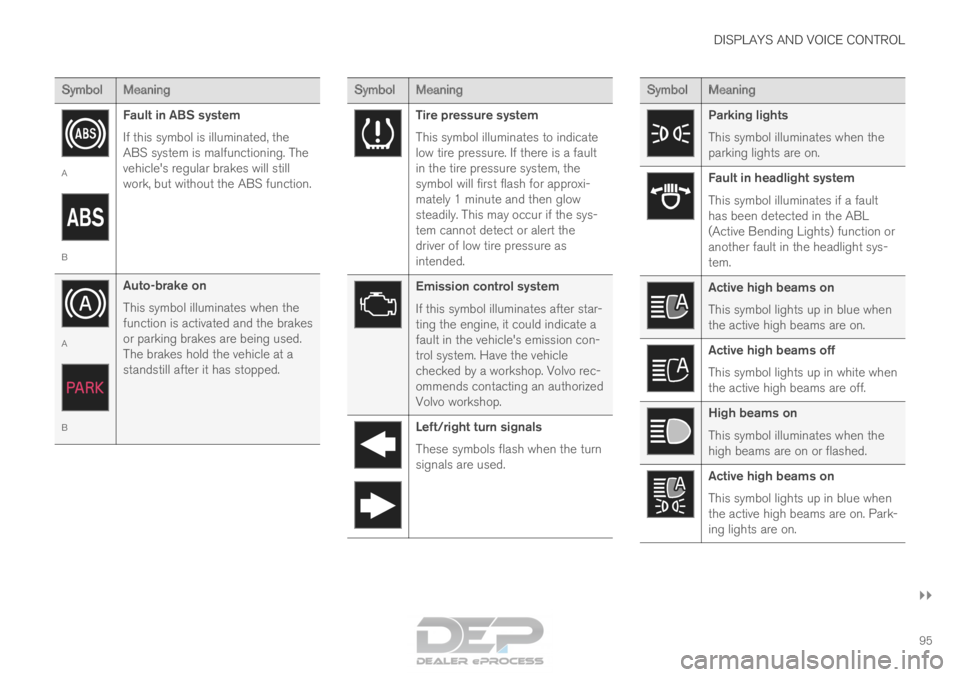
Fault in ABS system
If this symbol is illuminated, the
ABS system is malfunctioning. The
vehicle's regular brakes will still
work, but without the ABS function. A
B
Auto-brake on
This symbol illuminates when the
function is activated and the brakes
or parking brakes are being used.
The brakes hold the vehicle at a
standstill after it has stopped. Symbol
Meaning Tire pressure system
This symbol illuminates to indicate
low tire pressure. If there is a fault
in the tire pressure system, the
symbol will first flash for approxi-
mately 1 minute and then glow
steadily. This may occur if the sys-
tem cannot detect or alert the
driver of low tire pressure as
intended.
Emission control system
If this symbol illuminates after star-
ting the engine, it could indicate a
fault in the vehicle's emission con-
trol system. Have the vehicle
checked by a workshop. Volvo rec-
ommends contacting an authorized
Volvo workshop.
Left/right turn signals
These symbols flash when the turn
signals are used. Symbol
Meaning Parking lights
This symbol illuminates when the
parking lights are on.
Fault in headlight system
This symbol illuminates if a fault
has been detected in the ABL
(Active Bending Lights) function or
another fault in the headlight sys-
tem.
Active high beams on
This symbol lights up in blue when
the active high beams are on.
Active high beams off
This symbol lights up in white when
the active high beams are off.
High beams on
This symbol illuminates when the
high beams are on or flashed.
Active high beams on
This symbol lights up in blue when
the active high beams are on. Park-
ing lights are on.
Page 279 of 686

DRIVER SUPPORT
277
Electronic Stability Control symbols
and messages
A number of symbols and messages related to
Electronic Stability Control (ESC) may be dis-
played in the instrument panel. Some examples of symbols and messages are
shown in the table below.Symbol
Message MeaningSteady glow for
approx. 2 seconds.
System check when the engine is started.Flashing light.
The ESC is actively operating.Steady glow.
Sport mode is activated.
Note: The ESC system is not deactivated in this mode, but has partially reduc\
ed functionality. ESC
Temporarily off
The ESC system's functionality has been temporarily reduced due to hi\
gh brake system temperatures. The
function will be automatically reactivated when the brakes have cooled.
See the message in the instrument panel.ESC
Service required
The ESC system is not functioning properly.
• Stop the vehicle in a safe place, turn off the engine and then restart i\
t.
• Consult a workshop if the message persists ‒ an authorized Volvo workshop is recommended. A text message can be erased by briefly pressing
the
button in the center of the right-side
steering wheel keypad. If the message persists: Contact a workshop ‒ an
authorized Volvo workshop is recommended.
Related information
• Electronic Stability Control (p. 274)
Page 432 of 686

||STARTING AND DRIVING
430
augment braking. This is indicated in the instru-
ment panel with the pointer down in the red area.
Symbols in the instrument panel
Symbol
Meaning A
B
Check the brake fluid level. If the
level is low, fill brake fluid and
check to determine the reason for
the loss of brake fluid. A
B
Fault in pedal sensor. Symbol
Meaning A
B
Steady glow for 2 seconds after
the engine is started: Automatic
function check.
Steady glow for more than 2 sec-
onds: Fault in the ABS system. The
vehicle's regular brake system is
still working, but without the ABS
function. If the message Brake pedal Cha-
racteristics changed Service
required is displayed, the "Brake-
by-wire" system is not functioning
properly. The brake pedal will go
down further than normal and
greater pressure will be needed on
the pedal to achieve braking effect. A
Canadian models.
B US models.
WARNING •
If both symbols illuminate at the same
time and the brake level is below the MIN
mark in the reservoir or if a brake system-
related message is shown in the instru-
ment panel: DO NOT DRIVE. Have the
vehicle towed to a trained and qualified
Volvo service technician and have the
brake system inspected.
• If both symbols illuminate at the same
time and the brake level is normal (not
below the MIN mark in the reservoir) or if
a brake system-related message is
shown in the instrument panel: drive the
vehicle carefully to an authorized Volvo
workshop and have the brake system
inspected by a trained and qualified Volvo
service technician.
Related information
• Brake Assist System (p. 431)
• Auto-hold brakes (p. 436)
• Hill Start Assist (p. 437)
• Braking on wet roads (p. 431)
• Braking on salted roads (p. 431)
• Maintenance of the brake system (p. 432)
• Brake lights (p. 160)
Page 462 of 686
||STARTING AND DRIVING
460
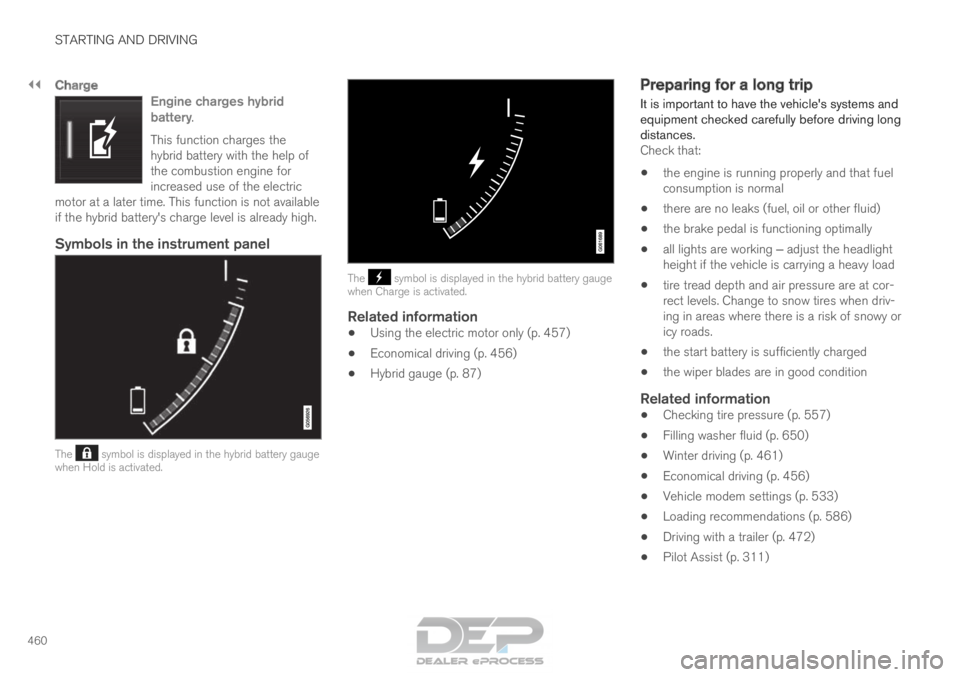
Charge
Engine charges hybrid
battery.
This function charges the
hybrid battery with the help of
the combustion engine for
increased use of the electric
motor at a later time. This function is not available
if the hybrid battery's charge level is already high.
Symbols in the instrument panel The symbol is displayed in the hybrid battery gauge
when Hold is activated. The symbol is displayed in the hybrid battery gauge
when Charge is activated.
Related information
• Using the electric motor only (p. 457)
• Economical driving (p. 456)
• Hybrid gauge (p. 87) Preparing for a long trip
It is important to have the vehicle's systems and
equipment checked carefully before driving long
distances.
Check that:
• the engine is running properly and that fuel
consumption is normal
• there are no leaks (fuel, oil or other fluid)
• the brake pedal is functioning optimally
• all lights are working ‒ adjust the headlight
height if the vehicle is carrying a heavy load
• tire tread depth and air pressure are at cor-
rect levels. Change to snow tires when driv-
ing in areas where there is a risk of snowy or
icy roads.
• the start battery is sufficiently charged
• the wiper blades are in good condition
Related information
• Checking tire pressure (p. 557)
• Filling washer fluid (p. 650)
• Winter driving (p. 461)
• Economical driving (p. 456)
• Vehicle modem settings (p. 533)
• Loading recommendations (p. 586)
• Driving with a trailer (p. 472)
• Pilot Assist (p. 311)
Page 464 of 686
STARTING AND DRIVING
462Driving through standing water
Driving the vehicle through a deep pool of stand-
ing water on a water-covered roadway is called
fording. This must be done with great caution. To prevent damage to the vehicle when driving
through water (e.g. on flooded roads):
• Do not drive in water higher than the floor of
the vehicle. If possible, check the depth of
the water at its deepest point before driving
through it. Be particularly careful when driv-
ing through flowing water.
• Always select the Off Road drive mode
before driving in water to ensure the gasoline
engine is running.
• Do not drive faster than walking speed.
• Do not stop the vehicle in the water. Drive
carefully forward or back the vehicle out of
the water.
• Remember that waves created by passing
vehicles could cause the water level to rise
above the vehicle's floor level.
• Avoid driving through salt water to help avoid
the risk of corrosion.
CAUTION Parts of the vehicle (e.g. engine, transmission,
driveline, electrical components, etc.) can be
damaged if the vehicle is driven through water
higher than its floor level. Damage to any
components caused by flooding, vapor lock or
insufficient oil is not covered under warranty.
If the engine stalls while the vehicle is in
water, do not attempt to restart it. Have the
vehicle towed on the bed of a tow truck to a
workshop - an authorized Volvo workshop is
recommended.
When you have passed the water, press lightly on
the brake pedal and check that the brakes are
functioning properly. Water, mud, slush, etc. can
make the brake linings slippery, resulting in
delayed braking effect.
If the vehicle is equipped with a trailer coupling
contact, clean the contact after driving in water or
mud.
Related information
•
Recovery (p. 477)
• Low Speed Control (p. 453) Opening/closing the fuel filler door
A button on the instrument panel is used to
unlock the fuel filler door.
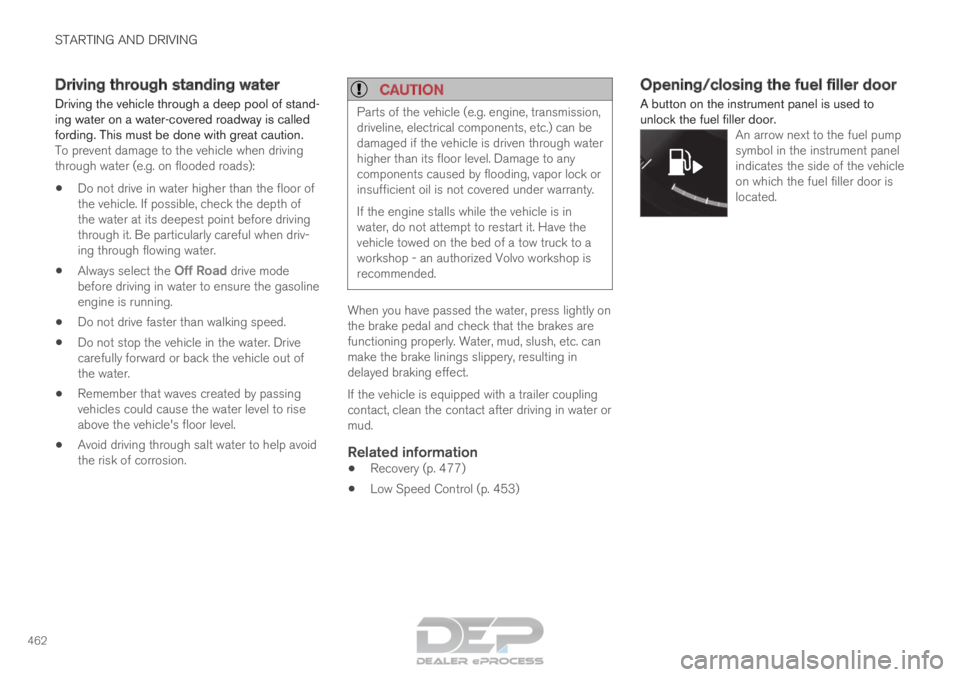
An arrow next to the fuel pump
symbol in the instrument panel
indicates the side of the vehicle
on which the fuel filler door is
located.
Page 467 of 686

STARTING AND DRIVING
}}
465
the emission control system and could result in
loss of emission warranty coverage. State and
local vehicle inspection programs will make
detection of misfueling easier, possibly resulting
in emission test failure for misfueled vehicles.
NOTE
Some U.S. and Canadian gasolines contain an
octane enhancing additive called methyl-
cyclopentadienyl manganese tricarbonyl
(MMT). If such fuels are used, your Emission
Control System performance may be affected,
and the Check Engine Light (malfunction
indicator light) located on your instrument
panel may light. If this occurs, please return
your vehicle to a trained and qualified Volvo
service technician for service.
Gasoline containing alcohol and ethers,
"Oxygenated fuels"
Some fuel suppliers sell gasoline containing
"oxygenates" which are usually alcohols or
ethers. In some areas, state or local laws require
that the service pump be marked indicating use
of alcohols or ethers. However, there are areas in
which the pumps are unmarked. If you are not
sure whether there is alcohol or ethers in the
gasoline you buy, check with the service station
operator. To meet seasonal air quality standards,
some areas require the use of "oxygenated" fuel.
Volvo permits the use of the following "oxygen-
ated" fuels. However, the specified octane ratings
must still be met.
Alcohol - Ethanol
Fuels containing up to 10% ethanol by volume
may be used. Ethanol may also be referred to as
Ethyl alcohol, or "Gasohol".
Ethers - MTBE/ETBE: Fuels containing up to
15% MTBE/ETBE may be used.
MethanolDo not use gasolines containing methanol
(methyl alcohol, wood alcohol). This practice can
result in vehicle performance deterioration and
can damage critical parts in the fuel system. Such
damage may not be covered under the New
Vehicle Limited Warranty.
Related information
•
Octane rating (p. 465)
• Opening/closing the fuel filler door (p. 462)
• Refueling (p. 463)
• Emission controls (p. 467) Octane rating
Volvo demands premium fuel (91 octane
6
or
higher) for all T5, T6 and T8 engines. See both
supplied decal examples. 6
AKI (Anti Knock Index) is an average value of RON (Research Octane Nu\
mber) and MON (Motor Octane Number) - (RON)+(MON)/2
Page 475 of 686

STARTING AND DRIVING
* Option/accessory.473
CAUTION•
Bumper-attached trailer hitches must not
be used on Volvos, nor should safety
chains be attached to the bumper.
• Trailer hitches attaching to the vehicle
rear axle must not be used.
• Never connect a trailer's hydraulic brake
system directly to the vehicle brake sys-
tem, nor a trailer's lighting system directly
to the vehicle lighting system. Consult
your nearest authorized Volvo retailer for
correct installation.
• When towing a trailer, the trailer's safety
chains or wire must be correctly fastened
to the attachment points provided in the
trailer hitch on the vehicle. The safety
chain or wire must never be fastened to
or wound around the towing ball.
NOTE The optional detachable trailer hitch may not
be available in all markets or on all models.
Consult your Volvo retailer.
NOTE
Extreme weather conditions, towing a trailer,
driving at high altitudes and fuel quality are
factors that significantly increase a vehicle's
fuel consumption.
Trailer weights
WARNING Please adhere to the recommendations provi-
ded for trailer weight. If the recommendations
are not followed, the vehicle and trailer may
be difficult to control during evasive maneu-
vers and braking.
NOTE
The specified maximum trailer weights are
those permitted by Volvo. National vehicle
regulations may set additional restrictions on
trailer weight and speed. The trailer hitches
may be certified for higher towing weights
than the vehicle is permitted to tow.
Self-leveling suspension*The vehicle's self-leveling system attempts to
keep the vehicle at a constant level, regardless of
load (up to the maximum permitted weight).
When the vehicle is stationary, the rear end of the
vehicle will be slightly lowered, which is normal.
Driving in hilly terrain or hot weatherIn certain conditions, there is a risk of overheat-
ing when driving with a trailer. If overheating of
the engine and drive system is detected, a warn-
ing symbol will illuminate in the instrument panel
along with a message.The automatic transmission selects the optimal
gear for the current load and engine speed.
Steep inclines
Do not lock the automatic transmission into a
higher gear than what the engine can handle ‒ it
is not always preferable to drive in high gears at
low rpm.
Parking on a hill
1. Depress the brake pedal.
2. Apply the parking brake.
3. Put the gear selector in P.
4. Release the brake pedal.
Put chocks behind the wheels when the vehicle
is parked on a hill with a trailer attached.
Starting on a hill
1. Depress the brake pedal.
2. Put the gear selector in D.
3. Release the parking brake.
4. Release the brake pedal and start driving.
Related information
• Trailer Stability Assist* (p. 474)
• Checking trailer lights (p. 475)
• Towing capacity and tongue weight (p. 660)
• Overheating of engine and transmission
(p. 468)
Page 477 of 686

STARTING AND DRIVING
* Option/accessory.475
Checking trailer lights
When connecting a trailer, make sure that all of
the lights on the trailer are functioning before
starting to drive.
Trailer turn signals and brake lightsIf one or more of the turn signals or brake lights
on the trailer is not working, a symbol and mes-
sage will be displayed in the instrument panel.
The other lights on the trailer must be checked
manually by the driver before the vehicle is driven. Symbol
Message •
Trailer turn indicator Right
turn indicator malfunction
• Trailer turn indicator Left
turn indicator malfunction •
Trailer brake light Malfunc-
tion If any of the trailer's turn signal lights is not work-
ing, the turn signal symbol in the instrument
panel will also flash more quickly than normal.
Trailer rear fog lightWhen a trailer is connected, the vehicle's rear fog
light may not illuminate and rear fog light func-
tionality is instead transferred to the trailer. If this
is the case, check to see if the trailer is equipped
with a rear fog light before activating the vehicle's fog lights when driving with a trailer to help
ensure safe operation.
Checking trailer lights*
Automatic check
When the trailer has been connected to the vehi-
cle's electrical system, its lights can be checked
by automatically activating them. This function
helps the driver check that the trailer's lights are
functioning correctly before starting to drive.
In order to perform this check, the engine must
be turned off.
1. When a trailer is connected to the towbar, the message Automatic Trailer Lamp
Check will appear in the instrument panel.
2.
Acknowledge the message by pressing the
O button on the right-side steering wheel
keypad.
> The light check will begin.
3. Get out of the vehicle to perform the check. > All of the lights on the trailer will beginflashing, and then illuminate separately
one at a time.
4. Visually check that all of the trailer's lights are functioning correctly.
5. After a short time, all of the trailer's lights will start flashing again.
> The light check is completed.
Disabling the automatic check
The automatic light check can be disabled in the
center display.
1.Tap Settings in the Top view.
2.
Tap My Car Lights and Lighting
.
3. Deselect Automatic Trailer Lamp Check.
Manual check
If the automatic check has been disabled, the
check can be started manually.
1.
Tap Settings in the Top view.
2.
Tap My Car Lights and Lighting
.
3. Select Manual Trailer Lamp Check.
>
The light check will begin. Get out of the
vehicle to perform the check.
Related information
• Driving with a trailer (p. 472)