window VOLVO XC90 TWIN ENGINE 2020 Owners Manual
[x] Cancel search | Manufacturer: VOLVO, Model Year: 2020, Model line: XC90 TWIN ENGINE, Model: VOLVO XC90 TWIN ENGINE 2020Pages: 693, PDF Size: 13.34 MB
Page 7 of 693
5
WINDOWS, GLASS AND MIRRORS
Windows, glass and mirrors170
Pinch protection for windows and sun curtains 170
Reset procedure for pinch protection 171
Power windows 171
Operating the power windows 172
Using sun curtains *
173
Rearview/door mirrors 174
Adjusting the rearview mirror dim-ming function 174
Adjusting the door mirrors 175
Panoramic roof *
176
Operating the panoramic roof *
178
Auto closing the panoramic roof *
sun curtain 180
Wiper blades and washer fluid 181
Using the windshield wipers 181
Using the rain sensor 182
Using the rain sensor's memoryfunction 183
Using the windshield and head-light washers 184
Using the rear window wiper/washer 185
Using automatic rear windowwiping when backing up 186
SEATS AND STEERING WHEEL
Manual front seats
188
Power * front seats
189
Adjusting the power * front seats
189
Storing positions for seats, mir- rors and head-up display *190
Using stored positions for seats,mirrors and head-up display *191
Front seat massage * settings
192
Adjusting front seat massage set-tings * 193
Adjusting * front seat cushion length
194
Adjusting front seat side bolstersettings * 195
Adjusting front seat lumbar support *
195
Adjusting the passenger seat fromthe driver's seat * 197
Folding the second row backrests 198
Adjusting the second row head restraints 200
Moving the second row seats for- ward/rearward * 201
Adjusting the second row backrest tilt 202
Getting into and out of the thirdrow of seats * 203
Folding the third row backrests *
204
Steering wheel controls and horn 205
Adjusting the steering wheel 206
CLIMATE CONTROL
Climate208
Climate zones 208
Climate control sensors 208
Perceived temperature 209
Climate control system voice commands 209
Air quality 210
Clean Zone *
211
Clean Zone Interior Package *
212
Interior Air Quality System *
212
Activating and deactivating the air quality sensor * 213
Passenger compartment air filter 213
Air distribution 213
Adjusting air distribution 214
Opening, closing and directing air vents 215
Air distribution options 216
Climate system controls 219
Activating and deactivating power front seats * 221
Activating and deactivating theheated front seat * 221
Activating and deactivating theheated rear seats * 222
Activating and deactivating frontseat ventilation * 222
Page 8 of 693
6
Activating and deactivating the heated steering wheel*223
Activating and deactivating auto-matic steering wheel heating *223
Activating auto climate control 224
Activating and deactivating recir- culation 224
Activating and deactivating therecirculation timer setting 225
Activating and deactivating maxdefroster 225
Activating and deactivating theheated rear window and door mirrors 226
Automatically activating and deac-tivating the heated rear windowand door mirrors 227
Setting the blower speed for thefront seats 227
Setting the blower speed for therear seats 228
Setting the temperature for thefront seats 229
Setting the temperature for therear seats 230
Synchronize temperature 231
Activating and deactivating airconditioning 232
Activating and deactivating cli- mate control for the third-row seats *233
Parking climate
233
Preconditioning 233
Starting and stopping preconditioning 234
Preconditioning timer 235
Adding and editing timer settings for preconditioning 235
Activating and deactivating pre-conditioning timer 236
Deleting preconditioning timersettings 237
Climate comfort retaining function 238
Starting and switching off the cli-mate retaining function when parking 238
Parking climate symbols and mes-sages 239
Heater 240
Parking heater 240
Additional heater 240
Activating and deactivating theauxiliary heater 241
KEY, LOCKS AND ALARM
Lock indication
244
Lock confirmation settings 245
Remote key 246
Locking and unlocking using the remote key 248
Settings for remote and insidedoor unlock 249
Unlocking the tailgate using theremote key 250
Remote key range 250
Replacing the remote key's battery 251
Ordering additional remote keys 254
Red Key - restricted remote key *
255
Settings for Red Key *
256
Detachable key blade 257
Locking and unlocking withdetachable key blade 258
Electronic immobilizer 259
Start and lock system type desig-nations 260
Keyless and touch-sensitive surfaces *
261
Keyless locking and unlocking *
262
Keyless unlock settings *
263
Keyless tailgate unlock *
264
Antenna locations for the startand lock system 264
Page 16 of 693
14
Fuses in the engine compartment621
Fuses under the glove compartment 628
Fuses in the cargo compartment 634
Cleaning the interior 639
Cleaning the center display 639
Cleaning the head-up display *
640
Cleaning fabric upholstery and ceiling liner 641
Cleaning the seat belt 641
Cleaning floor mats and inlay mats 641
Cleaning leather upholstery *
642
Cleaning the leather steering wheel 643
Cleaning interior plastic, metal andwood surfaces 643
Cleaning the exterior 644
Polishing and waxing 644
Hand washing 645
Automatic car washes 647
High-pressure washing 648
Cleaning the wiper blades 648
Cleaning exterior plastic, rubberand trim components 649
Cleaning rims 650
Corrosion protection 650
Paintwork 651
Touching up minor paint damage651
Color codes 652
Changing rear window wipers 653
Replacing windshield wiper blades 654
Putting the wiper blades in service position 655
Filling washer fluid 656
SPECIFICATIONS
Type designations660
Dimensions 663
Weights 665
Towing capacity and tongue weight 667
Engine specifications 668
Engine oil specifications 669
Coolant specifications 670
Transmission fluid specifications 670
Brake fluid specifications 670
Fuel tank volume 671
Air conditioning specifications 671
Approved tire pressure 672
Page 31 of 693
YOUR VOLVO
* Option/accessory.29
Creating and registering a Volvo ID
A Volvo ID can be created in two ways. If your Volvo ID was created with the Volvo On Callapp, the Volvo IDmust also be registered tothe vehicle to enable access to the Volvo IDservices.
Creating a Volvo ID with the Volvo ID app
1. Download the Volvo ID app fromDownload Center in the center display's
App view.
2. Start the app and register a personal email address.
3. Follow the instructions that will be sent automatically to this email address.
> A Volvo ID has now been created and isautomatically registered to the vehicle. The Volvo ID services can now be used.
Creating a Volvo ID using the Volvo On Call
app 1
1. Download the latest version of the Volvo
On Call app to your phone, via e.g. App Store, Windows Phone or Google Play.
2. Choose to create a Volvo ID.
3. The website for creating a Volvo ID will open. Fill in the requested information.
4. Check the box to accept the terms and conditions. 5. Press the button to create your Volvo ID.
6. An email will be sent to the address you
have provided. Confirm that the address is correct.
> Your Volvo ID is now ready to be used.
Registering your Volvo ID to the vehicle
If your Volvo ID was created using the Volvo On Call app, follow these steps to register theID to the vehicle:
1. If you have not already done so, download
the Volvo ID app from
Download Centerin the center display's App view.
NOTE
To download apps the vehicle must be connected to the internet.
2. Start the app and enter your Volvo ID/email address.
3. Follow the instructions that will be auto- matically sent to the email address con- nected to your Volvo ID.
> Your Volvo ID has now been registeredto the vehicle. The Volvo ID services can now be used.
Related information
Volvo ID (p. 28)
Download apps (p. 481)
Handling system updates via DownloadCenter (p. 600)
Internet-connected vehicle
* (p. 524)
1
Vehicles with Volvo On Call.
Page 60 of 693
||
SAFETY
581-800-458-1552 www.volvocars.com/us In Canada Volvo Car Canada Ltd.Customer Care Centre9130 Leslie Street, Suite 101Richmond Hill, Ontario L4B 0B91-800-663-8255www.volvocars.com/ca
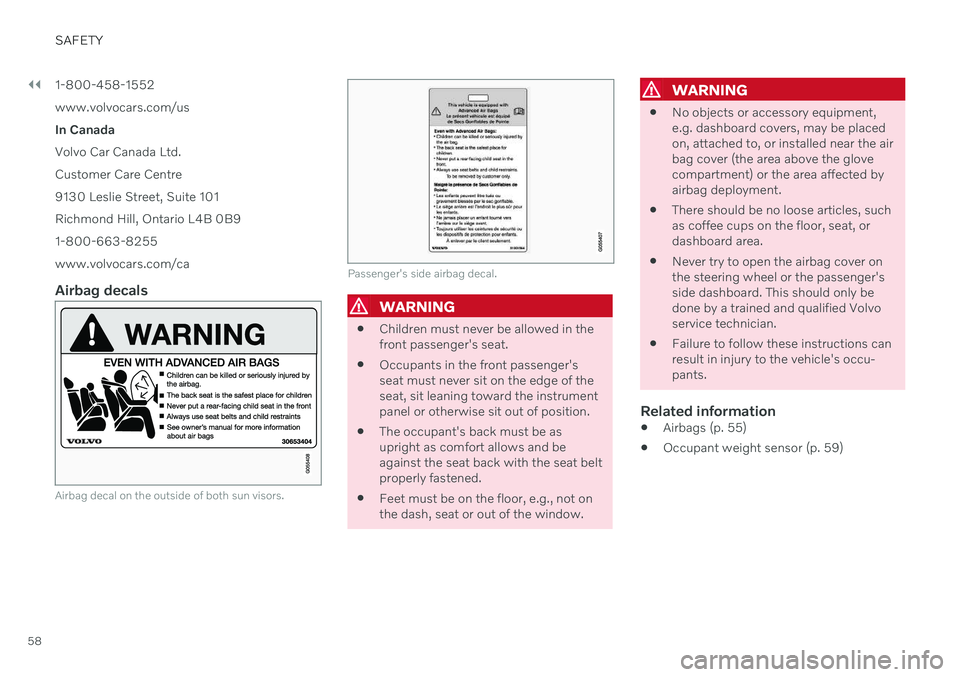
Airbag decals
Airbag decal on the outside of both sun visors.
Passenger's side airbag decal.
WARNING
Children must never be allowed in the front passenger's seat.
Occupants in the front passenger'sseat must never sit on the edge of theseat, sit leaning toward the instrumentpanel or otherwise sit out of position.
The occupant's back must be asupright as comfort allows and beagainst the seat back with the seat beltproperly fastened.
Feet must be on the floor, e.g., not onthe dash, seat or out of the window.
WARNING
No objects or accessory equipment, e.g. dashboard covers, may be placedon, attached to, or installed near the airbag cover (the area above the glovecompartment) or the area affected byairbag deployment.
There should be no loose articles, suchas coffee cups on the floor, seat, ordashboard area.
Never try to open the airbag cover onthe steering wheel or the passenger'sside dashboard. This should only bedone by a trained and qualified Volvoservice technician.
Failure to follow these instructions canresult in injury to the vehicle's occu-pants.
Related information
Airbags (p. 55)
Occupant weight sensor (p. 59)
Page 65 of 693
SAFETY
63
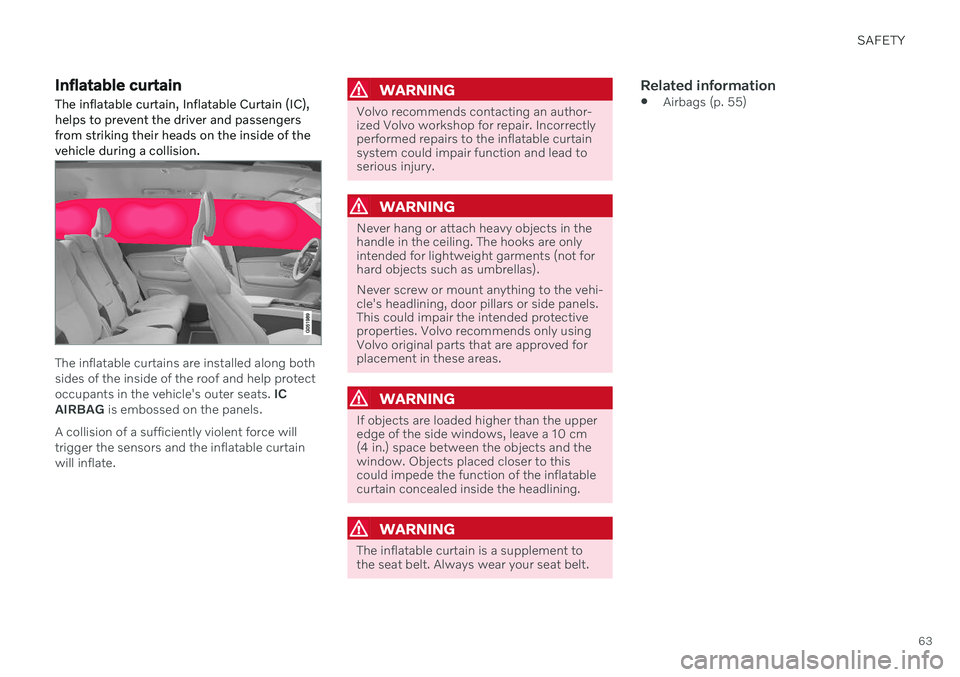
Inflatable curtain The inflatable curtain, Inflatable Curtain (IC), helps to prevent the driver and passengersfrom striking their heads on the inside of thevehicle during a collision.
The inflatable curtains are installed along both sides of the inside of the roof and help protectoccupants in the vehicle's outer seats. IC
AIRBAG is embossed on the panels.
A collision of a sufficiently violent force willtrigger the sensors and the inflatable curtainwill inflate.
WARNING
Volvo recommends contacting an author- ized Volvo workshop for repair. Incorrectlyperformed repairs to the inflatable curtainsystem could impair function and lead toserious injury.
WARNING
Never hang or attach heavy objects in the handle in the ceiling. The hooks are onlyintended for lightweight garments (not forhard objects such as umbrellas). Never screw or mount anything to the vehi- cle's headlining, door pillars or side panels.This could impair the intended protectiveproperties. Volvo recommends only usingVolvo original parts that are approved forplacement in these areas.
WARNING
If objects are loaded higher than the upper edge of the side windows, leave a 10 cm(4 in.) space between the objects and thewindow. Objects placed closer to thiscould impede the function of the inflatablecurtain concealed inside the headlining.
WARNING
The inflatable curtain is a supplement to the seat belt. Always wear your seat belt.
Related information
Airbags (p. 55)
Page 87 of 693
DISPLAYS AND VOICE CONTROL
* Option/accessory.85
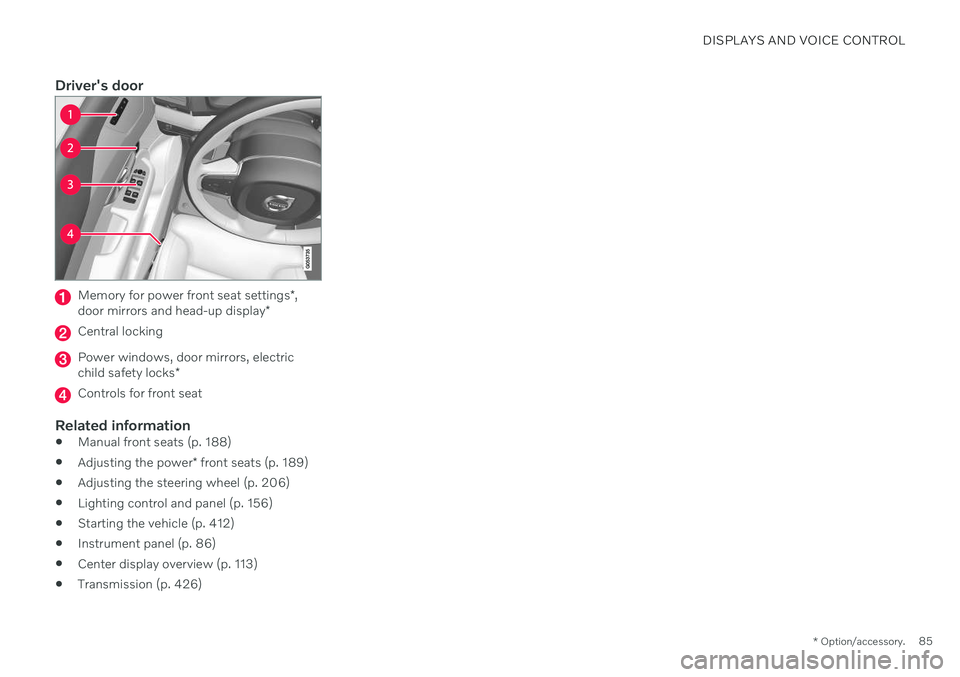
Driver's door
Memory for power front seat settings *,
door mirrors and head-up display *
Central locking
Power windows, door mirrors, electric child safety locks*
Controls for front seat
Related information
Manual front seats (p. 188)
Adjusting the power
* front seats (p. 189)
Adjusting the steering wheel (p. 206)
Lighting control and panel (p. 156)
Starting the vehicle (p. 412)
Instrument panel (p. 86)
Center display overview (p. 113)
Transmission (p. 426)
Page 94 of 693
||
DISPLAYS AND VOICE CONTROL
92
Distance to empty tankThe trip computer calculates the dis- tance that can be driven on the fuelremaining in the tank.
This calculation is based on average fuel con- sumption during the last 30 km (20 miles)and the amount of fuel remaining in the tank. When the gauge displays "----", there is not enough fuel remaining to calculate the remain-ing mileage. Refuel as soon as possible.
NOTE
The information will change based on your driving style.
An economical driving style will generally increase how far you can drive on a certainamount of fuel.
Distance to discharged batteryThis gauge shows the approximatedistance that can be driven with theremaining current in the hybrid bat-tery.
This calculation is based on average consump- tion with a normally loaded vehicle in normaldriving conditions, and takes into accountwhether the air conditioning is on or off. Changing drive modes from
Hybrid to Puremay increase the calculated distance because
Pure mode has reduced climate control set-
tings (ECO Climate). When the gauge displays "----", there is little charge remaining in the battery and electricmotor range cannot be reliably calculated.
NOTE
The information will change based on your driving style.
An economical driving style will generally increase how far you can drive on a certainamount of fuel.
Starting values for fully charged hybrid battery
Because it is difficult to predict driving style and other factors that affect the range of elec-tric motors, Volvo uses a starting value whenthe vehicle is fully charged. This starting valueprovides an "up to" amount instead of a pre-diction on the range of the electric current inthe motor. The difference in starting value between
Hybrid and Pure is because the
vehicle is permitted to use more current from the hybrid battery in
Pure mode, and because
the vehicle switches to ECO Climate.
Mileage when using electric motor
To achieve the longest possible mileage when using the electric motor, the driver of an elec-tric vehicle also needs to think about conserv- ing electricity. The more electricity consumers(stereo, heated windows/mirrors/seats, verycold air from climate control system, etc.) thatare active, the shorter the potential mileage.
NOTE
In addition to high electrical consumption in the passenger compartment, rapidacceleration, sudden braking, high speeds,heavy loads, low ambient temperaturesand driving up hills can reduce possibledriving distance.
Tourist - alternative speedometerThe alternative digital speedometer makes it easier to drive in countries where speed limitsigns are shown in a different measurementunit than the one shown in the vehicle'sgauges. When used, the digital speed is displayed in the opposite unit to that shown in the analogspeedometer. If
mph is used in the analog
speedometer, the equivalent speed in km/h
will be shown in the digital speedometer.
Related information
Displaying trip data in the instrumentpanel (p. 93)
Resetting the trip odometer (p. 94)
Displaying trip statistics in the center dis-play (p. 94)
Page 116 of 693
||
DISPLAYS AND VOICE CONTROL
* Option/accessory.
114
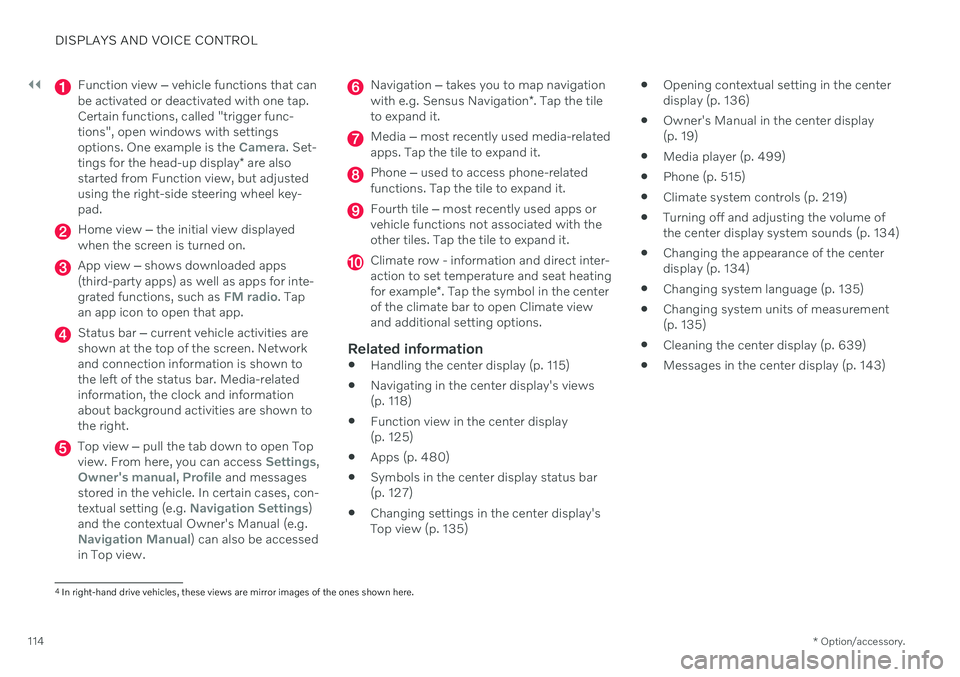
Function view ‒ vehicle functions that can
be activated or deactivated with one tap. Certain functions, called "trigger func-tions", open windows with settingsoptions. One example is the
Camera. Set-
tings for the head-up display * are also
started from Function view, but adjusted using the right-side steering wheel key-pad.
Home view ‒ the initial view displayed
when the screen is turned on.
App view ‒ shows downloaded apps
(third-party apps) as well as apps for inte- grated functions, such as
FM radio. Tap
an app icon to open that app.
Status bar ‒ current vehicle activities are
shown at the top of the screen. Network and connection information is shown tothe left of the status bar. Media-relatedinformation, the clock and informationabout background activities are shown tothe right.
Top view ‒ pull the tab down to open Top
view. From here, you can access Settings,Owner's manual, Profile and messages
stored in the vehicle. In certain cases, con- textual setting (e.g.
Navigation Settings)
and the contextual Owner's Manual (e.g.
Navigation Manual) can also be accessed
in Top view.
Navigation ‒ takes you to map navigation
with e.g. Sensus Navigation *. Tap the tile
to expand it.
Media ‒ most recently used media-related
apps. Tap the tile to expand it.
Phone ‒ used to access phone-related
functions. Tap the tile to expand it.
Fourth tile ‒ most recently used apps or
vehicle functions not associated with the other tiles. Tap the tile to expand it.
Climate row - information and direct inter- action to set temperature and seat heating for example *. Tap the symbol in the center
of the climate bar to open Climate view and additional setting options.
Related information
Handling the center display (p. 115)
Navigating in the center display's views (p. 118)
Function view in the center display (p. 125)
Apps (p. 480)
Symbols in the center display status bar(p. 127)
Changing settings in the center display'sTop view (p. 135)
Opening contextual setting in the centerdisplay (p. 136)
Owner's Manual in the center display(p. 19)
Media player (p. 499)
Phone (p. 515)
Climate system controls (p. 219)
Turning off and adjusting the volume ofthe center display system sounds (p. 134)
Changing the appearance of the centerdisplay (p. 134)
Changing system language (p. 135)
Changing system units of measurement(p. 135)
Cleaning the center display (p. 639)
Messages in the center display (p. 143)
4
In right-hand drive vehicles, these views are mirror images of the ones shown here.
Page 123 of 693
DISPLAYS AND VOICE CONTROL
121
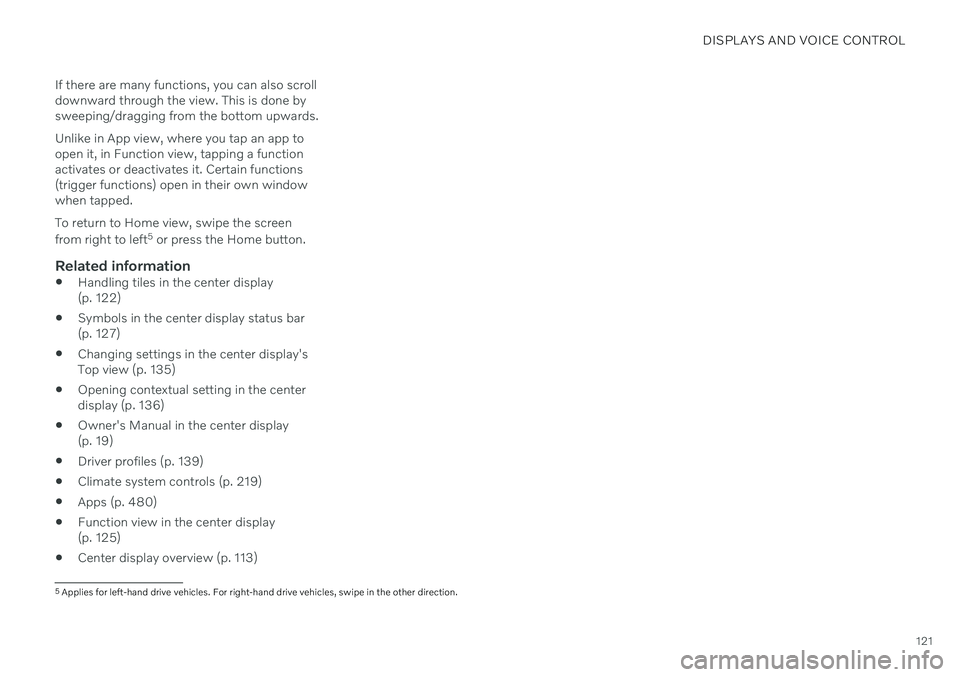
If there are many functions, you can also scroll downward through the view. This is done bysweeping/dragging from the bottom upwards. Unlike in App view, where you tap an app to open it, in Function view, tapping a functionactivates or deactivates it. Certain functions(trigger functions) open in their own windowwhen tapped. To return to Home view, swipe the screen from right to left
5
or press the Home button.
Related information
Handling tiles in the center display (p. 122)
Symbols in the center display status bar(p. 127)
Changing settings in the center display'sTop view (p. 135)
Opening contextual setting in the centerdisplay (p. 136)
Owner's Manual in the center display(p. 19)
Driver profiles (p. 139)
Climate system controls (p. 219)
Apps (p. 480)
Function view in the center display(p. 125)
Center display overview (p. 113)
5
Applies for left-hand drive vehicles. For right-hand drive vehicles, swipe in the other direction.