window VOLVO XC90 TWIN ENGINE HYBRID 2017 User Guide
[x] Cancel search | Manufacturer: VOLVO, Model Year: 2017, Model line: XC90 TWIN ENGINE HYBRID, Model: VOLVO XC90 TWIN ENGINE HYBRID 2017Pages: 584, PDF Size: 14.2 MB
Page 103 of 584
INSTRUMENTS AND CONTROLS
}}
* Option/accessory, for more information, see Introduction.101
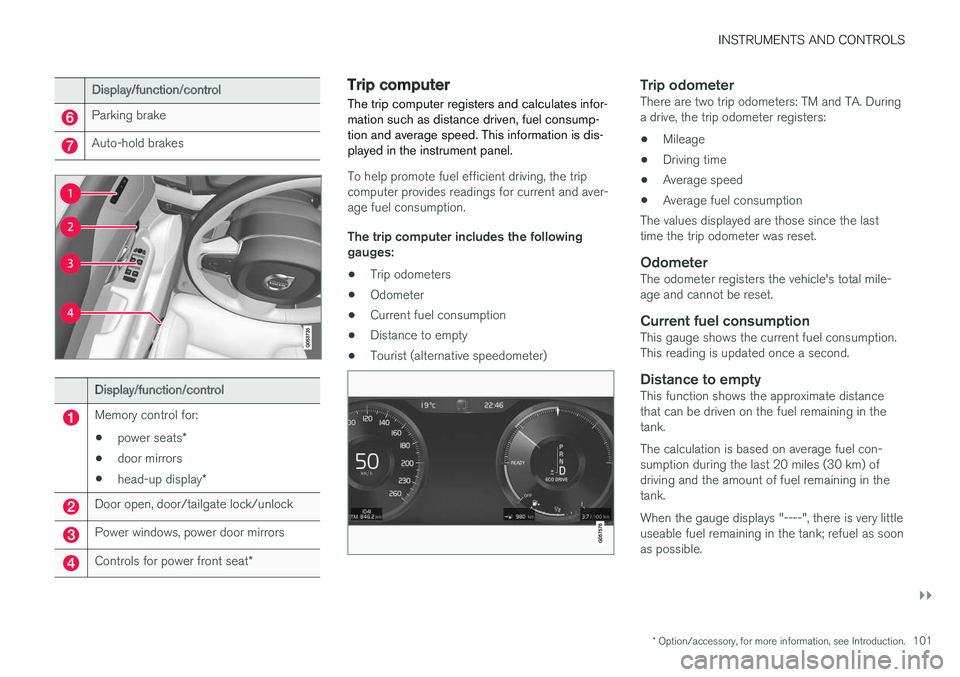
Display/function/control
Parking brake
Auto-hold brakes
Display/function/control
Memory control for:
•power seats*
•door mirrors
•head-up display*
Door open, door/tailgate lock/unlock
Power windows, power door mirrors
Controls for power front seat*
Trip computer
The trip computer registers and calculates infor-mation such as distance driven, fuel consump-tion and average speed. This information is dis-played in the instrument panel.
To help promote fuel efficient driving, the tripcomputer provides readings for current and aver-age fuel consumption.
The trip computer includes the followinggauges:
•Trip odometers
•Odometer
•Current fuel consumption
•Distance to empty
•Tourist (alternative speedometer)
Trip odometer
There are two trip odometers: TM and TA. Duringa drive, the trip odometer registers:
•Mileage
•Driving time
•Average speed
•Average fuel consumption
The values displayed are those since the lasttime the trip odometer was reset.
Odometer
The odometer registers the vehicle's total mile-age and cannot be reset.
Current fuel consumption
This gauge shows the current fuel consumption.This reading is updated once a second.
Distance to empty
This function shows the approximate distancethat can be driven on the fuel remaining in thetank.
The calculation is based on average fuel con-sumption during the last 20 miles (30 km) ofdriving and the amount of fuel remaining in thetank.
When the gauge displays "----", there is very littleuseable fuel remaining in the tank; refuel as soonas possible.
Page 104 of 584
||
INSTRUMENTS AND CONTROLS
102
The accuracy of this figure may vary if your driv-ing style changes. An economical driving style willgenerally increase this distance.
Distance to discharged battery
This gauge shows the approximate distance thatcan be driven on the charge remaining in thehybrid battery. When the gauge displays "----"there is no guaranteed driving charge remainingin the battery.
This calculation is based on the average electricalcurrent consumption in a normally loaded vehicleduring normal driving, and whether the A/C is onor off.
An economical driving style will generallyincrease this distance.
Distance using the electric motor
To get the optimal driving distance using theelectric motor, it is essential to conserve current.Functions that use a great deal of current (e.g.,audio system, electrical heating in the steeringwheel/door mirrors/rear window/seats, very coldair from the climate system, etc.) reduce the pos-sible driving distance.
NOTE
In addition to high electrical consumption inthe passenger compartment, fast accelera-tion, sudden braking, heavy loads, low ambienttemperatures and driving up hills can reducethe possible driving distance.
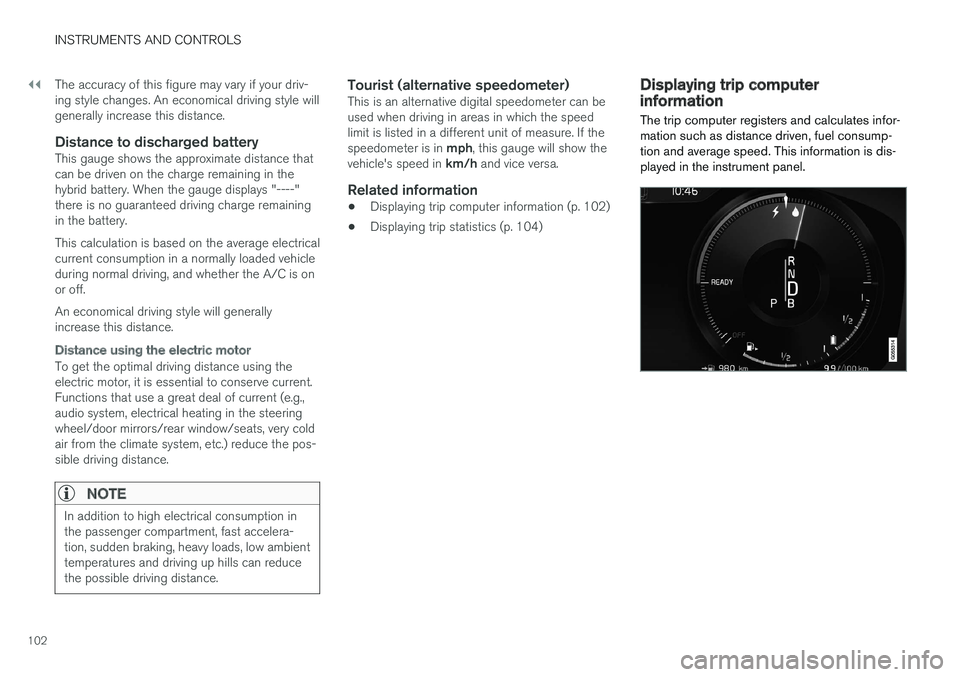
Tourist (alternative speedometer)
This is an alternative digital speedometer can beused when driving in areas in which the speedlimit is listed in a different unit of measure. If thespeedometer is in mph, this gauge will show thevehicle's speed in km/h and vice versa.
Related information
•Displaying trip computer information (p. 102)
•Displaying trip statistics (p. 104)
Displaying trip computerinformation
The trip computer registers and calculates infor-mation such as distance driven, fuel consump-tion and average speed. This information is dis-played in the instrument panel.
Page 114 of 584
||
INSTRUMENTS AND CONTROLS
112
2.Opening the laminated panoramic roof:Pull the control as far back as possible asecond time (to the auto open position) andrelease it to open the laminated panoramicroof to the "comfort" position that helpsreduce wind noise while driving. Pull the con-trol a third time (to the auto open position)and release it to open the roof completely.
Perform this procedure in reverse order to closethe laminated panoramic roof/sun shade. Theroof will not stop at the "comfort" position if it isclosed from the fully open position.
The laminated panoramic roof will stop when itreaches the "comfort" position, the fully openposition or the closed position. Movement willalso stop if the control is moved in the oppositedirection to the movement of the roof.
The roof will not stop at the "comfort" position ifit is closed from the fully open position.
Quick open/close
The laminated panoramic roof and the sun shadecan be opened/closed at the same time:
•Open: pull the control back (to the autoopen position) twice in quick succession andrelease it.
•Close: push the control forward (to the autoclose position) twice in quick succession andrelease it.
The laminated panoramic roof will stop when itreaches the "comfort" position or the closedposition. Movement will also stop if the control ismoved in the opposite direction to the movementof the roof.
The roof will not stop at the "comfort" position ifit is closed from the fully open position. The sunshade never stops when the roof reaches the"comfort" position.
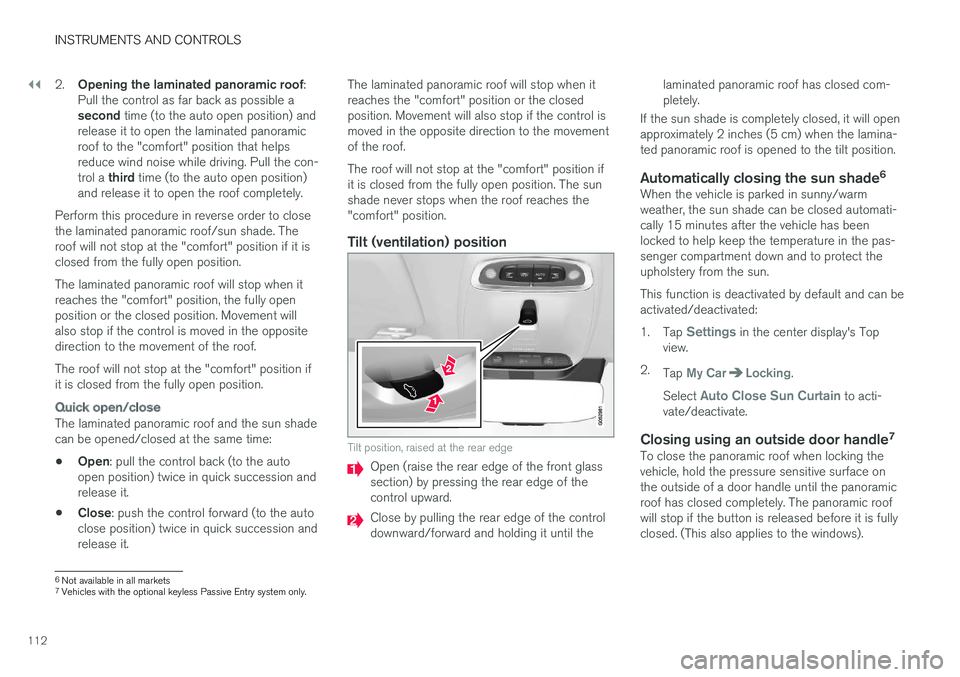
Tilt (ventilation) position
Tilt position, raised at the rear edge
Open (raise the rear edge of the front glasssection) by pressing the rear edge of thecontrol upward.
Close by pulling the rear edge of the controldownward/forward and holding it until the
laminated panoramic roof has closed com-pletely.
If the sun shade is completely closed, it will openapproximately 2 inches (5 cm) when the lamina-ted panoramic roof is opened to the tilt position.
Automatically closing the sun shade 6
When the vehicle is parked in sunny/warmweather, the sun shade can be closed automati-cally 15 minutes after the vehicle has beenlocked to help keep the temperature in the pas-senger compartment down and to protect theupholstery from the sun.
This function is deactivated by default and can beactivated/deactivated:
1.Tap Settings in the center display's Topview.
2.Tap My CarLocking.
Select Auto Close Sun Curtain to acti-vate/deactivate.
Closing using an outside door handle 7
To close the panoramic roof when locking thevehicle, hold the pressure sensitive surface onthe outside of a door handle until the panoramicroof has closed completely. The panoramic roofwill stop if the button is released before it is fullyclosed. (This also applies to the windows).
6
Not available in all markets
7
Vehicles with the optional keyless Passive Entry system only.
Page 115 of 584
INSTRUMENTS AND CONTROLS
}}
* Option/accessory, for more information, see Introduction.113
Auto-stop
The laminated panoramic roof has an auto-stopfeature that is triggered if the glass section of theroof or the sun shade is blocked in any way whenbeing closed. In this case, the laminated panor-amic roof or sun shade will stop and reverseautomatically approximately 2 in. (5 cm) from thepoint at which it was blocked (or will open fully tothe tilt position).
The auto-stop feature also functions when thelaminated panoramic roof or sun shade is beingopened.
WARNING
For 10 minutes after the auto-stop functionhas been triggered, it will not function againthe first time the control is moved in the samedirection as when the auto-stop function wastriggered.
The auto-stop feature can be overridden if theclosing procedure has been interrupted (e.g., dueto ice around the moonroof) by pressing andholding the control forward/down until the moon-roof is closed.
Power windows
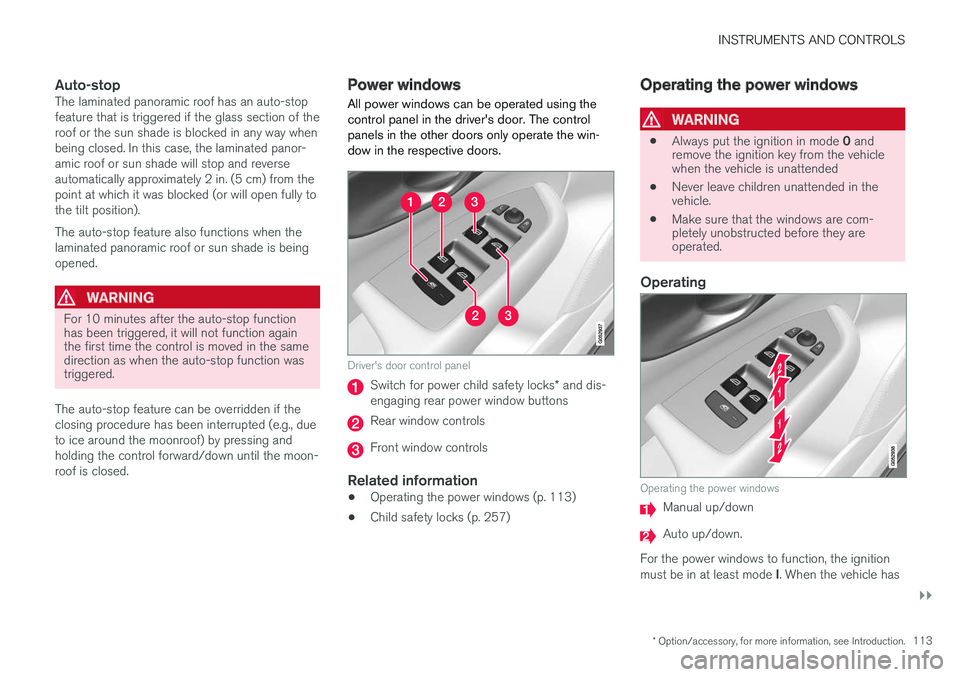
All power windows can be operated using thecontrol panel in the driver's door. The controlpanels in the other doors only operate the win-dow in the respective doors.
Driver's door control panel
Switch for power child safety locks* and dis-engaging rear power window buttons
Rear window controls
Front window controls
Related information
•Operating the power windows (p. 113)
•Child safety locks (p. 257)
Operating the power windows
WARNING
•Always put the ignition in mode 0 andremove the ignition key from the vehiclewhen the vehicle is unattended
•Never leave children unattended in thevehicle.
•Make sure that the windows are com-pletely unobstructed before they areoperated.
Operating
Operating the power windows
Manual up/down
Auto up/down.
For the power windows to function, the ignitionmust be in at least mode I. When the vehicle has
Page 116 of 584
||
INSTRUMENTS AND CONTROLS
114
been running, the power windows can be oper-ated for several minutes after the ignition hasbeen switched off, or until a door has beenopened.
NOTE
•Movement of the windows will stop if theyare obstructed in any way. If this happenstwice in succession, the automatic func-tion will not work for several minutes andthe window can be closed by holding thebutton up.
•To reduce buffeting wind noise if the rearwindows are opened, also open the frontwindows slightly.
Manual up/down
–Move one of the controls up/down slightly.
>The power windows move up/down aslong as the control is held in position.
Auto up/down
–Move one of the controls up/down as far aspossible and release it.
>The window will open or close completely.
Resetting
If the battery has been disconnected, the autoopen function must be reset so that it will workproperly
1. Gently raise the front section of the button toclose the window and hold it for one second.
2. Release the button briefly.
3. Raise the front section of the button againfor one second.
Related information
•Child safety locks (p. 257)
Rearview mirror
The interior rearview mirror has an auto-dimfunction that helps reduce glare from followingvehicle's headlights.
Auto-dim function
The auto-dim function is controlled by two sen-sors: one pointing forward (located on the for-ward-facing side of the mirror, which monitors theamount of ambient light) and one pointing rear-ward (located on the side of the mirror facing thedriver at the upper edge, which senses thestrength of following vehicles' headlights), andwork together to help eliminate glare.
NOTE
Obstructing the forward sensor with e.g.,parking stickers, transponders, etc., or the rearsensor by loading the cargo area or the rearseat in such a way that light is prevented fromreaching the sensor will reduce the auto-dimfunction in the interior rearview mirror andoptional auto-dim function in the door mirrors.
The auto-dim function is always active while thevehicle is being driven except when the reversegear has been selected. The level of sensitivityfor this function can be set to three levels, whichaffect the rearview mirror and door mirrors.
Page 117 of 584
INSTRUMENTS AND CONTROLS
}}
115
NOTE
When the level of sensitivity is changed, thischange will not be noticeable immediately butwill take effect after a short period of time.
The level of sensitivity is set from the center dis-play:
1.Tap Settings in Top view.
2.Tap My CarMirrors.
3.Under Auto Dim Mirrors, select Normal,Dark or Light.
Related information
•Adjusting the power door mirrors (p. 108)
Using sun shades
Both rear doors have integrated sun shades.
Rear doors
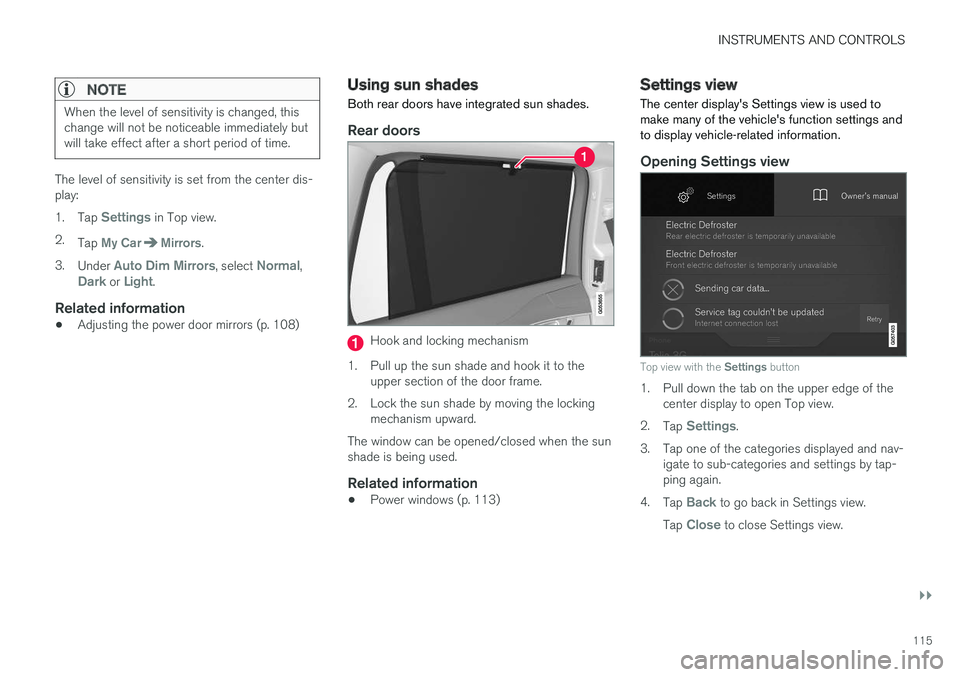
Hook and locking mechanism
1.Pull up the sun shade and hook it to theupper section of the door frame.
2. Lock the sun shade by moving the lockingmechanism upward.
The window can be opened/closed when the sunshade is being used.
Related information
•Power windows (p. 113)
Settings view
The center display's Settings view is used tomake many of the vehicle's function settings andto display vehicle-related information.
Opening Settings view
Top view with the Settings button
1. Pull down the tab on the upper edge of thecenter display to open Top view.
2.Tap Settings.
3.Tap one of the categories displayed and nav-igate to sub-categories and settings by tap-ping again.
4.Tap Back to go back in Settings view.
Tap Close to close Settings view.
Page 127 of 584
INSTRUMENTS AND CONTROLS
}}
* Option/accessory, for more information, see Introduction.125
Voice control
Voice commands make it possible for the driverto voice-control certain functions in the mediaplayer, a Bluetooth-connected cell phone, cli-mate system and the Volvo navigation system*.
Voice control offers convenience and enables thedriver to keep his/her hands on the steeringwheel and concentrate on driving and the trafficsituation around the vehicle.
WARNING
As the driver, you have full responsibility foroperating the vehicle safely and adhering toall applicable traffic regulations.
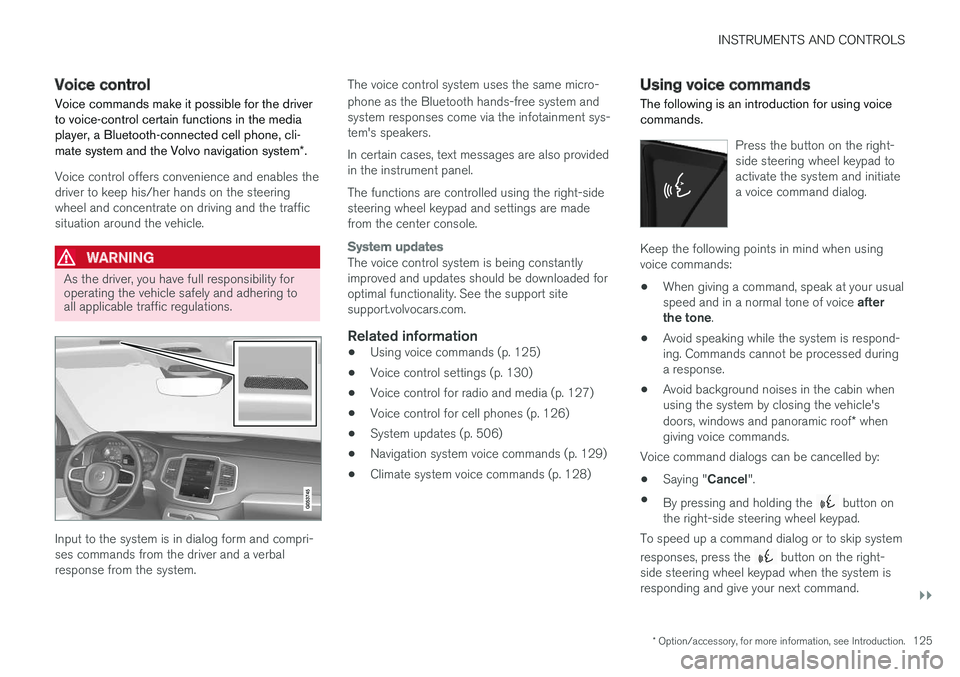
Input to the system is in dialog form and compri-ses commands from the driver and a verbalresponse from the system.
The voice control system uses the same micro-
phone as the Bluetooth hands-free system andsystem responses come via the infotainment sys-tem's speakers.
In certain cases, text messages are also providedin the instrument panel.
The functions are controlled using the right-sidesteering wheel keypad and settings are madefrom the center console.
System updates
The voice control system is being constantlyimproved and updates should be downloaded foroptimal functionality. See the support sitesupport.volvocars.com.
Related information
•Using voice commands (p. 125)
•Voice control settings (p. 130)
•Voice control for radio and media (p. 127)
•Voice control for cell phones (p. 126)
•System updates (p. 506)
•Navigation system voice commands (p. 129)
•Climate system voice commands (p. 128)
Using voice commands
The following is an introduction for using voicecommands.
Press the button on the right-side steering wheel keypad toactivate the system and initiatea voice command dialog.
Keep the following points in mind when usingvoice commands:
•When giving a command, speak at your usualspeed and in a normal tone of voice afterthe tone.
•Avoid speaking while the system is respond-ing. Commands cannot be processed duringa response.
•Avoid background noises in the cabin whenusing the system by closing the vehicle'sdoors, windows and panoramic roof* whengiving voice commands.
Voice command dialogs can be cancelled by:
•Saying "Cancel".
•By pressing and holding the button onthe right-side steering wheel keypad.
To speed up a command dialog or to skip system
responses, press the button on the right-side steering wheel keypad when the system isresponding and give your next command.
Page 130 of 584
INSTRUMENTS AND CONTROLS
* Option/accessory, for more information, see Introduction.128
Climate system voice commands
Voice commands can be used to control the cli-mate system to e.g., change the temperature,activate seat heating* or change blower (fan)speed.
To use the voice control system, press the on the right-side steering wheel keypad and sayone of the following commands after the tone:
•"Climate": starts a command dialog andprovides examples of commands that can beused.
•"Set temperature to X degrees": sets thedesired temperature.
•"Raise temperature"/"Lowertemperature": raises/lowers the tempera-ture.
•"Sync temperature": synchronizes the tem-perature in all of the vehicle's climate zoneswith the one set for the driver's side.
•"Air on feet"/"Air on body": opens thedesired air vent.
•"Air on feet off"/"Air on body off": closesthe desired air vent.
•"Set fan to max"/"Turn off fan": changesthe blower speed to Max/Off.
•"Raise fan speed"/"Lower fan speed":raises/lowers the blower speed.
•"Turn on auto": activates automatic climatecontrol.
•"Air condition on"/"Air condition off":activates/deactivates the air conditioning.
•"Recirculation on"/"Recirculation off":activates/deactivates recirculation.
•"Turn on defroster "/"Turn off defroster":activates/deactivates window and door mirrordefrosting.
•"Turn on max defroster"/"Turn off maxdefroster": activates/deactivates maxdefroster.
•"Turn on electric defroster"/"Turn offelectric defroster": activates/deactivatesthe electrically heated windshield*.
•"Turn on rear defroster"/"Turn off reardefroster": activates/deactivates the electri-cally heated rear window and door mirrors.
•"Turn steering wheel heat on"/"Turnsteering wheel heat off": activates/deacti-vates the electrically heated steering wheel*.
•"Raise steering wheel heat"/"Lowersteering wheel heat": raises/lowers theheating level for the electrically heated steer-ing wheel*.
•"Turn on seat heat"/"Turn off seat heat":activates/deactivates the electrically heatedseats*.
•"Raise seat heat"/"Lower seat heat": rai-ses/lowers the heating level for the electri-cally heated seats*.
•"Turn on seat ventilation"/"Turn off seatventilation": activates/deactivates seat ven-tilation*.
•"Raise seat ventilation"/"Lower seatventilation": raises/lowers the level for seatventilation*.
Related information
•Climate system controls (p. 199)
•Voice control (p. 125)
•Using voice commands (p. 125)
Page 144 of 584
||
INSTRUMENTS AND CONTROLS
142
SymbolMeaning
Oil pressure
If the symbol illuminates duringdriving, stop the vehicle, theengine oil level is too low. Stop theengine immediately and check theengine oil level. Add oil if neces-sary. If the oil level is normal andthe symbol remains illuminated,have the vehicle towed to thenearest authorized Volvo work-shop or trained and qualified Volvoservice technician.
Generator not charging
This symbol illuminates duringdriving if a fault has occurred inthe electrical system. Contact anauthorized Volvo workshop ortrained and qualified Volvo servicetechnician.
AUS modelsBCanadian models
WARNING
•If the fluid level is below the MIN mark inthe brake fluid reservoir or if a warningmessage is displayed in the text window:DO NOT DRIVE. Have the vehicle towedto a trained and qualified Volvo servicetechnician and have the brake systeminspected.
•If the BRAKE and ABS symbols illumi-nate at the same time, there is a risk ofreduced vehicle stability.
Door/hood/tailgate/fuel filler door
reminder
It a door, tailgate, the hood or the fuel filler doorare not closed properly, the information or warn-ing symbol will illuminate and a graphic will bedisplayed in the instrument panel.
Related information
•Instrument panel (p. 132)
•Indicator symbols in the instrument panel(p. 130)
Compass
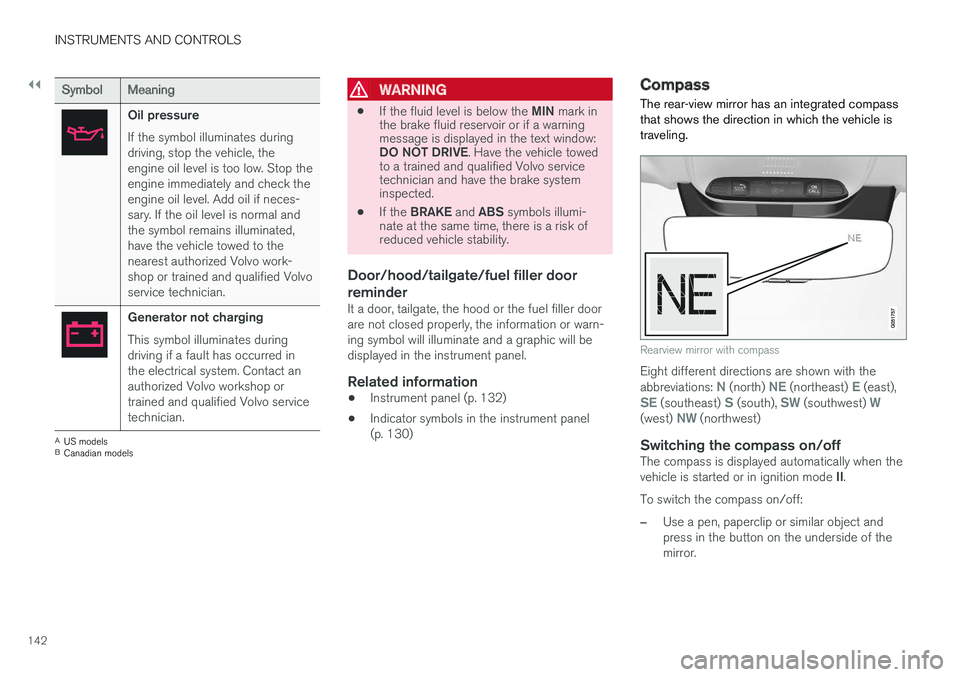
The rear-view mirror has an integrated compassthat shows the direction in which the vehicle istraveling.
Rearview mirror with compass
Eight different directions are shown with theabbreviations: N (north) NE (northeast) E (east),SE (southeast) S (south), SW (southwest) W(west) NW (northwest)
Switching the compass on/off
The compass is displayed automatically when thevehicle is started or in ignition mode II.
To switch the compass on/off:
–Use a pen, paperclip or similar object andpress in the button on the underside of themirror.
Page 146 of 584

||
INSTRUMENTS AND CONTROLS
144
8. Repeat the calibration procedure if neces-sary.
Related information
•Defrosting windows and mirrors (p. 206)
•Compass (p. 142)
Lighting panel and controls
The lighting ring on the left-side steering wheellever can be used to activate the vehicle's exte-rior lighting.
Instrument lighting brightness can be adjustedusing the thumb wheel on the lighting panel.
Lighting ring on the left-side steering
wheel lever
Lightingring posi-tion
Result
With the ignition in mode II or ifthe engine is running:
•In the US: the Daytime Run-ning Lights (DRL) will be off
•In Canada: the Daytime Run-ning Lights will be on
•High beam flash can be used
With the ignition in mode II or if
the engine is running:A
•Parking lights will be on
•In the US: the Daytime Run-ning Lights will be off
•In Canada: the Daytime Run-ning Lights will be on
•High beam flash can be used
With the ignition in mode II or ifthe engine is running:
•The Daytime Running Lightswill be off
•The low beam headlights willbe on
•High Beams/High Beamflash can be used