recommended oil YAMAHA DT125R 2000 Owners Manual
[x] Cancel search | Manufacturer: YAMAHA, Model Year: 2000, Model line: DT125R, Model: YAMAHA DT125R 2000Pages: 91, PDF Size: 4.67 MB
Page 6 of 91
EAU00009
TABLE OF CONTENTS
1
2
3
4
5
6
7
8
9 GIVE SAFETY THE RIGHT OF WAY..................1-1
DESCRIPTION....................................................2-1
Left view............................................................2-1
Right view.........................................................2-2
Controls/Instruments.........................................2-3
INSTRUMENT AND CONTROL FUNCTIONS....3-1
Main switch.......................................................3-1
Indicator lights...................................................3-1
Oil level indicator circuit check..........................3-2
Speedometer....................................................3-3
Tachometer.......................................................3-3
Engine temperature gauge...............................3-4
Handlebar switches..........................................3-4
Clutch lever.......................................................3-5
Shift pedal.........................................................3-5
Front brake lever...............................................3-6
Rear brake pedal..............................................3-6
Fuel tank cap....................................................3-6
Fuel (except for Switzerland and Austria).........3-7
Fuel (for Switzerland and Austria)....................3-7
Catalyzer (for Switzerland and Austria)............3-8
Two-stroke engine oil........................................3-9
Fuel cock..........................................................3-9
Starter (choke) Ò
1Ó.........................................3-10Kick starter......................................................3-11
Steering lock...................................................3-11
Seat................................................................3-12
Helmet holder.................................................3-12
Rear shock absorber adjustment....................3-13
Rear carrier.....................................................3-14
Note on handling of the Yamaha Energy
Induction System (Y.E.I.S.).............................3-14
Y.P.V.S.
(Yamaha Power Valve System)......................3-15
Sidestand........................................................3-15
Sidestand switch operation check..................3-16
PRE-OPERATION CHECKS...............................4-1
Pre-operation check list....................................4-1
OPERATION AND IMPORTANT RIDING
POINTS................................................................5-1
Starting the engine............................................5-1
Starting a warm engine.....................................5-3
Shifting..............................................................5-4
Recommended shift points
(for Switzerland only)........................................5-4
Tips for reducing fuel consumption...................5-5
Engine break-in.................................................5-5
Parking..............................................................5-6
123
45
3MB-9-E7 12/27/00 2:52 PM Page 5
Page 22 of 91
3-9
INSTRUMENT AND CONTROL FUNCTIONS
1
23
4
5
6
7
8
9
EC000114
cCThe following must be observed to
prevent a fire hazard or other dam-
ages.
8 8
Use only unleaded gasoline.
Use of leaded gasoline will
cause unrepairable damage to
the catalytic converter.
8 8
Never park this motorcycle in
an area that would cause a fire
hazard such as grass or other
materials that may easily burn.
8 8
Do not allow the engine to idle
for very long.
EAU03050
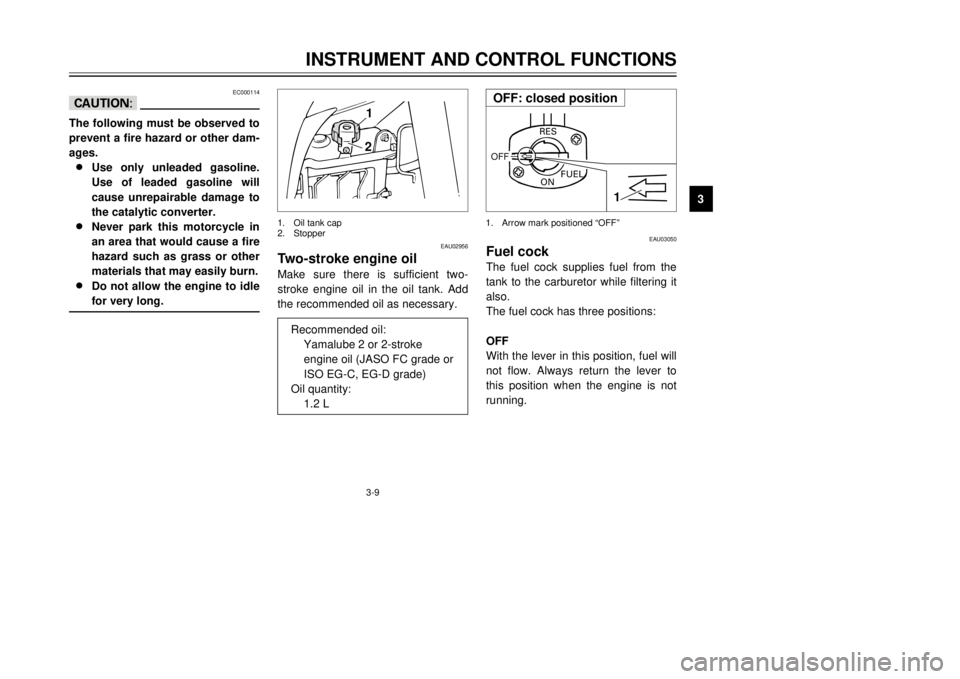
Fuel cockThe fuel cock supplies fuel from the
tank to the carburetor while filtering it
also.
The fuel cock has three positions:
OFF
With the lever in this position, fuel will
not flow. Always return the lever to
this position when the engine is not
running.
RES
ONFUEL
OFF
1
1.Arrow mark positioned ÒOFFÓ
EAU02956
Two-stroke engine oilMake sure there is sufficient two-
stroke engine oil in the oil tank. Add
the recommended oil as necessary.
21
1.Oil tank cap
2.Stopper
Recommended oil:
Yamalube 2 or 2-stroke
engine oil (JASO FC grade or
ISO EG-C, EG-D grade)
Oil quantity:
1.2 L
OFF: closed position
3MB-9-E7 12/27/00 2:52 PM Page 21
Page 49 of 91
6-12
PERIODIC MAINTENANCE AND MINOR REPAIR
1
2
3
4
56
7
8
95.Fill the engine with sufficient oil
to reach the specified level.
Install the oil filler cap and tight-
en it.
EC000079
cCDo not put in any chemical addi-
tives. Transmission oil also lubri-
cates the clutch and additives
could cause clutch slippage.6.Start the engine and warm up for
a few minutes. While warming
up, check for oil leakage. If oil
leakage is found, stop the engine
immediately and check for
cause. Recommended oil:
See page 8-1.
Oil quantity:
Total amount: 0.8 L
Periodic oil change: 0.75 L
1
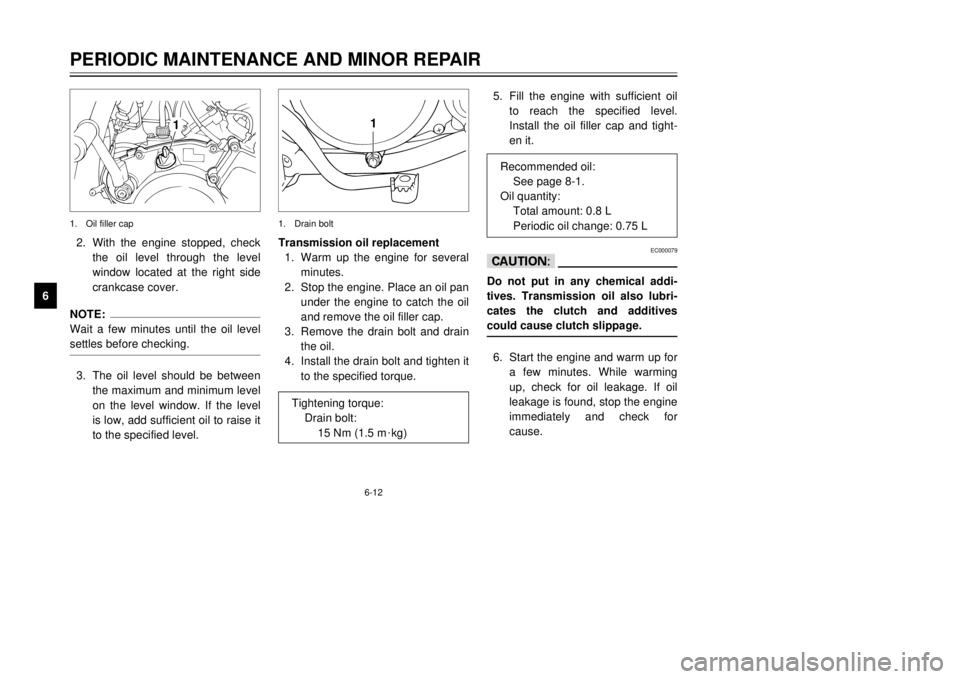
Transmission oil replacement
1.Warm up the engine for several
minutes.
2.Stop the engine. Place an oil pan
under the engine to catch the oil
and remove the oil filler cap.
3.Remove the drain bolt and drain
the oil.
4.Install the drain bolt and tighten it
to the specified torque.1.Drain bolt
Tightening torque:
Drain bolt:
15 Nm (1.5 m
0kg)
1
2.With the engine stopped, check
the oil level through the level
window located at the right side
crankcase cover.NOTE:
Wait a few minutes until the oil level
settles before checking.3.The oil level should be between
the maximum and minimum level
on the level window. If the level
is low, add sufficient oil to raise it
to the specified level.1.Oil filler cap
3MB-9-E7 12/27/00 2:52 PM Page 48
Page 53 of 91
6-16
PERIODIC MAINTENANCE AND MINOR REPAIR
1
2
3
4
56
7
8
96.Insert the air filter guide into the
air filter and install it in the case.
7.Install the air filter case cover
and panel by installing the
screws.
EC000082
cC8
8
Make sure the air filter is prop-
erly seated in the air filter
case.
8 8
The engine should never be
run without the air filter
installed. Excessive piston
and/or cylinder wear may
result.
EAU00629
Carburetor adjustmentThe carburetor is a vital part of the
engine and requires very sophisticat-
ed adjustment. Most adjustments
should be left to a Yamaha dealer
who has the professional knowledge
and experience to do so. However,
the following may be serviced by the
owner as part of routine mainte-
nance.
EC000094
cCThe carburetor was set at the
Yamaha factory after many tests. If
the settings are changed, poor
engine performance and damage
may result.
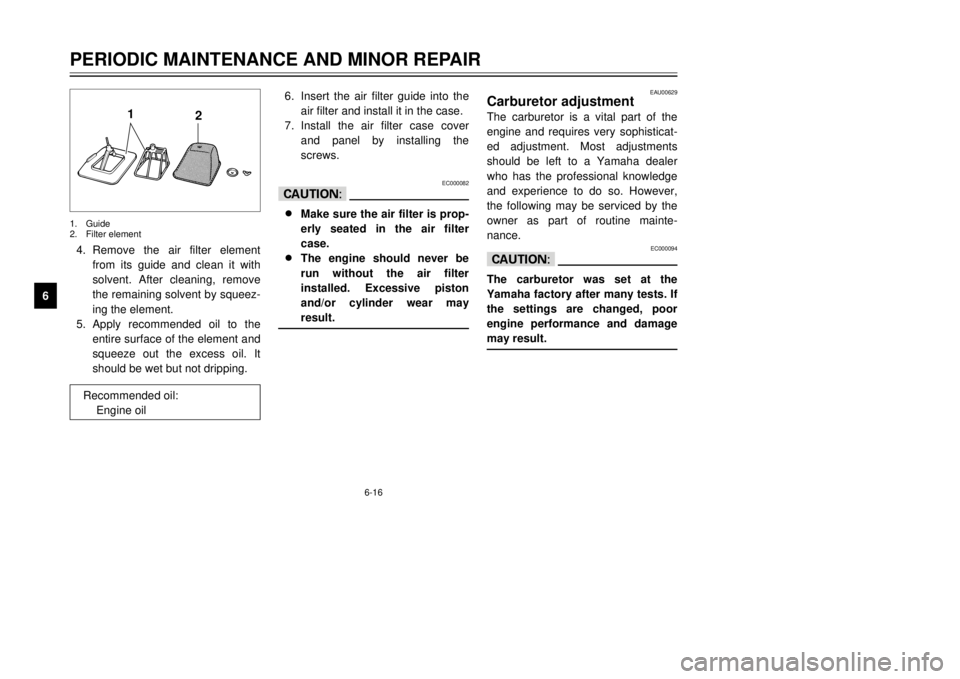
4.Remove the air filter element
from its guide and clean it with
solvent. After cleaning, remove
the remaining solvent by squeez-
ing the element.
5.Apply recommended oil to the
entire surface of the element and
squeeze out the excess oil. It
should be wet but not dripping.
1
2
1.Guide
2.Filter element
Recommended oil:
Engine oil
3MB-9-E7 12/27/00 2:52 PM Page 52
Page 61 of 91
6-24
PERIODIC MAINTENANCE AND MINOR REPAIR
1
2
3
4
56
7
8
98Use only the designated quality
brake fluid. Otherwise, the rub-
ber seals may deteriorate, caus-
ing leakage and poor brake per-
formance.
NOTE:
If DOT 4 is not available, DOT 3 can
be used.
EAU00732
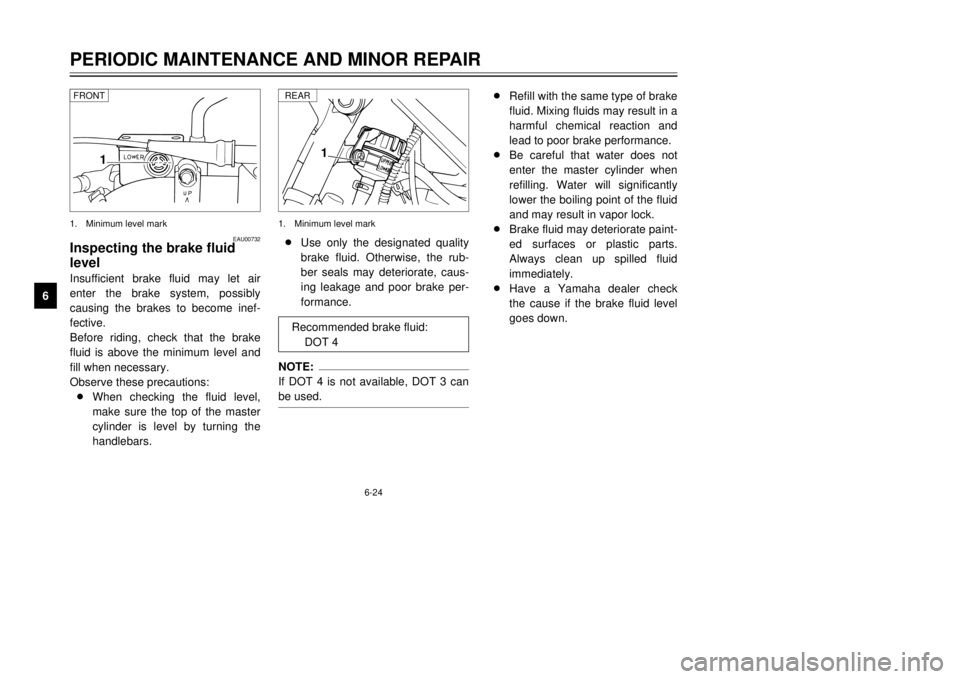
Inspecting the brake fluid
levelInsufficient brake fluid may let air
enter the brake system, possibly
causing the brakes to become inef-
fective.
Before riding, check that the brake
fluid is above the minimum level and
fill when necessary.
Observe these precautions:
8When checking the fluid level,
make sure the top of the master
cylinder is level by turning the
handlebars.
1
1.Minimum level mark FRONT
1
1.Minimum level markREARRecommended brake fluid:
DOT 4
8Refill with the same type of brake
fluid. Mixing fluids may result in a
harmful chemical reaction and
lead to poor brake performance.
8Be careful that water does not
enter the master cylinder when
refilling. Water will significantly
lower the boiling point of the fluid
and may result in vapor lock.
8Brake fluid may deteriorate paint-
ed surfaces or plastic parts.
Always clean up spilled fluid
immediately.
8Have a Yamaha dealer check
the cause if the brake fluid level
goes down.
3MB-9-E7 12/27/00 2:52 PM Page 60
Page 64 of 91
6-27
PERIODIC MAINTENANCE AND MINOR REPAIR
1
2
3
4
56
7
8
9
EC000097
cCBe sure to oil the chain after wash-
ing the motorcycle or riding in the
rain.
EAU02962
Cable inspection and
lubrication
EW000112
wDamage to the outer housing of
cables may lead to internal rusting
and interfere with the cable move-
ment. Replace damaged cables as
soon as possible to prevent unsafe
conditions.Lubricate the cables and cable ends.
If a cable does not operate smoothly,
ask a Yamaha dealer to replace it.
EAU00773
Throttle cable and grip
lubricationThe throttle twist grip assembly
should be greased at the time that
the cable is lubricated, since the grip
must be removed to get at the end of
the throttle cable. After removing the
screws, hold the end of the cable up
in the air and put in several drops of
lubricant. With the throttle grip disas-
sembled, coat the metal surface of
the grip assembly with a suitable all-
purpose grease.
Recommended lubricant:
Engine oil
3MB-9-E7 12/27/00 2:52 PM Page 63
Page 65 of 91

6-28
PERIODIC MAINTENANCE AND MINOR REPAIR
1
2
3
4
56
7
8
9
EAU00774
Autolube pump adjustmentThe autolube pump is a vital part of
the engine and requires very sophisti-
cated adjustment.
Adjusting should be left to a Yamaha
dealer who has the professional
knowledge and experience to do so.
EAU02984
Brake and shift pedal
lubricationLubricate the pivoting parts.
EAU02985
Brake and clutch lever
lubricationLubricate the pivoting parts.
Recommended lubricant:
Engine oil
Recommended lubricant:
Engine oil
3MB-9-E7 12/27/00 2:52 PM Page 64
Page 66 of 91
6-29
PERIODIC MAINTENANCE AND MINOR REPAIR
1
2
3
4
56
7
8
9
EAU02986
Sidestand lubricationLubricate the sidestand pivoting point
and metal-to-metal contact surfaces.
Check that the sidestand moves up
and down smoothly.
EW000113
wIf the sidestand does not move
smoothly, consult a Yamaha deal-
er.
Recommended lubricant:
Engine oil
EAU02939
Front fork inspectionVisual check
EW000115
wSecurely support the motorcycle
so there is no danger of it falling
over.Check for scratches or damage on
the inner tube and excessive oil leak-
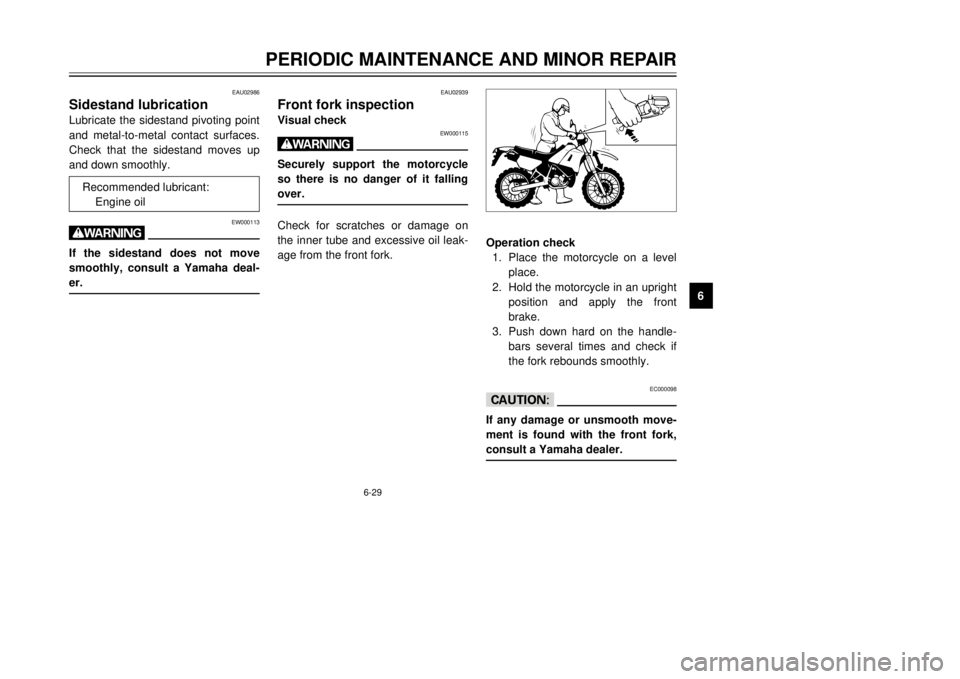
age from the front fork.Operation check
1.Place the motorcycle on a level
place.
2.Hold the motorcycle in an upright
position and apply the front
brake.
3.Push down hard on the handle-
bars several times and check if
the fork rebounds smoothly.
EC000098
cCIf any damage or unsmooth move-
ment is found with the front fork,
consult a Yamaha dealer.
3MB-9-E7 12/27/00 2:52 PM Page 65
Page 79 of 91
7-1
EAU01518
MOTORCYCLE CARE AND STORAGE
1
2
3
4
5
67
8
9
CareThe exposure of its technology
makes a motorcycle charming but
also vulnerable. Although high-quality
components are used, they are not
all rust-resistant. While a rusty
exhaust pipe may remain unnoticed
on a car, it does look unattractive on
a motorcycle. Frequent and proper
care, however, will keep your motor-
cycle looking good, extend its life and
maintain its performance. Moreover,
the warranty states that the vehicle
must be properly taken care of. For
all these reasons, it is recommended
that you observe the following clean-
ing and storing precautions.Before cleaning
1.Cover up the muffler outlet with a
plastic bag.
2.Make sure that all caps and cov-
ers as well as all electrical cou-
plers and connectors, including
the spark plug cap, are tightly
installed.
3.Remove extremely stubborn dirt,
like oil burnt onto the crankcase,
with a degreasing agent and a
brush, but never apply such
products onto seals, gaskets,
sprockets, the drive chain and
wheel axles. Always rinse the dirt
and degreaser off with water.Cleaning
After normal use
Remove dirt with warm water, a neu-
tral detergent and a soft clean
sponge, then rinse with plenty of
clean water. Use a tooth or bottle
brush for hard-to-reach parts.
Tougher dirt and insects will come off
more easily if the area is covered with
a wet cloth for a few minutes before
cleaning.
ECA00010
cC8
8
Avoid using strong acidic
wheel cleaners, especially on
spoked wheels. If you do use
such products for hard-to-
remove dirt, do not leave it on
any longer than instructed,
then thoroughly rinse it off
with water, immediately dry
the area and apply a corrosion
protection spray.
3MB-9-E7 12/27/00 2:52 PM Page 78