4WD YAMAHA GRIZZLY 700 2017 Owners Manual
[x] Cancel search | Manufacturer: YAMAHA, Model Year: 2017, Model line: GRIZZLY 700, Model: YAMAHA GRIZZLY 700 2017Pages: 174, PDF Size: 4.45 MB
Page 18 of 174
1-8
1
**.* kPa
*.** kgf/cm²*.* psi **.* kPa
*.** kgf/cm²
*.* psi
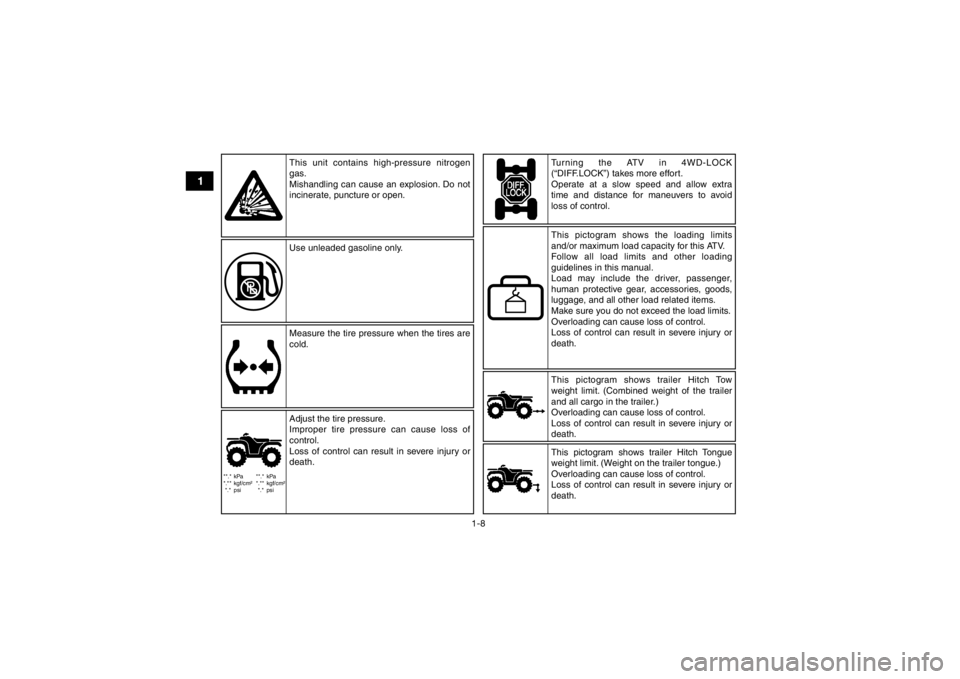
This pictogram shows trailer Hitch Tow
weight limit. (Combined weight of the trailer
and all cargo in the trailer.)
Overloading can cause loss of control.
Loss of control can result in severe injury or
death.
This unit contains high-pressure nitrogen
gas.
Mishandling can cause an explosion. Do not
incinerate, puncture or open.
Use unleaded gasoline only.
Measure the tire pressure when the tires are
cold. Turning the ATV in 4WD-LOCK
(“DIFF.LOCK”) takes more effort.
Operate at a slow speed and allow extra
time and distance for maneuvers to avoid
loss of control.
Adjust the tire pressure.
Improper tire pressure can cause loss of
control.
Loss of control can result in severe injury or
death. This pictogram shows the loading limits
and/or maximum load capacity for this ATV.
Follow all load limits and other loading
guidelines in this manual.
Load may include the driver, passenger,
human protective gear, accessories, goods,
luggage, and all other load related items.
Make sure you do not exceed the load limits.
Overloading can cause loss of control.
Loss of control can result in severe injury or
death.
This pictogram shows trailer Hitch Tongue
weight limit. (Weight on the trailer tongue.)
Overloading can cause loss of control.
Loss of control can result in severe injury or
death.
U2UD61E0.book Page 8 Monday, April 25, 2016 10:55 AM
Page 24 of 174
1-14
1
WARNING
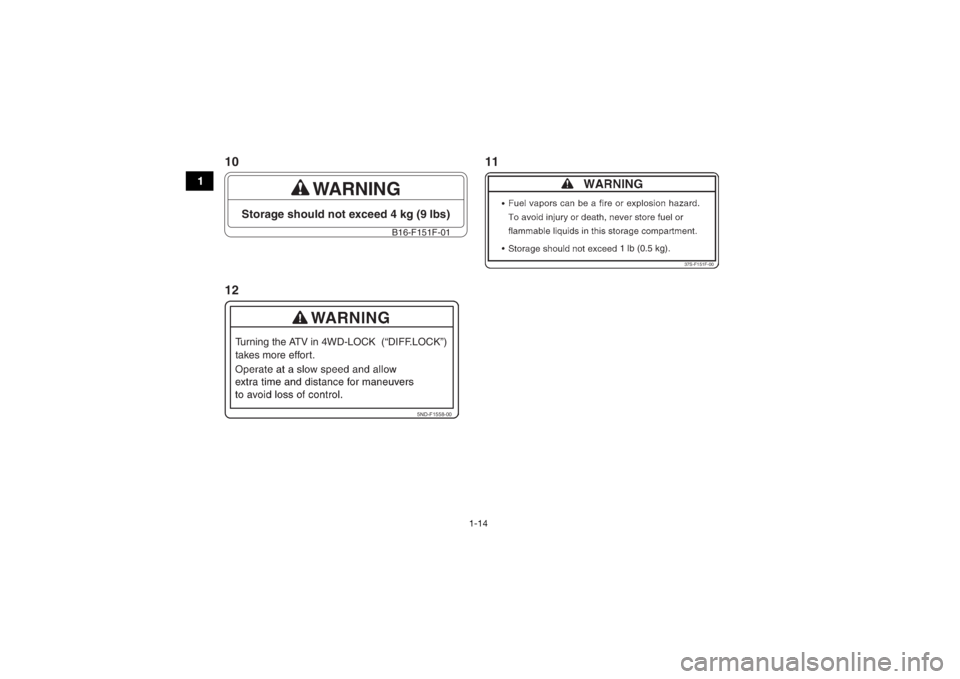
Storage should not exceed 4 kg (9 lbs)
B16-F151F-01
1 lb (0.5 kg).
37S-F151F-00
5ND-F1558-00
Turning the ATV in 4WD-LOCK (“DIFF.LOCK”)
takes more effort.1011
12U2UD61E0.book Page 14 Monday, April 25, 2016 10:55 AM
Page 36 of 174

4-4
4tem may not be working correctly. When this oc-
curs, have a Yamaha dealer check the EPS
system.
The electrical circuit of the warning light can be
checked by turning the key to “ ” (on). If the
warning light does not come on, have a Yamaha
dealer check the electrical circuit.
TIP
If the engine is stopped using the engine stop
switch and the key is in the “ ” (on) position,
the EPS warning light comes on to indicate that
the power assistance for the steering is not
functioning.
If the steering load is too heavy (i.e., excessive
steering use when the ATV is traveling at a slow
speed), the power assist is reduced to protect
the EPS motor from overheating. EBU30451On-Command four-wheel-drive indicator “ ”,
On-Command differential gear lock
indicator “ ” and indicator light “DIFF. LOCK”
The On-Command four-wheel-drive indicator “ ”
comes on when the On-Command four-wheel-
drive switch is set to the “4WD” position. The On-Command differential gear lock
indicator “ ” and the On-Command differential
gear lock indicator light “DIFF. LOCK” come on
when the On-Command differential gear lock
switch is set to the “LOCK” position.
TIP
Due to the synchronizing mechanism in the dif-
ferential gear case, the four-wheel-drive indica-
tor may not come on until the ATV starts
moving.
When the On-Command differential gear lock
switch is set to “LOCK” or “4WD”, the
indicator “ ” and the indicator light “DIFF.
LOCK” will flash until the differential gear is
completely locked or unlocked. If the indicator
and the indicator light continue to flash, the dif-
ferential is not completely locked or unlocked.
In this case, start moving to allow time for the
differential to lock or unlock.
U2UD61E0.book Page 4 Monday, April 25, 2016 10:55 AM
Page 42 of 174

4-10
4
WARNING
EWB00151Always ride at a slow speed when the ATV is in
four-wheel-drive differential gear lock, and al-
low extra time and distance for maneuvers.
All wheels turn at the same speed when the dif-
ferential is locked, so it takes more effort to
turn the ATV. The effort needed to turn increas-
es with the riding speed. You may lose control
and have an accident if you cannot make a
sharp enough turn for the speed you are trav-
eling. EBU26608On-Command four-wheel-drive switch
“2WD”/“4WD”
WARNING
EWB00164Always stop the ATV before changing from
two-wheel drive to four-wheel drive and vice
versa. The ATV handles differently in two-
wheel drive than in four-wheel drive in some
circumstances. Changing from two-wheel
drive to four-wheel drive or vice versa while
moving may cause the ATV to unexpectedlyhandle differently. This could distract the oper-
ator and increase the risk of losing control and
of causing an accident.
This ATV is equipped with a switch to change from
two-wheel drive to four-wheel drive and vice ver-
sa. Select the appropriate drive according to the
terrain and the conditions.
“2WD” (two-wheel drive): Power is supplied to
the rear wheels.
“4WD” (four-wheel drive): Power is supplied to
the rear and front wheels.
To change from two-wheel drive to four-wheel
drive, stop the ATV and push the switch in to the
“4WD” position. Then, the four-wheel-drive
indicator “ ” comes on in the multi-function dis-
play.
To change from four-wheel drive to two-wheel
drive, stop the ATV and push the switch in to the
“2WD” position.
U2UD61E0.book Page 10 Monday, April 25, 2016 10:55 AM
Page 43 of 174
4-11
4
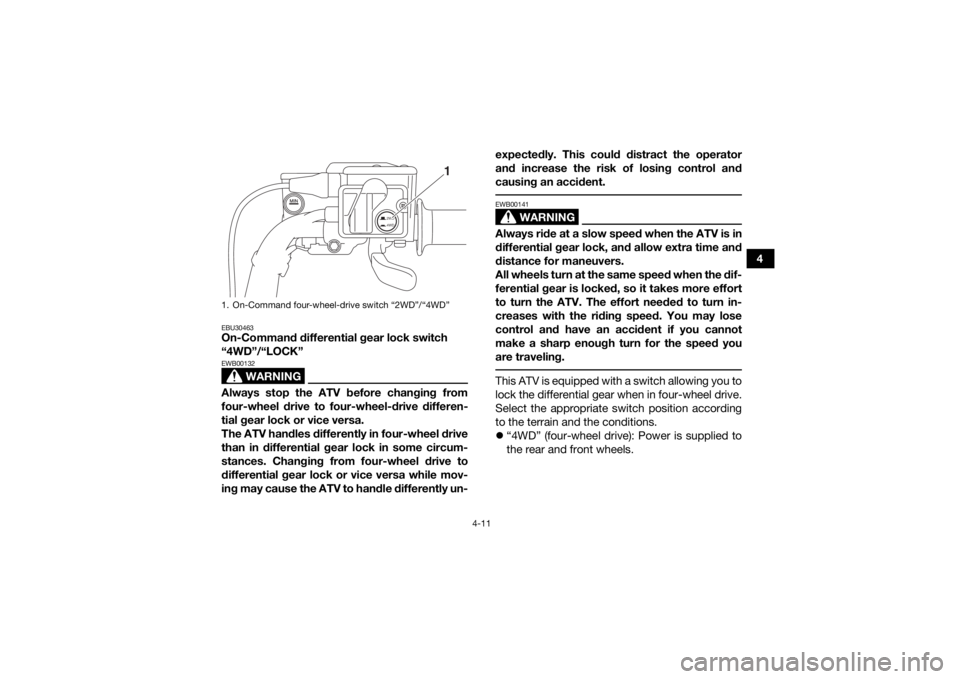
EBU30463On-Command differential gear lock switch
“4WD”/“LOCK”
WARNING
EWB00132Always stop the ATV before changing from
four-wheel drive to four-wheel-drive differen-
tial gear lock or vice versa.
The ATV handles differently in four-wheel drive
than in differential gear lock in some circum-
stances. Changing from four-wheel drive to
differential gear lock or vice versa while mov-
ing may cause the ATV to handle differently un-expectedly. This could distract the operator
and increase the risk of losing control and
causing an accident.
WARNING
EWB00141Always ride at a slow speed when the ATV is in
differential gear lock, and allow extra time and
distance for maneuvers.
All wheels turn at the same speed when the dif-
ferential gear is locked, so it takes more effort
to turn the ATV. The effort needed to turn in-
creases with the riding speed. You may lose
control and have an accident if you cannot
make a sharp enough turn for the speed you
are traveling. This ATV is equipped with a switch allowing you to
lock the differential gear when in four-wheel drive.
Select the appropriate switch position according
to the terrain and the conditions.
“4WD” (four-wheel drive): Power is supplied to
the rear and front wheels.
1. On-Command four-wheel-drive switch “2WD”/“4WD”
2WD
4WD
1
U2UD61E0.book Page 11 Monday, April 25, 2016 10:55 AM
Page 44 of 174
4-12
4
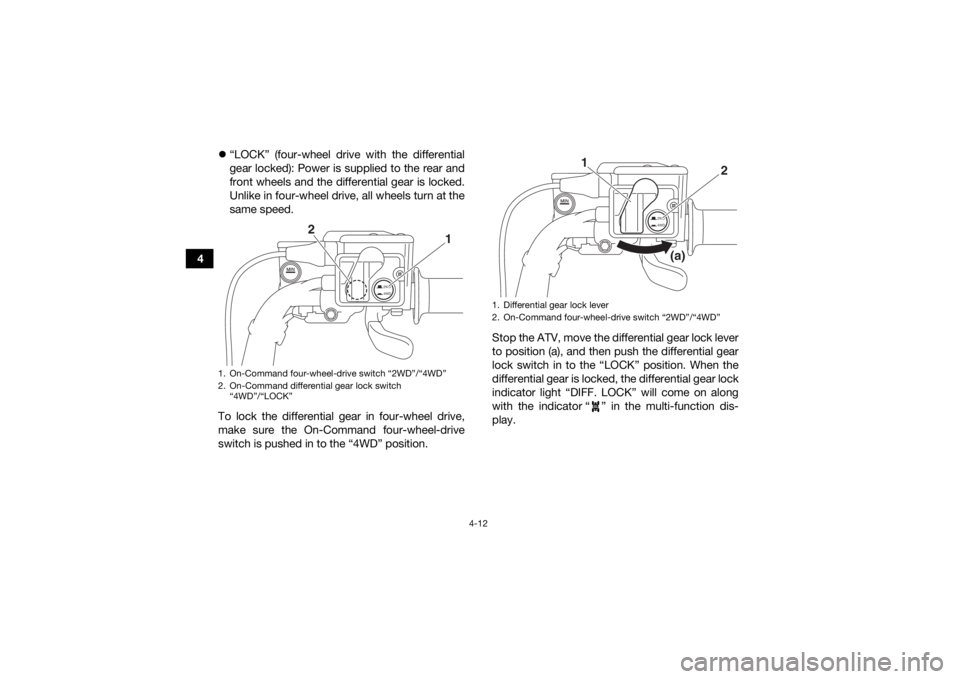
“LOCK” (four-wheel drive with the differential
gear locked): Power is supplied to the rear and
front wheels and the differential gear is locked.
Unlike in four-wheel drive, all wheels turn at the
same speed.
To lock the differential gear in four-wheel drive,
make sure the On-Command four-wheel-drive
switch is pushed in to the “4WD” position. Stop the ATV, move the differential gear lock lever
to position (a), and then push the differential gear
lock switch in to the “LOCK” position. When the
differential gear is locked, the differential gear lock
indicator light “DIFF. LOCK” will come on along
with the indicator “ ” in the multi-function dis-
play.
1. On-Command four-wheel-drive switch “2WD”/“4WD”
2. On-Command differential gear lock switch
“4WD”/“LOCK”
2WD
4WD
1
2
1. Differential gear lock lever
2. On-Command four-wheel-drive switch “2WD”/“4WD”
2WD
4WD
2
1
(a)
U2UD61E0.book Page 12 Monday, April 25, 2016 10:55 AM
Page 45 of 174
4-13
4
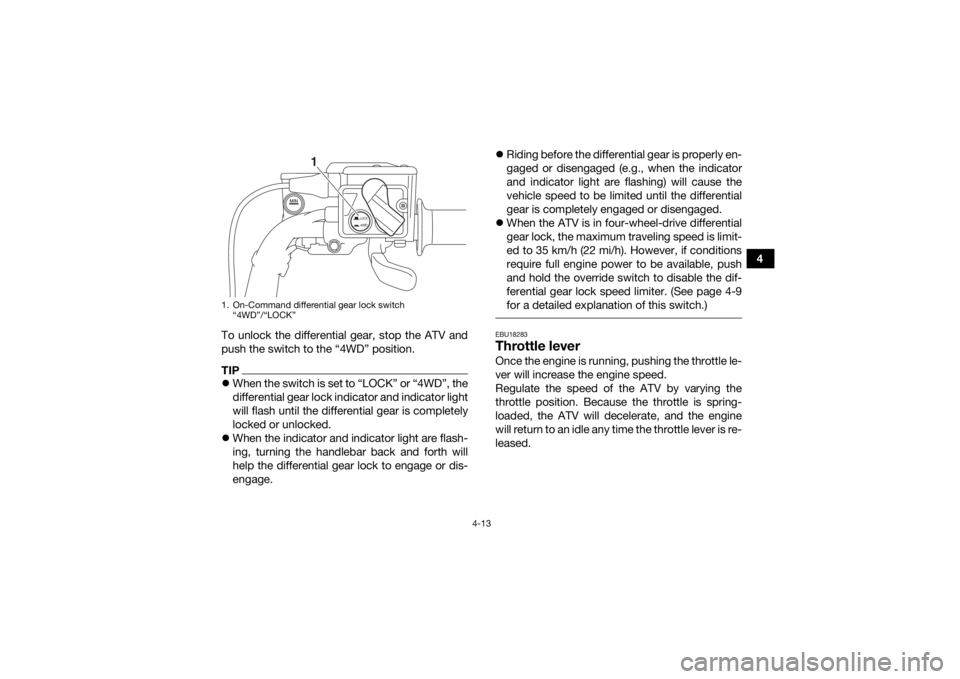
To unlock the differential gear, stop the ATV and
push the switch to the “4WD” position.
TIP When the switch is set to “LOCK” or “4WD”, the
differential gear lock indicator and indicator light
will flash until the differential gear is completely
locked or unlocked.
When the indicator and indicator light are flash-
ing, turning the handlebar back and forth will
help the differential gear lock to engage or dis-
engage.
Riding before the differential gear is properly en-
gaged or disengaged (e.g., when the indicator
and indicator light are flashing) will cause the
vehicle speed to be limited until the differential
gear is completely engaged or disengaged.
When the ATV is in four-wheel-drive differential
gear lock, the maximum traveling speed is limit-
ed to 35 km/h (22 mi/h). However, if conditions
require full engine power to be available, push
and hold the override switch to disable the dif-
ferential gear lock speed limiter. (See page 4-9
for a detailed explanation of this switch.)
EBU18283Throttle leverOnce the engine is running, pushing the throttle le-
ver will increase the engine speed.
Regulate the speed of the ATV by varying the
throttle position. Because the throttle is spring-
loaded, the ATV will decelerate, and the engine
will return to an idle any time the throttle lever is re-
leased.
1. On-Command differential gear lock switch
“4WD”/“LOCK”
LOCK4WD
1
U2UD61E0.book Page 13 Monday, April 25, 2016 10:55 AM
Page 46 of 174
4-14
4Before starting the engine, check the throttle to be
sure it is operating smoothly. Make sure it returns
to the idle position as soon as the lever is released.
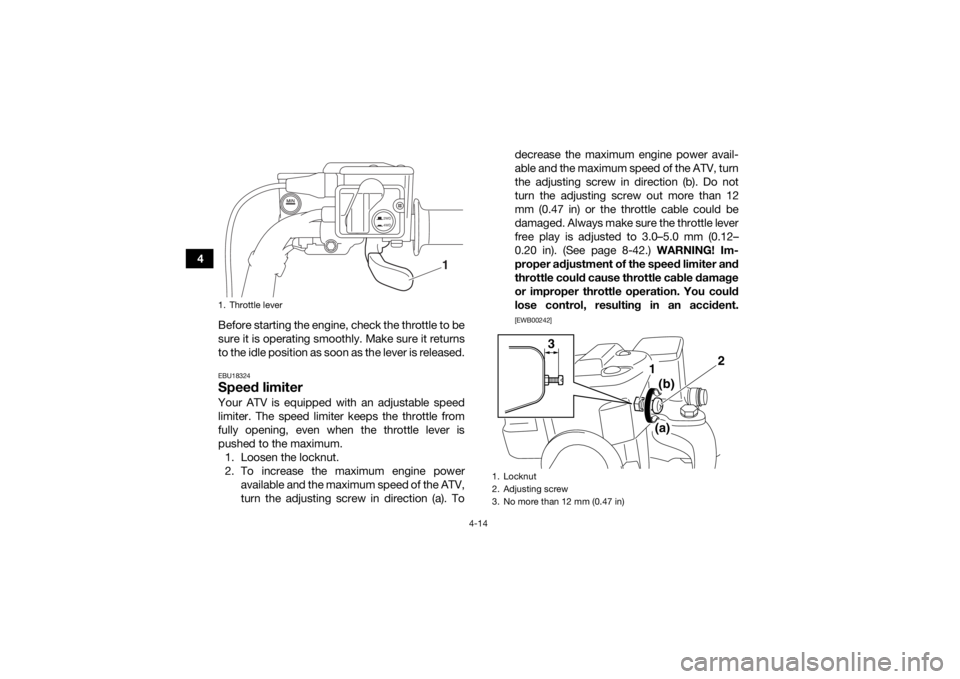
EBU18324Speed limiterYour ATV is equipped with an adjustable speed
limiter. The speed limiter keeps the throttle from
fully opening, even when the throttle lever is
pushed to the maximum.1. Loosen the locknut.
2. To increase the maximum engine power available and the maximum speed of the ATV,
turn the adjusting screw in direction (a). To decrease the maximum engine power avail-
able and the maximum speed of the ATV, turn
the adjusting screw in direction (b). Do not
turn the adjusting screw out more than 12
mm (0.47 in) or the throttle cable could be
damaged. Always make sure the throttle lever
free play is adjusted to 3.0–5.0 mm (0.12–
0.20 in). (See page 8-42.) WARNING! Im-
proper adjustment of the speed limiter and
throttle could cause throttle cable damage
or improper throttle operation. You could
lose control, resulting in an accident.
[EWB00242]
1. Throttle lever
2WD
4WD
1
1. Locknut
2. Adjusting screw
3. No more than 12 mm (0.47 in)
2
1
3
(b)
(a)
U2UD61E0.book Page 14 Monday, April 25, 2016 10:55 AM
Page 87 of 174
7-15
7
Do not attempt to climb hills until you have mas-
tered basic maneuvers on flat ground. Always
check the terrain carefully before attempting any
hill. In all cases avoid inclines with slippery or
loose surfaces, or obstacles that might cause you
to lose control.
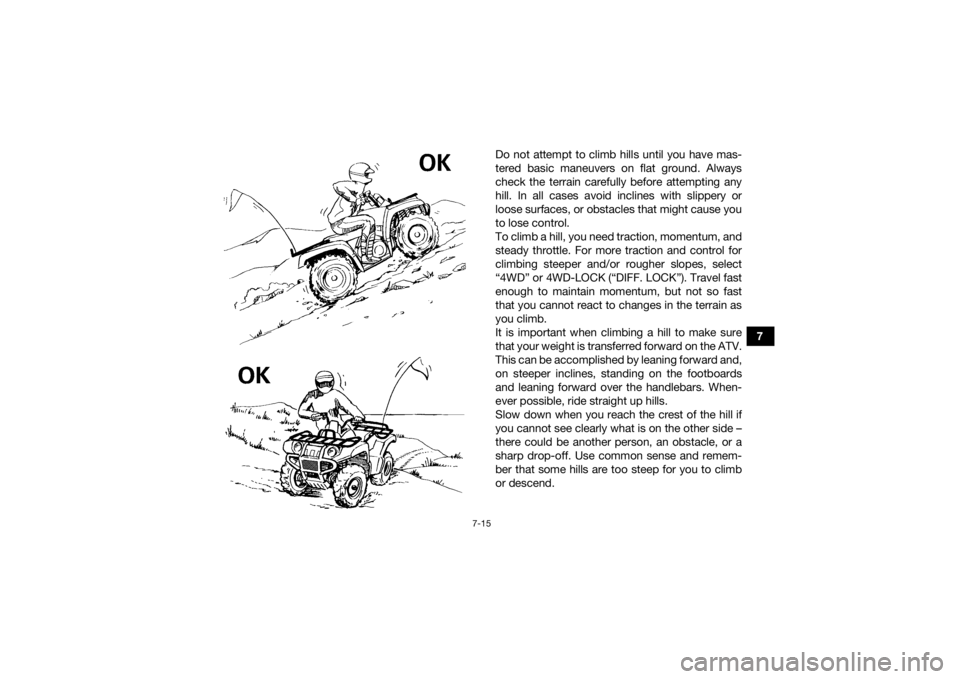
To climb a hill, you need traction, momentum, and
steady throttle. For more traction and control for
climbing steeper and/or rougher slopes, select
“4WD” or 4WD-LOCK (“DIFF. LOCK”). Travel fast
enough to maintain momentum, but not so fast
that you cannot react to changes in the terrain as
you climb.
It is important when climbing a hill to make sure
that your weight is transferred forward on the ATV.
This can be accomplished by leaning forward and,
on steeper inclines, standing on the footboards
and leaning forward over the handlebars. When-
ever possible, ride straight up hills.
Slow down when you reach the crest of the hill if
you cannot see clearly what is on the other side –
there could be another person, an obstacle, or a
sharp drop-off. Use common sense and remem-
ber that some hills are too steep for you to climb
or descend.
U2UD61E0.book Page 15 Monday, April 25, 2016 10:55 AM
Page 88 of 174
7-16
7If you are climbing a hill and you find that you have
not properly judged your ability to make it to the
top, you should turn the ATV around while you still
have forward motion (provided you have the room
to do so) and go down the hill.
If your ATV has stalled or stopped and you believe
you can continue up the hill, restart carefully to
make sure you do not lift the front wheels which
could cause you to lose control. If you are unable
to continue up the hill, dismount the ATV on the
uphill side. Physically turn the ATV around and
then descend the hill.
If you start to roll backwards, DO NOT apply either
brake abruptly. If you are in “2WD”, apply only the
front brake. When fully stopped, apply the rear
brake as well, and then shift to the park position. If
you are in “4WD”, because all wheels are inter-
connected by the drive train, applying either brake
will brake all wheels, therefore, avoid sudden ap-
plication of either the front or rear brake as the
wheels on the uphill side could come off the
ground. The ATV could easily tip over backwards.
Apply both the front and rear brakes gradually.
When fully stopped, lock shift to the park position
and dismount the ATV immediately on the uphill
side. Dismount on uphill side or to a side if pointed straight uphill. Turn the ATV around and remount,
following the procedure described in the Owner’s
Manual.
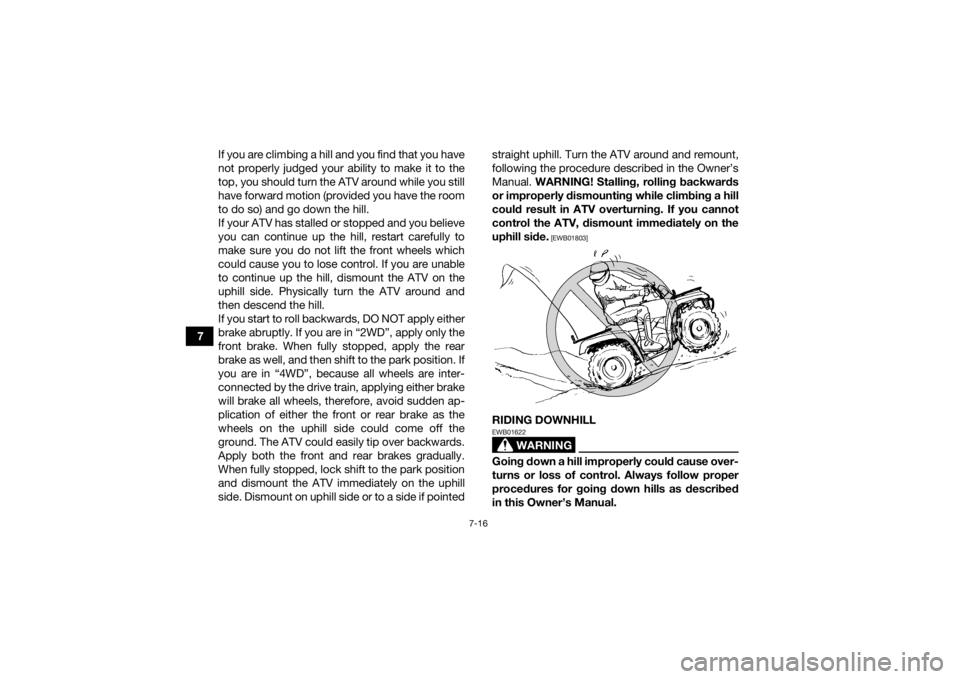
WARNING! Stalling, rolling backwards
or improperly dismounting while climbing a hill
could result in ATV overturning. If you cannot
control the ATV, dismount immediately on the
uphill side.
[EWB01803]
RIDING DOWNHILL
WARNING
EWB01622Going down a hill improperly could cause over-
turns or loss of control. Always follow proper
procedures for going down hills as described
in this Owner’s Manual.
U2UD61E0.book Page 16 Monday, April 25, 2016 10:55 AM