YAMAHA VIKING 2014 Workshop Manual
VIKING 2014
YAMAHA
YAMAHA
https://www.carmanualsonline.info/img/51/51971/w960_51971-0.png
YAMAHA VIKING 2014 Workshop Manual
Trending: coolant level, fuel tank capacity, fuses, ground clearance, fuse box, oil additives, fuse chart
Page 51 of 180
4-19
1
2
34
5
6
7
8
9
10
11
12
13
14
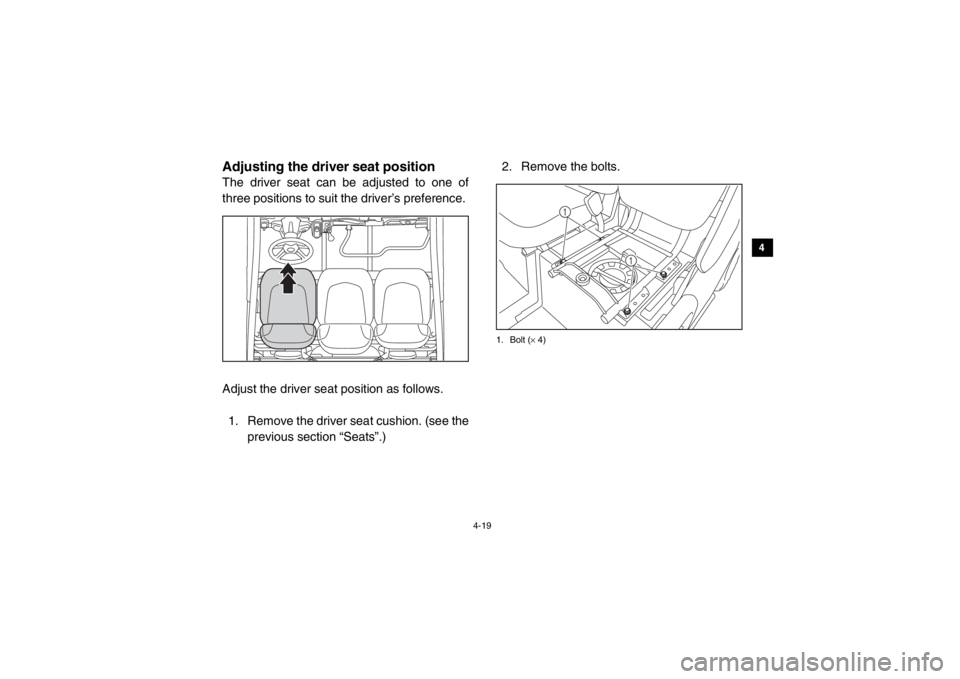
Adjusting the driver seat positionThe driver seat can be adjusted to one of
three positions to suit the driver’s preference.
Adjust the driver seat position as follows.1. Remove the driver seat cushion. (see the previous section “Seats”.) 2. Remove the bolts.
1. Bolt (
× 4)
1
1
1XP7B_EE.book Page 19 Tuesday, February 4, 2014 3:40 PM
Page 52 of 180
4-20
4
5
6
7
8
9
10
11
12
13
14
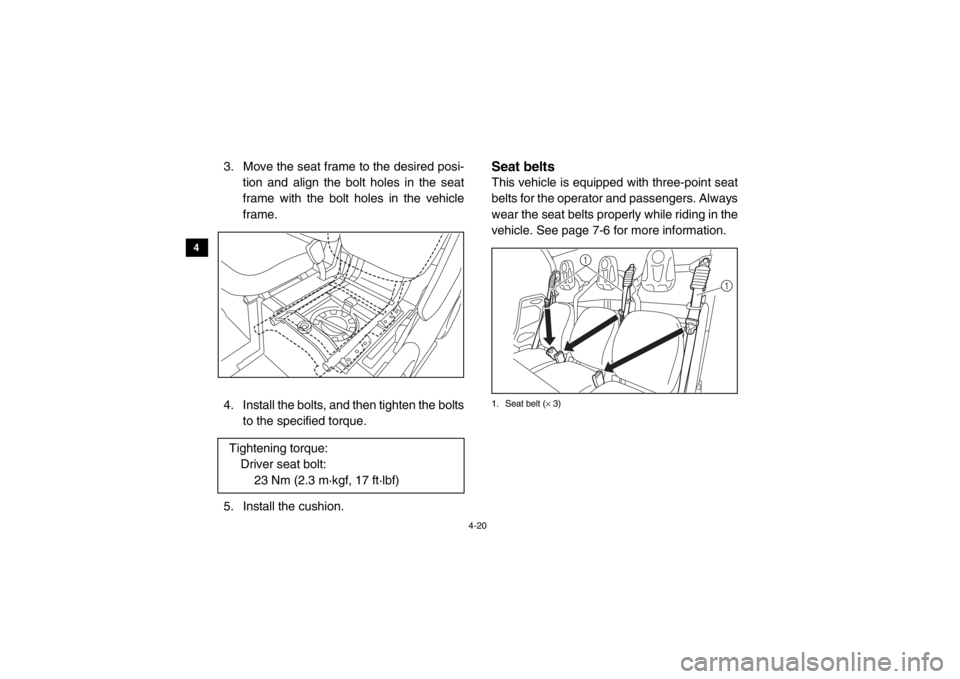
3. Move the seat frame to the desired posi- tion and align the bolt holes in the seat
frame with the bolt holes in the vehicle
frame.
4. Install the bolts, and then tighten the bolts to the specified torque.
5. Install the cushion.
EVU00340Seat beltsThis vehicle is equipped with three-point seat
belts for the operator and passengers. Always
wear the seat belts properly while riding in the
vehicle. See page 7-6 for more information.1. Seat belt ( × 3)
Tightening torque:
Driver seat bolt: 23 Nm (2.3 m·kgf, 17 ft·lbf)
1
1
1XP7B_EE.book Page 20 Tuesday, February 4, 2014 3:40 PM
Page 53 of 180

4-21
1
2
34
5
6
7
8
9
10
11
12
13
14
EVU01191Glove compartmentNOTICETo protect from damage, do not put metal
items, like tools, or sharply edged items,
directly in the glove compartment. If they
must be stored, wrap them in appropriate
cushioning material.a. Unlock.b. Open.
Storage compartmentsThe storage compartments are located under
the multi-function meter, under the right pas-
senger seat, and under the driver seat. To ac-
cess an under-seat compartment, remove the
seat (see page 4-18 for more information).
When storing any documents in the storage
compartments, be sure to wrap them in a
plastic bag so that they will not get wet. When
washing the vehicle, be careful not to let any
water enter the storage compartments.NOTICETo protect from damage, do not put metal
items, like tools, or sharply edged items
directly in the storage compartment. If
these items must be stored, wrap them in
appropriate cushioning material.
a
b
1XP7B_EE.book Page 21 Tuesday, February 4, 2014 3:40 PM
Page 54 of 180
4-22
4
5
6
7
8
9
10
11
12
13
14
1. Storage compartment
1. Storage compartment
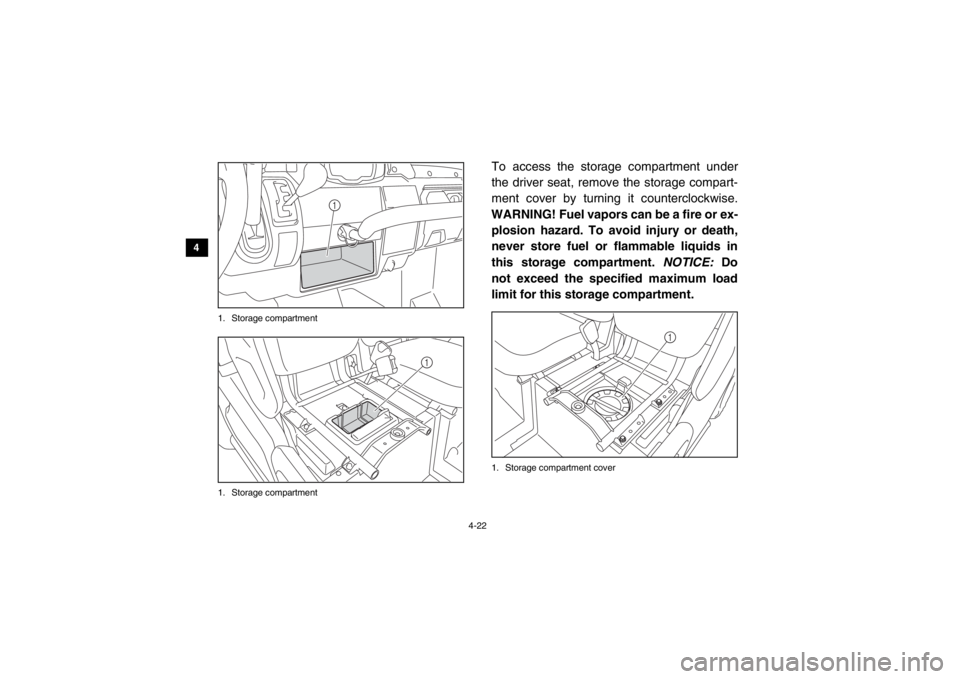
To access the storage compartment under
the driver seat, remove the storage compart-
ment cover by turning it counterclockwise.
WARNING! Fuel vapors can be a fire or ex- plosion hazard. To avoid injury or death,
never store fuel or flammable liquids in
this storage compartment. NOTICE: Do
not exceed the specified maximum load
limit for this storage compartment.1. Storage compartment cover
1
1
1
1XP7B_EE.book Page 22 Tuesday, February 4, 2014 3:40 PM
Page 55 of 180
4-23
1
2
34
5
6
7
8
9
10
11
12
13
14
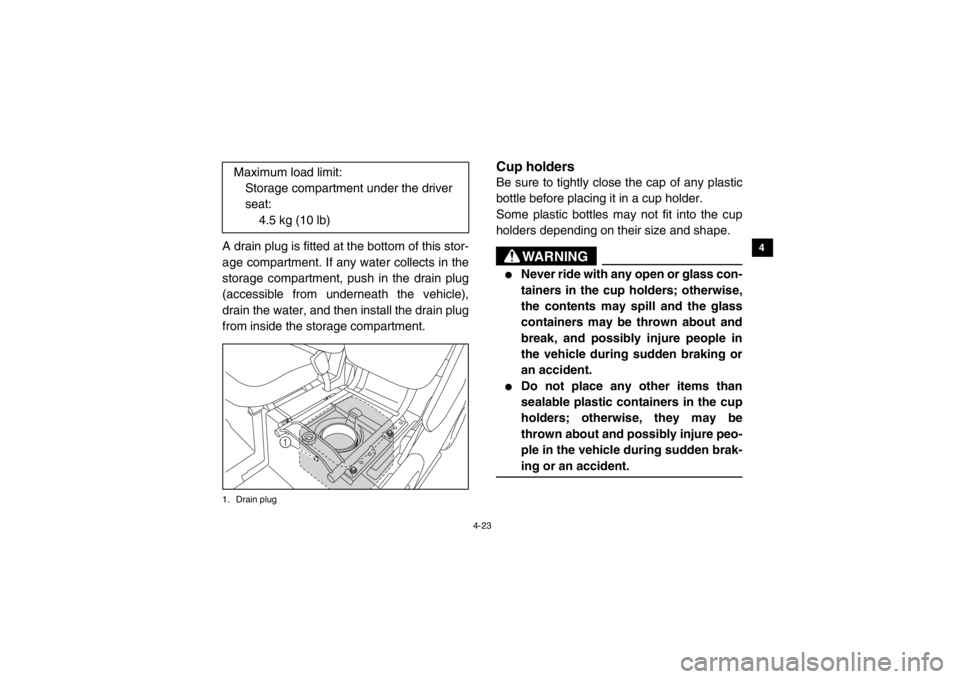
A drain plug is fitted at the bottom of this stor-
age compartment. If any water collects in the
storage compartment, push in the drain plug
(accessible from underneath the vehicle),
drain the water, and then install the drain plug
from inside the storage compartment.1. Drain plug
5B410005Cup holdersBe sure to tightly close the cap of any plastic
bottle before placing it in a cup holder.
Some plastic bottles may not fit into the cup
holders depending on their size and shape.
WARNING
●
Never ride with any open or glass con-
tainers in the cup holders; otherwise,
the contents may spill and the glass
containers may be thrown about and
break, and possibly injure people in
the vehicle during sudden braking or
an accident.
●
Do not place any other items than
sealable plastic containers in the cup
holders; otherwise, they may be
thrown about and possibly injure peo-
ple in the vehicle during sudden brak-
ing or an accident.
Maximum load limit:Storage compartment under the driver
seat:
4.5 kg (10 lb)
1
1XP7B_EE.book Page 23 Tuesday, February 4, 2014 3:40 PM
Page 56 of 180
4-24
4
5
6
7
8
9
10
11
12
13
14
1. Cup holder ( × 4)
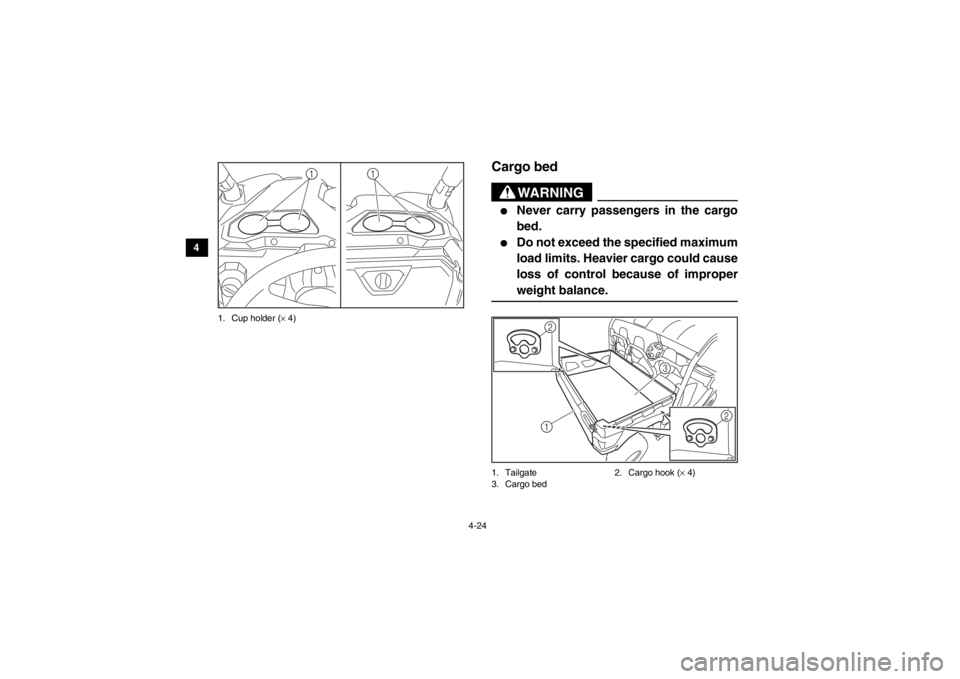
EVU00351Cargo bed
WARNING
●
Never carry passengers in the cargo
bed.
●
Do not exceed the specified maximum
load limits. Heavier cargo could cause
loss of control because of improper
weight balance.
1. Tailgate 2. Cargo hook (× 4)
3. Cargo bed
11
1 3
2
2
1XP7B_EE.book Page 24 Tuesday, February 4, 2014 3:40 PM
Page 57 of 180
4-25
1
2
34
5
6
7
8
9
10
11
12
13
14
For additional loading information, see page
6-8.
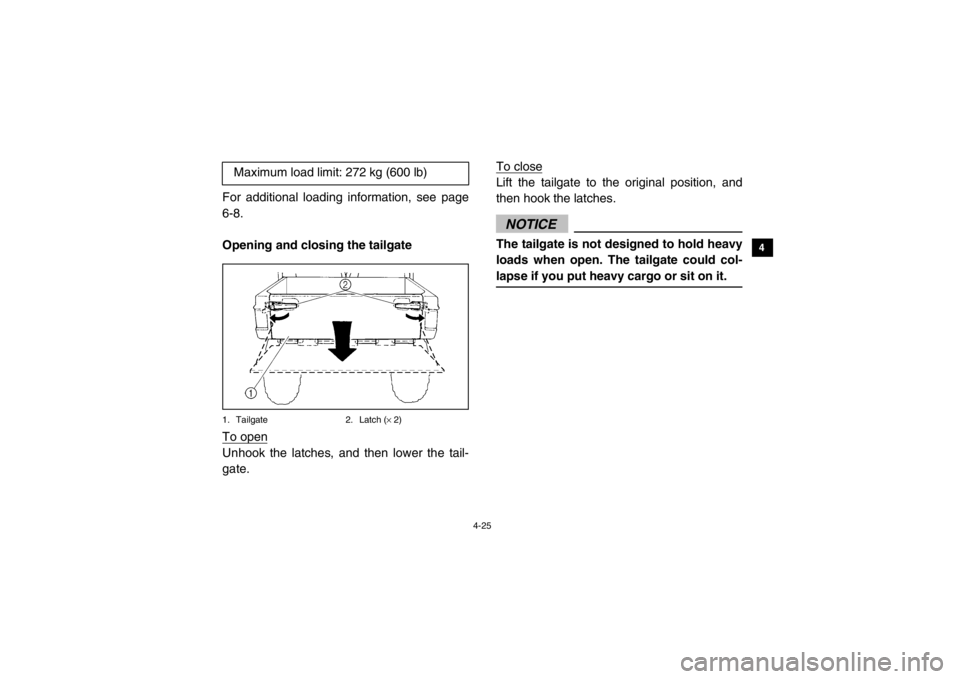
Opening and closing the tailgate1. Tailgate2. Latch (× 2)To openUnhook the latches, and then lower the tail-
gate. To close
Lift the tailgate to the original position, and
then hook the latches.NOTICEThe tailgate is not designed to hold heavy
loads when open. The tailgate could col-
lapse if you put heavy cargo or sit on it.
Maximum load limit: 272 kg (600 lb)
1XP7B_EE.book Page 25 Tuesday, February 4, 2014 3:40 PM
Page 58 of 180
4-26
4
5
6
7
8
9
10
11
12
13
14
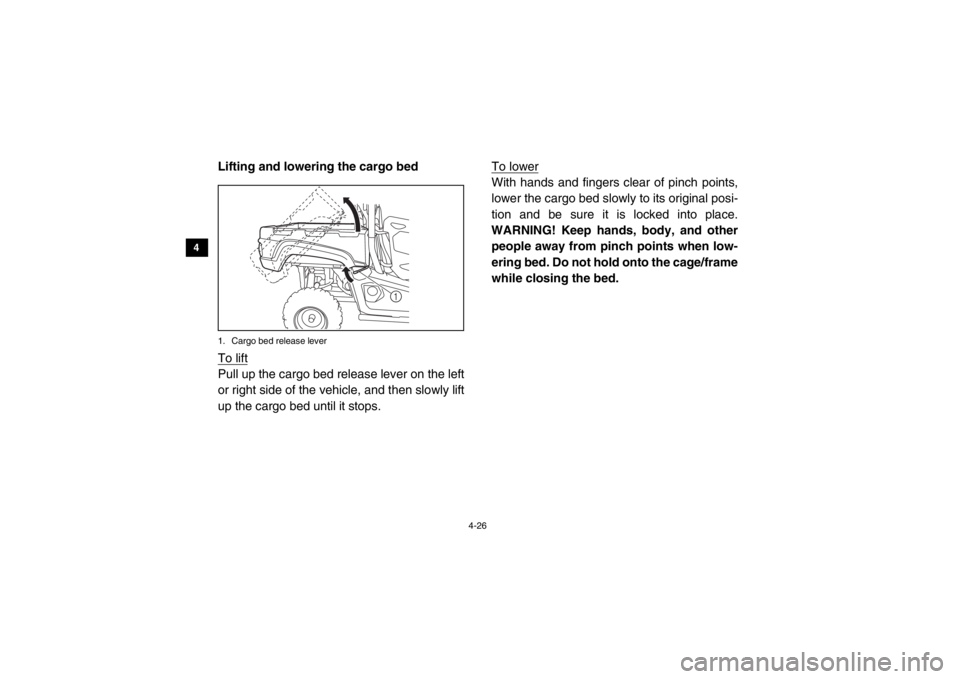
Lifting and lowering the cargo bed1. Cargo bed release leverTo liftPull up the cargo bed release lever on the left
or right side of the vehicle, and then slowly lift
up the cargo bed until it stops. To lower
With hands and fingers clear of pinch points,
lower the cargo bed slowly to its original posi-
tion and be sure it is locked into place.
WARNING! Keep hands, body, and other people away from pinch points when low-
ering bed. Do not hold onto the cage/frame
while closing the bed.
1
1XP7B_EE.book Page 26 Tuesday, February 4, 2014 3:40 PM
Page 59 of 180
4-27
1
2
34
5
6
7
8
9
10
11
12
13
14
5UG1B001 The front and rear shock absorber
assemblies
WARNING
These shock absorber assemblies contain
highly pressurized nitrogen gas. Read and
understand the following information be-
fore handling the shock absorber assem-
blies.●
Do not tamper with or attempt to open
the cylinder assemblies.
●
Do not subject the shock absorber as-
semblies to an open flame or other
high heat source. This may cause the
unit to explode due to excessive gas
pressure.
●
Do not deform or damage the cylin-
ders in any way. Cylinder damage will
result in poor damping performance.
●
Do not dispose of a damaged or worn
out shock absorber assembly your-
self. Take the shock absorber assem-
bly to a Yamaha dealer for any
service.
1XP7B_EE.book Page 27 Tuesday, February 4, 2014 3:40 PM
Page 60 of 180
4-28
4
5
6
7
8
9
10
11
12
13
14
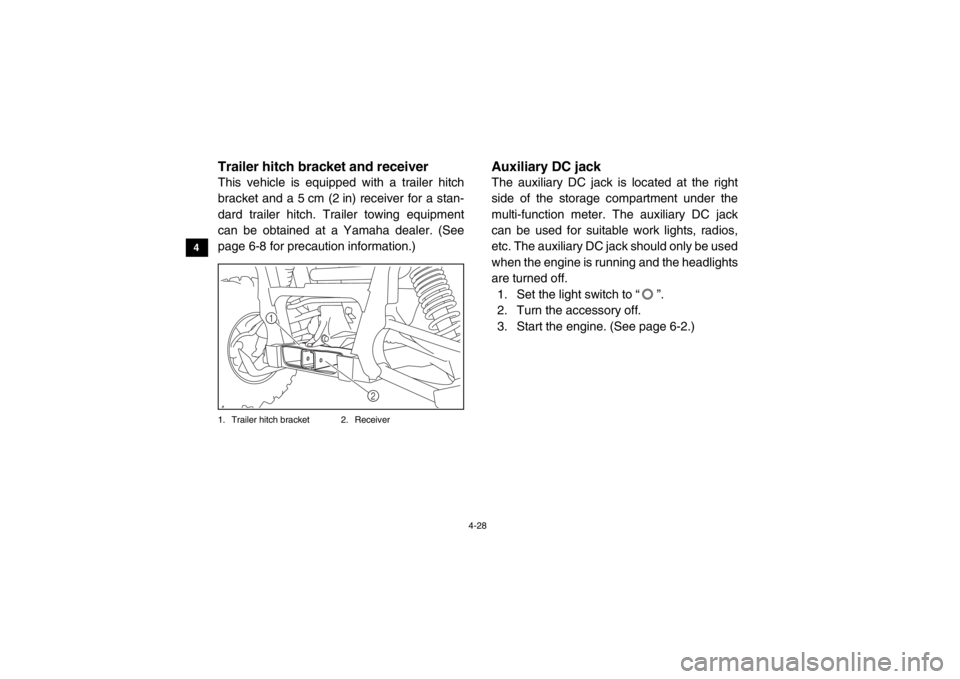
EVU00370Trailer hitch brac ket and receiverThis vehicle is equipped with a trailer hitch
bracket and a 5 cm (2 in) receiver for a stan-
dard trailer hitch. Trailer towing equipment
can be obtained at a Yamaha dealer. (See
page 6-8 for precaution information.)1. Trailer hitch bracket 2. Receiver
EVU00380Auxiliary DC jackThe auxiliary DC jack is located at the right
side of the storage compartment under the
multi-function meter. The auxiliary DC jack
can be used for suitable work lights, radios,
etc. The auxiliary DC jack should only be used
when the engine is running and the headlights
are turned off.
1. Set the light switch to “ ”.
2. Turn the accessory off.
3. Start the engine. (See page 6-2.)
2
1
1XP7B_EE.book Page 28 Tuesday, February 4, 2014 3:40 PM
Trending: oil dipstick, low beam, ECU, checking oil, steering, spare wheel, rims
