torque YAMAHA WOLVERINE 2016 User Guide
[x] Cancel search | Manufacturer: YAMAHA, Model Year: 2016, Model line: WOLVERINE, Model: YAMAHA WOLVERINE 2016Pages: 192, PDF Size: 4.38 MB
Page 136 of 192
8-21
8
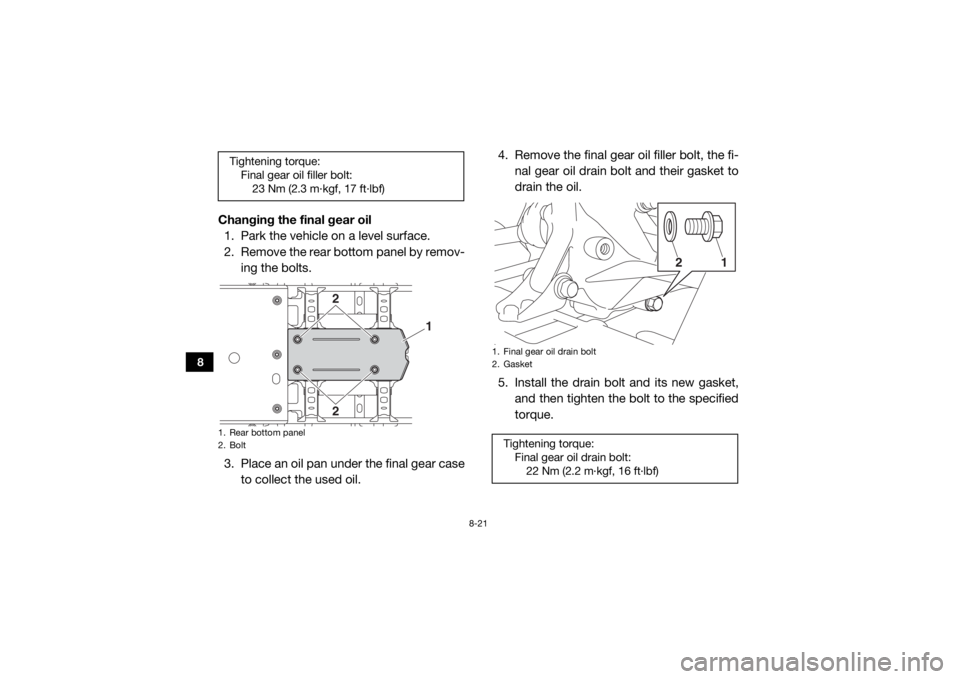
Changing the final gear oil1. Park the vehicle on a level surface.
2. Remove the rear bottom panel by remov-
ing the bolts.
3. Place an oil pan under the final gear case to collect the used oil. 4. Remove the final gear oil filler bolt, the fi-
nal gear oil drain bolt and their gasket to
drain the oil.
5. Install the drain bolt and its new gasket, and then tighten the bolt to the specified
torque.Tightening torque:Final gear oil filler bolt:23 Nm (2.3 m·kgf, 17 ft·lbf)1. Rear bottom panel
2. Bolt
22
1
1. Final gear oil drain bolt
2. GasketTightening torque:Final gear oil drain bolt:22 Nm (2.2 m·kgf, 16 ft·lbf)
21
UBN57AE0.book Page 21 Tuesday, November 24, 2015 1:42 PM
Page 137 of 192
![YAMAHA WOLVERINE 2016 User Guide 8-22
8
6. Refill with the recommended final gear oilup to the brim of the filler hole. NOTICE:
Be sure no foreign material enters the
final gear case.
[ECB00422]
7. Check the oil filler bolt gasket YAMAHA WOLVERINE 2016 User Guide 8-22
8
6. Refill with the recommended final gear oilup to the brim of the filler hole. NOTICE:
Be sure no foreign material enters the
final gear case.
[ECB00422]
7. Check the oil filler bolt gasket](/img/51/52237/w960_52237-136.png)
8-22
8
6. Refill with the recommended final gear oilup to the brim of the filler hole. NOTICE:
Be sure no foreign material enters the
final gear case.
[ECB00422]
7. Check the oil filler bolt gasket for dam- age, and replace it if necessary.
8. Install the oil filler bolt and its gasket, and
then tighten the bolt to the specified
torque.
9. Check for oil leakage. If oil leakage is found, check for the cause. 10. Install the panel by installing the bolts,
and then tightening them to the specified
torque.
EBU36082Differential gear oilChecking the differential gear oil level
1. Park the vehicle on a level surface.
2. Remove the differential gear oil filler bolt and its gasket, and then check the oil lev-
el. It should be up to the brim of the filler
hole.
Recommended oil:SAE 80 API GL-4 Hypoid gear oil
Oil quantity: 0.64 L (0.68 US qt, 0.56 Imp.qt)
Tightening torque: Final gear oil filler bolt:23 Nm (2.3 m·kgf, 17 ft·lbf)
Tightening torques: Rear bottom panel bolt:9 Nm (0.9 m·kgf, 6.5 ft·lbf)
UBN57AE0.book Page 22 Tuesday, November 24, 2015 1:42 PM
Page 138 of 192
![YAMAHA WOLVERINE 2016 User Guide 8-23
8
3. If the level is low, add sufficient oil of therecommended type to raise it to the
specified level. NOTICE: Be sure no for-
eign material enters the differential
gear case.
[ECB00412]
4. Ch YAMAHA WOLVERINE 2016 User Guide 8-23
8
3. If the level is low, add sufficient oil of therecommended type to raise it to the
specified level. NOTICE: Be sure no for-
eign material enters the differential
gear case.
[ECB00412]
4. Ch](/img/51/52237/w960_52237-137.png)
8-23
8
3. If the level is low, add sufficient oil of therecommended type to raise it to the
specified level. NOTICE: Be sure no for-
eign material enters the differential
gear case.
[ECB00412]
4. Check the gasket for damage, and re- place it if necessary.
5. Install the differential gear oil filler bolt and its gasket, and then tighten the bolt
to the specified torque. Changing the differential gear oil
1. Park the vehicle on a level surface.
2. Remove the front bottom panel by re-
moving the bolts.
3. Place an oil pan under the differential gear case to collect the used oil.1. Differential gear oil filler bolt
2. Gasket
3. Differential gear oil
4. Correct oil level
1
2
3
4
Tightening torque:Differential gear oil filler bolt:23 Nm (2.3 m·kgf, 17 ft·lbf)1. Front bottom panel
2. Bolt
22
1
UBN57AE0.book Page 23 Tuesday, November 24, 2015 1:42 PM
Page 139 of 192
8-24
8
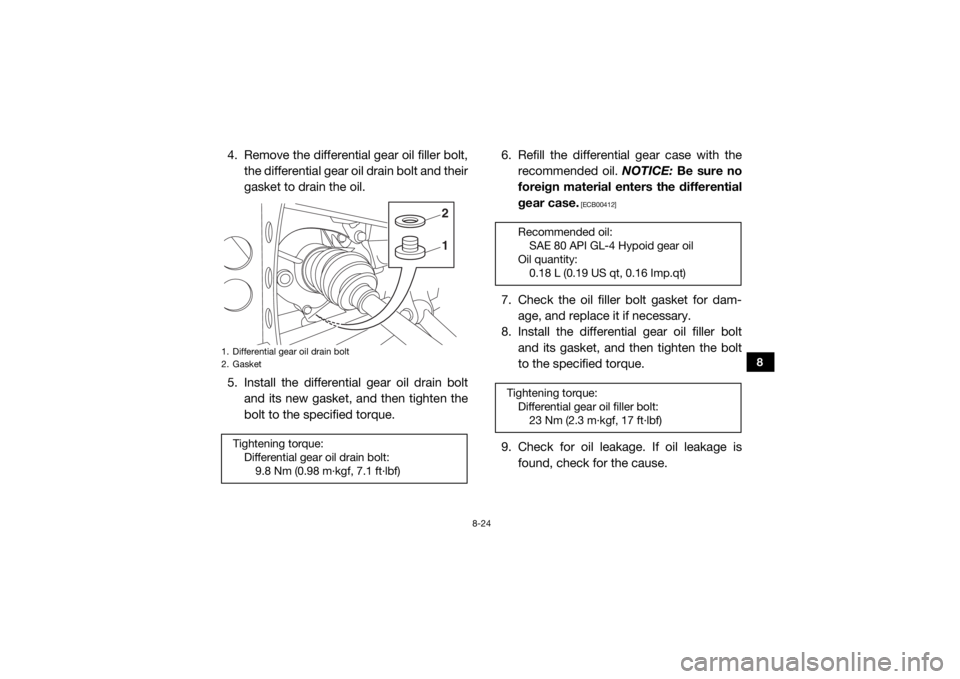
4. Remove the differential gear oil filler bolt,the differential gear oil drain bolt and their
gasket to drain the oil.
5. Install the differential gear oil drain bolt and its new gasket, and then tighten the
bolt to the specified torque. 6. Refill the differential gear case with the
recommended oil. NOTICE: Be sure no
foreign material enters the differential
gear case.
[ECB00412]
7. Check the oil filler bolt gasket for dam- age, and replace it if necessary.
8. Install the differential gear oil filler bolt
and its gasket, and then tighten the bolt
to the specified torque.
9. Check for oil leakage. If oil leakage is found, check for the cause.
1. Differential gear oil drain bolt
2. GasketTightening torque:Differential gear oil drain bolt:9.8 Nm (0.98 m·kgf, 7.1 ft·lbf)
12
Recommended oil:SAE 80 API GL-4 Hypoid gear oil
Oil quantity: 0.18 L (0.19 US qt, 0.16 Imp.qt)
Tightening torque: Differential gear oil filler bolt:23 Nm (2.3 m·kgf, 17 ft·lbf)
UBN57AE0.book Page 24 Tuesday, November 24, 2015 1:42 PM
Page 140 of 192
8-25
8
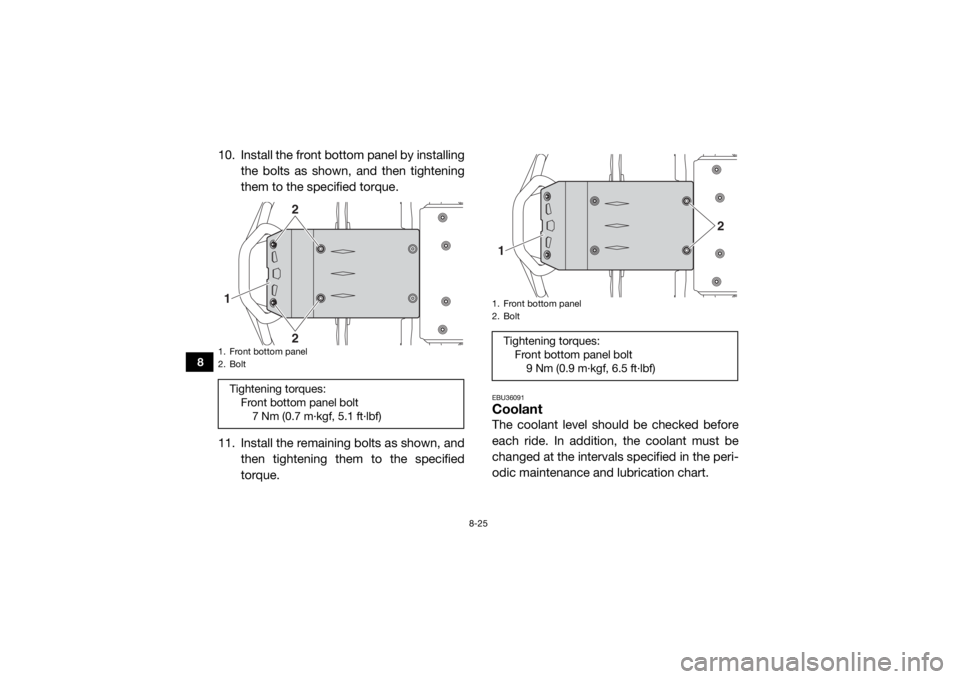
10. Install the front bottom panel by installingthe bolts as shown, and then tightening
them to the specified torque.
11. Install the remaining bolts as shown, and then tightening them to the specified
torque.
EBU36091CoolantThe coolant level should be checked before
each ride. In addition, the coolant must be
changed at the intervals specified in the peri-
odic maintenance and lubrication chart.
1. Front bottom panel
2. BoltTightening torques:Front bottom panel bolt7 Nm (0.7 m·kgf, 5.1 ft·lbf)
22
1
1. Front bottom panel
2. BoltTightening torques:Front bottom panel bolt9 Nm (0.9 m·kgf, 6.5 ft·lbf)
2
1
UBN57AE0.book Page 25 Tuesday, November 24, 2015 1:42 PM
Page 143 of 192
8-28
8
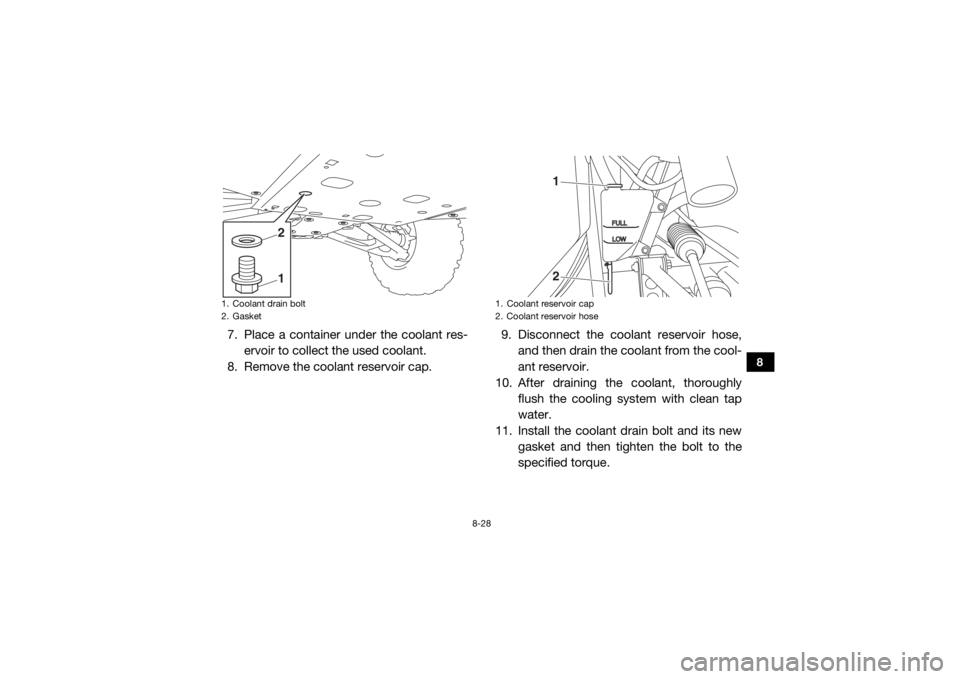
7. Place a container under the coolant res-ervoir to collect the used coolant.
8. Remove the coolant reservoir cap. 9. Disconnect the coolant reservoir hose,
and then drain the coolant from the cool-
ant reservoir.
10. After draining the coolant, thoroughly flush the cooling system with clean tap
water.
11. Install the coolant drain bolt and its new gasket and then tighten the bolt to the
specified torque.1. Coolant drain bolt
2. Gasket
1 2
1. Coolant reservoir cap
2. Coolant reservoir hose
12
UBN57AE0.book Page 28 Tuesday, November 24, 2015 1:42 PM
Page 144 of 192
8-29
8
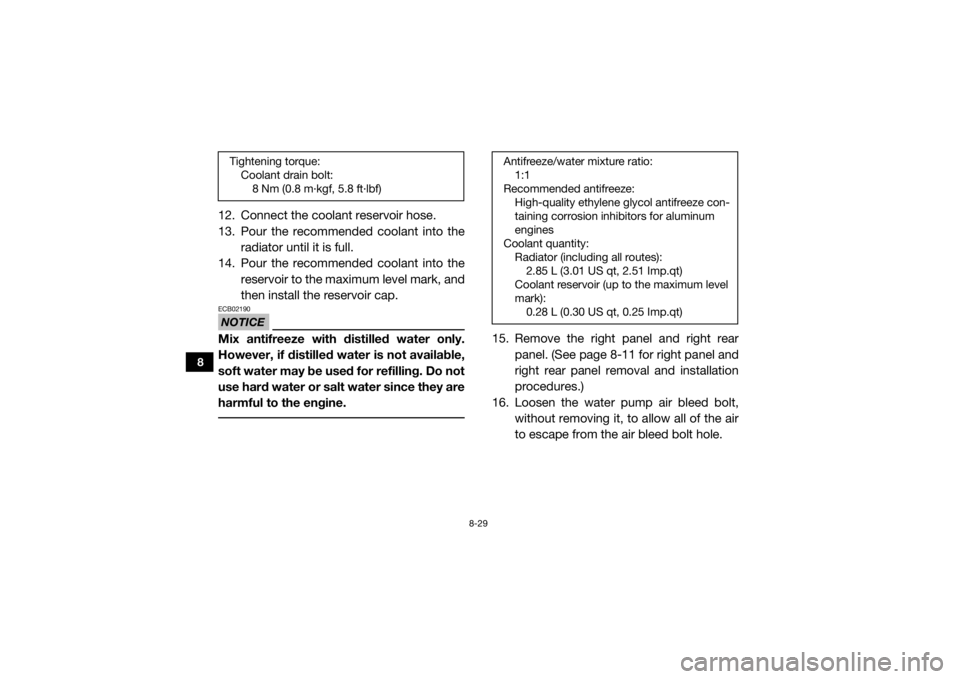
12. Connect the coolant reservoir hose.
13. Pour the recommended coolant into theradiator until it is full.
14. Pour the recommended coolant into the
reservoir to the maximum level mark, and
then install the reservoir cap.NOTICEECB02190Mix antifreeze with distilled water only.
However, if distilled water is not available,
soft water may be used for refilling. Do not
use hard water or salt water since they are
harmful to the engine.
15. Remove the right panel and right rearpanel. (See page 8-11 for right panel and
right rear panel removal and installation
procedures.)
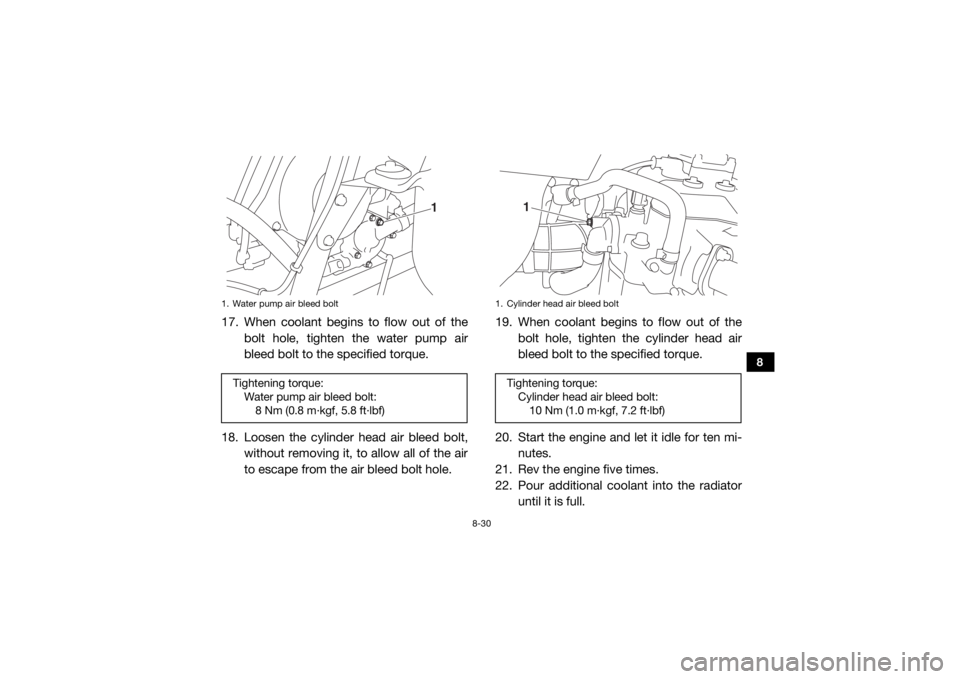
16. Loosen the water pump air bleed bolt, without removing it, to allow all of the air
to escape from the air bleed bolt hole.
Tightening torque:Coolant drain bolt:8 Nm (0.8 m·kgf, 5.8 ft·lbf)
Antifreeze/water mixture ratio:1:1
Recommended antifreeze: High-quality ethylene glycol antifreeze con-
taining corrosion inhibitors for aluminum
engines
Coolant quantity: Radiator (including all routes):2.85 L (3.01 US qt, 2.51 Imp.qt)
Coolant reservoir (up to the maximum level
mark): 0.28 L (0.30 US qt, 0.25 Imp.qt)
UBN57AE0.book Page 29 Tuesday, November 24, 2015 1:42 PM
Page 145 of 192
8-30
8
17. When coolant begins to flow out of thebolt hole, tighten the water pump air
bleed bolt to the specified torque.
18. Loosen the cylinder head air bleed bolt, without removing it, to allow all of the air
to escape from the air bleed bolt hole. 19. When coolant begins to flow out of the
bolt hole, tighten the cylinder head air
bleed bolt to the specified torque.
20. Start the engine and let it idle for ten mi- nutes.
21. Rev the engine five times.
22. Pour additional coolant into the radiator until it is full.1. Water pump air bleed boltTightening torque:Water pump air bleed bolt:8 Nm (0.8 m·kgf, 5.8 ft·lbf)
1
1. Cylinder head air bleed boltTightening torque: Cylinder head air bleed bolt:10 Nm (1.0 m·kgf, 7.2 ft·lbf)
1
UBN57AE0.book Page 30 Tuesday, November 24, 2015 1:42 PM
Page 146 of 192
8-31
8
23. Stop the engine and allow it to cool. If thecoolant level has dropped after the en-
gine has cooled, add sufficient coolant
until it reaches the top of the radiator, and
then install the radiator cap.
24. Check the coolant level in the reservoir. If necessary, remove the coolant reservoir
cap, add coolant to the maximum level
mark, and then install the cap.
25. Start the engine, and then check for cool- ant leakage.TIPIf any leakage is found, have a Yamaha dealer
check the cooling system. 26. Install the center bottom panel by install-
ing the bolts, and then tightening them to
the specified torque.
27. Install the panels and the hood.
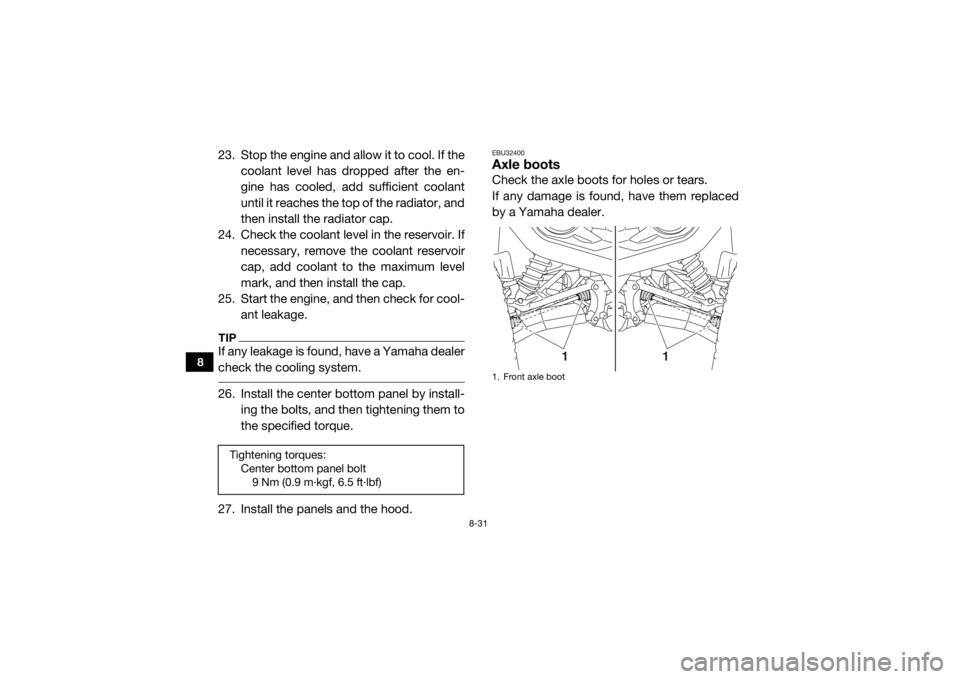
EBU32400Axle bootsCheck the axle boots for holes or tears.
If any damage is found, have them replaced
by a Yamaha dealer.
Tightening torques: Center bottom panel bolt9 Nm (0.9 m·kgf, 6.5 ft·lbf)
1. Front axle boot
1
1
UBN57AE0.book Page 31 Tuesday, November 24, 2015 1:42 PM
Page 148 of 192
8-33
8
Inspection
The spark plug is an important engine com-
ponent and is easy to inspect. The condition
of the spark plug can indicate the condition of
the engine.
The ideal color of the porcelain insulator
around the center electrode is a medium-to-
light tan for a vehicle that is being ridden nor-
mally.
You should periodically remove and inspect
the spark plug because heat and deposits will
cause the spark plug to slowly break down
and erode. If electrode erosion becomes ex-
cessive, or if carbon and other deposits are
excessive, you should replace the spark plug
with the specified plug.
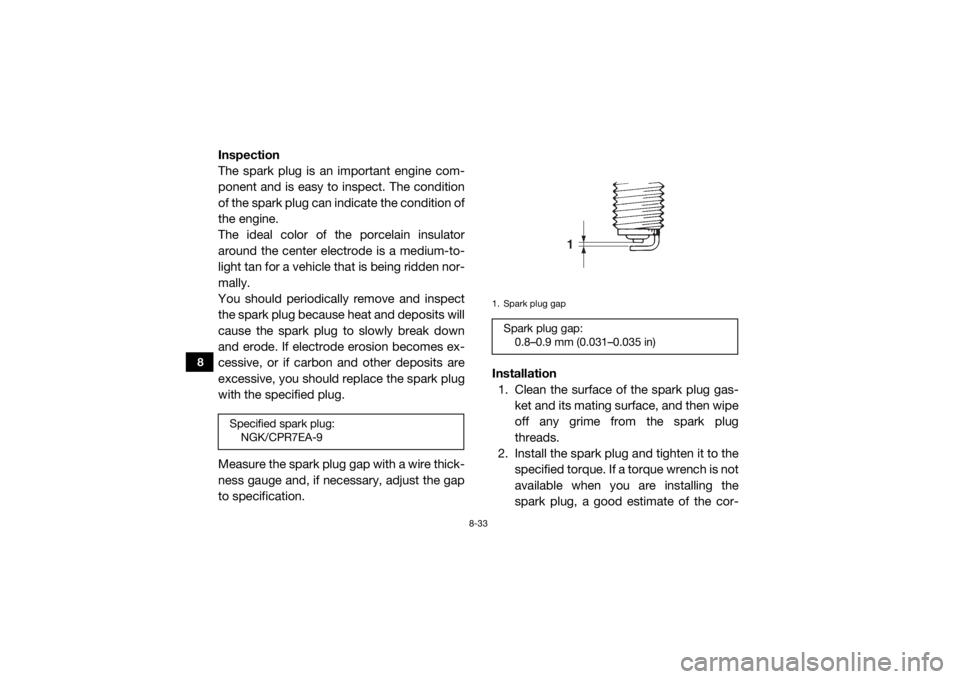
Measure the spark plug gap with a wire thick-
ness gauge and, if necessary, adjust the gap
to specification.Installation
1. Clean the surface of the spark plug gas- ket and its mating surface, and then wipe
off any grime from the spark plug
threads.
2. Install the spark plug and tighten it to the
specified torque. If a torque wrench is not
available when you are installing the
spark plug, a good estimate of the cor-Specified spark plug:NGK/CPR7EA-9
1. Spark plug gapSpark plug gap:0.8–0.9 mm (0.031–0.035 in)
1
UBN57AE0.book Page 33 Tuesday, November 24, 2015 1:42 PM