torque YAMAHA WOLVERINE 2016 Owners Manual
[x] Cancel search | Manufacturer: YAMAHA, Model Year: 2016, Model line: WOLVERINE, Model: YAMAHA WOLVERINE 2016Pages: 192, PDF Size: 4.38 MB
Page 56 of 192
4-17
4
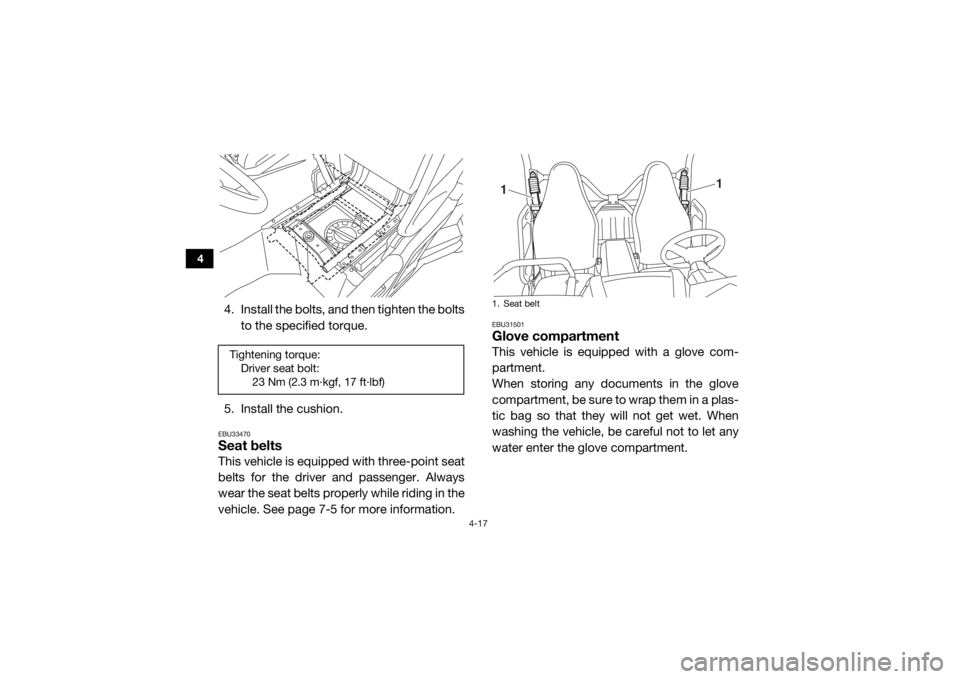
4. Install the bolts, and then tighten the boltsto the specified torque.
5. Install the cushion.EBU33470Seat beltsThis vehicle is equipped with three-point seat
belts for the driver and passenger. Always
wear the seat belts properly while riding in the
vehicle. See page 7-5 for more information.
EBU31501Glove compartmentThis vehicle is equipped with a glove com-
partment.
When storing any documents in the glove
compartment, be sure to wrap them in a plas-
tic bag so that they will not get wet. When
washing the vehicle, be careful not to let any
water enter the glove compartment.
Tightening torque: Driver seat bolt:23 Nm (2.3 m·kgf, 17 ft·lbf)
1. Seat belt1
1
UBN57AE0.book Page 17 Tuesday, November 24, 2015 1:42 PM
Page 64 of 192
4-25
4
TIPA special wrench can be obtained at a
Yamaha dealer to make this adjustment.
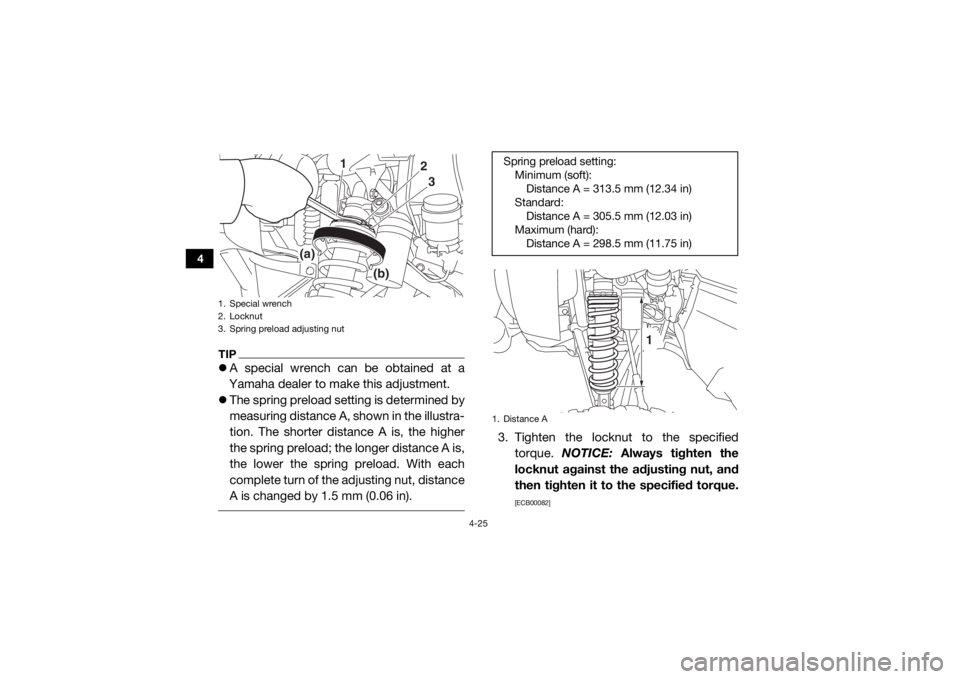
The spring preload setting is determined by
measuring distance A, shown in the illustra-
tion. The shorter distance A is, the higher
the spring preload; the longer distance A is,
the lower the spring preload. With each
complete turn of the adjusting nut, distance
A is changed by 1.5 mm (0.06 in).
3. Tighten the locknut to the specified
torque. NOTICE: Always tighten the
locknut against the adjusting nut, and
then tighten it to the specified torque.
[ECB00082]
1. Special wrench
2. Locknut
3. Spring preload adjusting nut
2
1
3
(a)
(b)
Spring preload setting: Minimum (soft):Distance A = 313.5 mm (12.34 in)
Standard: Distance A = 305.5 mm (12.03 in)
Maximum (hard): Distance A = 298.5 mm (11.75 in)1. Distance A
1
UBN57AE0.book Page 25 Tuesday, November 24, 2015 1:42 PM
Page 65 of 192
4-26
4
Rebound damping force
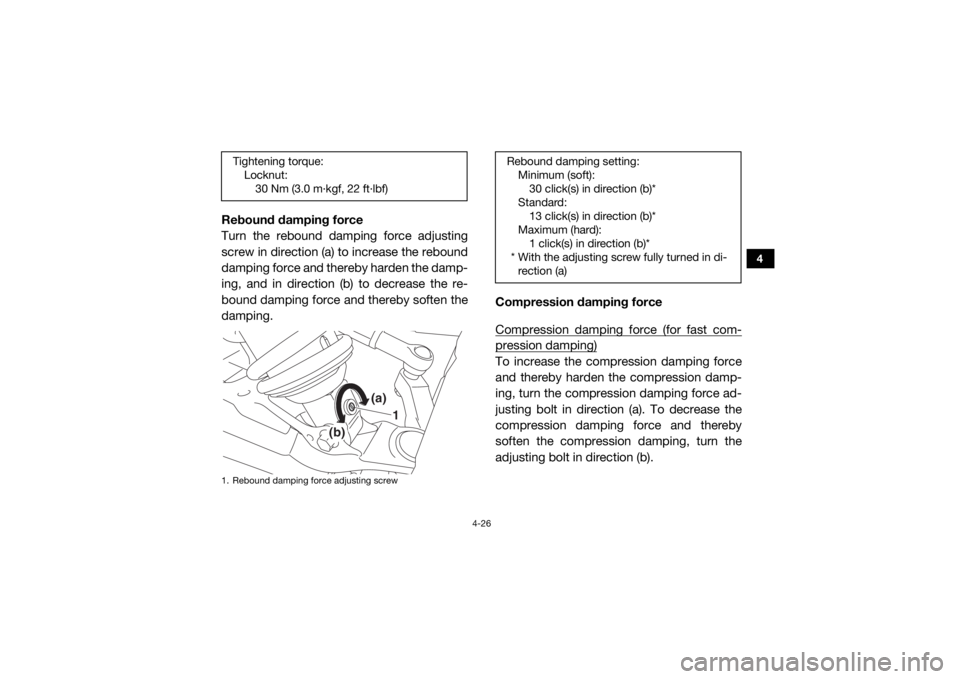
Turn the rebound damping force adjusting
screw in direction (a) to increase the rebound
damping force and thereby harden the damp-
ing, and in direction (b) to decrease the re-
bound damping force and thereby soften the
damping.Compression damping force
Compression damping force (for fast com-
pression damping)To increase the compression damping force
and thereby harden the compression damp-
ing, turn the compression damping force ad-
justing bolt in direction (a). To decrease the
compression damping force and thereby
soften the compression damping, turn the
adjusting bolt in direction (b).
Tightening torque:
Locknut:30 Nm (3.0 m·kgf, 22 ft·lbf)1. Rebound damping force adjusting screw
1
(a)
(b)
Rebound damping setting: Minimum (soft):30 click(s) in direction (b)*
Standard: 13 click(s) in direction (b)*
Maximum (hard): 1 click(s) in direction (b)*
* With the adjusting screw fully turned in di- rection (a)
UBN57AE0.book Page 26 Tuesday, November 24, 2015 1:42 PM
Page 69 of 192
4-30
4
TIPA special wrench can be obtained at a
Yamaha dealer to make this adjustment.
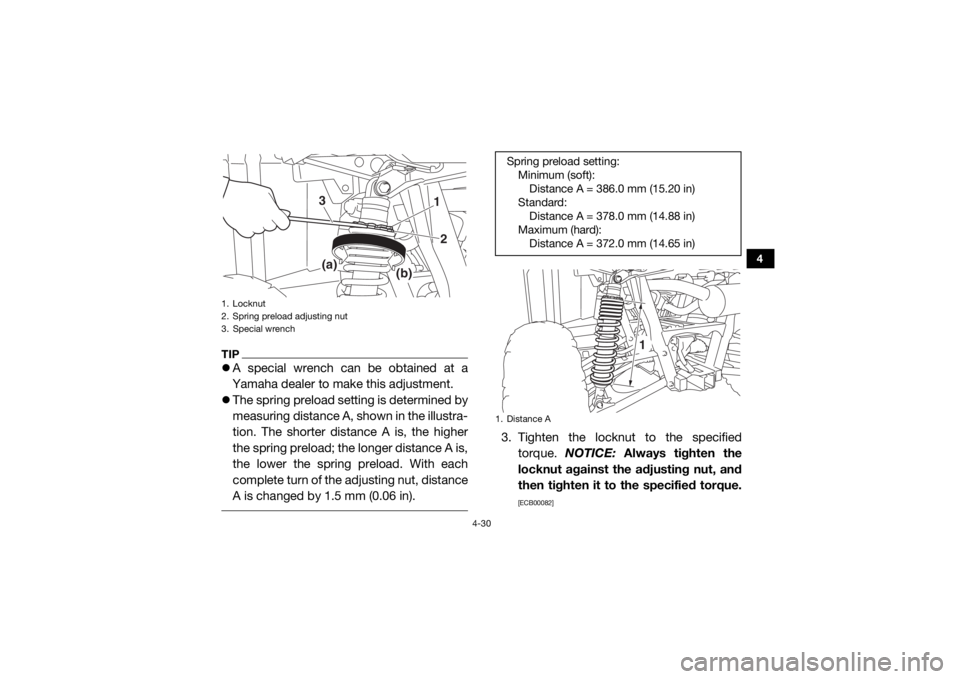
The spring preload setting is determined by
measuring distance A, shown in the illustra-
tion. The shorter distance A is, the higher
the spring preload; the longer distance A is,
the lower the spring preload. With each
complete turn of the adjusting nut, distance
A is changed by 1.5 mm (0.06 in).
3. Tighten the locknut to the specified
torque. NOTICE: Always tighten the
locknut against the adjusting nut, and
then tighten it to the specified torque.
[ECB00082]
1. Locknut
2. Spring preload adjusting nut
3. Special wrench
1
3
2
(a)
(b)
Spring preload setting: Minimum (soft):Distance A = 386.0 mm (15.20 in)
Standard: Distance A = 378.0 mm (14.88 in)
Maximum (hard): Distance A = 372.0 mm (14.65 in)1. Distance A
1
UBN57AE0.book Page 30 Tuesday, November 24, 2015 1:42 PM
Page 70 of 192
4-31
4
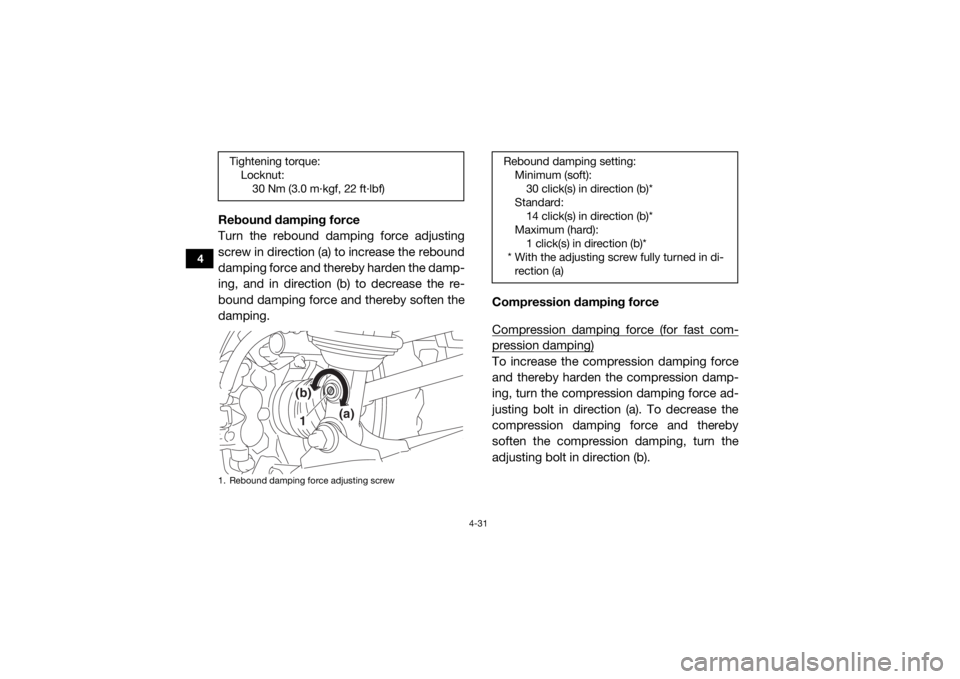
Rebound damping force
Turn the rebound damping force adjusting
screw in direction (a) to increase the rebound
damping force and thereby harden the damp-
ing, and in direction (b) to decrease the re-
bound damping force and thereby soften the
damping.Compression damping force
Compression damping force (for fast com-
pression damping)To increase the compression damping force
and thereby harden the compression damp-
ing, turn the compression damping force ad-
justing bolt in direction (a). To decrease the
compression damping force and thereby
soften the compression damping, turn the
adjusting bolt in direction (b).
Tightening torque:
Locknut:30 Nm (3.0 m·kgf, 22 ft·lbf)1. Rebound damping force adjusting screw
1
(a)
(b)
Rebound damping setting:Minimum (soft):30 click(s) in direction (b)*
Standard: 14 click(s) in direction (b)*
Maximum (hard): 1 click(s) in direction (b)*
* With the adjusting screw fully turned in di- rection (a)
UBN57AE0.book Page 31 Tuesday, November 24, 2015 1:42 PM
Page 82 of 192

5-8
5
EBU35700Fittings and fastenersAlways check the tightness of chassis and
wheel fittings and fasteners before starting
off. Take the vehicle to a Yamaha dealer or re-
fer to the Service Manual for correct tighten-
ing torque.EBU31840Instruments, lights and switchesCheck that all instruments, lights and switch-
es are working properly. Correct if necessary.EBU31851Control cablesWhen driving in cold weather, always make
sure all control cables work smoothly before
starting off. WARNING! Control cables can
freeze in cold weather and you could be
unable to control the vehicle.
[EWB03280] EBU33480
TiresCheck tire pressure regularly to make sure it
is at the recommended specifications. Also
check for wear and damage.
Tire pressure
Use the tire pressure gauge to check and ad-
just tire pressures when the tires are cold. Tire
pressures must be equal on both sides.
WARNING! Operation of this vehicle with improper tire pressure may cause severe
injury or death from loss of control or roll-
over. Tire pressure below the minimum
specified could also cause the tire to dis-
lodge from the rim under severe riding
conditions.
[EWB02542]
Set tire pressures to the following specifica-
tions:
UBN57AE0.book Page 8 Tuesday, November 24, 2015 1:42 PM
Page 117 of 192
8-2
8
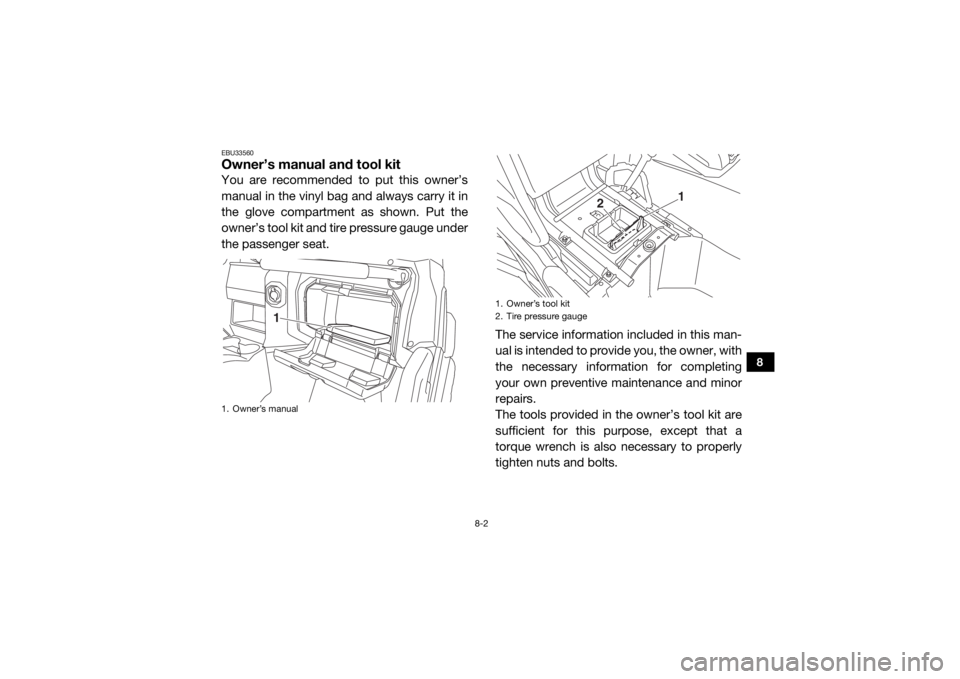
EBU33560Owner’s manual and tool kitYou are recommended to put this owner’s
manual in the vinyl bag and always carry it in
the glove compartment as shown. Put the
owner’s tool kit and tire pressure gauge under
the passenger seat.The service information included in this man-
ual is intended to provide you, the owner, with
the necessary information for completing
your own preventive maintenance and minor
repairs.
The tools provided in the owner’s tool kit are
sufficient for this purpose, except that a
torque wrench is also necessary to properly
tighten nuts and bolts.1. Owner’s manual
1
1. Owner’s tool kit
2. Tire pressure gauge
1
2
UBN57AE0.book Page 2 Tuesday, November 24, 2015 1:42 PM
Page 118 of 192

8-3
8
If you do not have a torque wrench available
during a service operation requiring one, take
your vehicle to a Yamaha dealer to check the
torque settings and adjust them as neces-
sary.UBN57AE0.book Page 3 Tuesday, November 24, 2015 1:42 PM
Page 133 of 192
8-18
8
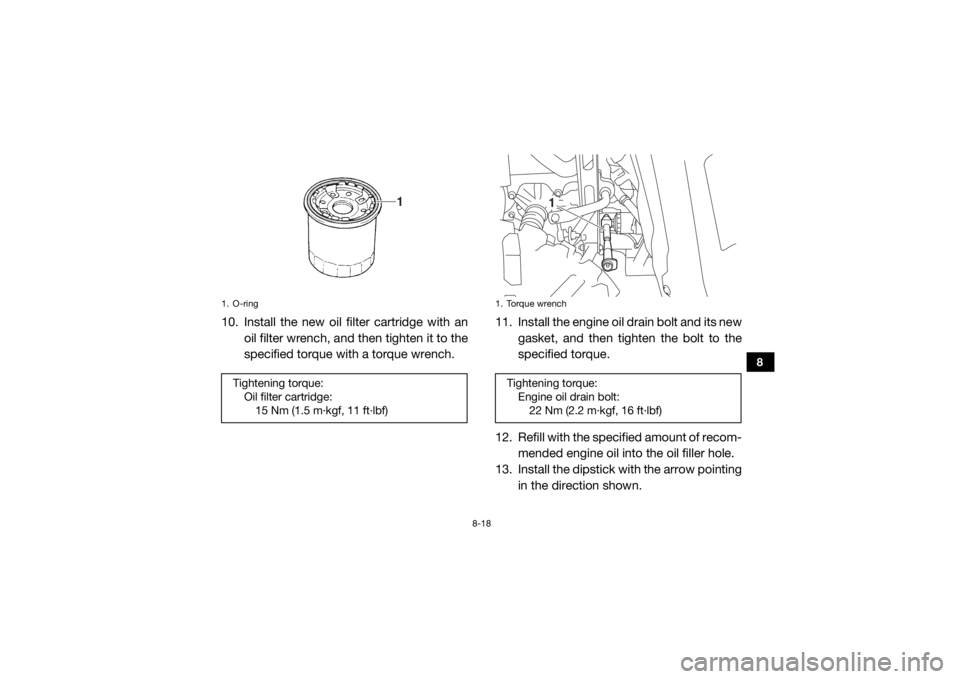
10. Install the new oil filter cartridge with anoil filter wrench, and then tighten it to the
specified torque with a torque wrench. 11. Install the engine oil drain bolt and its new
gasket, and then tighten the bolt to the
specified torque.
12. Refill with the specified amount of recom- mended engine oil into the oil filler hole.
13. Install the dipstick with the arrow pointing in the direction shown.1. O-ringTightening torque:Oil filter cartridge:15 Nm (1.5 m·kgf, 11 ft·lbf)
1
1. Torque wrenchTightening torque: Engine oil drain bolt:22 Nm (2.2 m·kgf, 16 ft·lbf)
1
UBN57AE0.book Page 18 Tuesday, November 24, 2015 1:42 PM
Page 135 of 192
8-20
8
15. Turn the engine off, wait at least 10 minu-tes, and then check the oil level and cor-
rect it if necessary.
16. Install the rubber cover.
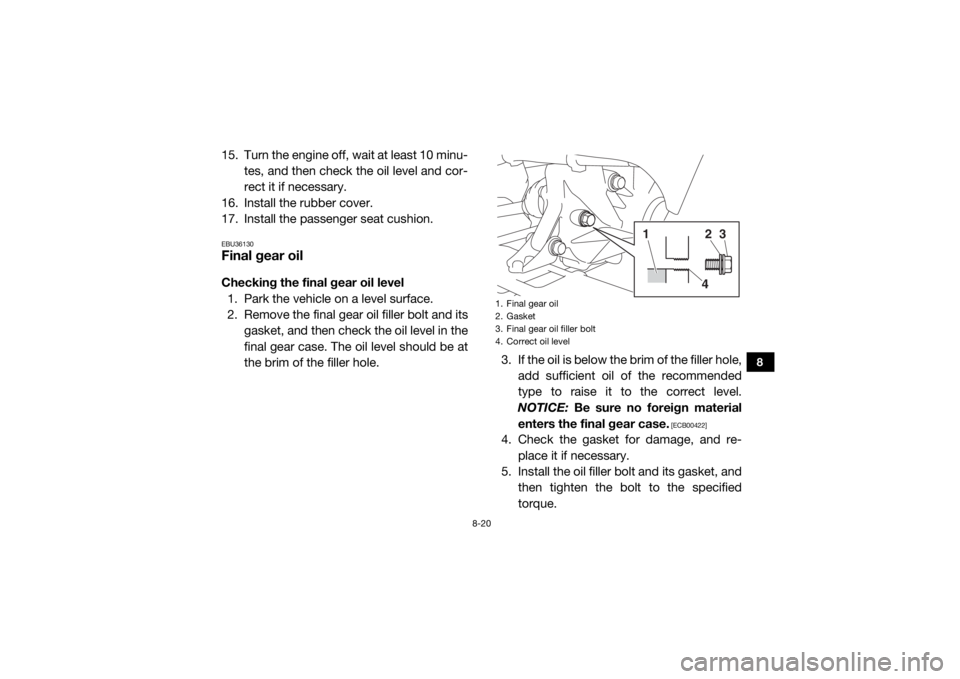
17. Install the passenger seat cushion.EBU36130Final gear oilChecking the final gear oil level 1. Park the vehicle on a level surface.
2. Remove the final gear oil filler bolt and its gasket, and then check the oil level in the
final gear case. The oil level should be at
the brim of the filler hole. 3. If the oil is below the brim of the filler hole,
add sufficient oil of the recommended
type to raise it to the correct level.
NOTICE: Be sure no foreign material
enters the final gear case.
[ECB00422]
4. Check the gasket for damage, and re- place it if necessary.
5. Install the oil filler bolt and its gasket, and then tighten the bolt to the specified
torque.1. Final gear oil
2. Gasket
3. Final gear oil filler bolt
4. Correct oil level
24
3
1
UBN57AE0.book Page 20 Tuesday, November 24, 2015 1:42 PM