fork YAMAHA WR 450F 2006 Service Manual
[x] Cancel search | Manufacturer: YAMAHA, Model Year: 2006, Model line: WR 450F, Model: YAMAHA WR 450F 2006Pages: 786, PDF Size: 22.49 MB
Page 626 of 786

5 - 50
CHAS
4. Install:
•Ring nut 1
Tighten the ring nut using the ring nut
wrench 2.
Refer to “STEERING HEAD INSPEC-
TION AND ADJUSTMENT” section in the
CHAPTER 3.
T R..7 Nm (0.7 m · kg, 5.1 ft · lb)
5. Check the steering shaft by turning it lock
to lock. If there is any binding, remove the
steering shaft assembly and inspect the
steering bearings.
6. Install:
•Plain washer 1
7. Install:
•Front fork 1
•Handle crown 2
•Main switch 3
•Hose guide bracket 4
NOTE:
•Temporarily tighten the pinch bolts (under
bracket).
•Do not tighten the pinch bolts (handle crown)
yet.
8. Install:
•Guide (speed sensor lead) 1
NOTE:
After installing the guide as shown, pass the
speed sensor lead through the guide.
1
STEERING
Page 628 of 786

5 - 51
CHASSTEERING
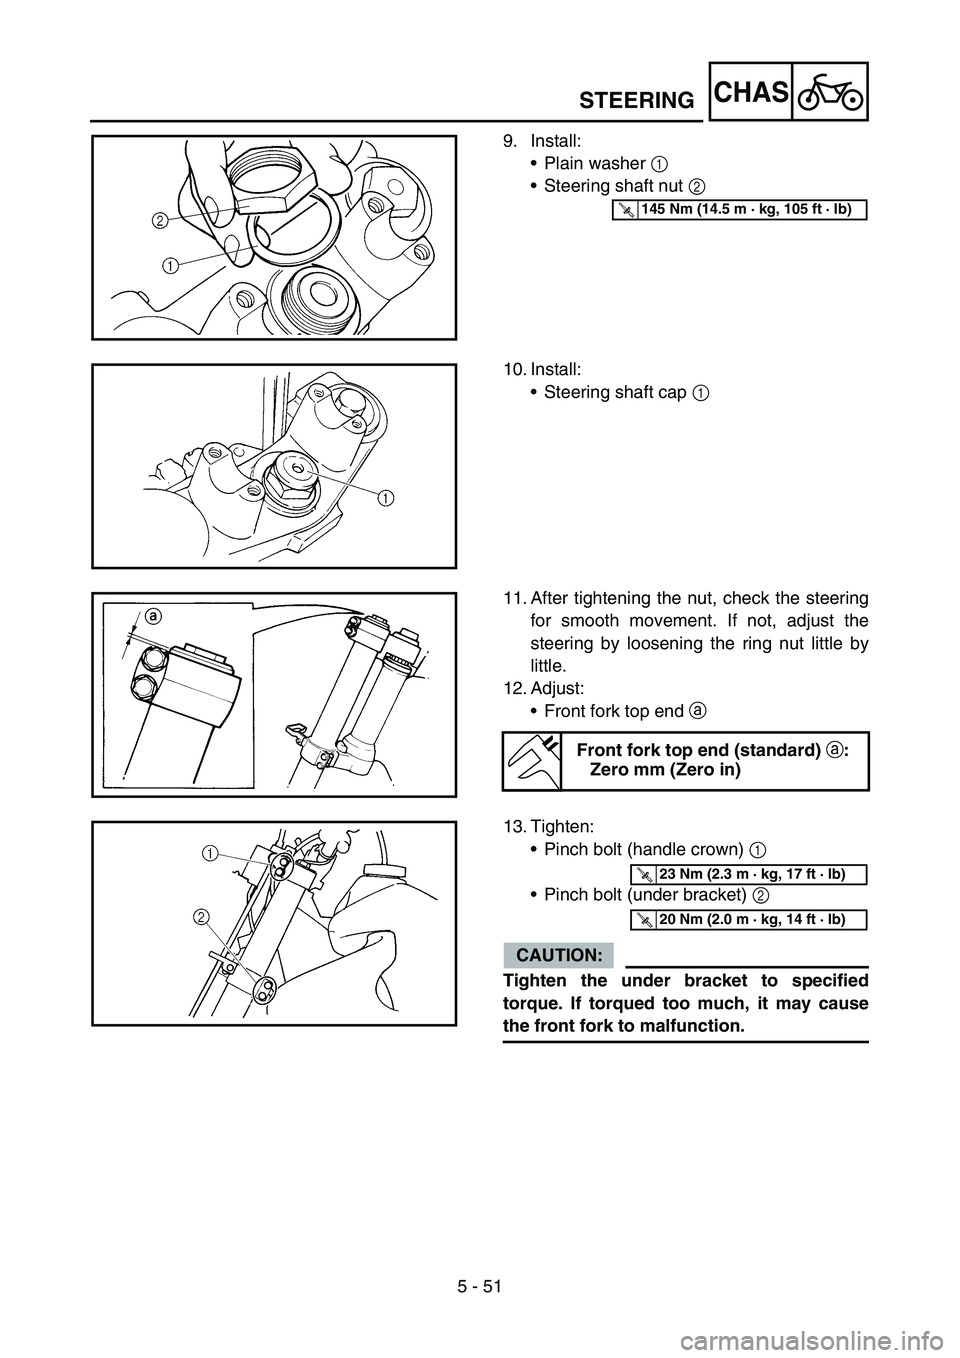
9. Install:
•Plain washer 1
•Steering shaft nut 2
T R..145 Nm (14.5 m · kg, 105 ft · lb)
10. Install:
•Steering shaft cap 1
11. After tightening the nut, check the steering
for smooth movement. If not, adjust the
steering by loosening the ring nut little by
little.
12. Adjust:
•Front fork top end a
Front fork top end (standard)
a:
Zero mm (Zero in)
13. Tighten:
•Pinch bolt (handle crown) 1
•Pinch bolt (under bracket) 2
CAUTION:
Tighten the under bracket to specified
torque. If torqued too much, it may cause
the front fork to malfunction.
T R..23 Nm (2.3 m · kg, 17 ft · lb)
T R..20 Nm (2.0 m · kg, 14 ft · lb)
Page 760 of 786

7 - 11
TUNSETTING
EC722011
Front fork setting
The front fork setting should be made depend-
ing on the rider’s feeling of an actual run and
the circuit conditions.
The front fork setting includes the following
three factors:
1. Setting of air spring characteristics
•Change the fork oil level.
2. Setting of spring preload
•Change the spring.
•Install the adjustment washer.
3. Setting of damping force
•Change the compression damping.
•Change the rebound damping.
The spring acts on the load and the
damping force acts on the cushion travel
speed.
EC723001
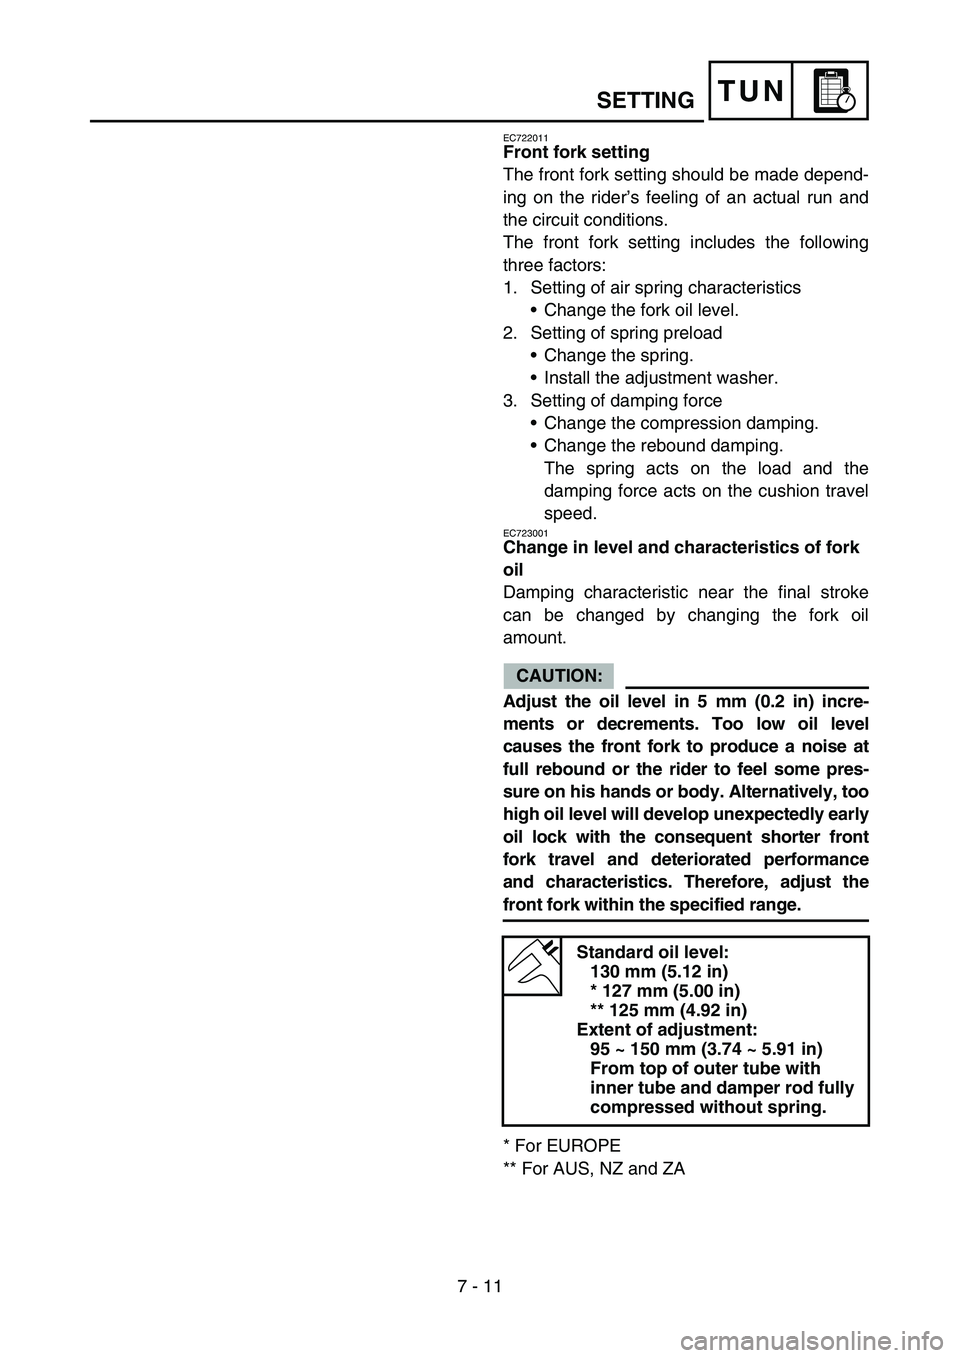
Change in level and characteristics of fork
oil
Damping characteristic near the final stroke
can be changed by changing the fork oil
amount.
CAUTION:
Adjust the oil level in 5 mm (0.2 in) incre-
ments or decrements. Too low oil level
causes the front fork to produce a noise at
full rebound or the rider to feel some pres-
sure on his hands or body. Alternatively, too
high oil level will develop unexpectedly early
oil lock with the consequent shorter front
fork travel and deteriorated performance
and characteristics. Therefore, adjust the
front fork within the specified range.
* For EUROPE
** For AUS, NZ and ZA
Standard oil level:
130 mm (5.12 in)
* 127 mm (5.00 in)
** 125 mm (4.92 in)
Extent of adjustment:
95 ~ 150 mm (3.74 ~ 5.91 in)
From top of outer tube with
inner tube and damper rod fully
compressed without spring.
Page 762 of 786

7 - 12
TUNSETTING
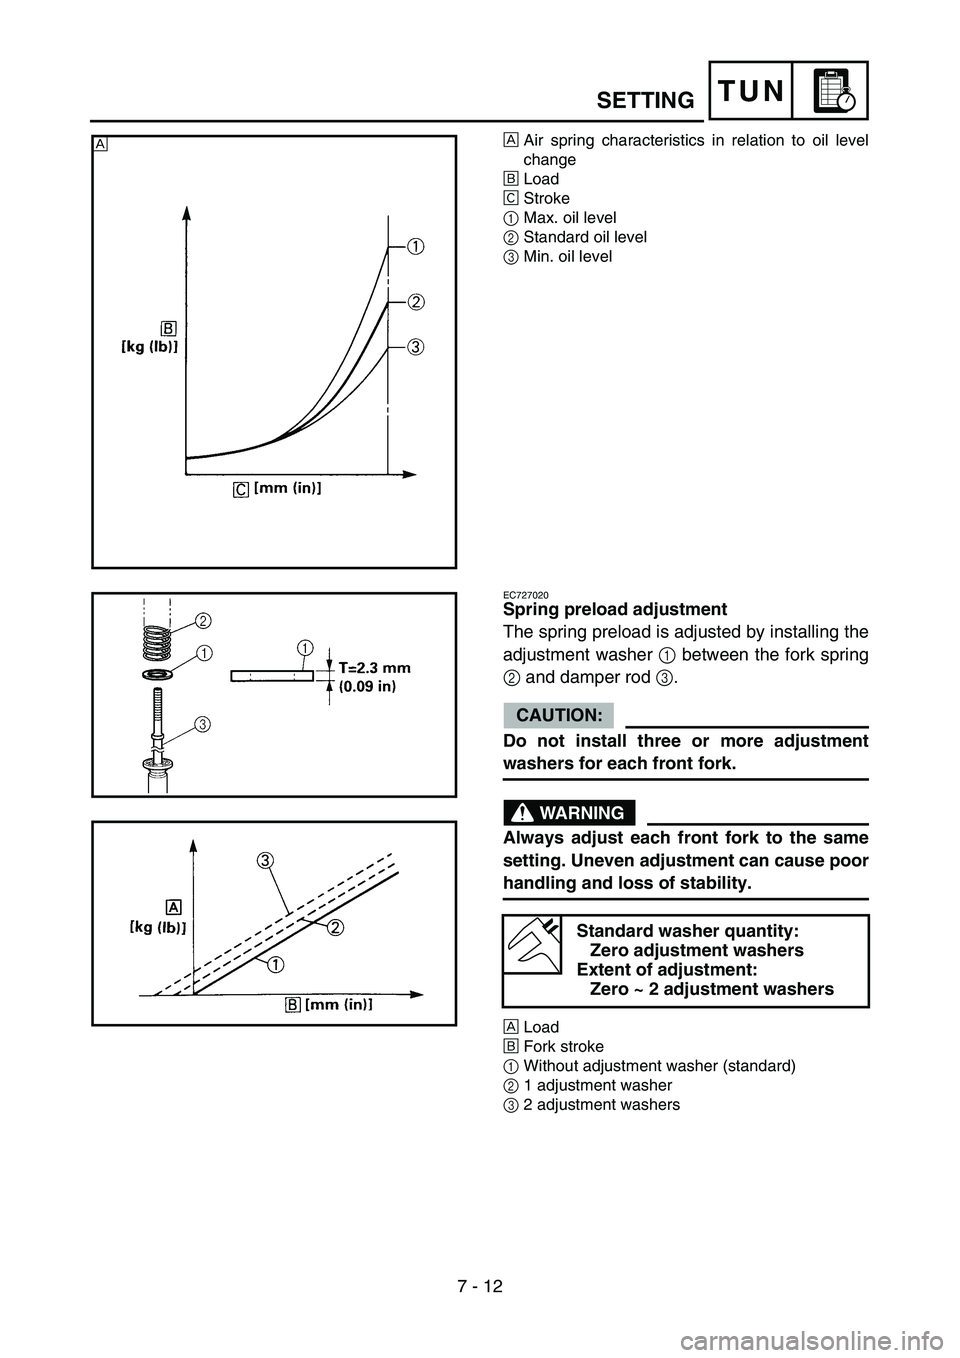
ÈAir spring characteristics in relation to oil level
change
ÉLoad
ÊStroke
1Max. oil level
2Standard oil level
3Min. oil levelÈ
EC727020
Spring preload adjustment
The spring preload is adjusted by installing the
adjustment washer 1
between the fork spring
2
and damper rod 3
.
CAUTION:
Do not install three or more adjustment
washers for each front fork.
WARNING
Always adjust each front fork to the same
setting. Uneven adjustment can cause poor
handling and loss of stability.
ÈLoad
ÉFork stroke
1Without adjustment washer (standard)
21 adjustment washer
32 adjustment washers
Standard washer quantity:
Zero adjustment washers
Extent of adjustment:
Zero ~ 2 adjustment washers
Page 764 of 786

7 - 13
TUN
EC72A001
Setting of spring after replacement
As the front fork setting can be easily affected
by rear suspension, take care so that the
machine front and rear are balanced (in posi-
tion, etc.) when setting the front fork.
1. Use of soft spring
Generally a soft spring gives a soft riding
feeling. Rebound damping tends to
become stronger and the front fork may
sink deeply over a series of gaps.
To set a soft spring:
•Change the rebound damping.
Turn out one or two clicks.
•Change the compression damping.
Turn in one or two clicks.
2. Use of stiff spring
Generally a stiff spring gives a stiff riding
feeling. Rebound damping tends to
become weaker, resulting in lack of a
sense of contact with the road surface or in
a vibrating handlebar.
To set a stiff spring:
•Change the rebound damping.
Turn in one or two clicks.
•Change the compression damping.
Turn out one or two clicks.
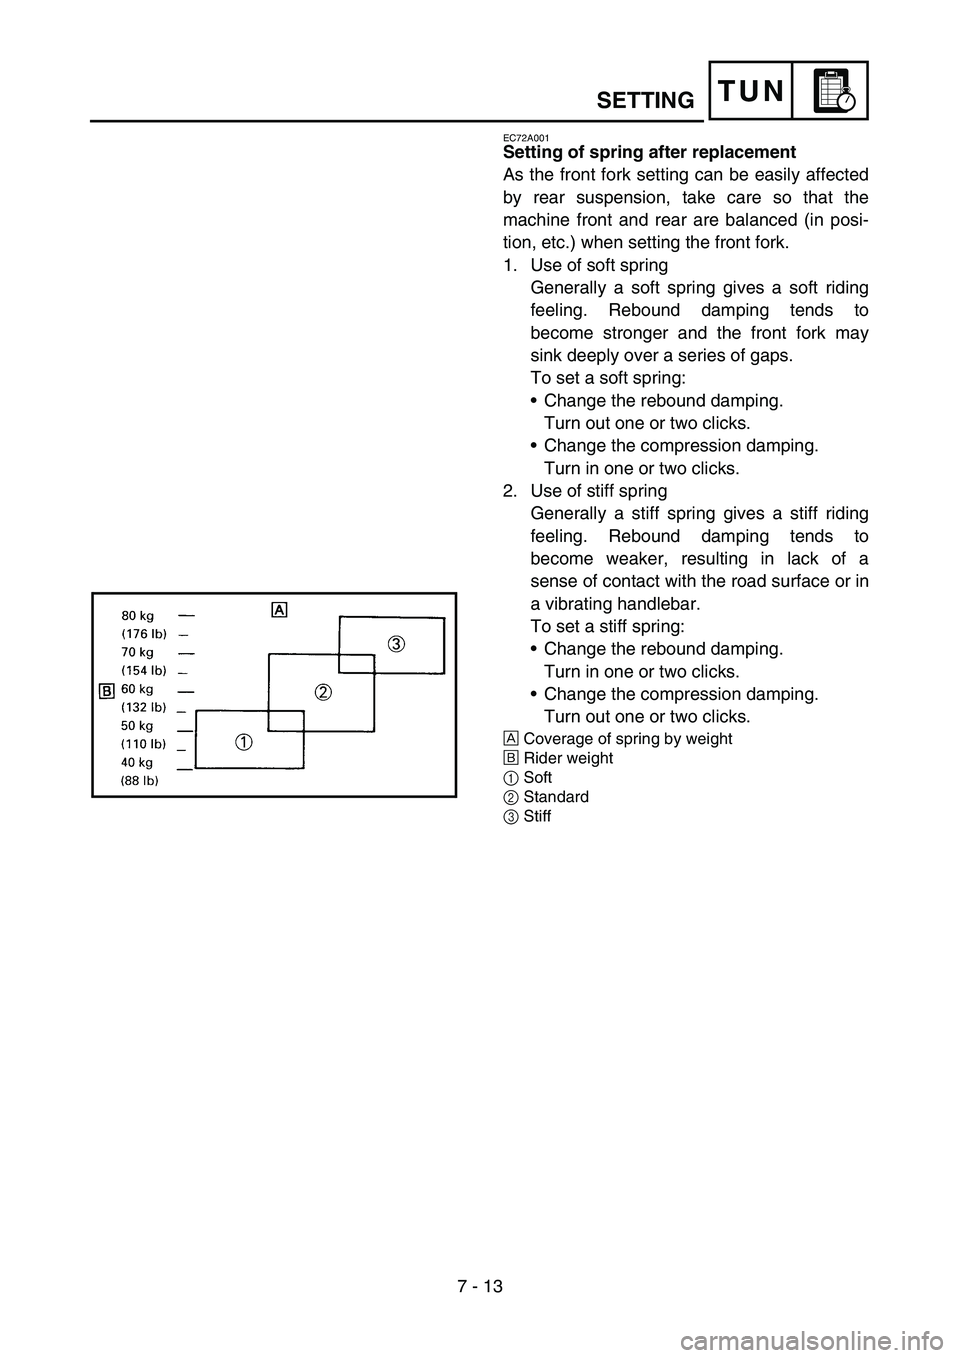
ÈCoverage of spring by weight
ÉRider weight
1Soft
2Standard
3Stiff
SETTING
Page 766 of 786

7 - 14
TUN
EC72P000
Front fork setting parts
•Adjustment washer 1
•Front fork spring 2
* For EUROPE
** For AUS, NZ and ZA
NOTE:
The I.D. mark (slits) a is proved on the end of
the spring.
CAUTION:
When using a spring with a spring rate of
0.469 kg/mm, do not install two or more
adjustment washers for each front fork.TYPE (thickness) PART NUMBER
T = 2.3 mm (0.09 in) 5XE-23364-00
TYPESPRING
RATESPRING PART
NUMBERI.D.
MARK
(slits)
SOFT0.408
0.4185TJ-23141-00
5TJ-23141-10I
II
*STD 0.428 5TJ-23141-90–
0.438 5TJ-23141-30 IIII
**STD 0.449 5TJ-23141-A0–
STD 0.459 5TJ-23141-L0–
STIFF 0.469 5TJ-23141-60 I-II
SETTING
Page 776 of 786

7 - 19
TUNSETTING
EC72H002
Suspension setting
•Front fork
NOTE:
•If any of the following symptoms is experienced with the standard position as the base, make
resetting by reference to the adjustment procedure given in the same chart.
•Before any change, set the rear shock absorber sunken length to the standard figure 90 ~ 100 mm
(3.5 ~ 3.9 in).
SymptomSection
Check Adjust
JumpLarge
gapMedium
gapSmall
gap
Stiff over entire rangeCompression damping Turn adjuster counterclockwise (about 2 clicks) to
decrease damping.
Oil level (oil amount) Decrease oil level by about 5 ~ 10 mm (0.2 ~ 0.4 in).
Spring Replace with soft spring.
Unsmooth movement
over entire rangeOuter tube
Check for any bends, dents, and other noticeable
scars, etc. If any, replace affected parts.
Inner tube
Under bracket tightening
torqueRetighten to specified torque.
Poor initial
movementRebound damping Turn adjuster counterclockwise (about 2 clicks) to
decrease damping.
Oil seal Apply grease in oil seal wall.
Soft over entire
range, bottoming outCompression damping Turn adjuster clockwise (about 2 clicks) to increase
damping.
Oil level (oil amount) Increase oil level by about 5 ~ 10 mm (0.2 ~ 0.4 in).
Spring Replace with stiff spring.
Stiff toward stroke
endOil level (oil amount) Decrease oil level by about 5 mm (0.2 in).
Soft toward stroke
end, bottoming outOil level (oil amount) Increase oil level by about 5 mm (0.2 in).
Stiff initial movement Compression dampingTurn adjuster counterclockwise (about 2 clicks) to
decrease damping.
Low front, tending to
lower front postureCompression damping Turn adjuster clockwise (about 2 clicks) to increase
damping.
Rebound damping Turn adjuster counterclockwise (about 2 clicks) to
decrease damping.
Balance with rear end Set sunken length for 95 ~ 100 mm (3.7 ~ 3.9 in)
when one passenger is astride seat (lower rear pos-
ture).
Oil level (oil amount) Increase oil level by about 5 mm (0.2 in).
“Obtrusive” front,
tending to upper front
postureCompression damping Turn adjuster counterclockwise (about 2 clicks) to
decrease damping.
Balance with rear end Set sunken length for 90 ~ 95 mm (3.5 ~ 3.7 in)
when one passenger is astride seat (upper rear pos-
ture).
Spring Replace with soft spring.
Oil lever (oil amount) Decrease oil level by about 5 ~ 10 mm (0.2 ~ 0.4 in).