YAMAHA XJ600S 2000 User Guide
XJ600S 2000
YAMAHA
YAMAHA
https://www.carmanualsonline.info/img/51/52632/w960_52632-0.png
YAMAHA XJ600S 2000 User Guide
Trending: window, brake fluid, checking oil, service schedule, check engine, ignition, spark plugs replace
Page 11 of 101
L
2-1
DESCRIPTION
/Net/layout8/layout_G2/work/Imai_work/OM-PS/AA9156_XJ600SN-E6/English/E-2.frame
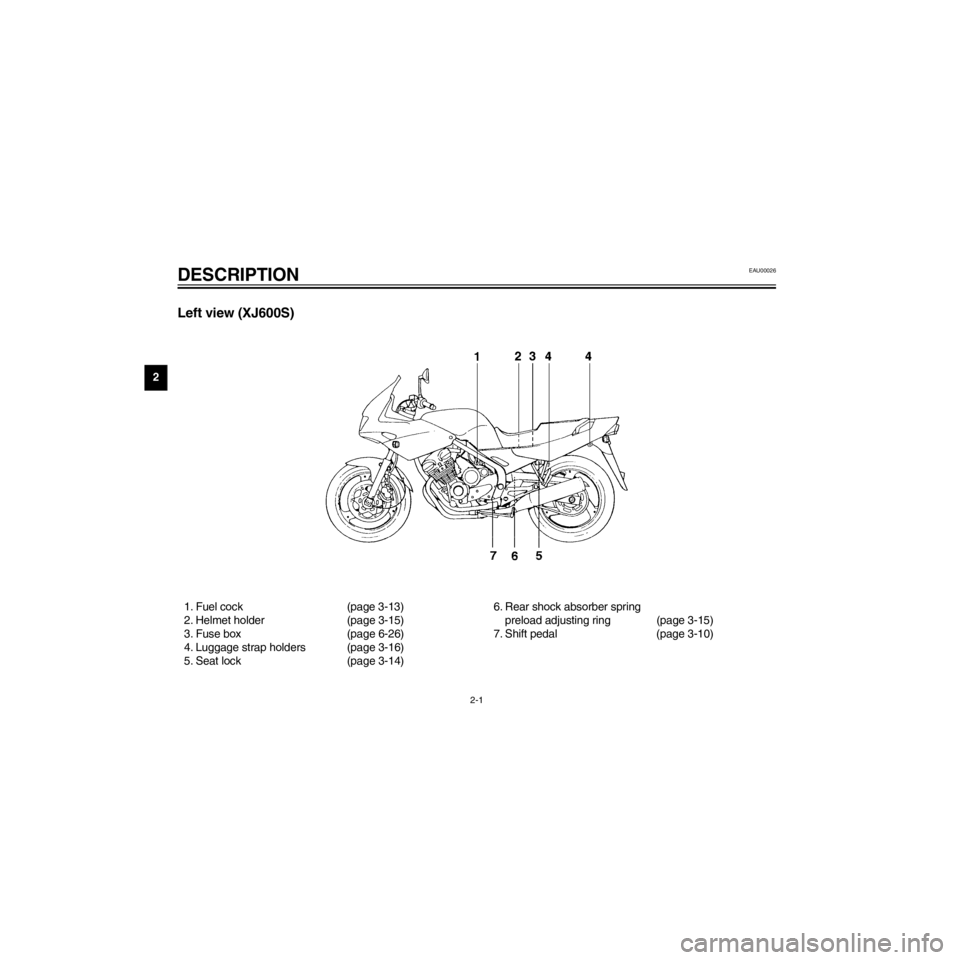
Left view (XJ600S)
EAU00026
1. Fuel cock (page 3-13)
2. Helmet holder (page 3-15)
3. Fuse box (page 6-26)
4. Luggage strap holders (page 3-16)
5. Seat lock (page 3-14)6. Rear shock absorber spring
preload adjusting ring (page 3-15)
7. Shift pedal (page 3-10)
Page 12 of 101
R
2-2
DESCRIPTION
/Net/layout8/layout_G2/work/Imai_work/OM-PS/AA9156_XJ600SN-E6/English/E-2.frame
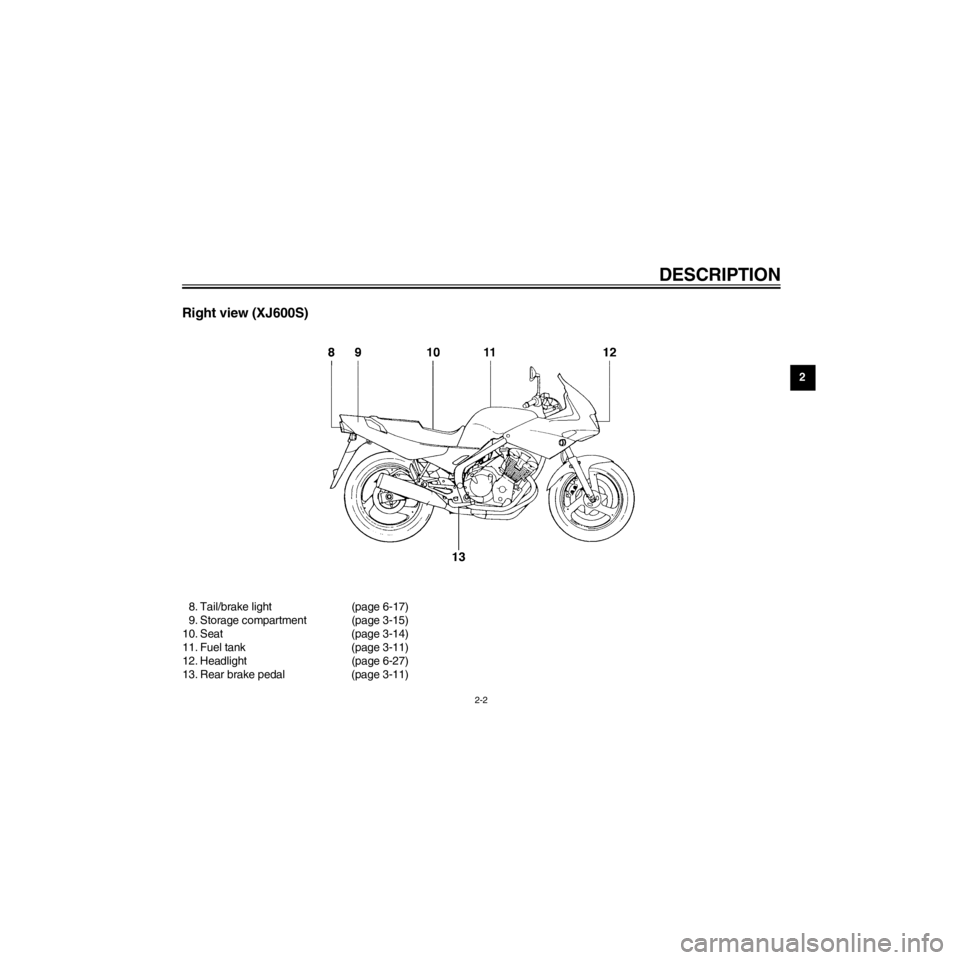
Right view (XJ600S)
8. Tail/brake light (page 6-17)
9. Storage compartment (page 3-15)
10. Seat (page 3-14)
11. Fuel tank (page 3-11)
12. Headlight (page 6-27)
13. Rear brake pedal (page 3-11)
Page 13 of 101
L
2-3
DESCRIPTION
/Net/layout8/layout_G2/work/Imai_work/OM-PS/AA9156_XJ600SN-E6/English/E-2.frame
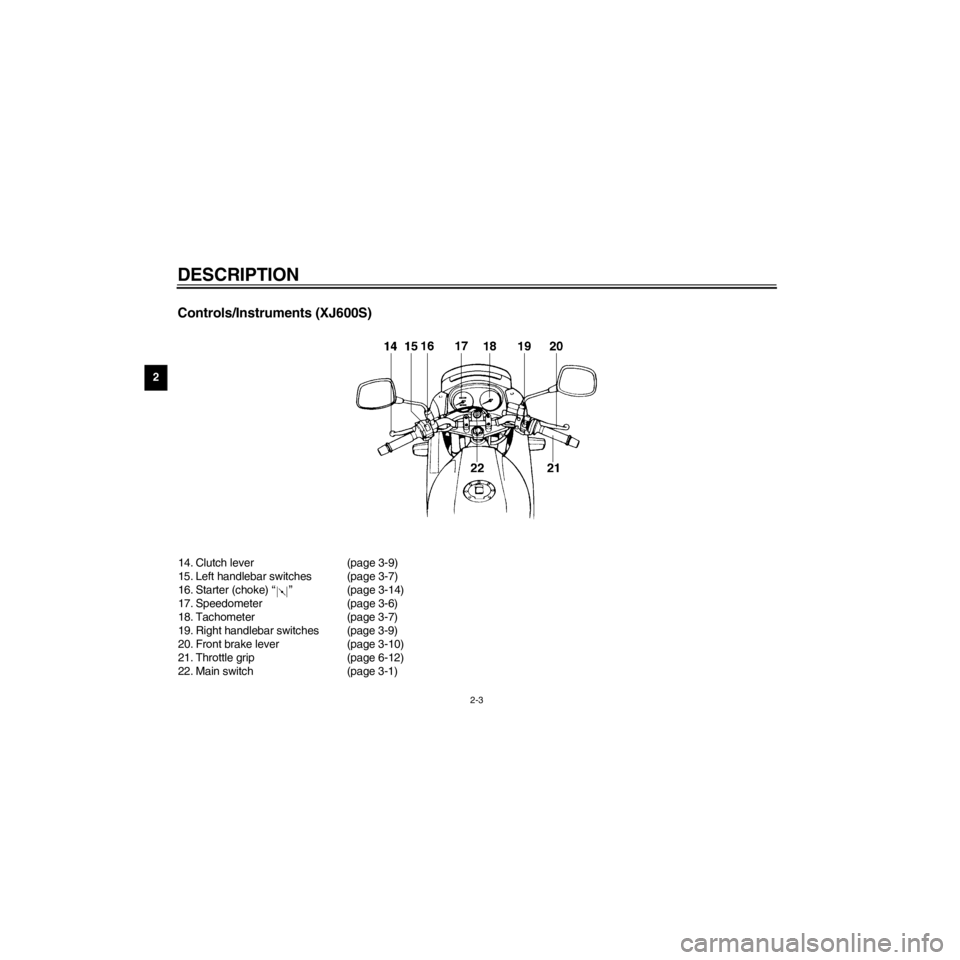
Controls/Instruments (XJ600S)
14. Clutch lever (page 3-9)
15. Left handlebar switches (page 3-7)
16. Starter (choke) Ò Ó (page 3-14)
17. Speedometer (page 3-6)
18. Tachometer (page 3-7)
19. Right handlebar switches (page 3-9)
20. Front brake lever (page 3-10)
21. Throttle grip (page 6-12)
22. Main switch (page 3-1)
Page 14 of 101
R
2-4
DESCRIPTION
/Net/layout8/layout_G2/work/Imai_work/OM-PS/AA9156_XJ600SN-E6/English/E-2.frame
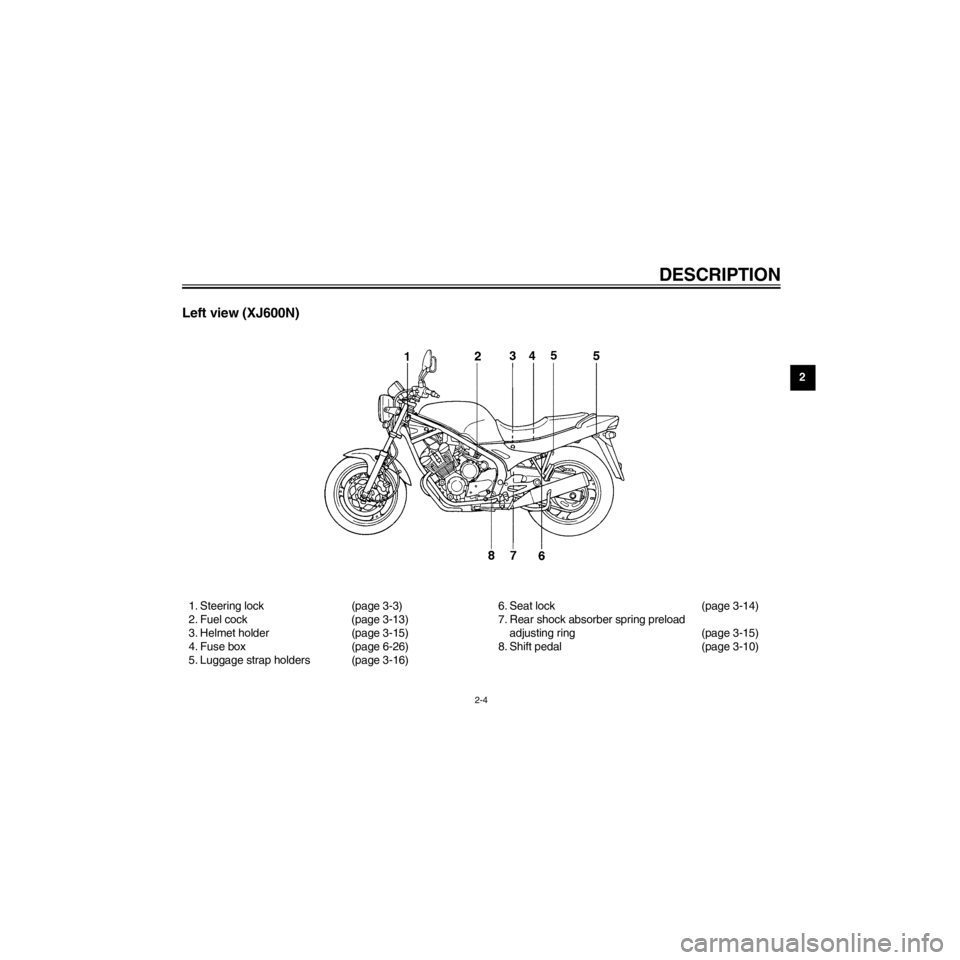
Left view (XJ600N)
1. Steering lock (page 3-3)
2. Fuel cock (page 3-13)
3. Helmet holder (page 3-15)
4. Fuse box (page 6-26)
5. Luggage strap holders (page 3-16)6. Seat lock (page 3-14)
7. Rear shock absorber spring preload
adjusting ring (page 3-15)
8. Shift pedal (page 3-10)
Page 15 of 101
L
2-5
DESCRIPTION
/Net/layout8/layout_G2/work/Imai_work/OM-PS/AA9156_XJ600SN-E6/English/E-2.frame
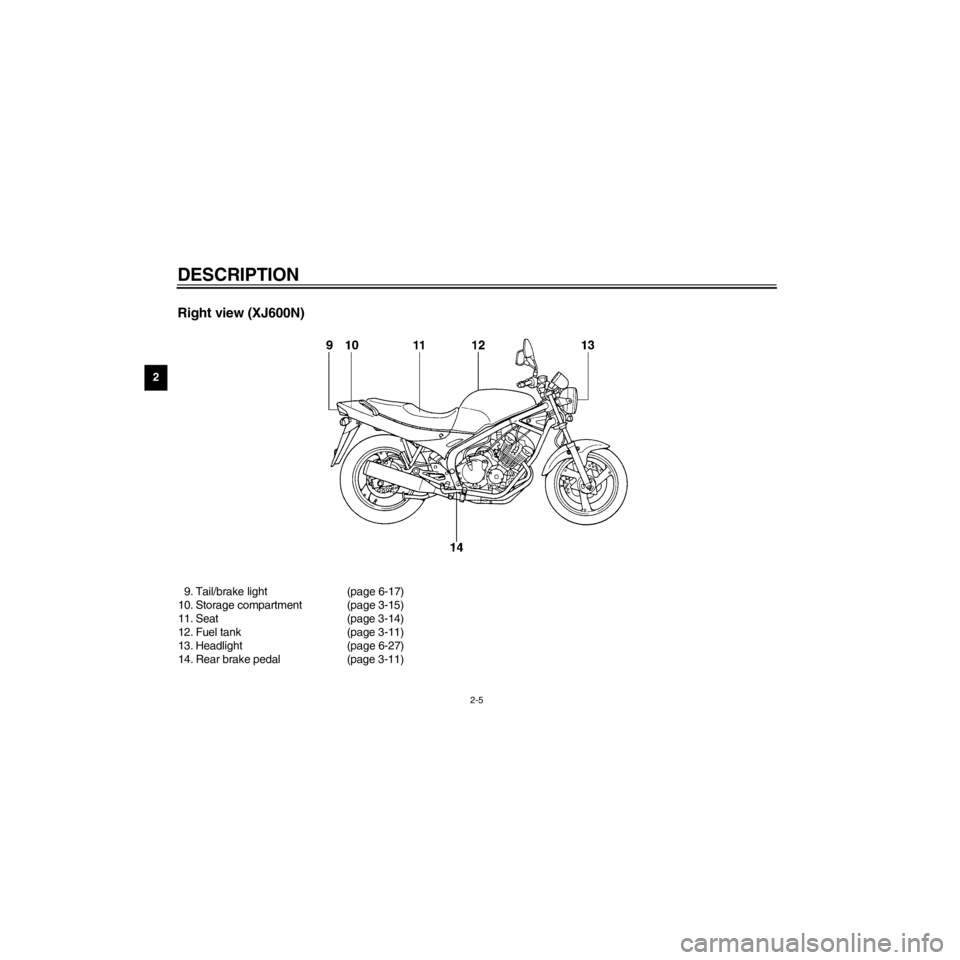
Right view (XJ600N)
9. Tail/brake light (page 6-17)
10. Storage compartment (page 3-15)
11. Seat (page 3-14)
12. Fuel tank (page 3-11)
13. Headlight (page 6-27)
14. Rear brake pedal (page 3-11)
Page 16 of 101
R
2-6
DESCRIPTION
/Net/layout8/layout_G2/work/Imai_work/OM-PS/AA9156_XJ600SN-E6/English/E-2.frame
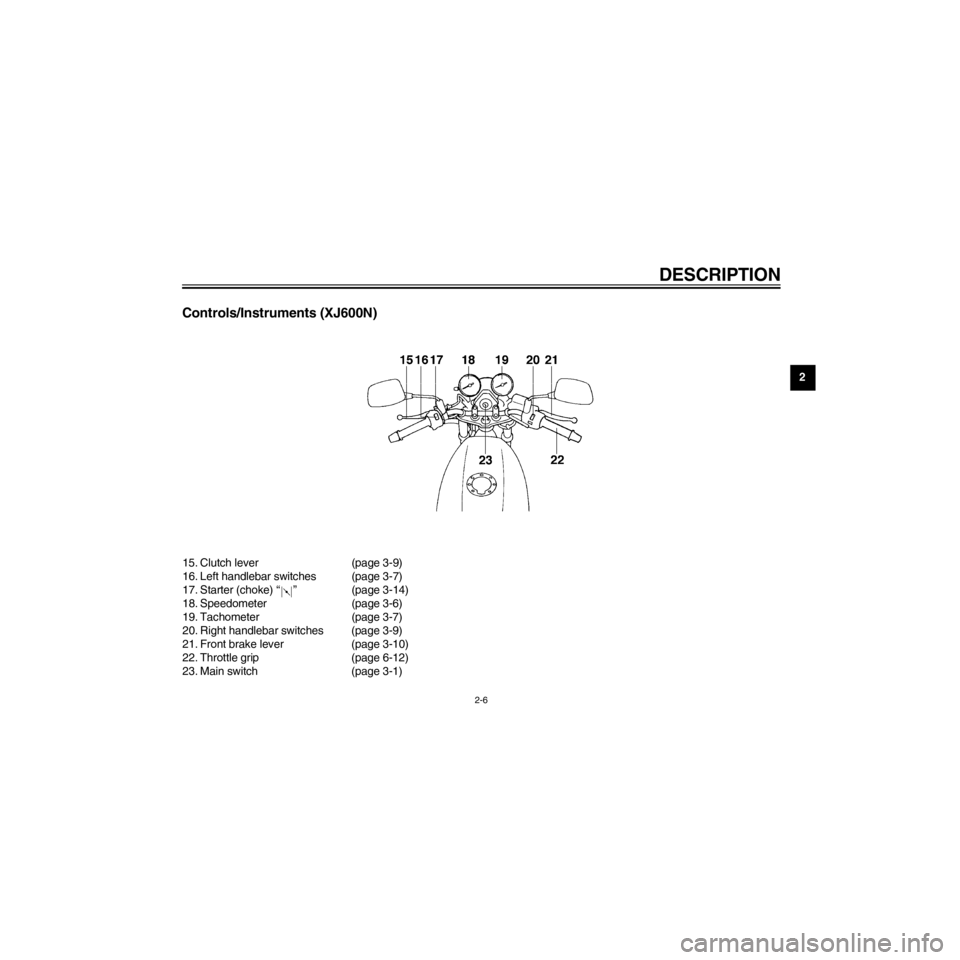
Controls/Instruments (XJ600N)
15. Clutch lever (page 3-9)
16. Left handlebar switches (page 3-7)
17. Starter (choke) Ò Ó (page 3-14)
18. Speedometer (page 3-6)
19. Tachometer (page 3-7)
20. Right handlebar switches (page 3-9)
21. Front brake lever (page 3-10)
22. Throttle grip (page 6-12)
23. Main switch (page 3-1)
Page 17 of 101
/Net/layout8/layout_G2/work/Imai_work/OM-PS/AA9156_XJ600SN-E6/English/E-2.frame
Page 18 of 101
R
INSTRUMENT AND CONTROL FUNCTIONS
/Net/layout8/layout_G2/work/Imai_work/OM-PS/AA9156_XJ600SN-E6/English/E-3TOC.-
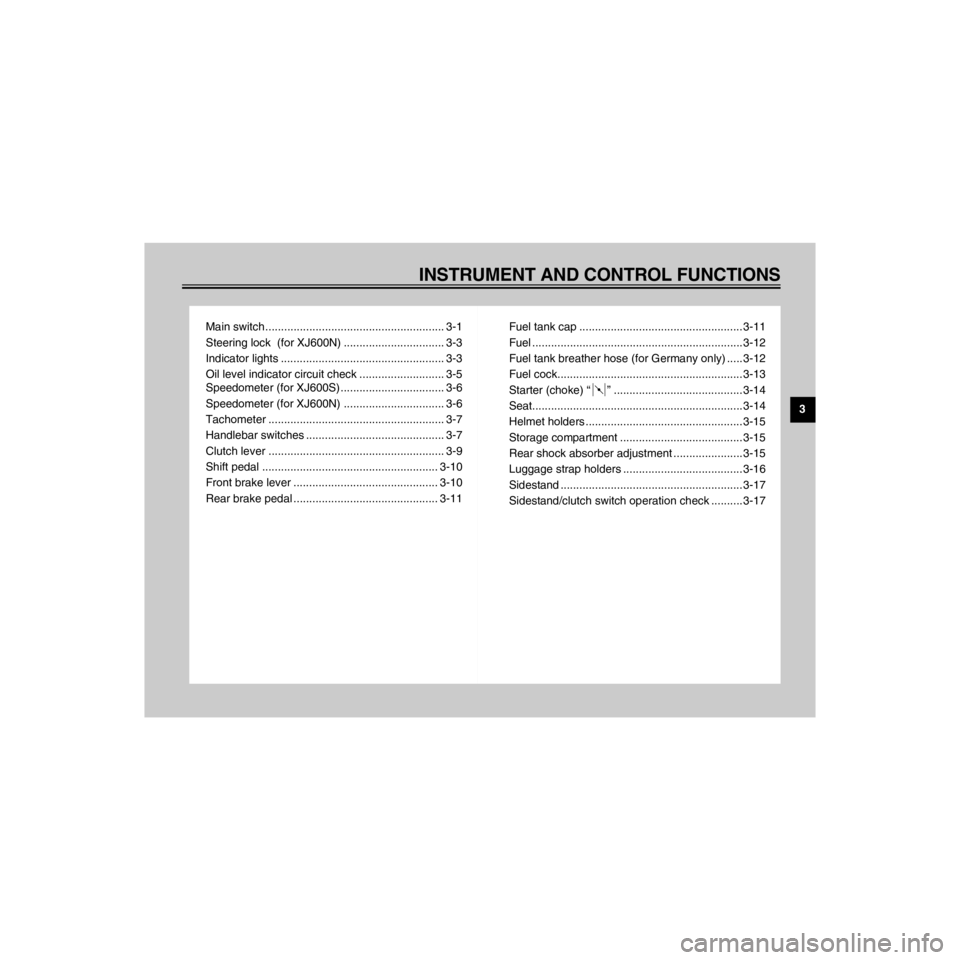
Main switch ......................................................... 3-1
Steering lock (for XJ600N) ................................ 3-3
Indicator lights .................................................... 3-3
Oil level indicator circuit check ........................... 3-5
Speedometer (for XJ600S) ................................. 3-6
Speedometer (for XJ600N) ................................ 3-6
Tachometer ........................................................ 3-7
Handlebar switches ............................................ 3-7
Clutch lever ........................................................ 3-9
Shift pedal ........................................................ 3-10
Front brake lever .............................................. 3-10
Rear brake pedal .............................................. 3-11Fuel tank cap .................................................... 3-11
Fuel ................................................................... 3-12
Fuel tank breather hose (for Germany only) ..... 3-12
Fuel cock........................................................... 3-13
Starter (choke) Ò Ó ......................................... 3-14
Seat................................................................... 3-14
Helmet holders .................................................. 3-15
Storage compartment ....................................... 3-15
Rear shock absorber adjustment ...................... 3-15
Luggage strap holders ...................................... 3-16
Sidestand .......................................................... 3-17
Sidestand/clutch switch operation check .......... 3-17
Page 19 of 101
L
3-1
INSTRUMENT AND CONTROL FUNCTIONS
/Net/layout8/layout_G2/work/Imai_work/OM-PS/AA9156_XJ600SN-E6/English/E-3.frame
EAU00027
EAU00028
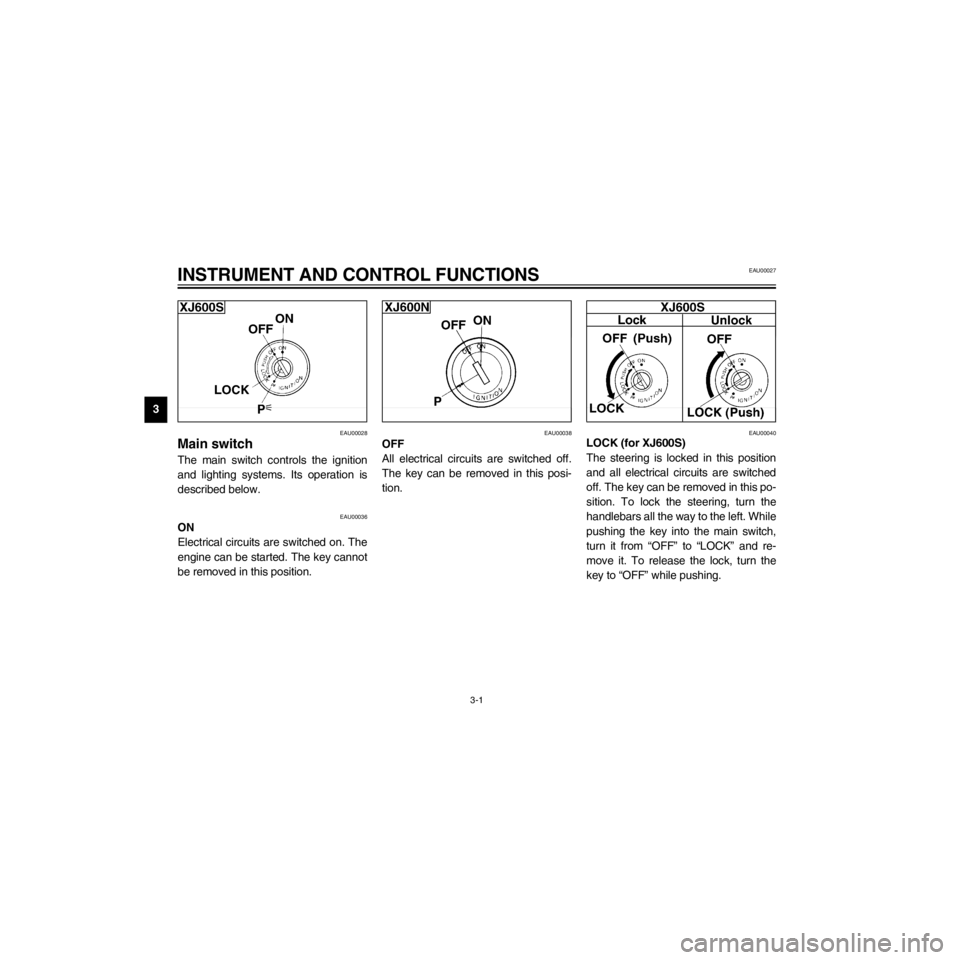
Main switch
The main switch controls the ignition
and lighting systems. Its operation is
described below.
EAU00036
ON
Electrical circuits are switched on. The
engine can be started. The key cannot
be removed in this position.
EAU00038
OFF
All electrical circuits are switched off.
The key can be removed in this posi-
tion.
EAU00040
LOCK (for XJ600S)
The steering is locked in this position
and all electrical circuits are switched
off. The key can be removed in this po-
sition. To lock the steering, turn the
handlebars all the way to the left. While
pushing the key into the main switch,
turn it from ÒOFFÓ to ÒLOCKÓ and re-
move it. To release the lock, turn the
key to ÒOFFÓ while pushing.
Page 20 of 101
R
3-2
INSTRUMENT AND CONTROL FUNCTIONS
/Net/layout8/layout_G2/work/Imai_work/OM-PS/AA9156_XJ600SN-E6/English/E-3.frame
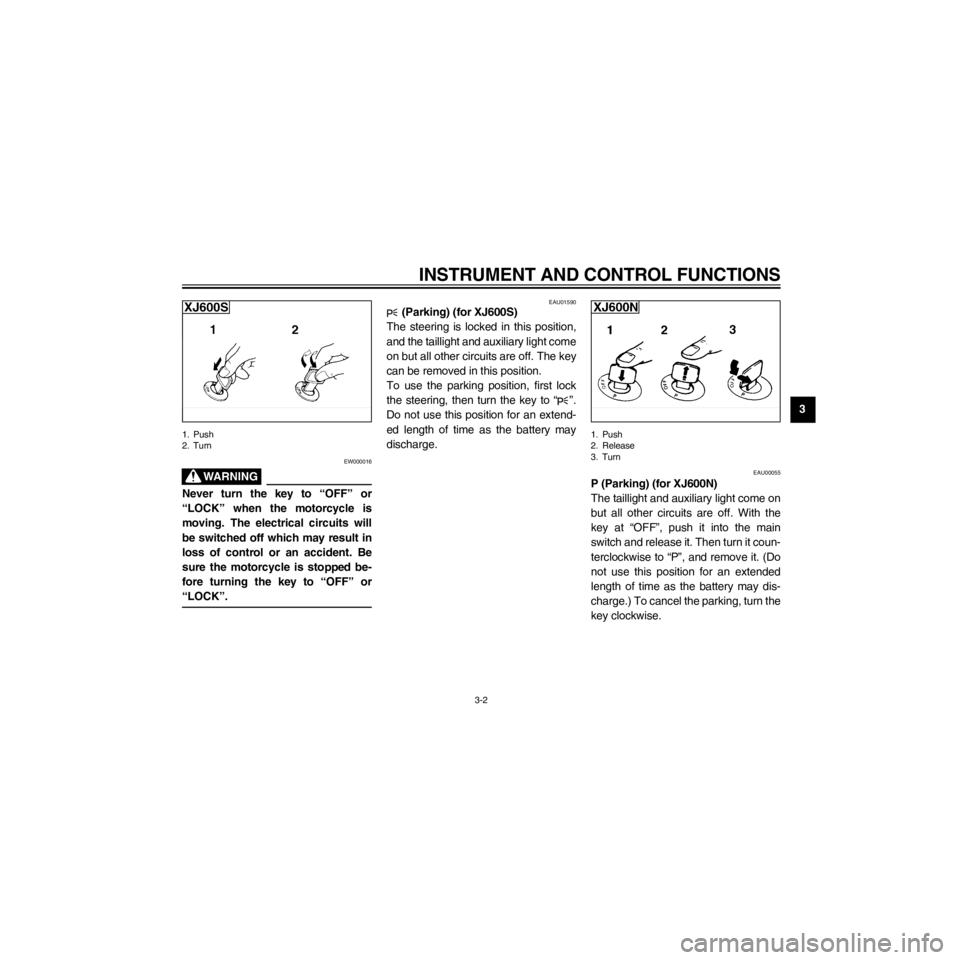
1. Push
2. Turn
EW000016
Never turn the key to ÒOFFÓ or
ÒLOCKÓ when the motorcycle is
moving. The electrical circuits will
be switched off which may result in
loss of control or an accident. Be
sure the motorcycle is stopped be-
fore turning the key to ÒOFFÓ or
ÒLOCKÓ.
EAU01590
(Parking) (for XJ600S)
The steering is locked in this position,
and the taillight and auxiliary light come
on but all other circuits are off. The key
can be removed in this position.
To use the parking position, first lock
the steering, then turn the key to Ò Ó.
Do not use this position for an extend-
ed length of time as the battery may
discharge.
1. Push
2. Release
3. Turn
EAU00055
P (Parking) (for XJ600N)
The taillight and auxiliary light come on
but all other circuits are off. With the
key at ÒOFFÓ, push it into the main
switch and release it. Then turn it coun-
terclockwise to ÒPÓ, and remove it. (Do
not use this position for an extended
length of time as the battery may dis-
charge.) To cancel the parking, turn the
key clockwise.
Trending: seat adjustment, four wheel drive, headlight bulb, compression ratio, fuel cap release, width, ECO mode
