YAMAHA XT1200ZE 2015 Owner's Guide
Manufacturer: YAMAHA, Model Year: 2015, Model line: XT1200ZE, Model: YAMAHA XT1200ZE 2015Pages: 118, PDF Size: 3.13 MB
Page 31 of 118
![YAMAHA XT1200ZE 2015 Owners Guide INSTRUMENT AND CONTROL FUNCTIONS
3-16
3
The accuracy of the temperature
reading may be affected when rid-
ing slowly [approximately under
20 km/h (12.5 mi/h)] or when
stopped at traffic signals, r YAMAHA XT1200ZE 2015 Owners Guide INSTRUMENT AND CONTROL FUNCTIONS
3-16
3
The accuracy of the temperature
reading may be affected when rid-
ing slowly [approximately under
20 km/h (12.5 mi/h)] or when
stopped at traffic signals, r](/img/51/53177/w960_53177-30.png)
INSTRUMENT AND CONTROL FUNCTIONS
3-16
3
The accuracy of the temperature
reading may be affected when rid-
ing slowly [approximately under
20 km/h (12.5 mi/h)] or when
stopped at traffic signals, railroad
crossings, etc.
Coolant temperature display:The coolant temperature display indi-
cates the temperature of the coolant.
The coolant temperature varies with
changes in the weather and engine
load.
If the message “Hi” flashes, stop the
vehicle, then stop the engine, and let
the engine cool. (See page 6-38.)
TIPThe selected information display can-
not be switched while the message
“Hi” is flashing.NOTICE
ECA10022
Do not continue to operate the en-
gine if it is overheatin g.Average fuel consumption display:
The average fuel consumption display
modes “km/L”, “L/100km” or “MPG”
(for the UK only) show the average fuel
consumption since the display was last
reset.
The “km/L” display shows the av-
erage distance that can be trav-
eled on 1.0 L of fuel.
The “L/100km” display shows the
average amount of fuel necessary
to travel 100 km.
For the UK only: The “MPG” dis-
play shows the average distance
that can be traveled on
1.0 Imp.gal of fuel.
To reset the average fuel consumption
display, use the select switch to select
the information display that contains
the average fuel consumption display.
Push the “RESET” button briefly so
that the average fuel consumption dis-
play flashes, and then push the “RE-
SET” button again for at least 2
seconds while the display is flashing.
Lo
C.TEMP ˚C
GEAR4
Hi
C.TEMP˚C
12.3
FUEL AVG km/L
U2KBE1E0.book Page 16 Monday, August 18, 2014 9:42 AM
Page 32 of 118
INSTRUMENT AND CONTROL FUNCTIONS
3-17
3
TIPAfter resetting the average fuel con-
sumption display, “_ _._” will be shown
for that display until the vehicle has
traveled 1 km (0.6 mi).NOTICE
ECA15474
If there is a malfunction, “– –.–” will
be continuously displaye d. Have a
Yamaha dealer check the vehicle.Instantaneous fuel consumption dis-play:The instantaneous fuel consumption
display modes “km/L”, “L/100km” or
“MPG” (for the UK only) show the fuel
consumption under the current riding
conditions.
The “km/L” display shows the dis-
tance that can be traveled on 1.0 L
of fuel.
The “L/100km” display shows the
amount of fuel necessary to travel
100 km.
For the UK only: The “MPG” dis-
play shows the distance that can
be traveled on 1.0 Imp.gal of fuel.
TIPIf traveling at speeds under 10 km/h (6
mi/h), “_ _._” will be displayed.NOTICE
ECA15474
If there is a malfunction, “– –.–” will
be continuously displaye d. Have a
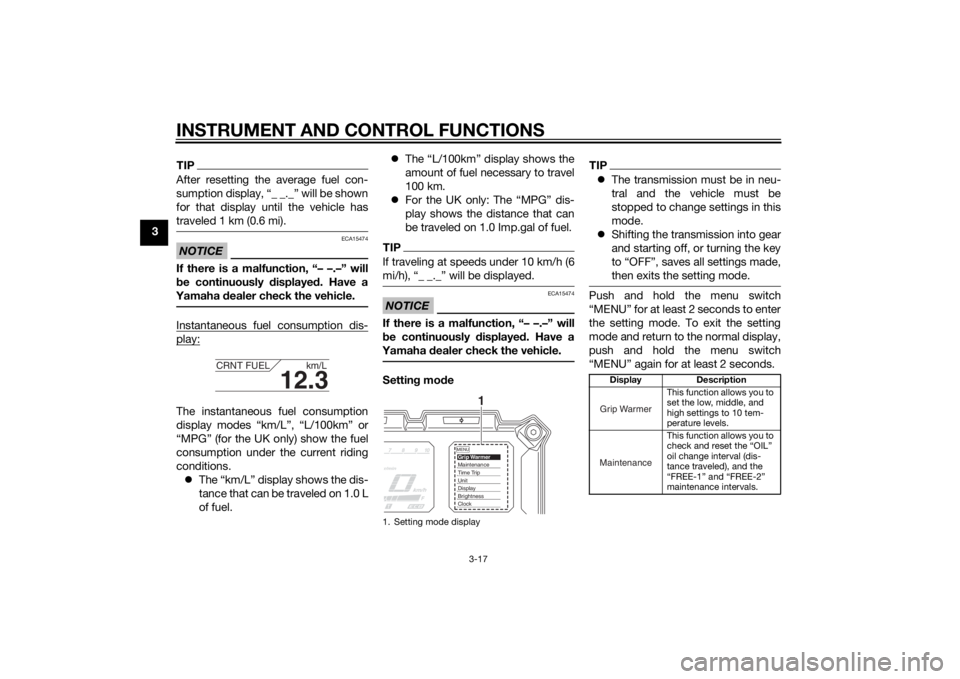
Yamaha dealer check the vehicle.Setting mode
TIP The transmission must be in neu-
tral and the vehicle must be
stopped to change settings in this
mode.
Shifting the transmission into gear
and starting off, or turning the key
to “OFF”, saves all settings made,
then exits the setting mode.Push and hold the menu switch
“MENU” for at least 2 seconds to enter
the setting mode. To exit the setting
mode and return to the normal display,
push and hold the menu switch
“MENU” again for at least 2 seconds.
12.3
CRNT FUEL km/L
1. Setting mode display
MENUGrip WarmerMaintenanceTime TripUnitDisplayBrightnessClock
1
Display Description
This function allows you to
set the low, middle, and
high settings to 10 tem-
perature levels.
This function allows you to
check and reset the “OIL”
oil change interval (dis-
tance traveled), and the
“FREE-1” and “FREE-2”
maintenance intervals.Grip WarmerMaintenance
U2KBE1E0.book Page 17 Monday, August 18, 2014 9:42 AM
Page 33 of 118
INSTRUMENT AND CONTROL FUNCTIONS
3-18
3
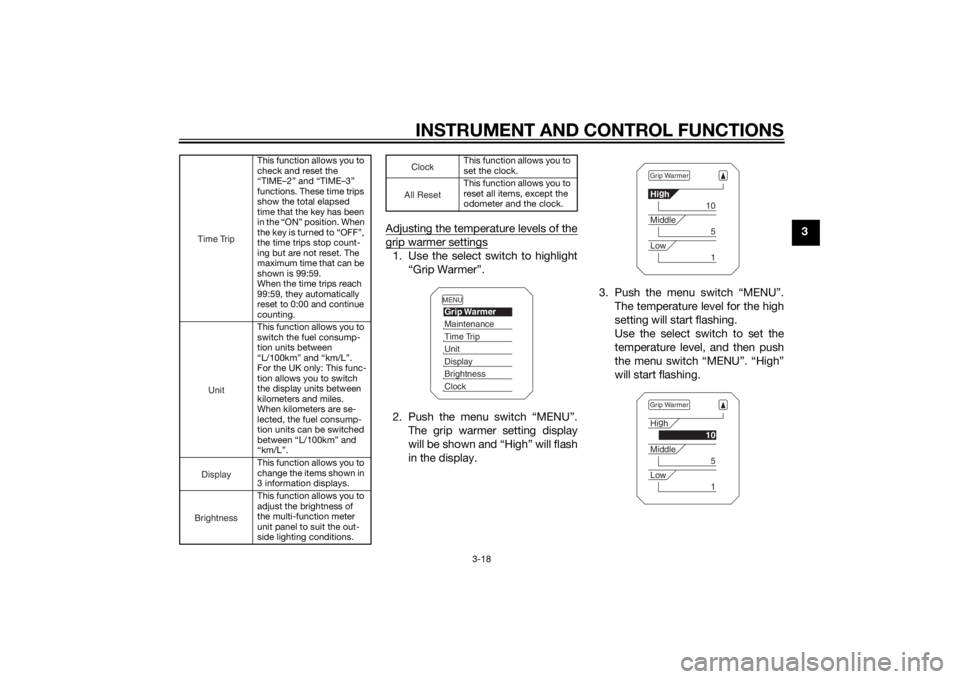
Adjusting the temperature levels of the
grip warmer settings1. Use the select switch to highlight
“Grip Warmer”.
2. Push the menu switch “MENU”. The grip warmer setting display
will be shown and “High” will flash
in the display. 3. Push the menu switch “MENU”.
The temperature level for the high
setting will start flashing.
Use the select switch to set the
temperature level, and then push
the menu switch “MENU”. “High”
will start flashing.
This function allows you to
check and reset the
“TIME–2” and “TIME–3”
functions. These time trips
show the total elapsed
time that the key has been
in the “ON” position. When
the key is turned to “OFF”,
the time trips stop count-
ing but are not reset. The
maximum time that can be
shown is 99:59.
When the time trips reach
99:59, they automatically
reset to 0:00 and continue
counting.
This function allows you to
switch the fuel consump-
tion units between
“L/100km” and “km/L”.
For the UK only: This func-
tion allows you to switch
the display units between
kilometers and miles.
When kilometers are se-
lected, the fuel consump-
tion units can be switched
between “L/100km” and
“km/L”.
This function allows you to
change the items shown in
3 information displays.
This function allows you to
adjust the brightness of
the multi-function meter
unit panel to suit the out-
side lighting conditions.
Time Trip
Unit
DisplayBrightness
This function allows you to
set the clock.
This function allows you to
reset all items, except the
odometer and the clock.
Cloc
k
All Reset
MENUGrip WarmerMaintenanceTime TripUnitDisplayBrightnessClock
Grip WarmerHi g
h
10
Middle
5
Low
1
Grip WarmerHi g
h
10
Middle
5
Low
1
U2KBE1E0.book Page 18 Monday, August 18, 2014 9:42 AM
Page 34 of 118
INSTRUMENT AND CONTROL FUNCTIONS
3-19
34. Use the select switch to highlight
“Middle” or “Low”, and then
change the setting using the same
procedure that was used for the
high setting.
5. When you are finished changing the settings, use the select switch
to highlight “ ”, and then push the
menu switch “MENU” to return to
the setting mode menu.
TIPThe setting can be set to 10 tempera-
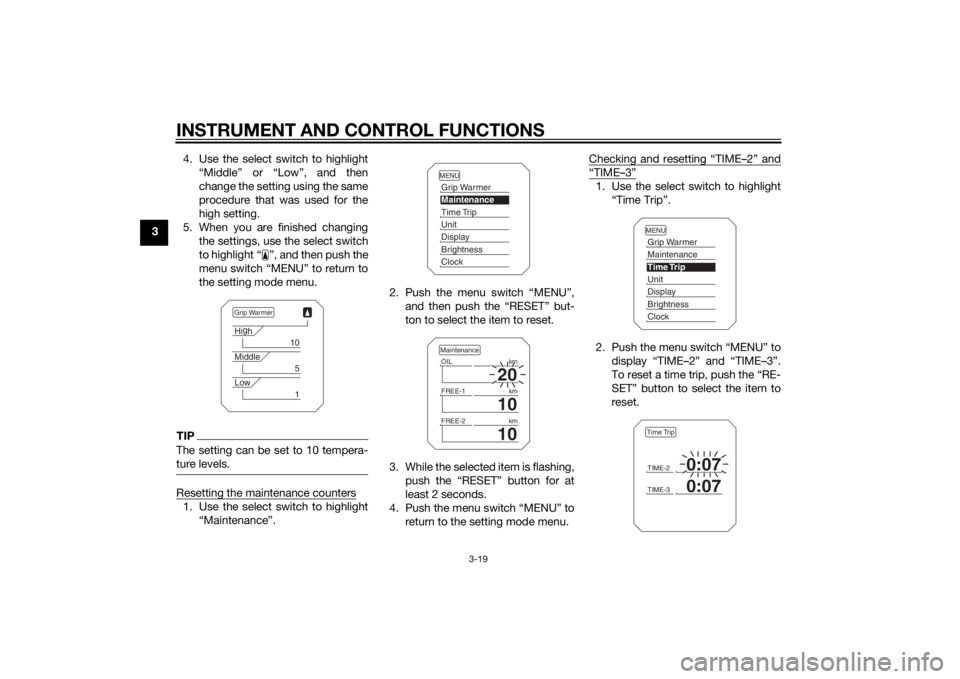
ture levels.Resetting the maintenance counters1. Use the select switch to highlight“Maintenance”. 2. Push the menu switch “MENU”,
and then push the “RESET” but-
ton to select the item to reset.
3. While the selected item is flashing, push the “RESET” button for at
least 2 seconds.
4. Push the menu switch “MENU” to return to the setting mode menu. Checking and resetting “TIME–2” and
“TIME–3”1. Use the select switch to highlight
“Time Trip”.
2. Push the menu switch “MENU” to display “TIME–2” and “TIME–3”.
To reset a time trip, push the “RE-
SET” button to select the item to
reset.
Grip WarmerHig
h
10
Middle
5
Low
1
MENUGrip WarmerMaintenanceTime TripUnitDisplayBrightnessClock
20
OIL km
10
FREE-1km
10
FREE-2kmMaintenance
MENUGrip WarmerMaintenanceTime TripUnitDisplayBrightnessClockTIME-2
0:07
TIME-3
0:07
Time Trip
U2KBE1E0.book Page 19 Monday, August 18, 2014 9:42 AM
Page 35 of 118
INSTRUMENT AND CONTROL FUNCTIONS
3-20
3
3. While the selected item is flashing,
push the “RESET” button for at
least 2 seconds.
4. Push the menu switch “MENU” to return to the setting mode menu.
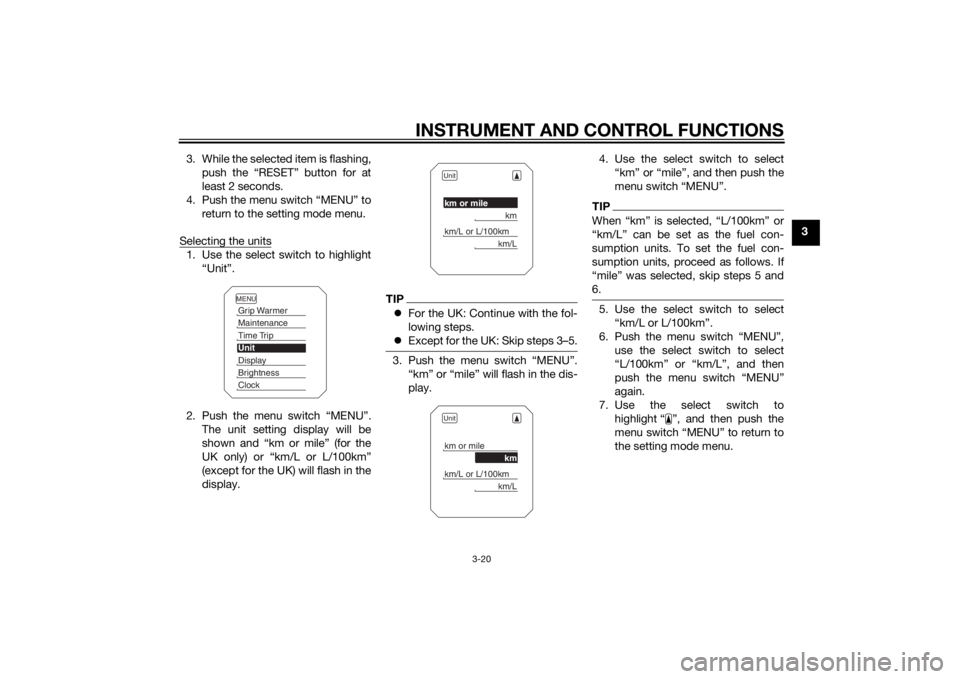
Selecting the units
1. Use the select switch to highlight “Unit”.
2. Push the menu switch “MENU”. The unit setting display will be
shown and “km or mile” (for the
UK only) or “km/L or L/100km”
(except for the UK) will flash in the
display.
TIPFor the UK: Continue with the fol-
lowing steps.
Except for the UK: Skip steps 3–5.3. Push the menu switch “MENU”.
“km” or “mile” will flash in the dis-
play. 4. Use the select switch to select
“km” or “mile”, and then push the
menu switch “MENU”.
TIPWhen “km” is selected, “L/100km” or
“km/L” can be set as the fuel con-
sumption units. To set the fuel con-
sumption units, proceed as follows. If
“mile” was selected, skip steps 5 and
6.5. Use the select switch to select“km/L or L/100km”.
6. Push the menu switch “MENU”, use the select switch to select
“L/100km” or “km/L”, and then
push the menu switch “MENU”
again.
7. Use the select switch to highlight “ ”, and then push the
menu switch “MENU” to return to
the setting mode menu.
MENUGrip WarmerMaintenanceTime TripUnitDisplayBrightnessClock
Unitkm or mile
km
km/L or L/100km
km/L
Unitkm or mile
km
km/L or L/100km
km/L
U2KBE1E0.book Page 20 Monday, August 18, 2014 9:42 AM
Page 36 of 118
INSTRUMENT AND CONTROL FUNCTIONS
3-21
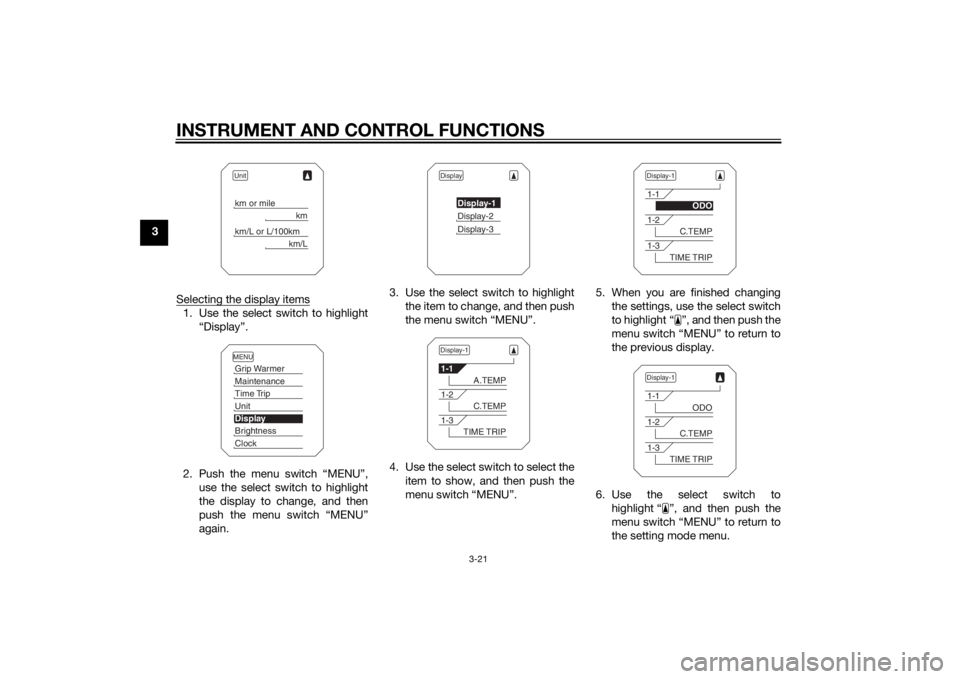
3Selecting the display items
1. Use the select switch to highlight“Display”.
2. Push the menu switch “MENU”, use the select switch to highlight
the display to change, and then
push the menu switch “MENU”
again. 3. Use the select switch to highlight
the item to change, and then push
the menu switch “MENU”.
4. Use the select switch to select the item to show, and then push the
menu switch “MENU”. 5. When you are finished changing
the settings, use the select switch
to highlight “ ”, and then push the
menu switch “MENU” to return to
the previous display.
6. Use the select switch to highlight “ ”, and then push the
menu switch “MENU” to return to
the setting mode menu.
Unitkm or mile
km
km/L or L/100km
km/L
MENUGrip WarmerMaintenanceTime TripUnitDisplayBrightnessClock
Display
Display-1Display-2Display-3
Display-11-1
A.TEMP
1-2
C.TEMP
1-3
TIME TRIP
Display-11-1
ODO
1-2
C.TEMP
1-3
TIME TRIP
Display-11-1
ODO
1-2
C.TEMP
1-3
TIME TRIP
U2KBE1E0.book Page 21 Monday, August 18, 2014 9:42 AM
Page 37 of 118
INSTRUMENT AND CONTROL FUNCTIONS
3-22
3
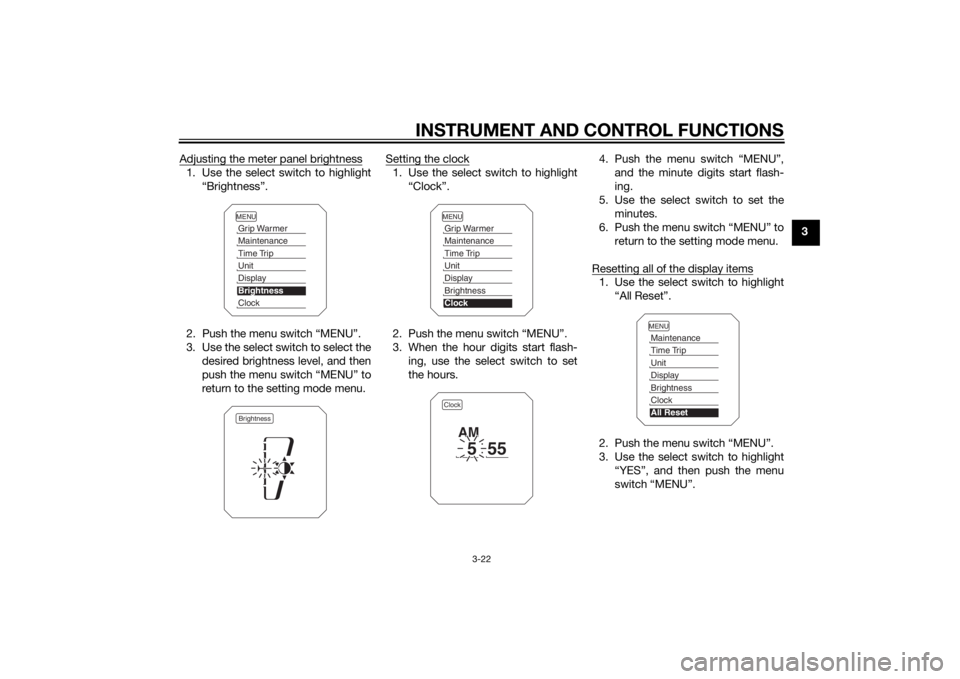
Adjusting the meter panel brightness
1. Use the select switch to highlight
“Brightness”.
2. Push the menu switch “MENU”.
3. Use the select switch to select the desired brightness level, and then
push the menu switch “MENU” to
return to the setting mode menu. Setting the clock
1. Use the select switch to highlight
“Clock”.
2. Push the menu switch “MENU”.
3. When the hour digits start flash- ing, use the select switch to set
the hours. 4. Push the menu switch “MENU”,
and the minute digits start flash-
ing.
5. Use the select switch to set the minutes.
6. Push the menu switch “MENU” to return to the setting mode menu.
Resetting all of the display items
1. Use the select switch to highlight “All Reset”.
2. Push the menu switch “MENU”.
3. Use the select switch to highlight “YES”, and then push the menu
switch “MENU”.
MENUGrip WarmerMaintenanceTime TripUnitDisplayBrightnessClockBrightness
MENUGrip WarmerMaintenanceTime TripUnitDisplayBrightnessClockClock
5
55
AM
MENUMaintenanceTime TripUnitDisplayBrightnessClockAll Reset
U2KBE1E0.book Page 22 Monday, August 18, 2014 9:42 AM
Page 38 of 118
INSTRUMENT AND CONTROL FUNCTIONS
3-23
3
TIPThe odometer and the clock cannot be
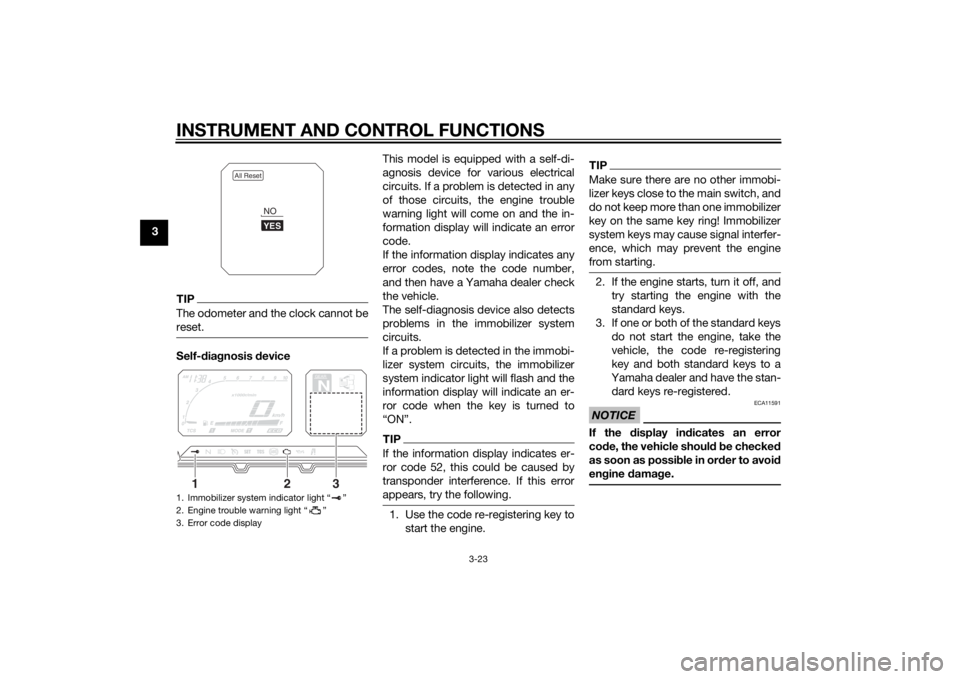
reset.Self-diagnosis device This model is equipped with a self-di-
agnosis device for various electrical
circuits. If a problem is detected in any
of those circuits, the engine trouble
warning light will come on and the in-
formation display will indicate an error
code.
If the information display indicates any
error codes, note the code number,
and then have a Yamaha dealer check
the vehicle.
The self-diagnosis device also detects
problems in the immobilizer system
circuits.
If a problem is detected in the immobi-
lizer system circuits, the immobilizer
system indicator light will flash and the
information display will indicate an er-
ror code when the key is turned to
“ON”.
TIPIf the information display indicates er-
ror code 52, this could be caused by
transponder interference. If this error
appears, try the following.1. Use the code re-registering key to
start the engine.
TIPMake sure there are no other immobi-
lizer keys close to the main switch, and
do not keep more than one immobilizer
key on the same key ring! Immobilizer
system keys may cause signal interfer-
ence, which may prevent the engine
from starting.2. If the engine starts, turn it off, andtry starting the engine with the
standard keys.
3. If one or both of the standard keys do not start the engine, take the
vehicle, the code re-registering
key and both standard keys to a
Yamaha dealer and have the stan-
dard keys re-registered.NOTICE
ECA11591
If the display in dicates an error
co de, the vehicle shoul d b e checked
as soon as possi ble in or der to avoi d
en gine damag e.
1. Immobilizer system indicator light “ ”
2. Engine trouble warning light “ ”
3. Error code display
All Reset
YESNO
GEARN
25
A.TEMP ˚C
Lo
C.TEMP ˚C
0:00
TIME TRIP
1
2
3
U2KBE1E0.book Page 23 Monday, August 18, 2014 9:42 AM
Page 39 of 118
INSTRUMENT AND CONTROL FUNCTIONS
3-24
3
EAU49432
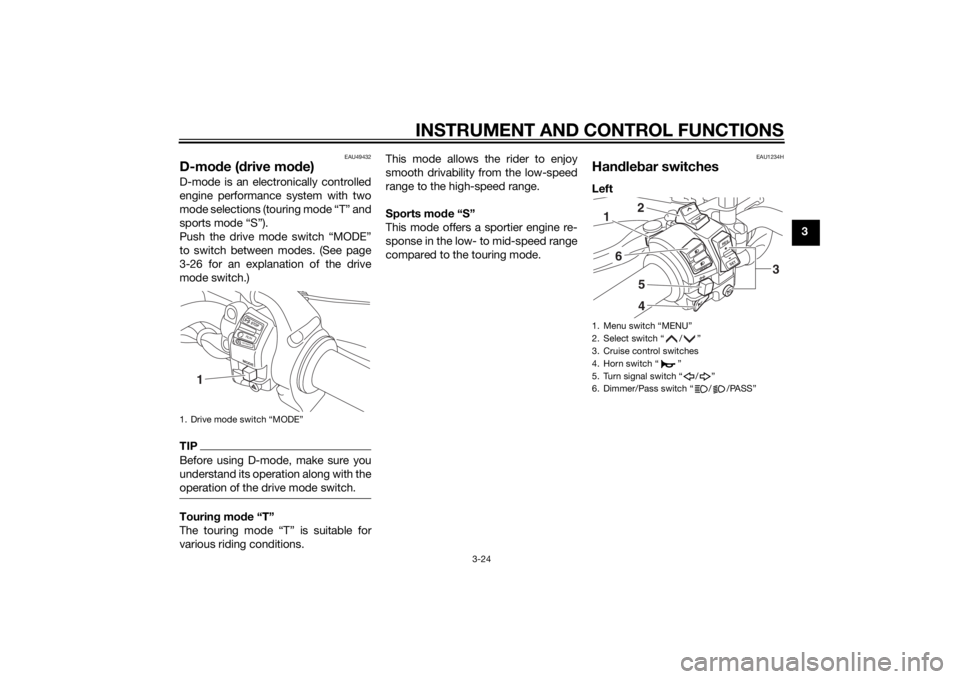
D-mode ( drive mo de)D-mode is an electronically controlled
engine performance system with two
mode selections (touring mode “T” and
sports mode “S”).
Push the drive mode switch “MODE”
to switch between modes. (See page
3-26 for an explanation of the drive
mode switch.)TIPBefore using D-mode, make sure you
understand its operation along with the
operation of the drive mode switch.Tourin g mo de “T”
The touring mode “T” is suitable for
various riding conditions. This mode allows the rider to enjoy
smooth drivability from the low-speed
range to the high-speed range.
Sports mod
e “S”
This mode offers a sportier engine re-
sponse in the low- to mid-speed range
compared to the touring mode.
EAU1234H
Han dle bar switchesLeft
1. Drive mode switch “MODE”
M ODESTOPRUNSTA R
T
1
1. Menu switch “MENU”
2. Select switch “ / ”
3. Cruise control switches
4. Horn switch “ ”
5. Turn signal switch “ / ”
6. Dimmer/Pass switch “ / /PASS”
R ESSET
PA S S
1
6
542
3
U2KBE1E0.book Page 24 Monday, August 18, 2014 9:42 AM
Page 40 of 118
INSTRUMENT AND CONTROL FUNCTIONS
3-25
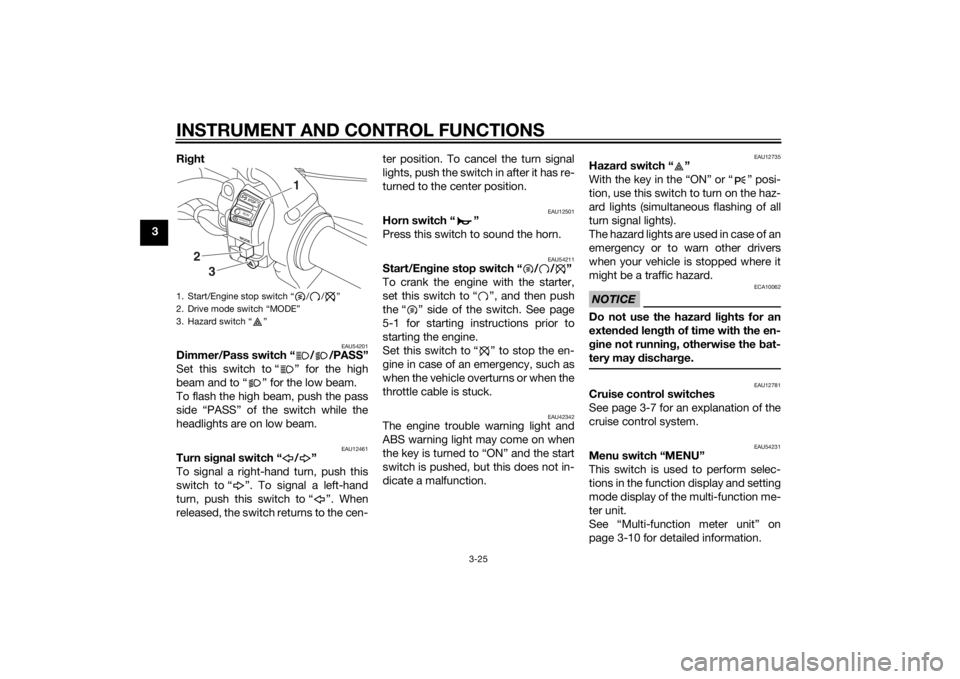
3Ri
ght
EAU54201
Dimmer/Pass switch “ / /PASS”
Set this switch to “ ” for the high
beam and to “ ” for the low beam.
To flash the high beam, push the pass
side “PASS” of the switch while the
headlights are on low beam.
EAU12461
Turn si gnal switch “ / ”
To signal a right-hand turn, push this
switch to “ ”. To signal a left-hand
turn, push this switch to “ ”. When
released, the switch returns to the cen- ter position. To cancel the turn signal
lights, push the switch in after it has re-
turned to the center position.
EAU12501
Horn switch “ ”
Press this switch to sound the horn.
EAU54211
Start/En
gine stop switch “ / / ”
To crank the engine with the starter,
set this switch to “ ”, and then push
the “ ” side of the switch. See page
5-1 for starting instructions prior to
starting the engine.
Set this switch to “ ” to stop the en-
gine in case of an emergency, such as
when the vehicle overturns or when the
throttle cable is stuck.
EAU42342
The engine trouble warning light and
ABS warning light may come on when
the key is turned to “ON” and the start
switch is pushed, but this does not in-
dicate a malfunction.
EAU12735
Hazar d switch “ ”
With the key in the “ON” or “ ” posi-
tion, use this switch to turn on the haz-
ard lights (simultaneous flashing of all
turn signal lights).
The hazard lights are used in case of an
emergency or to warn other drivers
when your vehicle is stopped where it
might be a traffic hazard.NOTICE
ECA10062
Do not use the hazard lights for an
exten ded len gth of time with the en-
g ine not runnin g, otherwise the bat-
tery may dischar ge.
EAU12781
Cruise control switches
See page 3-7 for an explanation of the
cruise control system.
EAU54231
Menu switch “MENU”
This switch is used to perform selec-
tions in the function display and setting
mode display of the multi-function me-
ter unit.
See “Multi-function meter unit” on
page 3-10 for detailed information.
1. Start/Engine stop switch “ / / ”
2. Drive mode switch “MODE”
3. Hazard switch “ ”
MODESTOPRUNS TA R
T
3
2
1
U2KBE1E0.book Page 25 Monday, August 18, 2014 9:42 AM