YAMAHA XVZ1300TF 2000 Workshop Manual
Manufacturer: YAMAHA, Model Year: 2000, Model line: XVZ1300TF, Model: YAMAHA XVZ1300TF 2000Pages: 121, PDF Size: 19.23 MB
Page 51 of 121
AUDIO SYSTEM
4-13
4
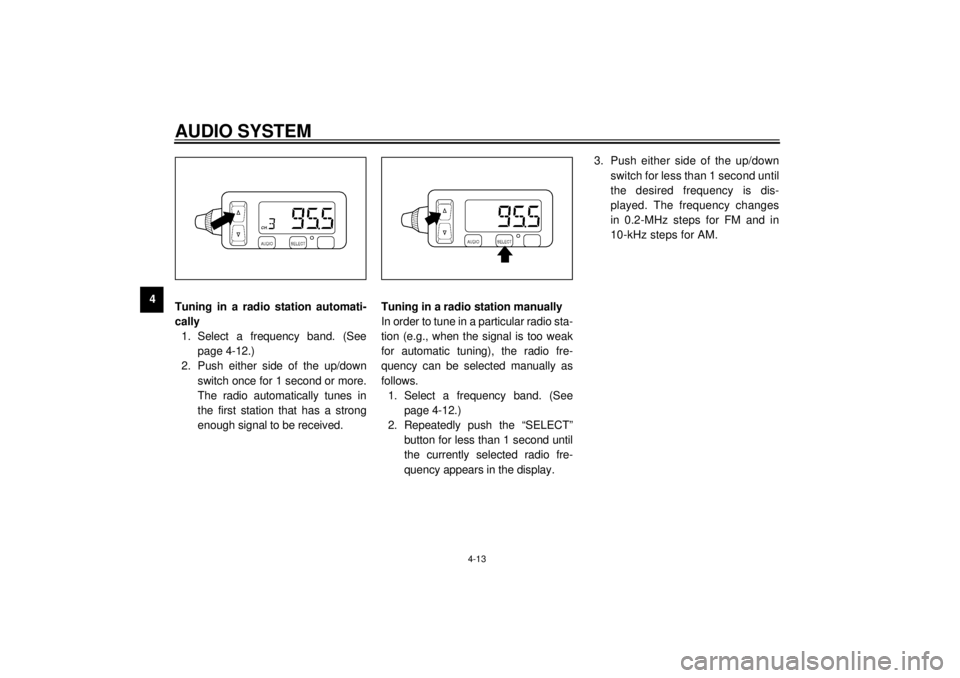
Tuning in a radio station automati-
cally
1. Select a frequency band. (See
page 4-12.)
2. Push either side of the up/down
switch once for 1 second or more.
The radio automatically tunes in
the first station that has a strong
enough signal to be received.Tuning in a radio station manually
In order to tune in a particular radio sta-
tion (e.g., when the signal is too weak
for automatic tuning), the radio fre-
quency can be selected manually as
follows.
1. Select a frequency band. (See
page 4-12.)
2. Repeatedly push the “SELECT”
button for less than 1 second until
the currently selected radio fre-
quency appears in the display.3. Push either side of the up/down
switch for less than 1 second until
the desired frequency is dis-
played. The frequency changes
in 0.2-MHz steps for FM and in
10-kHz steps for AM.
E_5jc_Audio.fm Page 13 Saturday, October 16, 1999 1:09 PM
Page 52 of 121
AUDIO SYSTEM
4-14
4
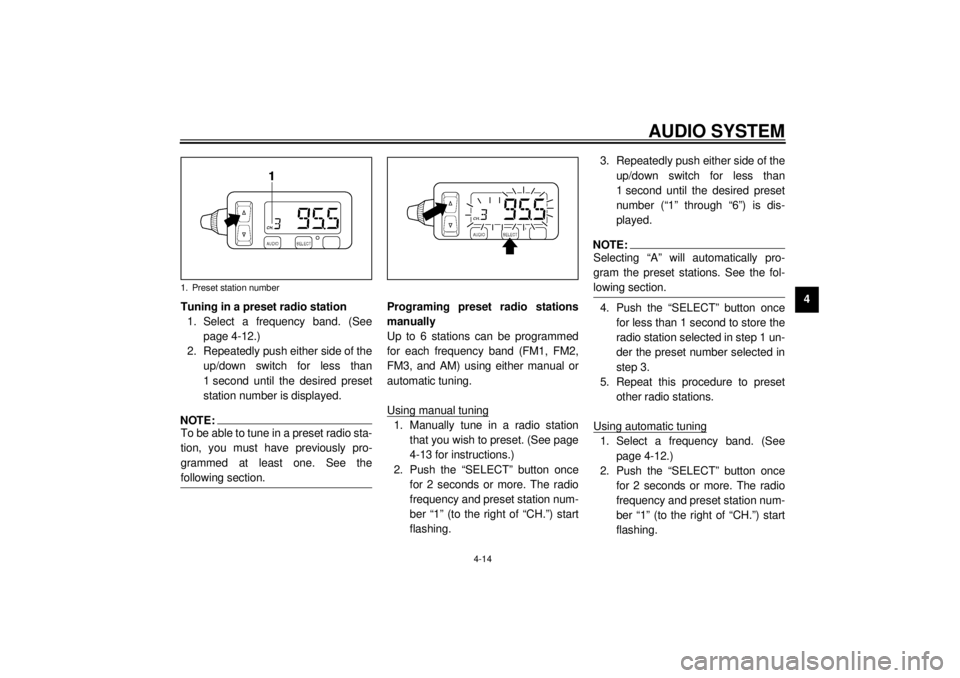
Tuning in a preset radio station
1. Select a frequency band. (See
page 4-12.)
2. Repeatedly push either side of the
up/down switch for less than
1 second until the desired preset
station number is displayed.
NOTE:@ To be able to tune in a preset radio sta-
tion, you must have previously pro-
grammed at least one. See the
following section. @
Programing preset radio stations
manually
Up to 6 stations can be programmed
for each frequency band (FM1, FM2,
FM3, and AM) using either manual or
automatic tuning.
Using manual tuning1. Manually tune in a radio station
that you wish to preset. (See page
4-13 for instructions.)
2. Push the “SELECT” button once
for 2 seconds or more. The radio
frequency and preset station num-
ber “1” (to the right of “CH.”) start
flashing.3. Repeatedly push either side of the
up/down switch for less than
1 second until the desired preset
number (“1” through “6”) is dis-
played.
NOTE:@ Selecting “A” will automatically pro-
gram the preset stations. See the fol-
lowing section. @4. Push the “SELECT” button once
for less than 1 second to store the
radio station selected in step 1 un-
der the preset number selected in
step 3.
5. Repeat this procedure to preset
other radio stations.
Using automatic tuning1. Select a frequency band. (See
page 4-12.)
2. Push the “SELECT” button once
for 2 seconds or more. The radio
frequency and preset station num-
ber “1” (to the right of “CH.”) start
flashing.
1. Preset station number
E_5jc_Audio.fm Page 14 Saturday, October 16, 1999 1:09 PM
Page 53 of 121
AUDIO SYSTEM
4-15
43. Push either side of the up/down
switch once for 1 second or more
to tune in a station automatically.
4. Repeatedly push either side of the
up/down switch for less than
1 second until the desired preset
number (“1” through “6”) is dis-
played.
5. Push the “SELECT” button once
for less than 1 second to store the
radio station selected in step 3 un-
der the preset number selected in
step 4.
6. Repeat this procedure to preset
other radio stations.Programing preset radio stations
automatically
Up to 6 stations can be programmed
automatically for each frequency band
(FM1, FM2, FM3, and AM) as follows.
NOTE:@ This function works best in areas with
strong radio signals. @1. Select a frequency band. (See
page 4-12.)
2. Push the “SELECT” button once
for 2 seconds or more. The radio
frequency and preset station num-
ber “1” (to the right of “CH.”) start
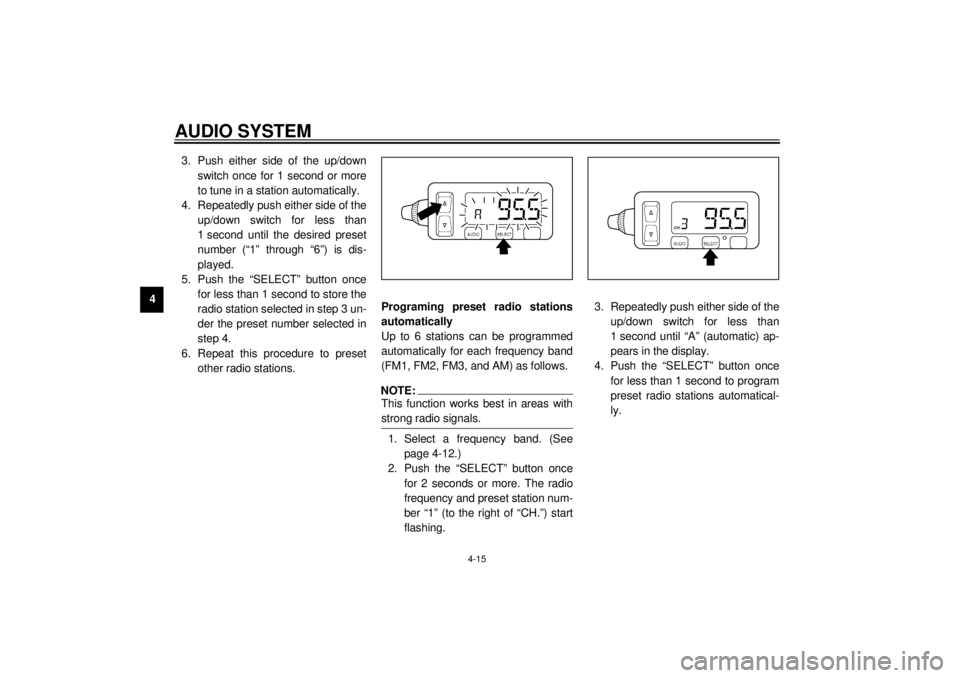
flashing.3. Repeatedly push either side of the
up/down switch for less than
1 second until “A” (automatic) ap-
pears in the display.
4. Push the “SELECT” button once
for less than 1 second to program
preset radio stations automatical-
ly.
E_5jc_Audio.fm Page 15 Saturday, October 16, 1999 1:09 PM
Page 54 of 121
AUDIO SYSTEM
4-16
4
CD changer (optional)
operation
WARNING
@ l
It is dangerous to operate the
CD changer while riding. Never
take your hands off the handle-
bars while riding.
l
Keep the volume at a low
enough level to be aware of traf-
fic conditions and ensure safe-
ty.
@An optional 6-disc CD changer can be
mounted in the travel trunk. Ask a
Yamaha dealer to install the genuine
Clarion CDC635 model.Playing a CD
1. Insert up to 6 CDs into the CD
changer. Follow the manufactur-
er’s directions.
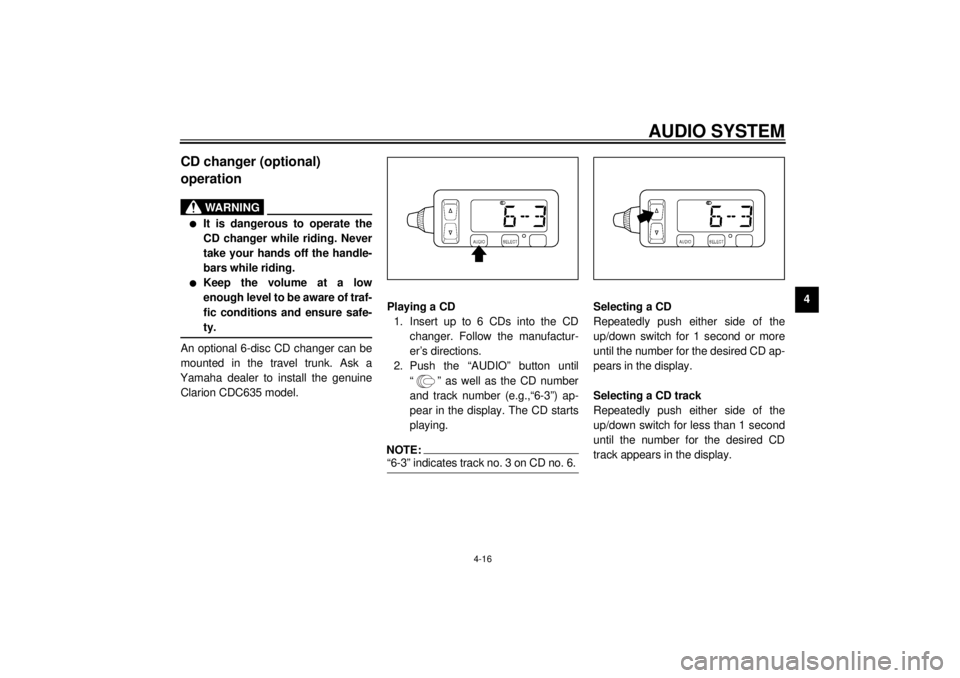
2. Push the “AUDIO” button until
“ ” as well as the CD number
and track number (e.g.,“6-3”) ap-
pear in the display. The CD starts
playing.
NOTE:@ “6-3” indicates track no. 3 on CD no. 6. @
Selecting a CD
Repeatedly push either side of the
up/down switch for 1 second or more
until the number for the desired CD ap-
pears in the display.
Selecting a CD track
Repeatedly push either side of the
up/down switch for less than 1 second
until the number for the desired CD
track appears in the display.
E_5jc_Audio.fm Page 16 Saturday, October 16, 1999 1:09 PM
Page 55 of 121
AUDIO SYSTEM
4-17
4
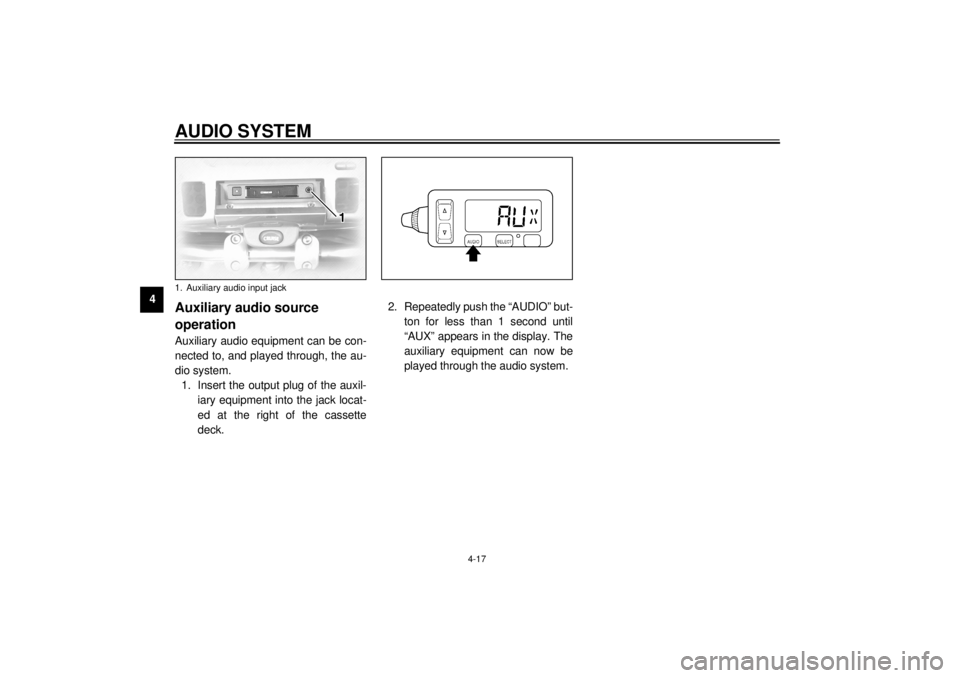
Auxiliary audio source
operationAuxiliary audio equipment can be con-
nected to, and played through, the au-
dio system.
1. Insert the output plug of the auxil-
iary equipment into the jack locat-
ed at the right of the cassette
deck.2. Repeatedly push the “AUDIO” but-
ton for less than 1 second until
“AUX” appears in the display. The
auxiliary equipment can now be
played through the audio system.1. Auxiliary audio input jackE_5jc_Audio.fm Page 17 Saturday, October 16, 1999 1:09 PM
Page 56 of 121
PRE-OPERATION CHECKS
5
Pre-operation check list ...................................................................... 5-1
E_5jc_PreopTOC.fm Page 1 Saturday, October 16, 1999 1:09 PM
Page 57 of 121

5-1
5
EAU01114
5-PRE-OPERATION CHECKSOwners are personally responsible for their vehicle’s condition. Your motorcycle’s vital functions can start to deteriorate
quickly and unexpectedly, even if it remains unused (for instance, if it is exposed to the elements). Any damage, fluid leak or
loss of tire pressure could have serious consequences. Therefore, it is very important that, in addition to a thorough visual in-
spection, you check the following points before each ride.
EAU00340
PRE-OPERATION CHECK LIST
ITEM CHECKS PAGE
Front brake• Check operation, fluid level and vehicle for fluid leakage.
• Fill with DOT 4 brake fluid if necessary.
7-23 ~ 7-26
Rear brake• Check operation, fluid level and vehicle for fluid leakage.
• Fill with DOT 4 brake fluid if necessary.
Clutch• Check operation, fluid level and vehicle for fluid leakage.
• Fill with DOT 4 brake fluid if necessary.7-22
Throttle grip and housing• Check for smooth operation.
• Lubricate if necessary.7-18
Engine oil• Check oil level.
• Fill with oil if necessary.7-11 ~ 7-13
Coolant reservoir tank• Check coolant level.
• Fill with coolant if necessary.7-14
Final gear oil• Check vehicle for leakage. 7-13
Wheels and tires• Check tire pressure, wear and for damage. 7-19 ~ 7-22
Brake and shift pedal
shafts• Check for smooth operation.
• Lubricate if necessary.7-27
Brake and clutch lever
pivots• Check for smooth operation.
• Lubricate if necessary.7-27
Sidestand pivot• Check for smooth operation.
• Lubricate if necessary.7-28
E_5jc_Preop.fm Page 1 Saturday, October 16, 1999 1:10 PM
Page 58 of 121
PRE-OPERATION CHECKS
5-2
5
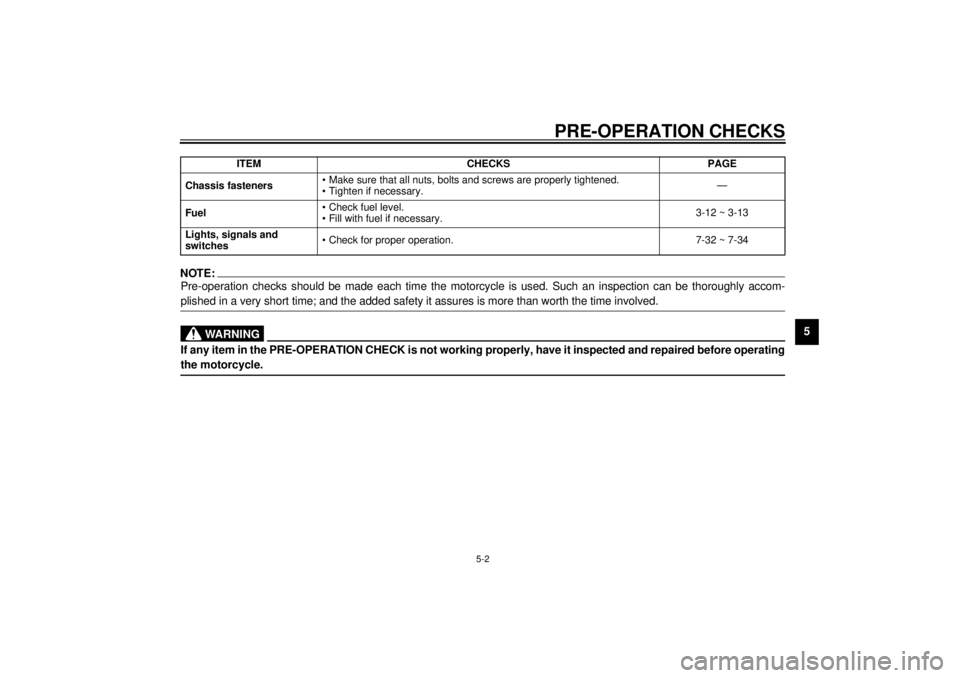
NOTE:Pre-operation checks should be made each time the motorcycle is used. Such an inspection can be thoroughly accom-
plished in a very short time; and the added safety it assures is more than worth the time involved.
WARNING
If any item in the PRE-OPERATION CHECK is not working properly, have it inspected and repaired before operating
the motorcycle.Chassis fasteners• Make sure that all nuts, bolts and screws are properly tightened.
• Tighten if necessary.—
Fuel• Check fuel level.
• Fill with fuel if necessary.3-12 ~ 3-13
Lights, signals and
switches• Check for proper operation. 7-32 ~ 7-34 ITEM CHECKS PAGE
E_5jc_Preop.fm Page 2 Saturday, October 16, 1999 1:10 PM
Page 59 of 121

E_5jc_Preop.fm Page 3 Saturday, October 16, 1999 1:10 PM
Page 60 of 121
OPERATION AND IMPORTANT RIDING POINTS
6
Starting the engine ............................................................................. 6-1
Starting a warm engine ...................................................................... 6-3
Shifting ............................................................................................... 6-3
Recommended shift points (for Switzerland only) .............................. 6-4
Tips for reducing fuel consumption .................................................... 6-4
Engine break-in .................................................................................. 6-4
Parking ............................................................................................... 6-5
E_5jc_OperationTOC.fm Page 1 Saturday, October 16, 1999 1:10 PM