YAMAHA YFM700R 2013 Owner's Guide
Manufacturer: YAMAHA, Model Year: 2013, Model line: YFM700R, Model: YAMAHA YFM700R 2013Pages: 162, PDF Size: 3.81 MB
Page 31 of 162
4-3
4
EBU29931Fuel level warning light “ ”
This warning light comes on when the fuel level
drops below approximately 2.9 L (0.77 US gal,
0.64 Imp.gal). When this occurs, refuel as soon as
possible.
The electrical circuit of the warning light can be
checked by setting the engine stop switch to “ ”
and turning the key to “ ” (on). The warning light
should come on for a few seconds, and then go off.
If the warning light does not come on initially when
the key is turned to “ ” (on), or if the warning light
remains on, have a Yamaha dealer check the elec-
trical circuit.EBU29942Engine trouble warning light “ ”
This warning light comes on or flashes when an
electrical circuit monitoring the engine is not work-
ing correctly. When this occurs, have a Yamaha
dealer check the self-diagnosis system.
The electrical circuit of the warning light can be
checked by turning the key to “ ” (on). The warn-
ing light should come on for a few seconds, and
then go off.If the warning light does not come on initially when
the key is turned to “ ” (on), or if the warning light
remains on, have a Yamaha dealer check the elec-
trical circuit.
EBU30760Self-diagnosis device This model is equipped with a self-diagnosis de-
vice for various electrical circuits.
If a problem is detected in any of those circuits, the
engine trouble warning light will come on or flash.
If this occurs, have a Yamaha dealer check the ve-
hicle.NOTICEECB01180To prevent engine damage, be sure to consult
a Yamaha dealer as soon as possible if this oc-
curs.
U1PE60E0.book Page 3 Friday, March 2, 2012 1:22 PM
Page 32 of 162
4-4
4
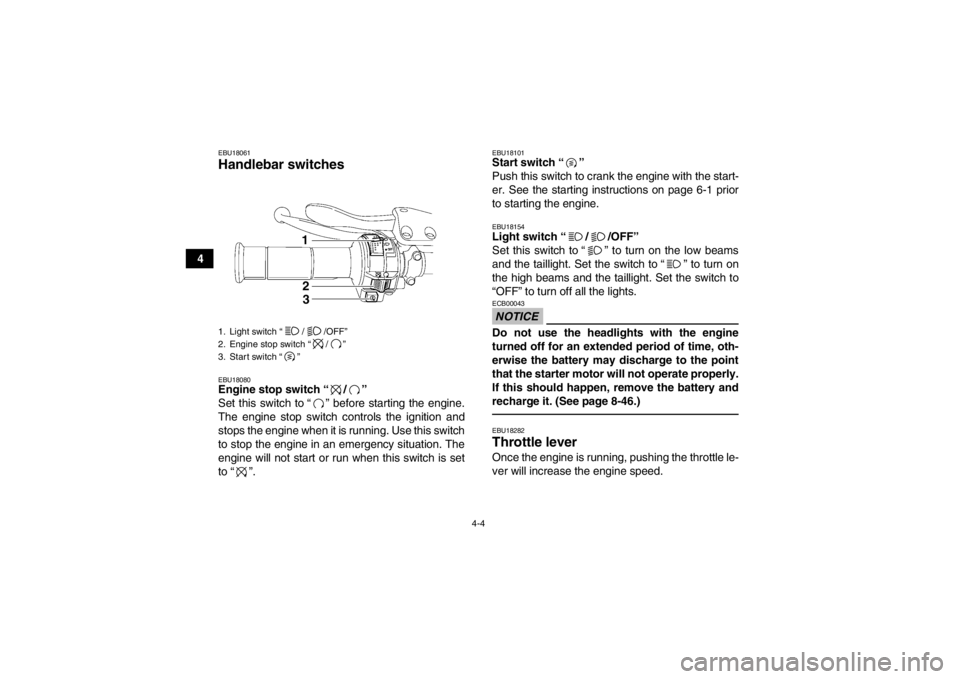
EBU18061Handlebar switches EBU18080Engine stop switch “ / ”
Set this switch to “ ” before starting the engine.
The engine stop switch controls the ignition and
stops the engine when it is running. Use this switch
to stop the engine in an emergency situation. The
engine will not start or run when this switch is set
to “ ”.
EBU18101Start switch “ ”
Push this switch to crank the engine with the start-
er. See the starting instructions on page 6-1 prior
to starting the engine.EBU18154Light switch “ / /OFF”
Set this switch to “ ” to turn on the low beams
and the taillight. Set the switch to “ ” to turn on
the high beams and the taillight. Set the switch to
“OFF” to turn off all the lights.NOTICEECB00043Do not use the headlights with the engine
turned off for an extended period of time, oth-
erwise the battery may discharge to the point
that the starter motor will not operate properly.
If this should happen, remove the battery and
recharge it. (See page 8-46.)EBU18282Throttle lever Once the engine is running, pushing the throttle le-
ver will increase the engine speed.
1. Light switch “ / /OFF”
2. Engine stop switch “ / ”
3. Start switch “ ”
123
U1PE60E0.book Page 4 Friday, March 2, 2012 1:22 PM
Page 33 of 162
4-5
4
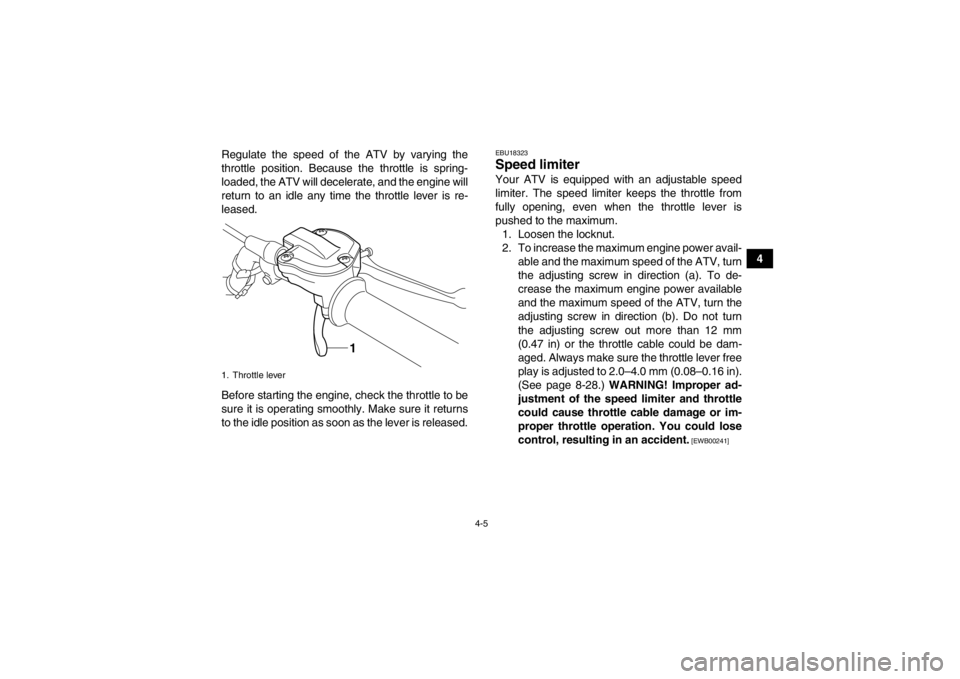
Regulate the speed of the ATV by varying the
throttle position. Because the throttle is spring-
loaded, the ATV will decelerate, and the engine will
return to an idle any time the throttle lever is re-
leased.
Before starting the engine, check the throttle to be
sure it is operating smoothly. Make sure it returns
to the idle position as soon as the lever is released.
EBU18323Speed limiter Your ATV is equipped with an adjustable speed
limiter. The speed limiter keeps the throttle from
fully opening, even when the throttle lever is
pushed to the maximum.
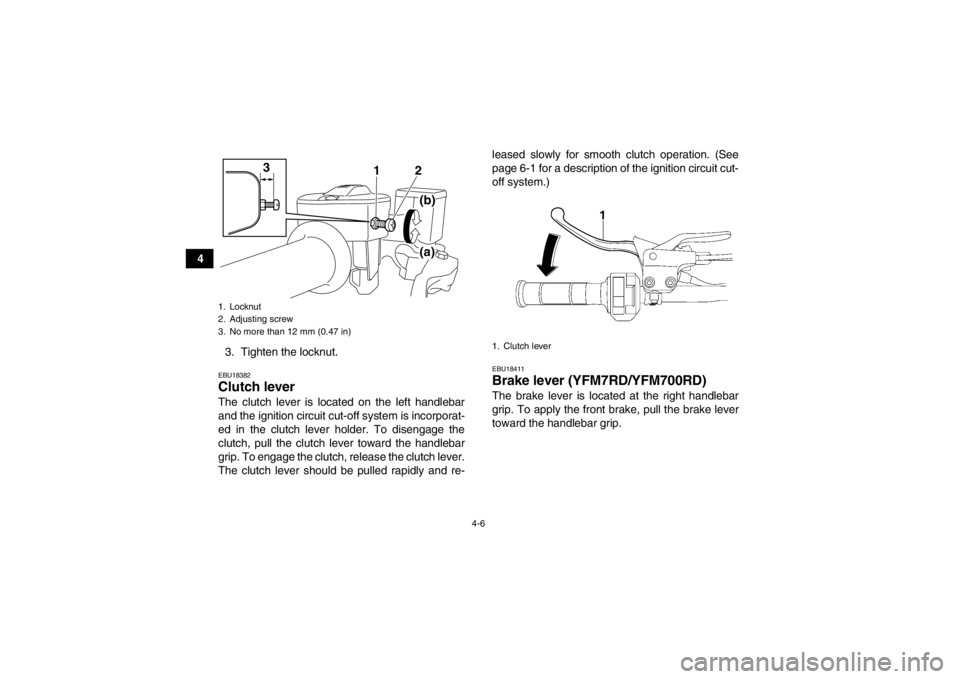
1. Loosen the locknut.
2. To increase the maximum engine power avail- able and the maximum speed of the ATV, turn
the adjusting screw in direction (a). To de-
crease the maximum engine power available
and the maximum speed of the ATV, turn the
adjusting screw in direction (b). Do not turn
the adjusting screw out more than 12 mm
(0.47 in) or the throttle cable could be dam-
aged. Always make sure the throttle lever free
play is adjusted to 2.0–4.0 mm (0.08–0.16 in).
(See page 8-28.) WARNING! Improper ad-
justment of the speed limiter and throttle
could cause throttle cable damage or im-
proper throttle operation. You could lose
control, resulting in an accident.
[EWB00241]
1. Throttle lever
1
U1PE60E0.book Page 5 Friday, March 2, 2012 1:22 PM
Page 34 of 162
4-6
43. Tighten the locknut.
EBU18382Clutch lever The clutch lever is located on the left handlebar
and the ignition circuit cut-off system is incorporat-
ed in the clutch lever holder. To disengage the
clutch, pull the clutch lever toward the handlebar
grip. To engage the clutch, release the clutch lever.
The clutch lever should be pulled rapidly and re- leased slowly for smooth clutch operation. (See
page 6-1 for a description of the ignition circuit cut-
off system.)
EBU18411Brake lever (YFM7RD/YFM700RD)The brake lever is located at the right handlebar
grip. To apply the front brake, pull the brake lever
toward the handlebar grip.
1. Locknut
2. Adjusting screw
3. No more than 12 mm (0.47 in)
3
12
(a)
(b)
1. Clutch lever
U1PE60E0.book Page 6 Friday, March 2, 2012 1:22 PM
Page 35 of 162
4-7
4
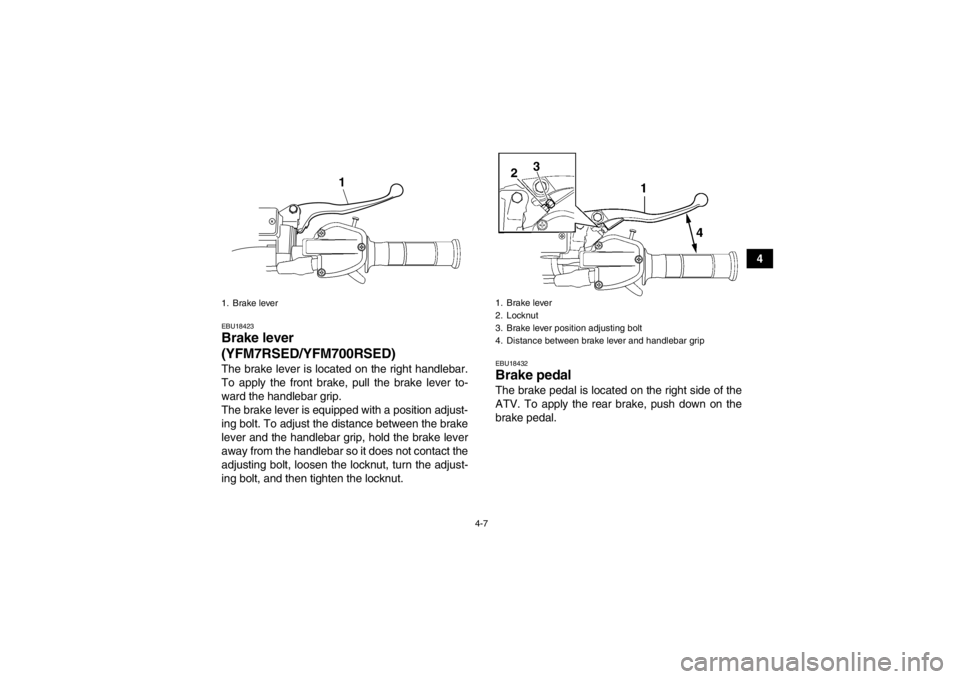
EBU18423Brake lever
(YFM7RSED/YFM700RSED)The brake lever is located on the right handlebar.
To apply the front brake, pull the brake lever to-
ward the handlebar grip.
The brake lever is equipped with a position adjust-
ing bolt. To adjust the distance between the brake
lever and the handlebar grip, hold the brake lever
away from the handlebar so it does not contact the
adjusting bolt, loosen the locknut, turn the adjust-
ing bolt, and then tighten the locknut.
EBU18432Brake pedal The brake pedal is located on the right side of the
ATV. To apply the rear brake, push down on the
brake pedal.
1. Brake lever
1
1. Brake lever
2. Locknut
3. Brake lever position adjusting bolt
4. Distance between brake lever and handlebar grip
U1PE60E0.book Page 7 Friday, March 2, 2012 1:22 PM
Page 36 of 162
4-8
4
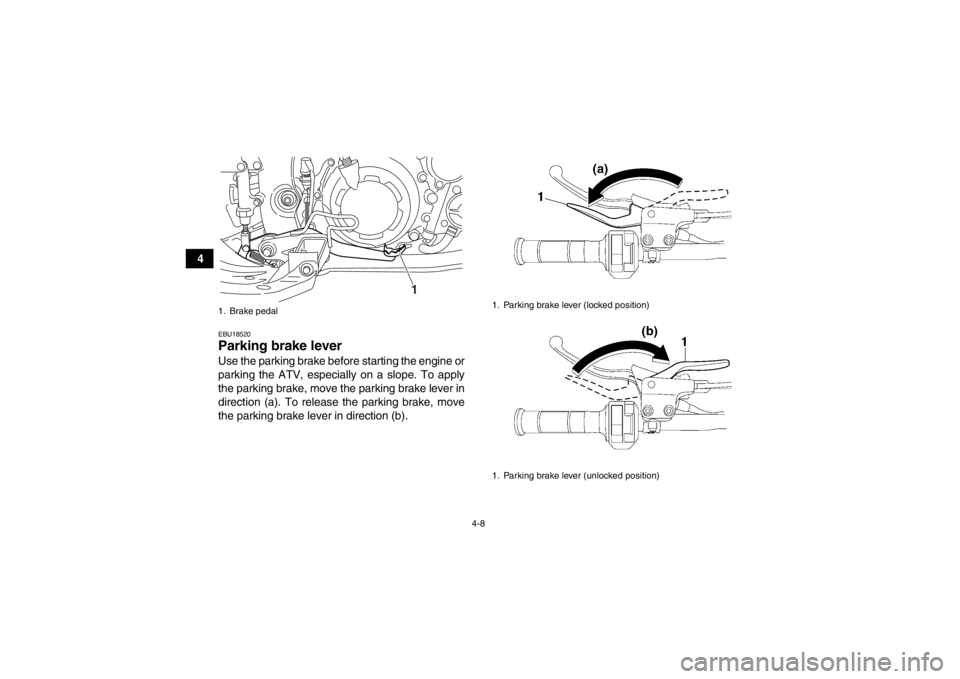
EBU18520Parking brake lever Use the parking brake before starting the engine or
parking the ATV, especially on a slope. To apply
the parking brake, move the parking brake lever in
direction (a). To release the parking brake, move
the parking brake lever in direction (b).1. Brake pedal
1
1. Parking brake lever (locked position)
1. Parking brake lever (unlocked position)
U1PE60E0.book Page 8 Friday, March 2, 2012 1:22 PM
Page 37 of 162
4-9
4
WARNING
EWB00220●Always set the parking brake before starting
the engine. The ATV could start moving un-
expectedly if the parking brake is not ap-
plied. This could cause loss of control or a
collision.●Always be sure you have released the park-
ing brake before you begin to ride. The brake
could overheat if you ride the ATV without re-
leasing the parking brake. You could lose
braking performance which could cause an
accident. You could also wear out the brakes
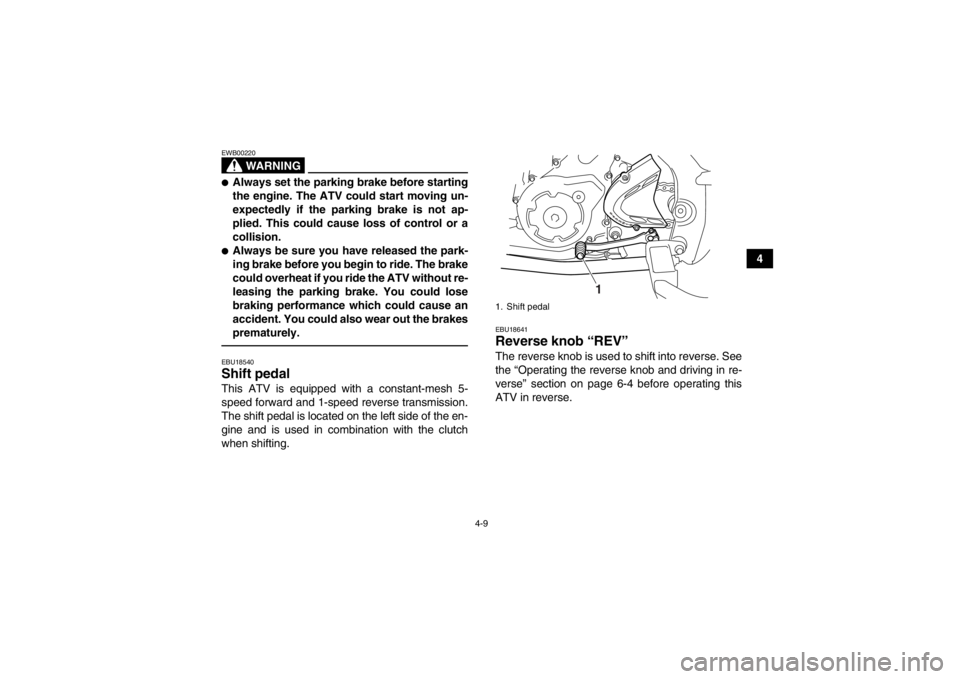
prematurely.EBU18540Shift pedal This ATV is equipped with a constant-mesh 5-
speed forward and 1-speed reverse transmission.
The shift pedal is located on the left side of the en-
gine and is used in combination with the clutch
when shifting.
EBU18641Reverse knob “REV” The reverse knob is used to shift into reverse. See
the “Operating the reverse knob and driving in re-
verse” section on page 6-4 before operating this
ATV in reverse.1. Shift pedal
1
U1PE60E0.book Page 9 Friday, March 2, 2012 1:22 PM
Page 38 of 162
4-10
4
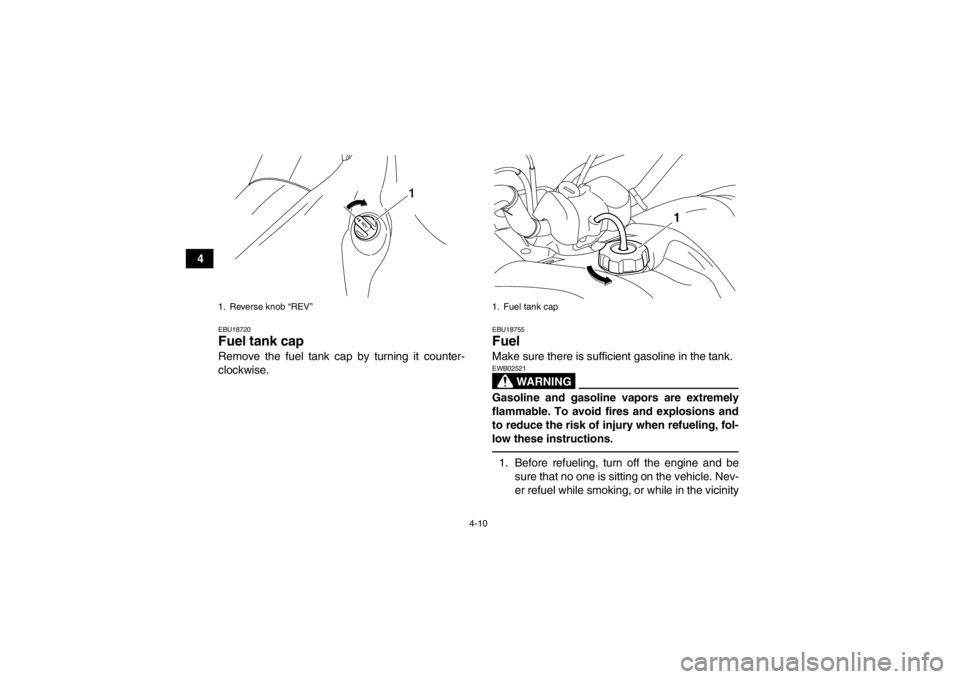
EBU18720Fuel tank cap Remove the fuel tank cap by turning it counter-
clockwise.
EBU18755Fuel Make sure there is sufficient gasoline in the tank.
WARNING
EWB02521Gasoline and gasoline vapors are extremely
flammable. To avoid fires and explosions and
to reduce the risk of injury when refueling, fol-
low these instructions.1. Before refueling, turn off the engine and besure that no one is sitting on the vehicle. Nev-
er refuel while smoking, or while in the vicinity
1. Reverse knob “REV”
1
1. Fuel tank cap
1
U1PE60E0.book Page 10 Friday, March 2, 2012 1:22 PM
Page 39 of 162
4-11
4
of sparks, open flames, or other sources of ig-
nition such as the pilot lights of water heaters
and clothes dryers.
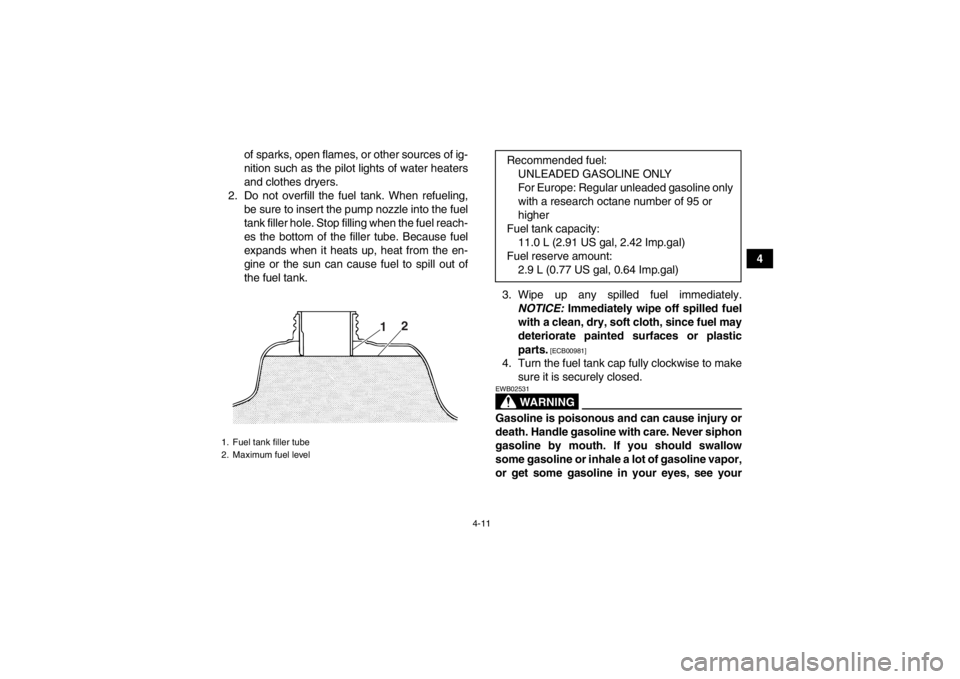
2. Do not overfill the fuel tank. When refueling, be sure to insert the pump nozzle into the fuel
tank filler hole. Stop filling when the fuel reach-
es the bottom of the filler tube. Because fuel
expands when it heats up, heat from the en-
gine or the sun can cause fuel to spill out of
the fuel tank.
3. Wipe up any spilled fuel immediately.NOTICE: Immediately wipe off spilled fuel
with a clean, dry, soft cloth, since fuel may
deteriorate painted surfaces or plastic
parts.
[ECB00981]
4. Turn the fuel tank cap fully clockwise to make sure it is securely closed.
WARNING
EWB02531Gasoline is poisonous and can cause injury or
death. Handle gasoline with care. Never siphon
gasoline by mouth. If you should swallow
some gasoline or inhale a lot of gasoline vapor,
or get some gasoline in your eyes, see your
1. Fuel tank filler tube
2. Maximum fuel level
1 2
Recommended fuel:
UNLEADED GASOLINE ONLY
For Europe: Regular unleaded gasoline only
with a research octane number of 95 or
higher
Fuel tank capacity: 11.0 L (2.91 US gal, 2.42 Imp.gal)
Fuel reserve amount: 2.9 L (0.77 US gal, 0.64 Imp.gal)
U1PE60E0.book Page 11 Friday, March 2, 2012 1:22 PM
Page 40 of 162
4-12
4doctor immediately. If gasoline spills on your
skin, wash with soap and water. If gasoline
spills on your clothing, change your clothes.
NOTICEECB00070Use only unleaded gasoline. The use of leaded
gasoline will cause severe damage to internal
engine parts, such as the valves and piston
rings, as well as to the exhaust system.Your Yamaha engine has been designed to use
regular unleaded gasoline with a research octane
number of 91 or higher (95 or higher for Europe). If
knocking (or pinging) occurs, use a gasoline of a
different brand. Use of unleaded fuel will extend
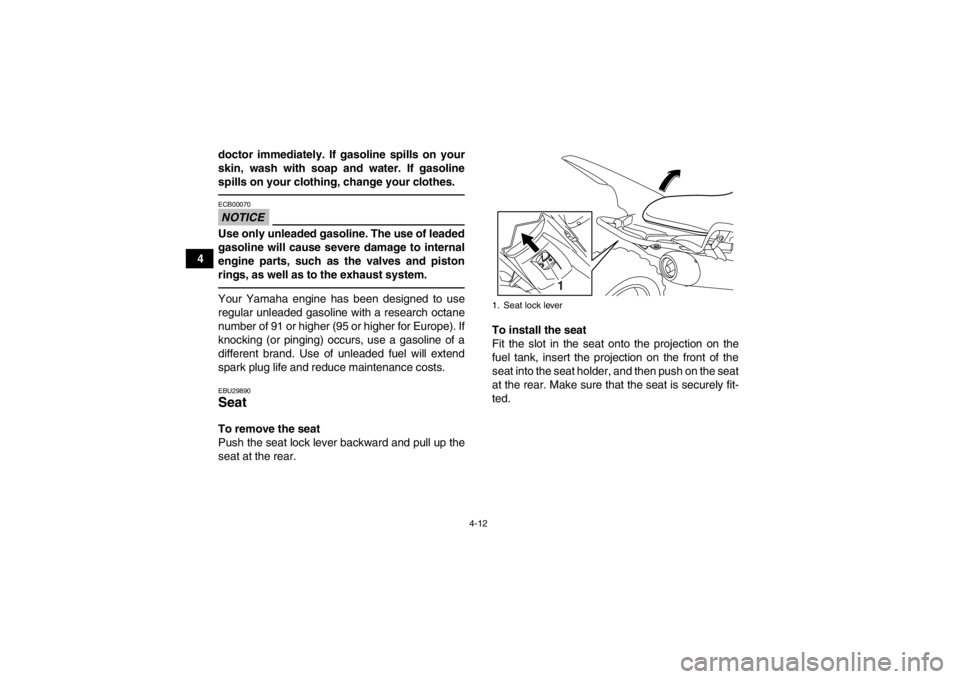
spark plug life and reduce maintenance costs.EBU29890Seat To remove the seat
Push the seat lock lever backward and pull up the
seat at the rear. To install the seat
Fit the slot in the seat onto the projection on the
fuel tank, insert the projection on the front of the
seat into the seat holder, and then push on the seat
at the rear. Make sure that the seat is securely fit-
ted.
1. Seat lock lever
1
U1PE60E0.book Page 12 Friday, March 2, 2012 1:22 PM