light YAMAHA YFM700R 2021 User Guide
[x] Cancel search | Manufacturer: YAMAHA, Model Year: 2021, Model line: YFM700R, Model: YAMAHA YFM700R 2021Pages: 150, PDF Size: 3.63 MB
Page 28 of 150
5-3
5
EBU29944Engine trouble warning light “ ”
This warning light comes on or flashes when an
electrical circuit monitoring the engine is not work-
ing correctly. When this occurs, have a Yamaha
dealer check the self-diagnostic system.
The electrical circuit of the warning light can be
checked by turning the key to “ ” (on). The
warning light should come on for a few seconds,
and then go off.
If the warning light does not come on initially when
the key is turned to “ ” (on), or if the warning
light remains on, have a Yamaha dealer check the
electrical circuit.EBU30762Self-diagnostic deviceThis model is equipped with a self-diagnostic de-
vice for various electrical circuits.
If a problem is detected in any of those circuits,
the engine trouble warning light will come on or
flash. If this occurs, have a Yamaha dealer check
the vehicle.
NOTICEECB01181To prevent engine damage, be sure to consult
a Yamaha dealer as soon as possible if this oc-
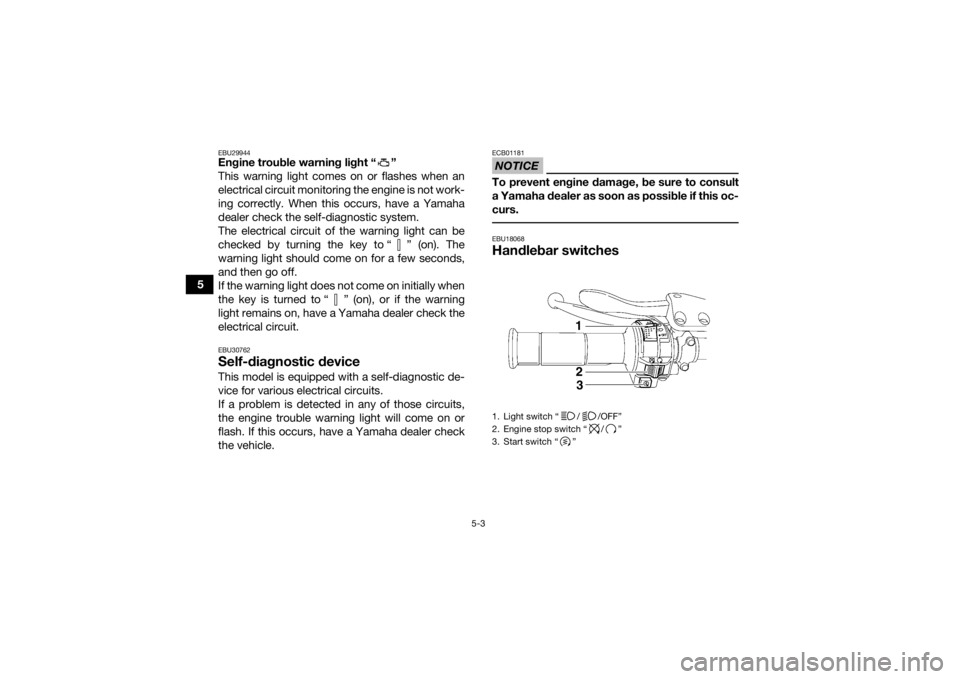
curs. EBU18068Handlebar switches1. Light switch “ / /OFF”
2. Engine stop switch “ / ”
3. Start switch “ ”
123
UBCX61E0.book Page 3 Friday, January 22, 2021 1:54 PM
Page 29 of 150
5-4
5
EBU18081Engine stop switch “ / ”
Set this switch to “ ” before starting the engine.
The engine stop switch controls the ignition and
stops the engine when it is running. Use this
switch to stop the engine in an emergency situa-
tion. The engine will not start or run when this
switch is set to “ ”.EBU18102Start switch “ ”
Push this switch to crank the engine with the start-
er. See the starting instructions on page 7-1 prior
to starting the engine.EBU18157Light switch “ / /OFF”
Set this switch to “ ” to turn on the low beams
and the taillight. Set the switch to “ ” to turn on
the high beams and the taillight. Set the switch to
“OFF” to turn off all the lights.NOTICEECB00046Do not use the headlights with the engine
turned off for an extended period of time. The
battery may discharge to the point that thestarter will not have enough power to crank the
engine. If this should happen, remove the bat-
tery and recharge it. (See page 9-45.)
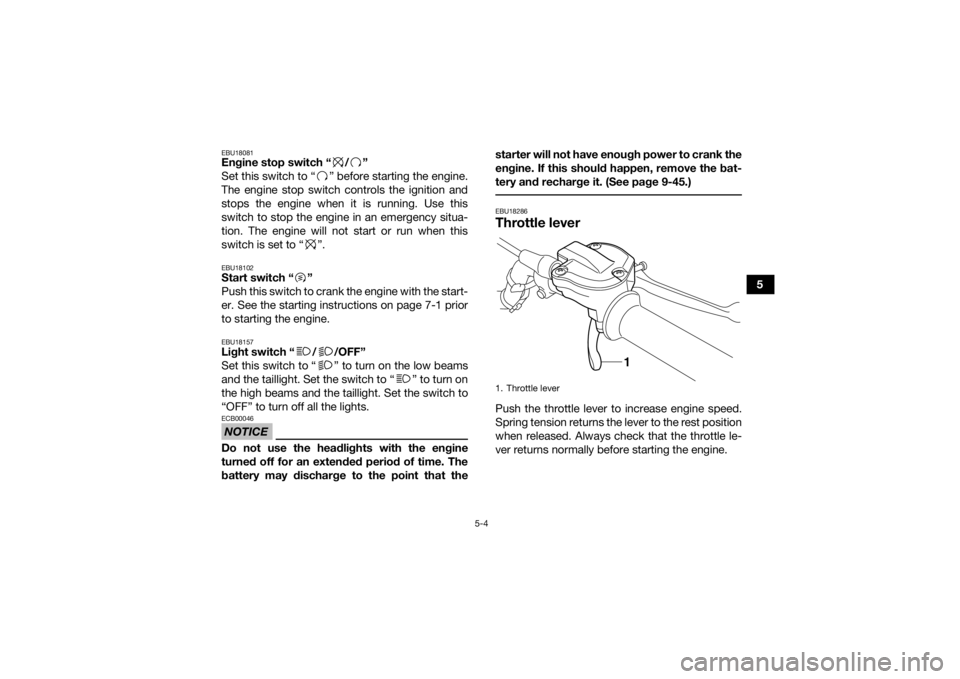
EBU18286Throttle leverPush the throttle lever to increase engine speed.
Spring tension returns the lever to the rest position
when released. Always check that the throttle le-
ver returns normally before starting the engine. 1. Throttle lever
1
UBCX61E0.book Page 4 Friday, January 22, 2021 1:54 PM
Page 34 of 150
5-9
5
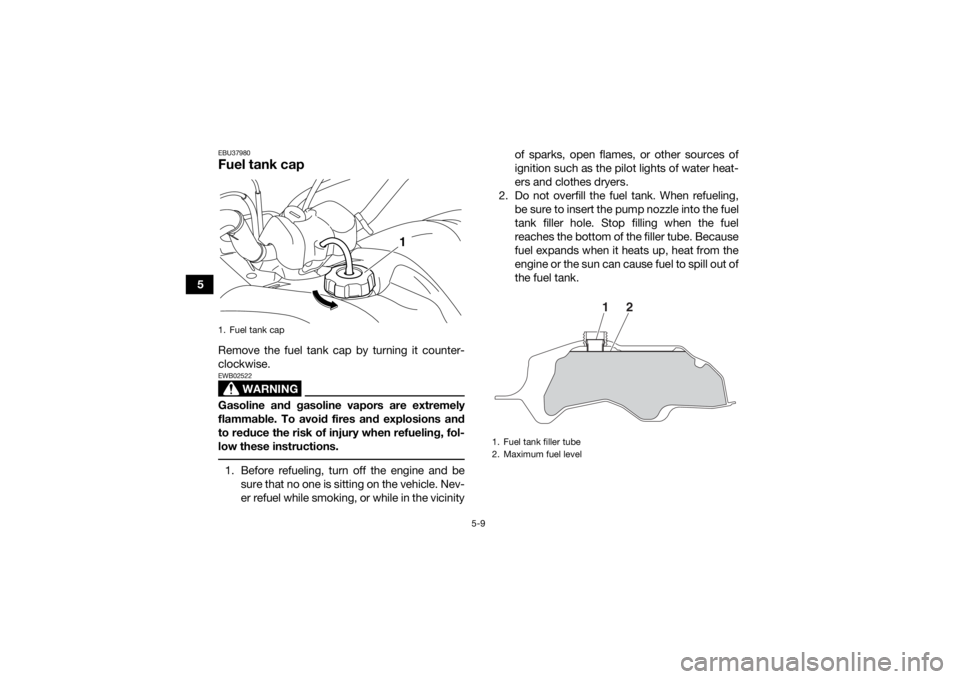
EBU37980Fuel tank capRemove the fuel tank cap by turning it counter-
clockwise.
WARNING
EWB02522Gasoline and gasoline vapors are extremely
flammable. To avoid fires and explosions and
to reduce the risk of injury when refueling, fol-
low these instructions. 1. Before refueling, turn off the engine and besure that no one is sitting on the vehicle. Nev-
er refuel while smoking, or while in the vicinity of sparks, open flames, or other sources of
ignition such as the pilot lights of water heat-
ers and clothes dryers.
2. Do not overfill the fuel tank. When refueling, be sure to insert the pump nozzle into the fuel
tank filler hole. Stop filling when the fuel
reaches the bottom of the filler tube. Because
fuel expands when it heats up, heat from the
engine or the sun can cause fuel to spill out of
the fuel tank.1. Fuel tank cap
1
1. Fuel tank filler tube
2. Maximum fuel level
1
2
UBCX61E0.book Page 9 Friday, January 22, 2021 1:54 PM
Page 49 of 150

6-3
6
Brake and clutch levers• Make sure that operation is smooth. Lubricate lever pivoting points
if necessary. 9-41
Chassis fasteners • Make sure that all nuts, bolts and screws are properly tightened. 6-7
Instruments, lights and
switches • Check operation, and correct if necessary.
6-7
ITEM
ROUTINE PAGE
UBCX61E0.book Page 3 Friday, January 22, 2021 1:54 PM
Page 53 of 150

6-7
6
Aftermarket tires and rims
The tires and rims that came with your ATV were
designed to match the performance capabilities
and to provide the best combination of handling,
braking, and comfort. Other tires, rims, sizes, and
combinations may not be appropriate.
WARNING
EWB02552Use of improper tires on this ATV may cause
loss of control, increasing your risk of an acci-
dent.
EBU19841Chassis fastenersMake sure that all nuts, bolts and screws are
properly tightened.EBU19851Instruments, lights and switchesCheck that all instruments, lights and switches are
working properly. Correct if necessary.
Front:
Manufacturer/model:MAXXIS/MS13
Size: AT22 x 7-10
Rear: Manufacturer/model:MAXXIS/M976Y
Size: AT20 x 10-9
UBCX61E0.book Page 7 Friday, January 22, 2021 1:54 PM
Page 54 of 150
7-1
7
EBU19882
OPERATION
EBU19902Read the Owner’s Manual carefully before riding
the ATV. If there is a control or function you do not
understand, ask your Yamaha dealer.
WARNING
EWB00632Read the Owner’s Manual carefully to become
familiar with all controls in order to help pre-
vent any loss of control, which could cause an
accident or injury. EBU29954Starting the engineNOTICEECB00151See the “Engine break-in” section on page 7-5
prior to operating the engine for the first time. 1. Set the parking brake.
2. Turn the key to “ ” (on) and the engine stopswitch to “ ”.
The following warning lights should come on
for a few seconds, then go off.
Coolant temperature warning light
Fuel level warning light
Engine trouble warning light
NOTICEECB00826To avoid possible damage, do not operate the
ATV if a warning light does not work as de-
scribed above. 3. Shift the transmission into neutral. The neutral
indicator light should come on, if it does not
come on, have a Yamaha dealer check the
electrical circuit.TIPThis model is equipped with an ignition circuit cut-
off system. The engine can be started under the
following conditions.
The transmission is in neutral.
The clutch is disengaged with the transmission
in gear. However, it is recommended to shift
into neutral before starting the engine. 4. Completely close the throttle lever and start
the engine by pushing the start switch.
UBCX61E0.book Page 1 Friday, January 22, 2021 1:54 PM
Page 55 of 150

7-2
7
TIPIf the engine fails to start, release the start switch,
then push it again. Pause a few seconds before
the next attempt. Each cranking should be as
short as possible to preserve battery energy. Do
not crank the engine more than 10 seconds on
each attempt. NOTICEECB00164For maximum engine life, never accelerate
hard when the engine is cold! EBU20535ShiftingThis ATV has a 5-speed forward and 1-speed re-
verse transmission. The transmission allows you
to control the amount of power you have available
at a given speed or for starting, accelerating,
climbing hills, etc.
To shift into neutral, release the throttle lever, ap-
ply the clutch, and then repeatedly depress the
shift pedal until it stops.
When it stops, it will be in first gear. Raise the ped-
al slightly to reach the neutral position, and then
release the clutch.
EBU20595To start out and accelerate1. Release the throttle lever, apply the front or rear brake, and then release the parking
brake.
2. Pull the clutch lever to disengage the clutch.
3. Shift into first gear, and then release the brake. NOTICE: Always close the throttle
before shifting gears, otherwise damage
to the engine and drive train may result.
[ECB01220]
1. Shift pedal
2. Neutral position
3. Reverse position
2 3
4 5N1R
1
23
UBCX61E0.book Page 2 Friday, January 22, 2021 1:54 PM
Page 57 of 150
7-4
7
Always use the clutch when changing gears.
The engine, transmission and drive train are
not designed to withstand the shock of
forced shifting and can be damaged by shift-
ing without using the clutch.
EBU20503Operating the reverse knob and driving
in reverse
WARNING
EWB00721Improper operation in reverse could make you
hit an obstacle or even a person behind you,
resulting in serious injury. When you shift into
reverse, make sure there are no people or ob-
stacles behind you. When it is safe to proceed,
go slowly. NOTICEECB00171Before shifting, stop the ATV, otherwise the
transmission may be damaged. 1. Bring the ATV to a complete stop, apply the
clutch lever, and then shift the transmission
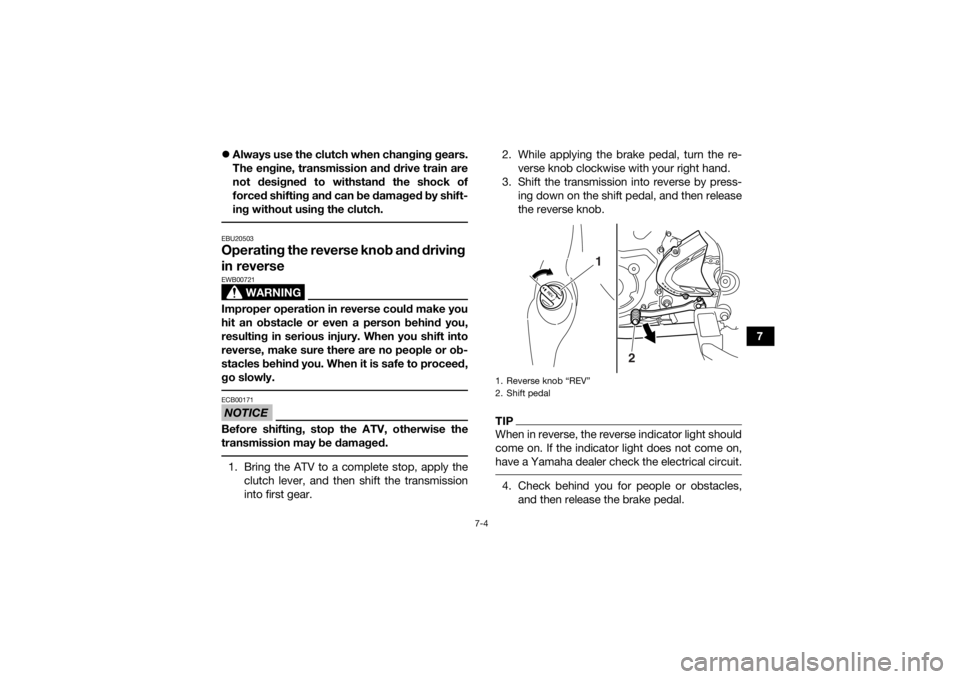
into first gear. 2. While applying the brake pedal, turn the re-
verse knob clockwise with your right hand.
3. Shift the transmission into reverse by press- ing down on the shift pedal, and then release
the reverse knob.
TIPWhen in reverse, the reverse indicator light should
come on. If the indicator light does not come on,
have a Yamaha dealer check the electrical circuit. 4. Check behind you for people or obstacles,and then release the brake pedal.1. Reverse knob “REV”
2. Shift pedal
2
1
UBCX61E0.book Page 4 Friday, January 22, 2021 1:54 PM
Page 73 of 150

8-12
8
To achieve maximum traction on unpaved surfac-
es, the two rear wheels turn together at the same
speed. Therefore, unless the wheel on the inside
of the turn is allowed to slip or lose some traction,
the ATV will resist turning. A special turning tech-
nique must be used to allow the ATV to make
turns quickly and easily. It is essential that this skill
be learned first at low speed.
As you approach a curve, slow down and begin to
turn the handlebars in the desired direction. As
you do so, put your weight on the footrest to the
outside of the turn (opposite your desired direc-
tion) and lean your upper body into the turn. Use
the throttle to maintain an even speed through the
turn. This maneuver will let the wheel on the inside
of the turn slip slightly, allowing the ATV to make
the turn properly.
This procedure should be practiced at slow speed
many times in a large unpaved area with no obsta-
cles. If an incorrect technique is used, your ATV
may continue to go straight. If the ATV doesn’t
turn, come to a stop and then practice the proce-
dure again. If the riding surface is slippery or
loose, it may help to position more of your weight
over the front wheels by moving forward on the
seat.
1. Lean towards inside of turn.
2. Support your weight on the outer footrest.
UBCX61E0.book Page 12 Friday, January 22, 2021 1:54 PM
Page 79 of 150

8-18
8
As you travel across a slope, lean your body in the
uphill direction. It may be necessary to correct the
steering when riding on loose surfaces by pointing
the front wheels slightly uphill. When riding on
slopes, be sure not to make sharp turns either up
or down hill.
If your ATV does begin to tip over, gradually steer
in the downhill direction if there are no obstacles
in your path. As you regain proper balance, grad-
ually steer again in the direction you wish to travel.
CROSSING THROUGH SHALLOW WATER
WARNING
EWB01642Operating this vehicle through deep or fast-
flowing water can lead to loss of control or an
overturn. To reduce your risk of drowning or
other injuries, use care when crossing through
water. Never operate this ATV water deeper
than the depth specified in your Owner’s Man-
ual, as tires may float, increasing the risk of an
overturn. The ATV can be used to cross slow moving, shal-
low water of up to a maximum of 35 cm (14 in) in
depth. Before entering the water, choose your
path carefully. Enter where there is no sharp drop
off, and avoid rocks or other obstacles which may
be slippery or upset the ATV. Drive slowly and
carefully.
UBCX61E0.book Page 18 Friday, January 22, 2021 1:54 PM