checking oil YAMAHA YFM80R 2008 Owners Manual
[x] Cancel search | Manufacturer: YAMAHA, Model Year: 2008, Model line: YFM80R, Model: YAMAHA YFM80R 2008Pages: 116, PDF Size: 4.81 MB
Page 10 of 116
RIDING YOUR ATV ...................................... 7-1
GETTING TO KNOW YOUR ATV.............. 7-2
RIDE WITH CARE AND GOOD
JUDGEMENT ...........................................7-2
BE CAREFUL WHERE YOU RIDE ............ 7-9
TURNING YOUR ATV ............................. 7-13
CLIMBING UPHILL .................................. 7-14
RIDING DOWNHILL................................. 7-17
CROSSING A SLOPE.............................. 7-18
CROSSING THROUGH SHALLOW
WATER ..................................................7-19
RIDING OVER ROUGH TERRAIN .......... 7-20
SLIDING AND SKIDDING ........................ 7-21
WHAT TO DO IF... ................................... 7-22
WHAT TO DO... ....................................... 7-22
PERIODIC MAINTENANCE AND MINOR
REPAIR .......................................................... 8-1
Owner’s manual and tool kit ...................... 8-1
Periodic maintenance chart for the
emission control system .......................... 8-3
General maintenance and lubrication
chart ........................................................ 8-5
Checking the spark plug ............................ 8-8
Engine oil .................................................. 8-9
Final gear oil ............................................ 8-12
Cleaning the air filter element ................. 8-13
Removing the air intake restrictor plate ... 8-17
Cleaning the spark arrester ..................... 8-17Adjusting the carburetor ........................... 8-18
Adjusting the engine idling speed ............ 8-18
Checking the throttle cable free play ....... 8-19
Timing chain ............................................ 8-20
Valve clearance ....................................... 8-20
Checking the front and rear brake
shoes .....................................................8-20
Adjusting the front brake lever free
play ........................................................8-21
Adjusting the rear brake lever and brake
pedal free play .......................................8-23
Adjusting the clutch free play ................... 8-26
Checking and lubricating the cables ........ 8-26
Checking and lubricating the front and
rear brake levers ....................................8-27
Checking and lubricating the brake and
shift pedals .............................................8-28
Checking the wheel hub bearings ............ 8-28
Lubricating the front knuckle pivots ......... 8-28
Lubricating the steering shaft ................... 8-28
Battery ..................................................... 8-29
Replacing the fuse ................................... 8-31
Removing a wheel ................................... 8-32
Installing a wheel ..................................... 8-33
Troubleshooting ....................................... 8-33
Troubleshooting chart .............................. 8-35
CLEANING AND STORAGE ..........................9-1
Cleaning ..................................................... 9-1
Page 78 of 116
8-10
1
2
3
4
5
6
78
9
10
11
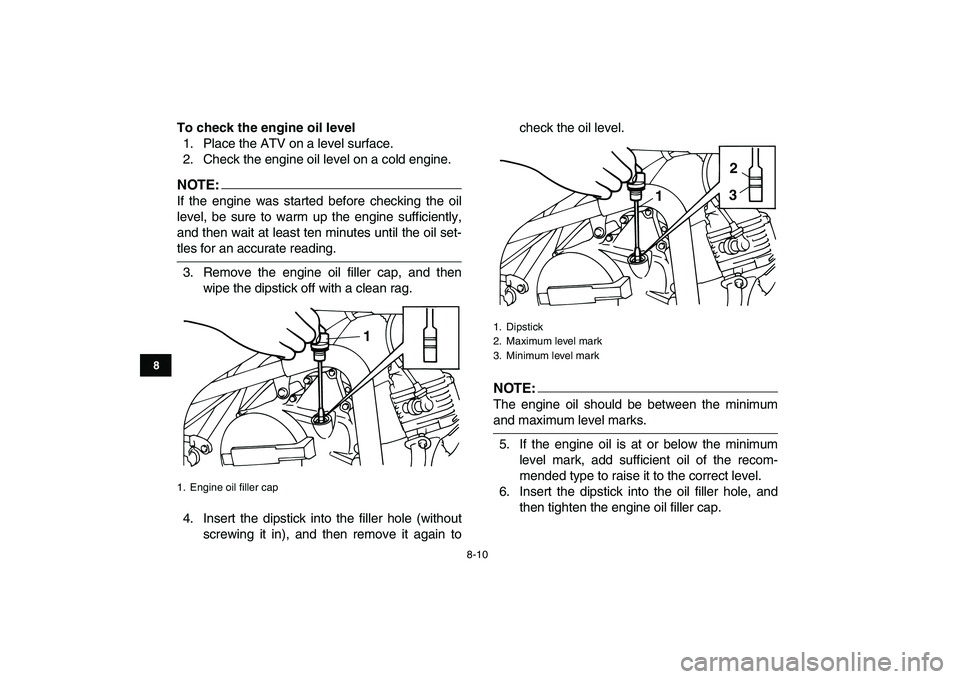
To check the engine oil level
1. Place the ATV on a level surface.
2. Check the engine oil level on a cold engine.
NOTE:
If the engine was started before checking the oil
level, be sure to warm up the engine sufficiently,
and then wait at least ten minutes until the oil set-
tles for an accurate reading.
3. Remove the engine oil filler cap, and then
wipe the dipstick off with a clean rag.
4. Insert the dipstick into the filler hole (without
screwing it in), and then remove it again tocheck the oil level.NOTE:
The engine oil should be between the minimum
and maximum level marks.
5. If the engine oil is at or below the minimum
level mark, add sufficient oil of the recom-
mended type to raise it to the correct level.
6. Insert the dipstick into the oil filler hole, and
then tighten the engine oil filler cap.
1. Engine oil filler cap
1
1. Dipstick
2. Maximum level mark
3. Minimum level mark
2
13
Page 80 of 116
8-12
1
2
3
4
5
6
78
9
10
11
minutes while checking it for oil leakage. If oil
is leaking, immediately turn the engine off and
check for the cause.
9. Turn the engine off, wait at least ten minutes,
and then check the oil level and correct it if
necessary.
EBU23403
Final gear oil
The final gear case must be checked for oil leak-
age before each ride. If any leakage is found, have
a Yamaha dealer check and repair the ATV. In ad-
dition, the final gear oil level must be checked and
the oil changed as follows at the intervals specified
in the periodic maintenance and lubrication chart.
To check the final gear oil level
1. Place the ATV on a level surface.
NOTE:
The final gear oil level must be checked on a cold
engine.
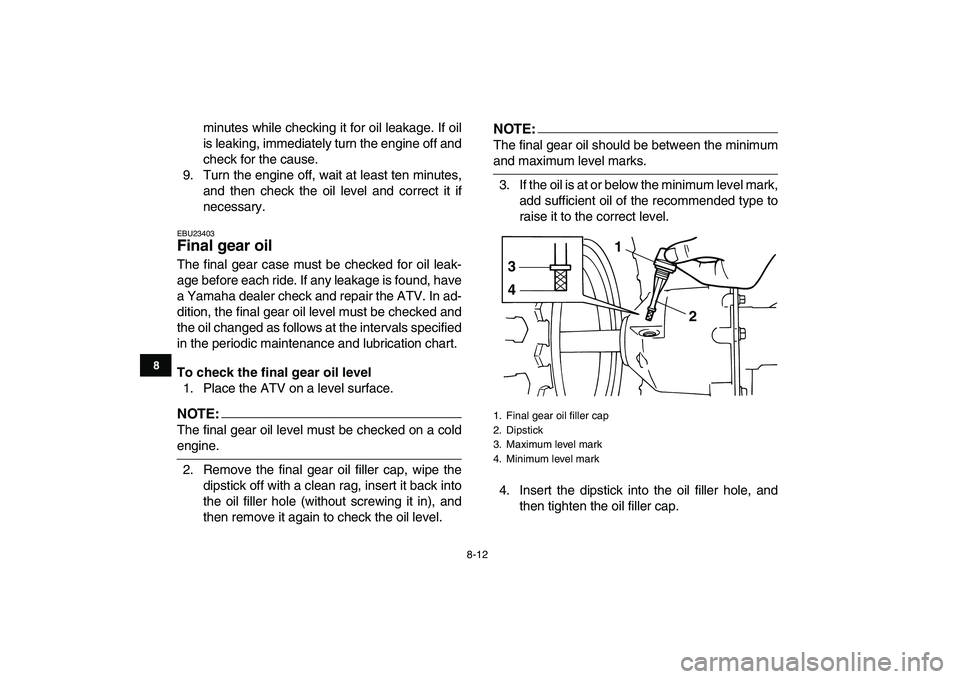
2. Remove the final gear oil filler cap, wipe the
dipstick off with a clean rag, insert it back into
the oil filler hole (without screwing it in), and
then remove it again to check the oil level.
NOTE:
The final gear oil should be between the minimum
and maximum level marks.
3. If the oil is at or below the minimum level mark,
add sufficient oil of the recommended type to
raise it to the correct level.
4. Insert the dipstick into the oil filler hole, and
then tighten the oil filler cap.
1. Final gear oil filler cap
2. Dipstick
3. Maximum level mark
4. Minimum level mark
2 3
4
1
Page 94 of 116
8-26
1
2
3
4
5
6
78
9
10
11
EBU24781
Adjusting the clutch free play
The clutch free play must be adjusted periodically.
Adjust the free play as follows.
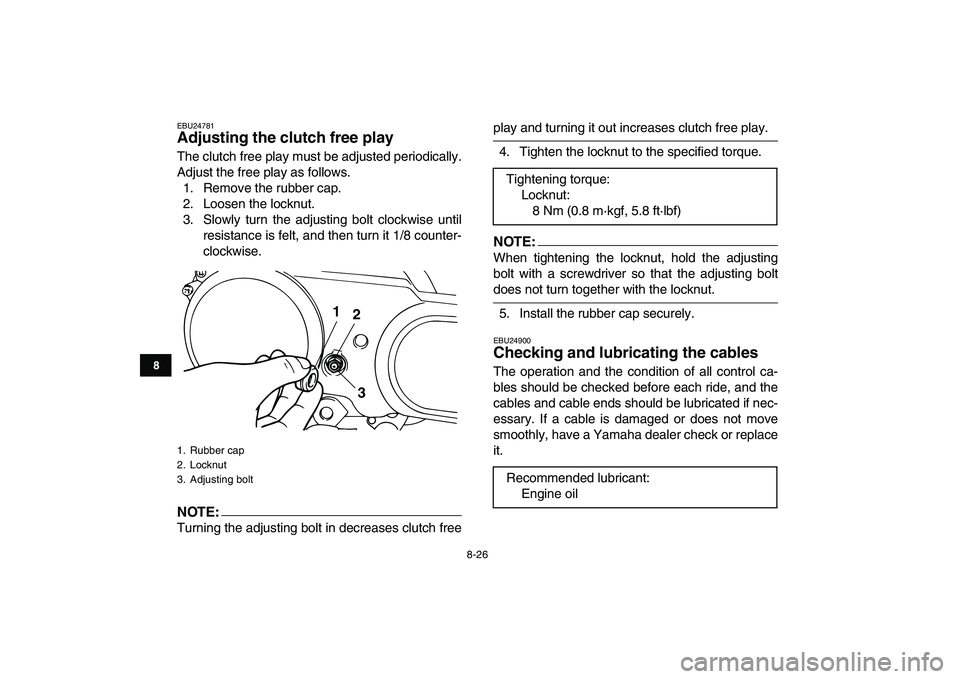
1. Remove the rubber cap.
2. Loosen the locknut.
3. Slowly turn the adjusting bolt clockwise until
resistance is felt, and then turn it 1/8 counter-
clockwise.
NOTE:
Turning the adjusting bolt in decreases clutch free
play and turning it out increases clutch free play.
4. Tighten the locknut to the specified torque.
NOTE:
When tightening the locknut, hold the adjusting
bolt with a screwdriver so that the adjusting bolt
does not turn together with the locknut.
5. Install the rubber cap securely.
EBU24900
Checking and lubricating the cables
The operation and the condition of all control ca-
bles should be checked before each ride, and the
cables and cable ends should be lubricated if nec-
essary. If a cable is damaged or does not move
smoothly, have a Yamaha dealer check or replace
it.
1. Rubber cap
2. Locknut
3. Adjusting bolt
1
2
3
Tightening torque:
Locknut:
8 Nm (0.8 m·kgf, 5.8 ft·lbf)
Recommended lubricant:
Engine oil
Page 113 of 116
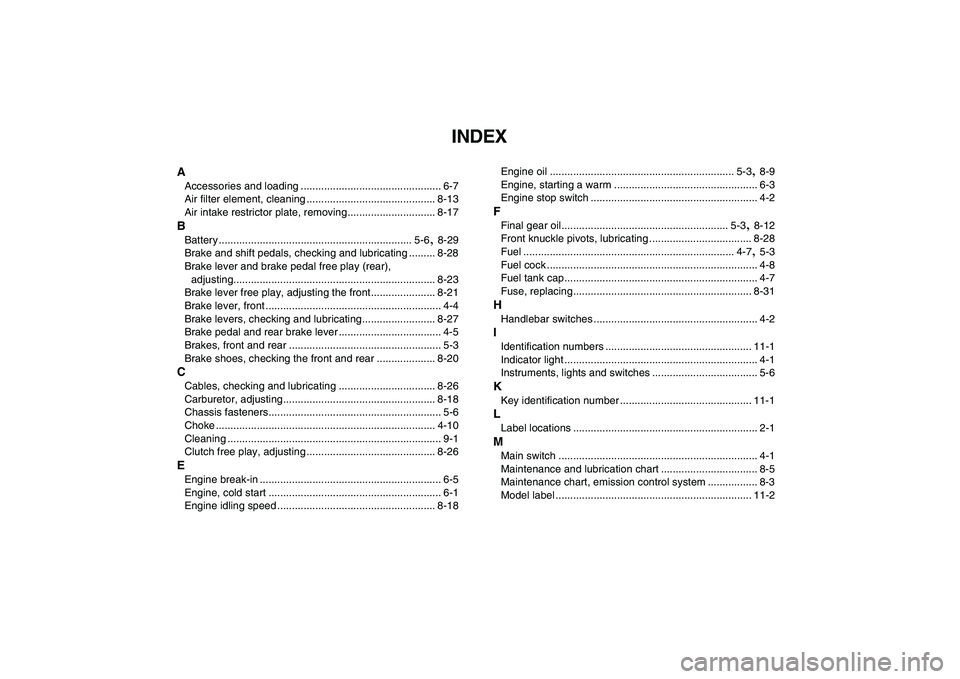
INDEX
A
Accessories and loading ................................................ 6-7
Air filter element, cleaning ............................................ 8-13
Air intake restrictor plate, removing.............................. 8-17
B
Battery .................................................................. 5-6
,
8-29
Brake and shift pedals, checking and lubricating ......... 8-28
Brake lever and brake pedal free play (rear),
adjusting..................................................................... 8-23
Brake lever free play, adjusting the front...................... 8-21
Brake lever, front ............................................................ 4-4
Brake levers, checking and lubricating......................... 8-27
Brake pedal and rear brake lever ................................... 4-5
Brakes, front and rear .................................................... 5-3
Brake shoes, checking the front and rear .................... 8-20
C
Cables, checking and lubricating ................................. 8-26
Carburetor, adjusting.................................................... 8-18
Chassis fasteners........................................................... 5-6
Choke ........................................................................... 4-10
Cleaning ......................................................................... 9-1
Clutch free play, adjusting ............................................ 8-26
E
Engine break-in .............................................................. 6-5
Engine, cold start ........................................................... 6-1
Engine idling speed ...................................................... 8-18Engine oil ............................................................... 5-3
,
8-9
Engine, starting a warm ................................................. 6-3
Engine stop switch ......................................................... 4-2
F
Final gear oil......................................................... 5-3
,
8-12
Front knuckle pivots, lubricating ................................... 8-28
Fuel ........................................................................ 4-7
,
5-3
Fuel cock ........................................................................ 4-8
Fuel tank cap.................................................................. 4-7
Fuse, replacing............................................................. 8-31
H
Handlebar switches ........................................................ 4-2
I
Identification numbers .................................................. 11-1
Indicator light .................................................................. 4-1
Instruments, lights and switches .................................... 5-6
K
Key identification number ............................................. 11-1
L
Label locations ............................................................... 2-1
M
Main switch .................................................................... 4-1
Maintenance and lubrication chart ................................. 8-5
Maintenance chart, emission control system ................. 8-3
Model label ................................................................... 11-2