DAB Abarth 124 Spider 2021 Owner handbook (in English)
[x] Cancel search | Manufacturer: ABARTH, Model Year: 2021, Model line: 124 Spider, Model: Abarth 124 Spider 2021Pages: 224, PDF Size: 3.9 MB
Page 100 of 224

102)Do not allow a child or anyone to lean
over or against the side window of a
vehicle with side air bags. It is dangerous
to allow anyone to lean over or against the
side window, the area of the passenger
seat from which the side air bags deploy,
even if a child-restraint system is used. The
impact of inflation from a side air bag could
cause serious injury or death to an out of
position child. Furthermore, leaning over or
against the door could block the side air
bags and eliminate the advantages of
supplementary protection. Because the
side air bag deploys from the outer
shoulder of the seat, do not allow the child
to lean over or against the side window,
even if the child is seated in a
child-restraint system.
103)Never use one seat belt on more than
one person at a time. Using one seat belt
for more than one person at a time is
dangerous. A seat belt used in this way
cannot spread the impact forces properly
and the two passengers could be crushed
together and seriously injured or even
killed. Never use one belt for more than
one person at a time and always operate
the vehicle with each occupant properly
restrained.
104)Use the tether and tether anchor only
for a child-restraint system. Child-restraint
system anchorages are designed to
withstand only those loads imposed by
correctly installed child-restraint systems.
Under no circumstances are they to be
used for adult seat belts, harnesses, or for
attaching other items or equipment to the
vehicle.105)Always install a rear-facing child seat
in the correct seat position. Installing a
rear-facing child seat without first
consulting the table “Child-restraint system
suitability for various seat positions” is
dangerous. A rear-facing child seat
installed on the wrong seat position cannot
be properly secured. In a collision, the child
could hit something or someone in the
vehicle and be seriously injured or even
killed.
106)Always install a junior seat in the
correct seat position. Installing a junior seat
without first consulting the table
“Child-restraint system suitability for
various seat positions” is dangerous. A
junior seat installed on the wrong seat
position cannot be properly secured. In a
collision, the child could hit something or
someone in the vehicle and be seriously
injured or even killed.
107)Always install a baby seat in the
correct seat position. Installing a baby seat
without first consulting the table
“Child-restraint system suitability for
various seat positions” is dangerous. A
baby seat installed on the wrong seat
position cannot be properly secured. In a
collision, the child could hit something or
someone in the vehicle and be seriously
injured or even killed.108)Never use a rear-facing child-restraint
system on the passenger seat protected
by an air bag. Extreme Hazard! Do not use
a rearward facing child-restraint on a seat
protected by an airbag in front of it! The
child-restraint system can be hit by the
deploying air bag and knocked out of
position. A child in the child-restraint
system could be seriously injured or killed.
If your vehicle is equipped with a
passenger occupant classification system,
always make sure the passenger air bag
deactivation OFF indicator light is
illuminated, if installing a rear-facing
child-restraint system on the passenger
seat is unavoidable.
109)Never install a front-facing child seat
in the wrong seat position: Installing a
front-facing child seat without first
consulting the table “Child-restraint system
suitability for various seat positions” is
dangerous. A front-facing child seat
installed in the wrong seat position cannot
be properly secured. In a collision, the child
could hit something or someone in the
vehicle and be seriously injured or even
killed. Make sure the passenger air bag
deactivation OFF indicator light is
illuminated.
110)Before installing child-restraint system
on the passenger seat, move the
passenger seat as far back as possible: In
a collision, the force of a deploying air bag
could cause serious injury or death to the
child. Make sure the passenger air bag
deactivation OFF indicator light is
illuminated.
98
SAFETY
Page 183 of 224

SEATS AND FABRIC
PARTS
Seat belt maintenance
220) 221)
Clean the soiled area by lightly dabbing
it with a soft cloth soaked in a mild
detergent (approx. 5%) diluted with
water.
Wipe off the remaining detergent using
a cloth soaked in clean water and
wrung out well.
Before retracting seat belts which have
been pulled out for cleaning, dry them
off thoroughly and make sure there is
no remaining moisture on them.
NOTE Clean seat belts diligently if they
get dirty. Leaving them uncleaned will
make it dif cult to clean them later, and
it may affect the smooth retracting of
the seat belt.
PLASTIC PART
MAINTENANCE
47)
Instrument panel top maintenance
219)
Wipe the soiled area with a soft cloth
soaked in a mild detergent (approx. 5%)
diluted with water.
Wipe off the remaining detergent using
a cloth soaked in clean water and
wrung out well.
ALCANTARA PARTS
48)
Procedure for restoring Alcantara parts:
treat the surface using a microfibre
cloth moistened with mild Marseilles
soap and water, taking care to cover
the whole covered area, applying a
uniform light pressure (do not rub hard);
rinse and wring out the microfibre
cloth, and pass over the covered area
treated in the previous point again;
leave it to dry and brush it gently with
a soft brush.
WARNING
219)Do not spray water into the vehicle
cabin. Spraying water into the vehicle cabin
is dangerous as electrical devices such as
the audio and switches could get wet
resulting in a malfunction or vehicle fire.
220)If a seat belt appears frayed or has
abrasions, have it replaced by a
Dealership. If a seat belts is used under
such a condition, it cannot function at its
full capacity which could result in serious
injury or death.
221)Use a mild detergent to remove
soiling from a seat belt. If organic solvents
are used for cleaning the seat belts or they
become stained or bleached, there is the
possibility of them becoming weakened
and as a result, they may not function at
their full capacity which could cause
serious injury or death.222)Never use flammable products, such
as petrol ether or rectified petrol to clean
the inside of the car. The electrostatic
charges which are generated by rubbing
during the cleaning operation may cause a
fire.
223)Do not keep aerosol cans in the car:
they might explode. Aerosol cans must not
be exposed to a temperature exceeding
50°C. When the vehicle is exposed to
sunlight, the internal temperature can
greatly exceed this value.
224)There must be no obstacles on the
floor underneath the pedals; make sure
that mats are always flat and do not
interfere with the pedals.
IMPORTANT
47)Never use alcohol, petrols and
derivatives to clean the dashboard and
instrument panel lens.
48)Do not use “hard” synthetic brushes as
they could damage the fabric beyond
repair. Do not perform partial, localised
restorations that could cause “aesthetic”
differences between treated and untreated
areas. Do not use alcohol or ketone-based
solvents.
181
Page 204 of 224

RADIO 7”
STEERING WHEEL
CONTROLS
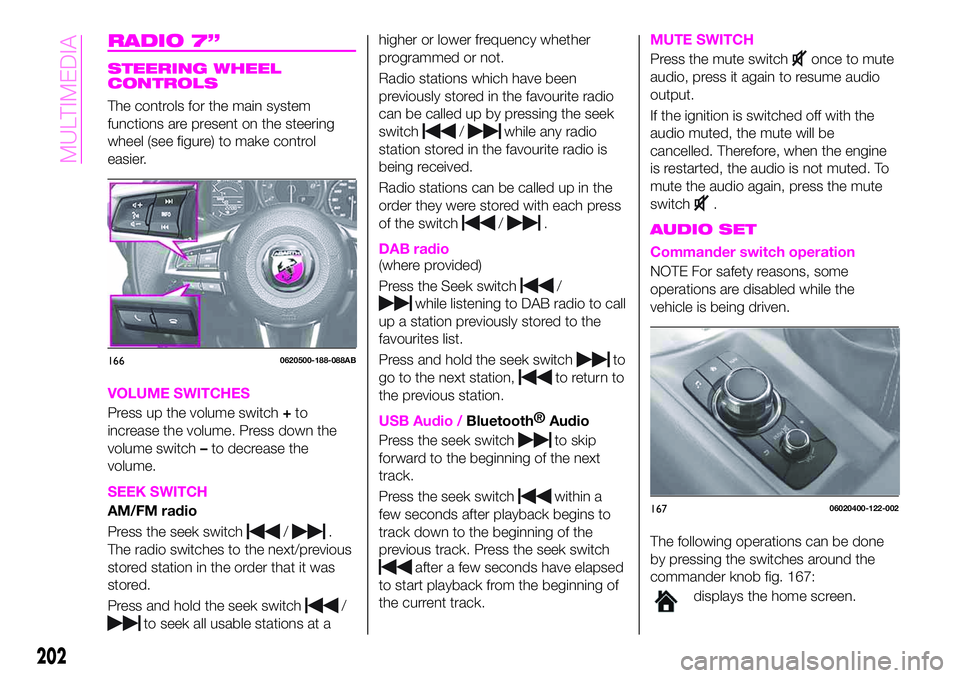
The controls for the main system
functions are present on the steering
wheel (see figure) to make control
easier.
VOLUME SWITCHES
Press up the volume switch+to
increase the volume. Press down the
volume switch–to decrease the
volume.
SEEK SWITCH
AM/FM radio
Press the seek switch
/.
The radio switches to the next/previous
stored station in the order that it was
stored.
Press and hold the seek switch
/
to seek all usable stations at ahigher or lower frequency whether
programmed or not.
Radio stations which have been
previously stored in the favourite radio
can be called up by pressing the seek
switch
/while any radio
station stored in the favourite radio is
being received.
Radio stations can be called up in the
order they were stored with each press
of the switch
/.
DAB radio(where provided)
Press the Seek switch
/
while listening to DAB radio to call
up a station previously stored to the
favourites list.
Press and hold the seek switch
to
go to the next station,
to return to
the previous station.
USB Audio /Bluetooth®
Audio
Press the seek switch
to skip
forward to the beginning of the next
track.
Press the seek switch
within a
few seconds after playback begins to
track down to the beginning of the
previous track. Press the seek switch
after a few seconds have elapsed
to start playback from the beginning of
the current track.
MUTE SWITCH
Press the mute switchonce to mute
audio, press it again to resume audio
output.
If the ignition is switched off with the
audio muted, the mute will be
cancelled. Therefore, when the engine
is restarted, the audio is not muted. To
mute the audio again, press the mute
switch
.
AUDIO SET
Commander switch operation
NOTE For safety reasons, some
operations are disabled while the
vehicle is being driven.
The following operations can be done
by pressing the switches around the
commander knob fig. 167:
displays the home screen.
1660620500-188-088AB
16706020400-122-002
202
MULTIMEDIA
Page 206 of 224

Communication:Bluetooth®
related functions are available.
Navigation: Navigation screen
(where provided) is displayed. If
the SD card for the navigation
system is not inserted, the
compass indicating the direction
in which the vehicle is moving is
displayed. The compass may
not indicate the correct bearing
when the vehicle is stopped or
travelling at a slow speed.
Settings: overall setting menu
(such as display, sound,
Bluetooth®
and Language).
Depending on the grade and
specification, the screen display
may differ.
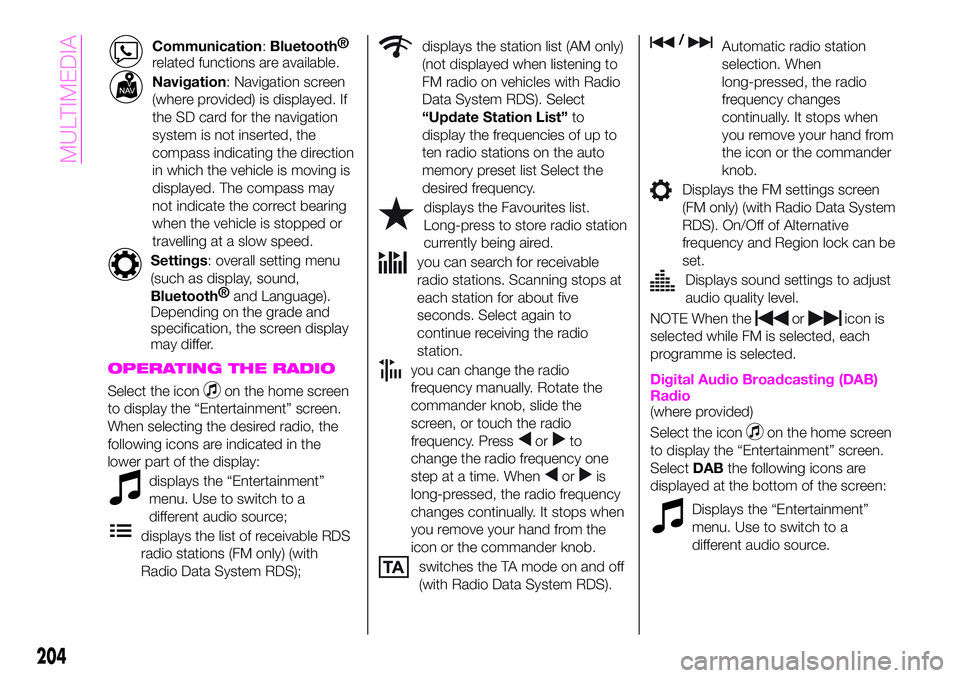
OPERATING THE RADIO
Select the iconon the home screen
to display the “Entertainment” screen.
When selecting the desired radio, the
following icons are indicated in the
lower part of the display:
displays the “Entertainment”
menu. Use to switch to a
different audio source;
displays the list of receivable RDS
radio stations (FM only) (with
Radio Data System RDS);
displays the station list (AM only)
(not displayed when listening to
FM radio on vehicles with Radio
Data System RDS). Select
“Update Station List”to
display the frequencies of up to
ten radio stations on the auto
memory preset list Select the
desired frequency.
displays the Favourites list.
Long-press to store radio station
currently being aired.
you can search for receivable
radio stations. Scanning stops at
each station for about five
seconds. Select again to
continue receiving the radio
station.
you can change the radio
frequency manually. Rotate the
commander knob, slide the
screen, or touch the radio
frequency. Press
orto
change the radio frequency one
step at a time. When
oris
long-pressed, the radio frequency
changes continually. It stops when
you remove your hand from the
icon or the commander knob.
switches the TA mode on and off
(with Radio Data System RDS).
/Automatic radio station
selection. When
long-pressed, the radio
frequency changes
continually. It stops when
you remove your hand from
the icon or the commander
knob.
Displays the FM settings screen
(FM only) (with Radio Data System
RDS). On/Off of Alternative
frequency and Region lock can be
set.
Displays sound settings to adjust
audio quality level.
NOTE When theoricon is
selected while FM is selected, each
programme is selected.
Digital Audio Broadcasting (DAB)
Radio
(where provided)
Select the icon
on the home screen
to display the “Entertainment” screen.
SelectDABthe following icons are
displayed at the bottom of the screen:
Displays the “Entertainment”
menu. Use to switch to a
different audio source.
204
MULTIMEDIA
Page 207 of 224

Displays the station list (ensemble
and station). Select “Update List”
to update the station list. Select
“Select Ensemble” to select the
ensemble you want to display.
Displays the favorites list. Press
and hold to store the currently
tuned station to the favorites list.
Searches your desired station
from the station list. Tunes to
each station in the station list for
10 seconds. Select again when
your desired station is tuned. If
the station list is not available, it
switches to the station list update
screen. Perform the station list
updating.
Switches the TA mode on and
off.
/Returns to the
previous/goes to the next
station. Touch and hold to
return to the top station in
the previous/next ensemble.
Displays the DAB radio setting
screen.
Displays sound settings to adjust
audio quality level.
SETTINGS
NOTE Depending on the grade and
specification, the screen display may
differ.
Select the
icon on the home screen
to display the Settings screen. Switch
the tab and select the setting item you
want to change.
You can customize settings in the setup
display as follows:
“Display”: refer to “Volume/Display/
Sound controls” paragraph in Radio 7”
supplement;
“Sound”: refer to “Volume/Display/
Sound controls” paragraph in Radio 7”
supplement;
“Clock”: “Adjust Time”, “GPS Sync”,
“Time Format”, “Time Zone Select”,
“Daylight Savings Time”;
“Vehicle”: rain sensing Wiper/Door
Lock/Other;
“Devices”: selectBluetooth®
or
“Network Management”;
“System”: “Tool Tips”, “Language”,
“Temperature”, “Distance”, “Music
Database Update”, “Factory Reset”,
“About (agreements and disclaimers)”,
“About (version Information)”
AUX / USB / iPod MODE
Audio can be heard from the vehicle's
speakers by connecting a commercially
available portable audio unit to the
auxiliary jack. A commercially-available,non-impedance (3.5 Ø) stereo mini plug
lead is required.
In addition, audio can be played from
the vehicle audio device by connecting
a USB device or an iPod to the USB
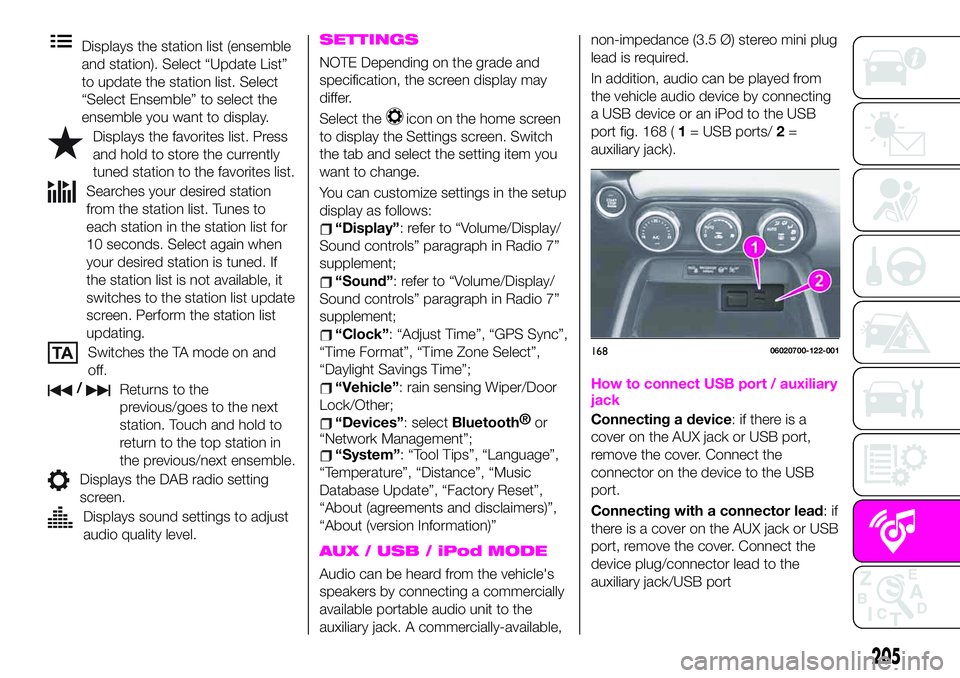
port fig. 168 (1= USB ports/2=
auxiliary jack).
How to connect USB port / auxiliary
jack
Connecting a device: if there is a
cover on the AUX jack or USB port,
remove the cover. Connect the
connector on the device to the USB
port.
Connecting with a connector lead:if
there is a cover on the AUX jack or USB
port, remove the cover. Connect the
device plug/connector lead to the
auxiliary jack/USB port
16806020700-122-001
205