display Abarth Grande Punto 2007 Owner handbook (in English)
[x] Cancel search | Manufacturer: ABARTH, Model Year: 2007, Model line: Grande Punto, Model: Abarth Grande Punto 2007Pages: 207, PDF Size: 3.01 MB
Page 23 of 207
21
SAFETY
DEVICES
CORRECT USE
OF THE CAR
WARNING
LIGHTS AND
MESSAGES
IN AN
EMERGENCY
CAR
MAINTENANCE
TECHNICAL
SPECIFICATIONS
INDEX
DASHBOARD
AND CONTROLS
First page (information displayed
in the main screen)
This function enables to select the type of
information displayed in the main screen.
It is possible to display the date or the
pressure of the turbo-compressor.
To select one of the two items, proceed
as follows:
– push the button MENU ESCfor a
short time, “First page” is displayed;
– press again the button MENU ESC for
a short time to display the “Date” and
“Engine Info” options;
– press +or –to select the type of infor-
mation to be displayed in the main screen;
– press MENU ESCfor a short time to
store the selection and return to the pre-
vious screen or press the button for a
longer time to return to the standard
screen without storing the selection.
Rotating the ignition key on MAR, the re-
configurable multifunctional display, after
the start-up check, displays the previous-
ly set information using the “First page”
function of the menu. See radio
(Repeat audio information)
This function is used to display informa-
tion relevant to the sound system.
– Radio: tuned radio station frequency or
RDS message, automatic tuning activation
or AutoSTore;
– CD audio, CD MP3: track number;
– CD Changer: CD number and track
number.
To activate (On) or to deactivate (Off)
sound system info displaying proceed as
follows:
– briefly press button MENU ESC: (On)
or (Off) will flash on the display (accord-
ing to previous setting);
– press button +or –for setting;
– briefly press button MENU ESCto go
back to the menu screen or press the but-
ton for long to go back to the standard
screen without storing settings. Set date (Set Date)
This function enables to update the date
(day - month - year).
To correct the date proceed as follows:
– briefly press button MENU ESC: “day”
will flash on the display;
– press button +or –for setting;
– briefly press button MENU ESC:
“month” will flash on the display;
– press button +or –for setting;
– briefly press button MENU ESC:
“year” will flash on the display;
– press button +or –for setting;
NoteEvery press on button +or – in-
creases/decreases by 1 unit. Keeping the
button pressed obtains automatic fast in-
crease or decrease. When you are near
the required setting complete adjustment
by single presses.
– briefly press button MENU ESCto go
back to the menu screen or press the but-
ton for long to go back to the standard
screen without storing settings.
Page 24 of 207
22
SAFETY
DEVICES
CORRECT USE
OF THE CAR
WARNING
LIGHTS AND
MESSAGES
IN AN
EMERGENCY
CAR
MAINTENANCE
TECHNICAL
SPECIFICATIONS
INDEX
DASHBOARD
AND CONTROLS
Autoclose
(Automatic door lock operation
with car running)
When activated (On), this function locks
automatically the doors when the car
speed exceeds 20 km/h.
This function is available on all versions
and may only be switched off by means
of the multifunctional display or reconfig-
urable multifunctional display.
Proceed as follows to switch this function
on or off:
- briefly press button MENU ESCto dis-
play a submenu;
– briefly press button MENU ESC: (On)
or (Off) will flash on the display (accord-
ing to previous setting);
– press button +or –for setting;
– briefly press button MENU ESCto go
back to the menu screen or press the but-
ton for long to go back to the standard
screen without storing settings;
– hold MENU ESCpressed to go back to
the standard screen or main menu accord-
ing to the points of the menu where you are
at.Unit of measure (Set units)
This function may be used to set the unit
for measure in three submenus: “Dis-
tances”, “Consumption” and “Tempera-
ture”.
Proceed as follows to set the required
unit:
– briefly press button MENU ESCto dis-
play the three sub-menus;
– press button +or –to browse the three
submenus;
– select the required submenu and then
press briefly button MENU ESC;
– when accessing the “Distance” submenu:
briefly press MENU ESC: either “km” or
“mi” will appear on the display (accord-
ing to the previous setting);
– press button +or –for setting;
– when accessing the “Consumption” sub-
menu: briefly press MENU ESC: either
“km/l ”, “l/100km” or “mpg” will appear
on the display (according to the previous
setting).
If the distance unit set is “km” the fuel con-
sumption unit will be displayed in km/l or
l/100km.If the distance unit set is “mi” the fuel con-
sumption unit will be displayed in “mpg”:
– press button +or –for setting;
– when accessing the “Temperature” sub-
menu: briefly press MENU ESC: either
“°C” or “°F” will appear on the display ac-
cording to the previous setting;
– press button +or –for setting;
When you have made the required set-
tings, briefly press button MENU ESCto
go back to the menu screen or press the
button for long to go back to the standard
screen without storing settings.
– hold MENU ESCpressed to go back
to the standard screen or main menu ac-
cording to the points of the menu where
you are at.
Page 25 of 207
23
SAFETY
DEVICES
CORRECT USE
OF THE CAR
WARNING
LIGHTS AND
MESSAGES
IN AN
EMERGENCY
CAR
MAINTENANCE
TECHNICAL
SPECIFICATIONS
INDEX
DASHBOARD
AND CONTROLS
Language (Selecting the language)
The messages may be displayed in the fol-
lowing languages: Italian, German,
English, Spanish, French, Portuguese,
Dutch.
To set the required language proceed as
follows:
– briefly press button MENU ESC: the
previously set “language” “ will flash on the
display;
– press button +or –for setting;
– briefly press button MENU ESCto go
back to the menu screen or press the but-
ton for long to go back to the standard
screen without storing settings.Buzzer volume (Adjusting the
failure/warning buzzer volume)
With this function the volume of the
buzzer accompanying any failure/warning
indication can be adjusted according to 8
levels.
To adjust the volume proceed as follows:
– briefly press button MENU ESC: the
previously set volume “level” will flash on
the display;
– press button +or –for setting;
– briefly press button MENU ESCto go
back to the menu screen or press the but-
ton for long to go back to the standard
screen without storing settings.Button volume
(Button volume adjustment)
This function may be used to adjust the
volume of the beep accompanying the ac-
tivation of buttons MENU ESC, +and
–can be adjusted according to 8 levels.
To adjust the volume proceed as follows:
– briefly press button MENU ESC: the
previously set volume “level” will flash on
the display;
– press button +or –for setting;
– briefly press button MENU ESCto go
back to the menu screen or press the but-
ton for long to go back to the standard
screen without storing settings.
Belt buzzer (Buzzer activation
for S.B.R. indication)
This function can be only displayed after
Abarth Dealership has deactivated the
S.B.R. system (see paragraph “S.B.R. sys-
tem” in section “Safety devices”).
Page 26 of 207
24
SAFETY
DEVICES
CORRECT USE
OF THE CAR
WARNING
LIGHTS AND
MESSAGES
IN AN
EMERGENCY
CAR
MAINTENANCE
TECHNICAL
SPECIFICATIONS
INDEX
DASHBOARD
AND CONTROLS
Service (Scheduled servicing)
This function may be used to display in-
formation connected to proper car ser-
vicing.
Proceed as follows:
– briefly press button MENU ESC: ser-
vice in km or mi, according to previous set-
ting, will be displayed (see paragraph
“Units”);
– briefly press button MENU ESCto go
back to the menu screen or press the but-
ton for long to go back to the standard
screen.
NoteThe “Service Schedule” requires the
car to be serviced every 30,000 km (or
18,000 mi); this indication will appear au-
tomatically with the key at MARwhen
there are 2000 km left (or equivalent dis-
tance in miles) and will be presented au-
tomatically every 200 km (or equivalent
distance in miles). The indications will ap-
pear more frequently where there are 200
km left. The indication will appear in kilo-
metres or miles according to the settings.
When the next scheduled service opera-
tion is approaching, the message “Service”
will appear on the display followed by the
number of kilometres or miles left when
the key is turned to MAR. Go to a Abarth
Dealership where the “Scheduled Service”
operations will be performed and the mes-
sage will be reset. Passenger bag Front passenger’s
airbag and side bag
activation/deactivation
(for versions/markets, where
provided)
This function may be used to acti-
vate/deactivate the front passenger’s
airbag.
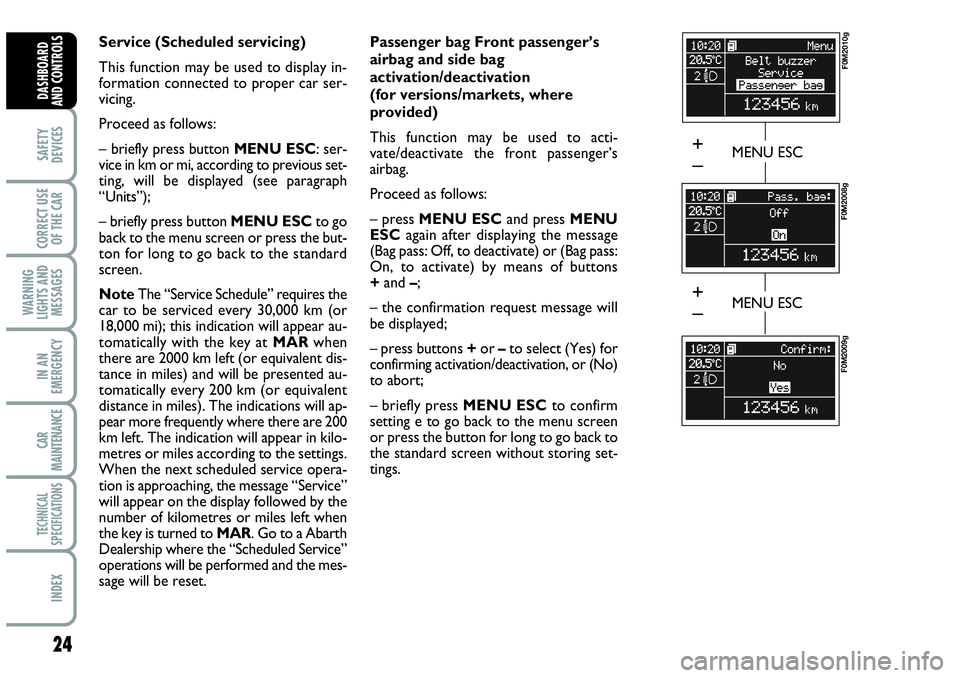
Proceed as follows:
– press MENU ESCand press MENU
ESCagain after displaying the message
(Bag pass: Off, to deactivate) or (Bag pass:
On, to activate) by means of buttons
+and –;
– the confirmation request message will
be displayed;
– press buttons +or –to select (Yes) for
confirming activation/deactivation, or (No)
to abort;
– briefly press MENU ESCto confirm
setting e to go back to the menu screen
or press the button for long to go back to
the standard screen without storing set-
tings.
MENU ESC
F0M2010g
F0M2008g
F0M2009g
MENU ESC
+
–
+
–
Page 27 of 207

25
SAFETY
DEVICES
CORRECT USE
OF THE CAR
WARNING
LIGHTS AND
MESSAGES
IN AN
EMERGENCY
CAR
MAINTENANCE
TECHNICAL
SPECIFICATIONS
INDEX
DASHBOARD
AND CONTROLS
Exit Menu
This is the last function that closes the cir-
cular setting cycle listed in the initial menu
screen.
Briefly press button MENU ESCto go
back to the standard screen without stor-
ing settings.
Press button –to return to the first menu
option (Speed Beep).TRIP COMPUTER
General features
The “Trip computer” displays information
(with ignition key at MAR), relating to the
operating status of the car. This function
comprises two separate and independent
trips: “Trip A” and “Trip B” concerning
the “complete mission” of the car (jour-
ney).Both functions are resettable (reset - start
of new mission).
“Trip A” shall be used to display the fig-
ures relating to:
– Range
– Trip distance
– Average consumption
– Instant consumption
– Average speed
– Travel time (driving time).
Page 28 of 207

26
SAFETY
DEVICES
CORRECT USE
OF THE CAR
WARNING
LIGHTS AND
MESSAGES
IN AN
EMERGENCY
CAR
MAINTENANCE
TECHNICAL
SPECIFICATIONS
INDEX
DASHBOARD
AND CONTROLS
“Trip B”, available on multifunction display
only, shall be used to display the figures
relating to:
– Trip distance B
– Average consumption B
– Average speed B
– Travel time B (driving time).
Note“Trip B” function can be excluded
(see paragraph “Trip B On/Off”). “Range”
and “Instant consumption” cannot be re-
set.Average consumption
This value shows the average consump-
tion from the start of the new mission.
Instant consumption
This value shows instant fuel consumption
(this value is updated second by second).
If parking the car with engine on,
the display will show “----”.
Average speed
This value shows the car average speed as
a function of the overall time elapsed since
the start of the new mission.
Travel time
This value shows the time elapsed since
the start of the new mission.
IMPORTANT Lacking information, Trip
computer values are displayed with “----”.
When normal operating condition is re-
set, calculation of different units will
restart regularly. Values displayed before
the failure will not be reset. Values displayed
Range
This value shows the distance in km (or
mi) that the car can still cover before
needing fuel, assuming that driving condi-
tions are kept unvaried. The display will
show “----” in the following cases:
– value lower than 50 km (or 30 mi)
– car left parked with engine running for
long.
IMPORTANT The variation of the auton-
omy value can be influenced by different
factors: driving style (see what is described
in paragraph “Driving style” in the chap-
ter “Start-up and driving”), type of route
(highways, urban, mountain, etc…), use
conditions of the car (load transported,
tire pressure, etc…). What was described
previously must be taken in consideration
when planning a trip.
Trip distance
This value shows the distance covered
from the start of the new mission.
Page 29 of 207
27
SAFETY
DEVICES
CORRECT USE
OF THE CAR
WARNING
LIGHTS AND
MESSAGES
IN AN
EMERGENCY
CAR
MAINTENANCE
TECHNICAL
SPECIFICATIONS
INDEX
DASHBOARD
AND CONTROLS
New mission
Reset can be:
– “manual” resetting by the user, by press-
ing the relevant button;
– “automatic” resetting, when the “Trip dis-
tance” reaches 3999.9 km or 9999.9 km
(according to the type of display) or when
the “Travel time” reaches 99.59 (99 hours
and 59 minutes);
– after disconnecting/reconnecting the
battery.
IMPORTANT The reset operation in the
presence of the screens concerning the
“Trip A” makes it possible to reset only
the information associated with this func-
tion.
IMPORTANT The reset operation in the
presence of the screens concerning the
“Trip B” makes it possible to reset only
the information associated with this func-
tion.Start of journey procedure
With ignition key at MAR, press and keep
button TRIPpressed for over 2 seconds
to reset.
Exit Trip
To quit the Trip function: keep button
MENU ESCpressed for over 2 seconds.
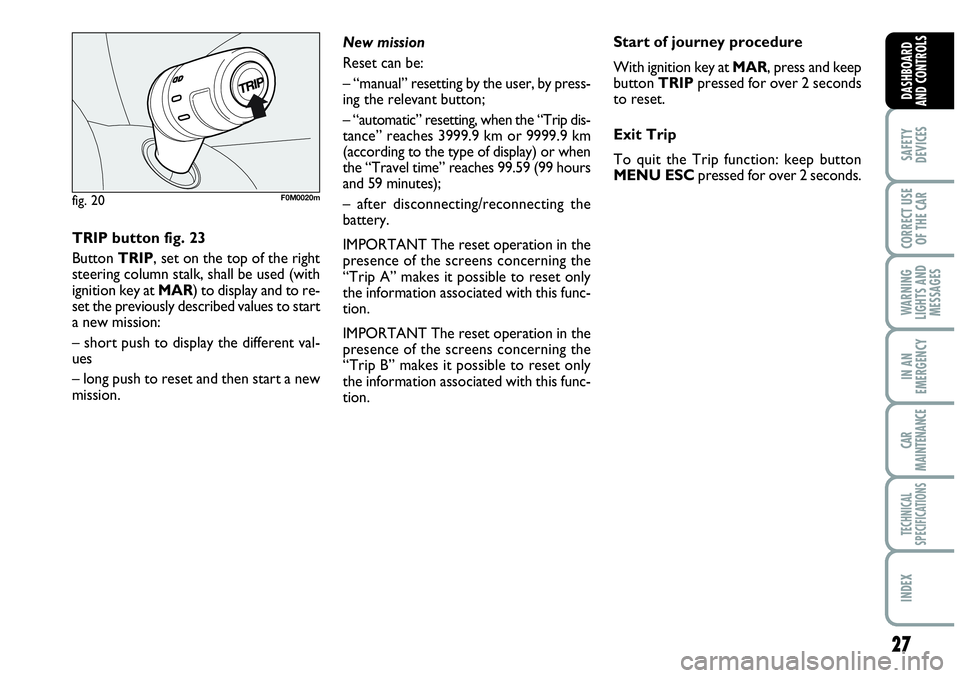
TRIP button fig. 23
Button TRIP, set on the top of the right
steering column stalk, shall be used (with
ignition key at MAR) to display and to re-
set the previously described values to start
a new mission:
– short push to display the different val-
ues
– long push to reset and then start a new
mission.
fig. 20F0M0020m
Page 42 of 207

40
SAFETY
DEVICES
CORRECT USE
OF THE CAR
WARNING
LIGHTS AND
MESSAGES
IN AN
EMERGENCY
CAR
MAINTENANCE
TECHNICAL
SPECIFICATIONS
INDEX
DASHBOARD
AND CONTROLS
AUTOMATIC
TWO-ZONE
CLIMATE
CONTROL SYSTEM
(for versions/markets,
where provided)
DESCRIPTION
The car is fitted with a two-zone climate
control system which makes it possible to
separately adjust the air temperatures and
air distribution on the driver’s side and on
the passenger’s side. Temperature control
is based on the “equivalent temperature”
logic, i.e.: the system continuously works
to keep constant the comfort inside the
passenger compartment and to compen-
sate any variation of the outside climate
conditions, including sunshine detected by
a proper sensor provided for the purpose.
The climate control system automatically
controls and adjusts the following para-
meters and functions:
❒ air temperature at driver/front passen-
ger vents;
❒ air distribution at driver/front passen-
ger vents;
❒ fan speed (continuous air flow varia-
tion);
❒compressor activation (to cool/ dehu-
midify air);
❒air recirculation.All the above functions can be changed
manually by selecting the required func-
tion/s and by changing the set parameters.
In this way the automatic control is de-
activated; the system will resume auto-
matic control only for safety reasons. Man-
ual selections prevail over automatic ones
and remain in storage until the user de-
cides to resume automatic control (press
button AUTO), except when the system
cuts in for particular safety conditions. The
control of functions not changed manual-
ly remains automatic. The amount of air
admitted to the passenger compartment
does not depend on the car speed, since
it is electronically controlled by the fan.
The temperature of the air admitted to
the passenger compartment is always con-
trolled automatically according to the tem-
peratures set on the driver’s and front
passenger’s display (except when the sys-
tem is off or under certain conditions
when the compressor is off).The following parameters and functions
can be set or changed manually:
❒ air temperatures on driver/front pas-
senger side;
❒fan speed (continuous variation);
❒air distribution on seven levels (dri-
ver/front passenger side);
❒ climate control compressor on/off en-
able;
❒monozone/two-zone distribution prior-
ity;
❒ fast demisting/defrosting;
❒ air recirculation;
❒ rear heated window;
❒system deactivation.
Page 43 of 207
41
SAFETY
DEVICES
CORRECT USE
OF THE CAR
WARNING
LIGHTS AND
MESSAGES
IIN AN
EMERGENCY
CAR
MAINTENANCE
TECHNICAL
SPECIFICATIONS
INDEX
DASHBOARD
AND CONTROLS
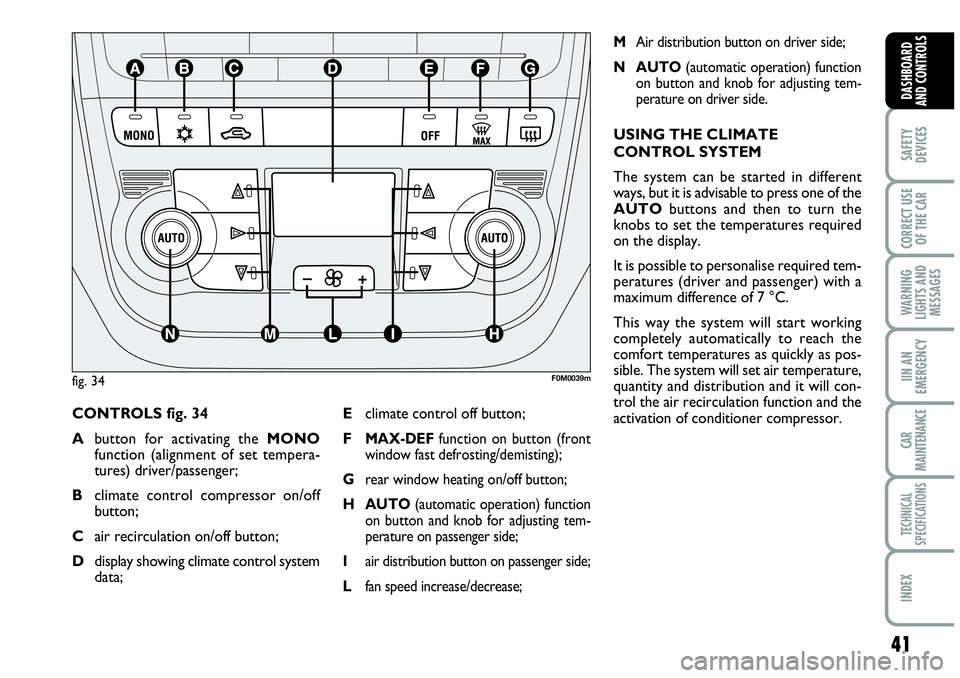
CONTROLS fig. 34
Abutton for activating the MONO
function (alignment of set tempera-
tures) driver/passenger;
Bclimate control compressor on/off
button;
Cair recirculation on/off button;
Ddisplay showing climate control system
data;
MAir distribution button on driver side;
N AUTO(automatic operation) function
on button and knob for adjusting tem-
perature on driver side.
USING THE CLIMATE
CONTROL SYSTEM
The system can be started in different
ways, but it is advisable to press one of the
AUTObuttons and then to turn the
knobs to set the temperatures required
on the display.
It is possible to personalise required tem-
peratures (driver and passenger) with a
maximum difference of 7 °C.
This way the system will start working
completely automatically to reach the
comfort temperatures as quickly as pos-
sible. The system will set air temperature,
quantity and distribution and it will con-
trol the air recirculation function and the
activation of conditioner compressor. Eclimate control off button;
F
MAX-DEFfunction on button (front
window fast defrosting/demisting);
Grear window heating on/off button;
H AUTO(automatic operation) function
on button and knob for adjusting tem-
perature on passenger side;
Iair distribution button on passenger side;
Lfan speed increase/decrease;
fig. 34F0M0039m
Page 44 of 207
42
SAFETY
DEVICES
CORRECT USE
OF THE CAR
WARNING
LIGHTS AND
MESSAGES
IN AN
EMERGENCY
CAR
MAINTENANCE
TECHNICAL
SPECIFICATIONS
INDEX
DASHBOARD
AND CONTROLS
During fully automatic operation, the on-
ly manual settings required are the fol-
lowing:
❒MONO, to align the air temperature
and distribution set on the passenger’s
side with that on the driver’s side;
❒•air recirculation, to keep it always
on or off;
❒-to speed up demisting/defrosting of
windscreen, side windows, rear window
and door mirrors;
❒
(to demist/defrost heated rear win-
dow and door mirrors.
During full automatic system operation,
you can change at any time set tempera-
tures, air distribution and fan speed by us-
ing the relevant buttons or knobs: the sys-
tem will automatically change its settings
to adjust to the new requirements.During (FULL AUTO) operation, chang-
ing air distribution and/or flow and/or
compressor activation and/or air recircu-
lation will make the FULLwording dis-
appear. In this way the system will keep
on controlling automatically all functions,
excluding those changed manually. Fan
speed is the same for every area of the
passenger compartment.
Air temperature adjusting
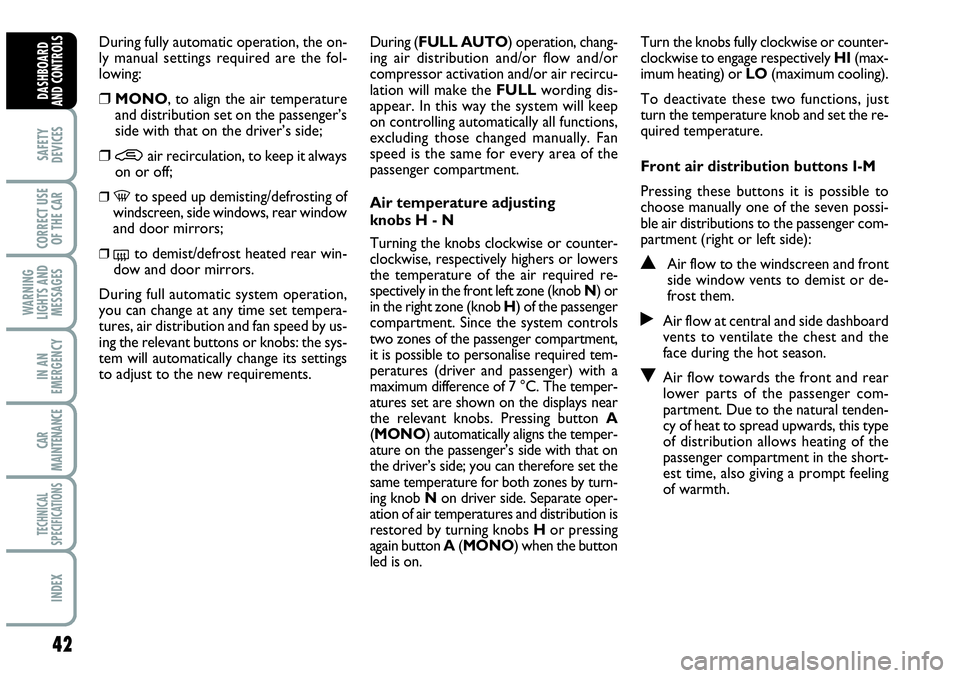
knobs H - N
Turning the knobs clockwise or counter-
clockwise, respectively highers or lowers
the temperature of the air required re-
spectively in the front left zone (knob N) or
in the right zone (knob H) of the passenger
compartment. Since the system controls
two zones of the passenger compartment,
it is possible to personalise required tem-
peratures (driver and passenger) with a
maximum difference of 7 °C. The temper-
atures set are shown on the displays near
the relevant knobs. Pressing button A
(MONO) automatically aligns the temper-
ature on the passenger’s side with that on
the driver’s side; you can therefore set the
same temperature for both zones by turn-
ing knob Non driver side. Separate oper-
ation of air temperatures and distribution is
restored by turning knobs Hor pressing
again button A(MONO) when the button
led is on.Turn the knobs fully clockwise or counter-
clockwise to engage respectively HI(max-
imum heating) or LO(maximum cooling).
To deactivate these two functions, just
turn the temperature knob and set the re-
quired temperature.
Front air distribution buttons I-M
Pressing these buttons it is possible to
choose manually one of the seven possi-
ble air distributions to the passenger com-
partment (right or left side):NAir flow to the windscreen and front
side window vents to demist or de-
frost them.
˙Air flow at central and side dashboard
vents to ventilate the chest and the
face during the hot season.
OAir flow towards the front and rear
lower parts of the passenger com-
partment. Due to the natural tenden-
cy of heat to spread upwards, this type
of distribution allows heating of the
passenger compartment in the short-
est time, also giving a prompt feeling
of warmth.