lock Acura Integra 2000 Hatchback User Guide
[x] Cancel search | Manufacturer: ACURA, Model Year: 2000, Model line: Integra, Model: Acura Integra 2000Pages: 279, PDF Size: 3.57 MB
Page 38 of 279
Protectin
g Childre n
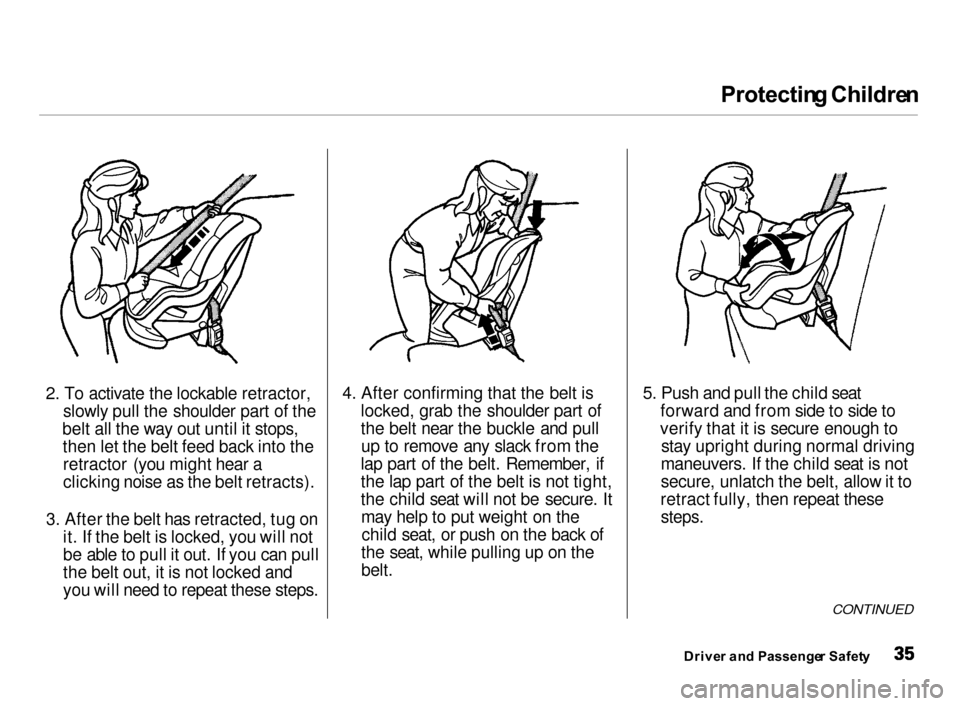
2. To activate the lockable retractor, slowly pull the shoulder part of the
belt all the way out until it stops, then let the belt feed back into theretractor (you might hear a
clicking noise as the belt retracts).
3. After the belt has retracted, tug on it. If the belt is locked, you will not
be able to pull it out. If you can pull
the belt out, it is not locked and
you will need to repeat these steps. 4. After confirming that the belt is
locked, grab the shoulder part of
the belt near the buckle and pull
up to remove any slack from the
lap part of the belt. Remember, if
the lap part of the belt is not tight,
the child seat will not be secure. It may help to put weight on thechild seat, or push on the back of
the seat, while pulling up on the
belt.
5. Push and pull the child seat
forward and from side to side to
verify that it is secure enough to stay upright during normal driving
maneuvers. If the child seat is not
secure, unlatch the belt, allow it to
retract fully, then repeat these
steps.
CONTINUED
Drive r an d Passenge r Safet y
Page 39 of 279
Protectin
g Childre n
To deactivate the locking
mechanism in order to remove a
child seat, unlatch the buckle,
unroute the seat belt, and let the belt
fully retract.
Additional Precautions for Small
Children Never hold a small child on your
lap. If you are not wearing a seat
belt in a crash, you could be
thrown forward into the dashboard and crush the child.
If you are wearing a seat belt, the child can be torn from your arms
during a crash. For example, if
your car crashes into a parked
vehicle at 30 mph (48 km/h), a 30-lb (14 kg) child will become a
900-lb (410 kg) force, and you will
not be able to hold on.
Never put a seat belt over yourself
and a child. During a crash, the
belt could press deep into the child
and cause very serious injuries.
Drive r an d Passenge r Safet y
Page 45 of 279
Additiona
l Informatio n Abou t You r Sea t Belt s
Sea t Bel t Syste m Component s
Your seat belt system includes lap/ shoulder belts in all four seating
positions.
The seat belt system alsoincludes a light on the
instrument panel to remind you and
your passengers to fasten your belts. If the driver's seat belt is not
fastened before the ignition is turned ON (II), the light will come on and a
beeper will also sound. The beeper
will stop after a few seconds, but the light will stay on until the driver's seat belt is fastened.
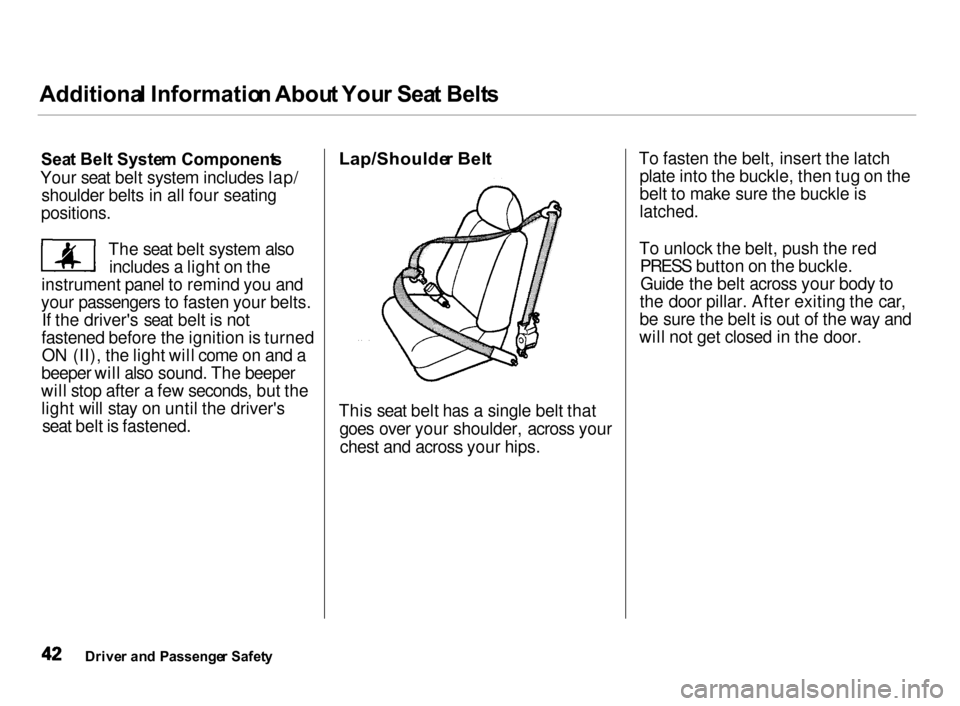
Lap/Shoulde
r Bel t
This seat belt has a single belt that goes over your shoulder, across yourchest and across your hips. To fasten the belt, insert the latch
plate into the buckle, then tug on the
belt to make sure the buckle is
latched.
To unlock the belt, push the red PRESS button on the buckle.Guide the belt across your body to
the door pillar. After exiting the car,
be sure the belt is out of the way and
will not get closed in the door.
Drive r an d Passenge r Safet y
Page 46 of 279
Additiona
l Informatio n Abou t You r Sea t Belt s
All seat belts have an emergency locking retractor. In normal driving,
the retractor lets you move freely in
your seat while it keeps some tension on the belt. During a collisionor sudden stop, the retractor
automatically locks the belt to help
restrain your body.
The seat belts in all seating positions except the driver's have an additional
locking mechanism that must be activated to secure a child seat. (See
pages 30 and 34 for instructions on
how to secure child seats with this
type of seat belt.)
If the shoulder part of the belt is
pulled all the way out, the locking mechanism will activate. The belt
will retract, but it will not allow the passenger to move freely. To deactivate the locking
mechanism, unlatch the buckle and
let the seat belt fully retract. To refasten the belt, pull it out only as
far as needed.
See page 16 for instructions on how
to wear the lap/shoulder belt
properly. Sea
t Belt Maintenanc e
For safety, you should check the
condition of your seat belts regularly.
Pull each belt out fully and look for
frays, cuts, burns, and wear. Check that the latches work smoothly and
that the lap/shoulder belts retracteasily. Any belt not in good condition
or not working properly will not
provide good protection and should
be replaced as soon as possible.U.S. Models
Acura provides a lifetime warranty on seat belts. Acura will repair or
replace any seat belt component that
fails to function properly during normal use.
Please see your Acura WarrantyInformation booklet for details.
CONTINUED
Drive r an d Passenge r Safet y
Page 54 of 279
Instrument
s an d Control s
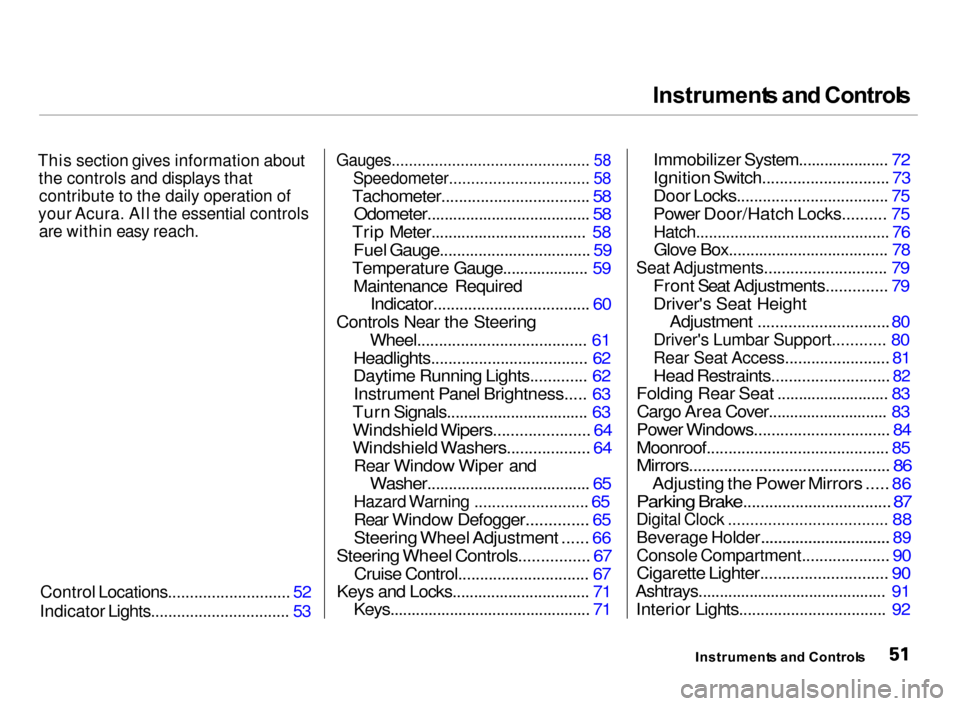
This section gives information about the controls and displays thatcontribute to the daily operation of
your Acura. All the essential controls
are within easy reach.
Control Locations............................ 52
Indicator Lights................................ 53
Gauges.............................................. 58
Speedometer................................ 58
Tachometer.................................. 58
Odometer...................................... 58
Trip Meter.................................... 58
Fuel Gauge................................... 59
Temperature Gauge.................... 59 Maintenance Required
Indicator.................................... 60
Controls Near the Steering Wheel....................................... 61
Headlights.................................... 62
Daytime Running Lights............. 62 Instrument Panel Brightness..... 63
Turn Signals................................. 63
Windshield Wipers...................... 64
Windshield Washers................... 64
Rear Window Wiper and
Washer...................................... 65
Hazard Warning .......................... 65
Rear Window Defogger
.............. 65
Steering Wheel Adjustment ...... 66
Steering Wheel Controls................ 67
Cruise Control.............................. 67
Keys and Locks................................
71
Keys...............................................
71
Immobilizer System....................
. 72
Ignition Switch............................. 73
Door Locks................................... 75
Power Door/Hatch Locks.......... 75
Hatch............................................. 76
Glove Box..................................... 78
Seat Adjustments............................ 79
Front Seat Adjustments.............. 79
Driver's Seat Height
Adjustment
.............................. 80
Driver's Lumbar Support............ 80
Rear Seat Access........................ 81
Head Restraints...........................
82
Folding Rear Seat .......................... 83 Cargo Area Cover............................ 83
Power Windows............................... 84
Moonroof.......................................... 85
Mirrors.............................................. 86
Adjusting the Power Mirrors .....
86
Parking Brake..................................
87
Digital Clock .................................... 88
Beverage Holder.............................. 89
Console Compartment.................... 90
Cigarette Lighter............................. 90
Ashtrays............................................ 91 Interior Lights.................................. 92
Instrument s an d Control s
Page 58 of 279
Indicato
r Light s
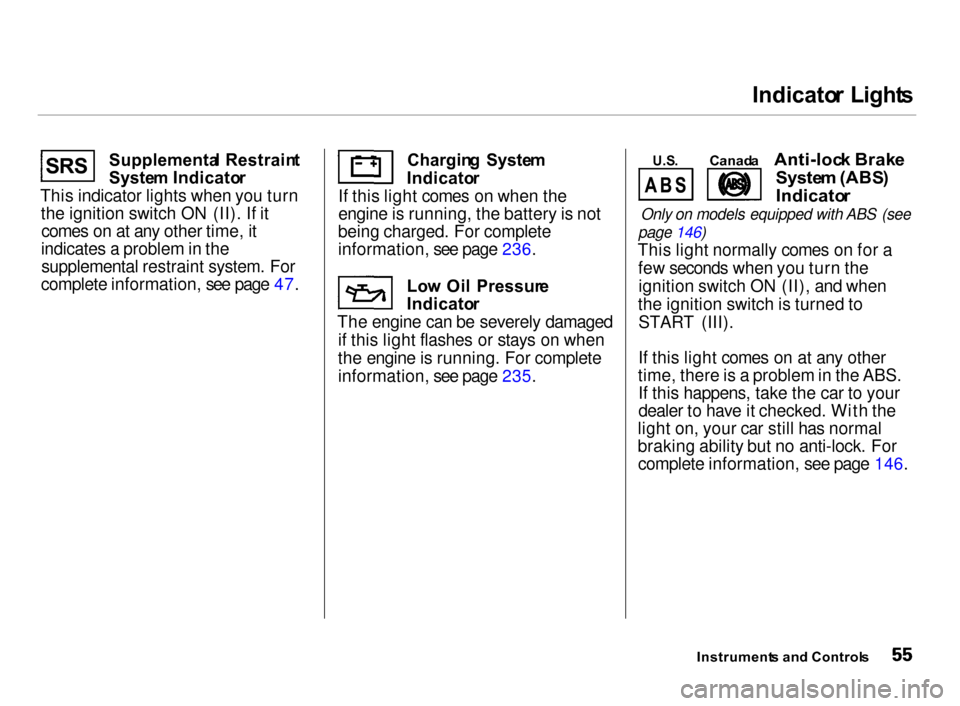
Supplementa l Restrain t
Syste m Indicato r
This indicator lights when you turn the ignition switch ON (II). If itcomes on at any other time, it
indicates a problem in the supplemental restraint system. For
complete information, see page 47. Chargin
g Syste m
Indicato r
If this light comes on when the
engine is running, the battery is not
being charged. For complete
information, see page 236.
Low Oi l Pressur e
Indicato r
The engine can be severely damaged if this light flashes or stays on when
the engine is running. For complete
information, see page 235.
Anti-loc
k Brak e
Syste m (ABS )
Indicato r
Only on models equipped with ABS (see
page 146)
This light normally comes on for a few seconds when you turn theignition switch ON (II), and when
the ignition switch is turned to START (III).
If this light comes on at any other
time, there is a problem in the ABS. If this happens, take the car to your
dealer to have it checked. With the
light on, your car still has normal
braking ability but no anti-lock. For complete information, see page 146.
Instrument s an d Control s
S
R
S
U.S
.
Canad a
A
B S
Page 60 of 279
Indicato
r Light s
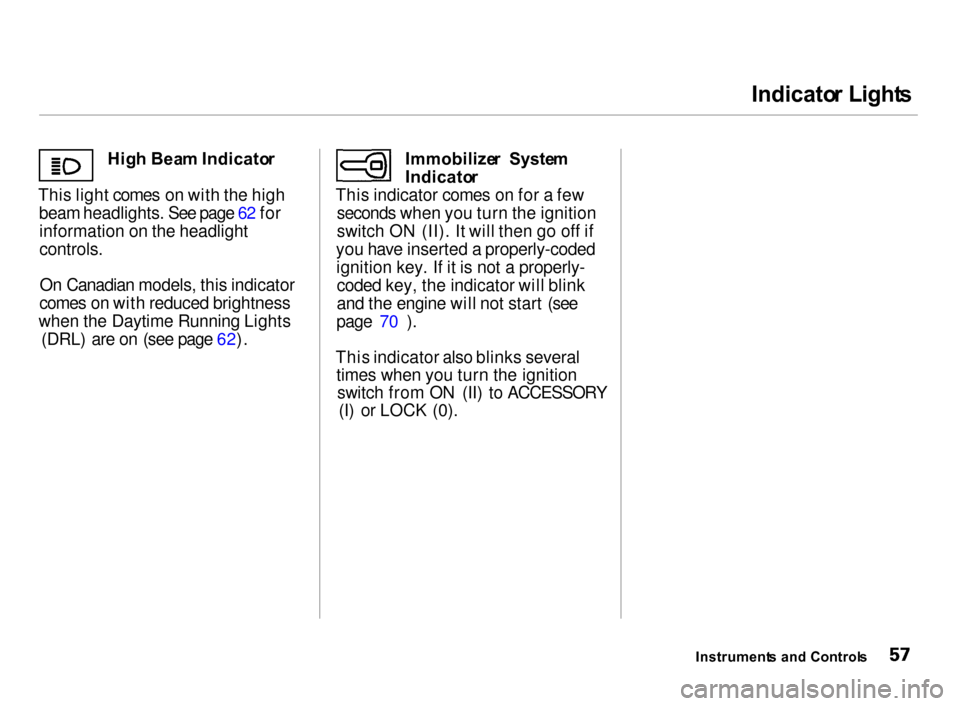
Hig h Bea m Indicato r
This light comes on with the high beam headlights. See page 62 forinformation on the headlight
controls.
On Canadian models, this indicator
comes on with reduced brightness
when the Daytime Running Lights (DRL) are on (see page 62). Immobilize
r Syste m
Indicato r
This indicator comes on for a few seconds when you turn the ignition
switch ON (II). It will then go off if
you have inserted a properly-coded ignition key. If it is not a properly-coded key, the indicator will blink
and the engine will not start (see
page 70 ).
This indicator also blinks several times when you turn the ignitionswitch from ON (II) to ACCESSORY (I) or LOCK (0).
Instruments an d Control s
Page 65 of 279
Control
s Nea r th e Steerin g Whee l
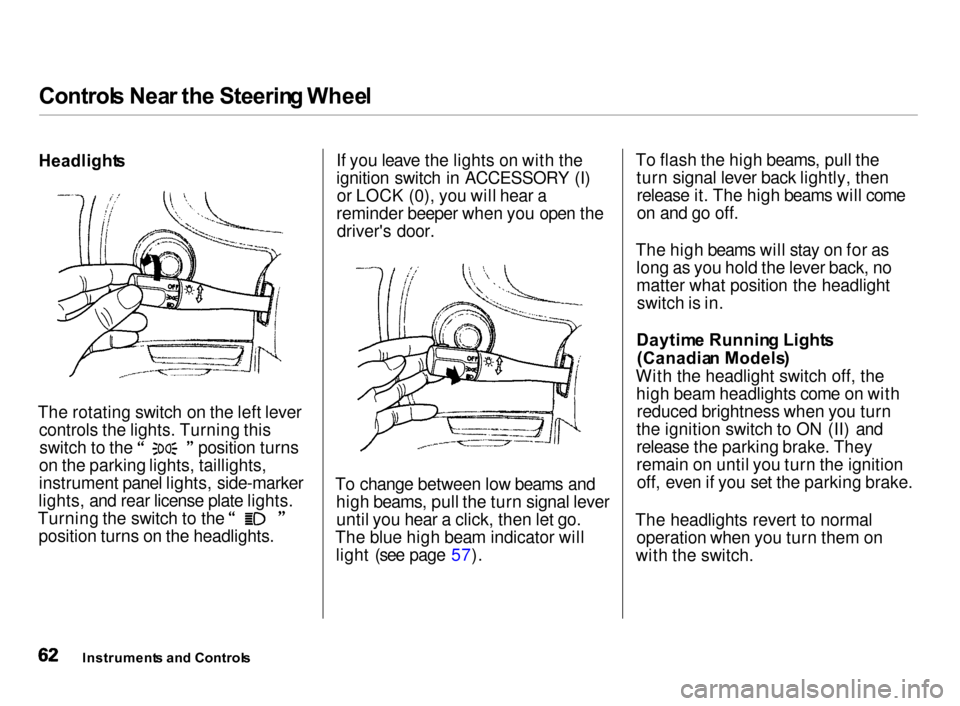
Headlight s
The rotating switch on the left lever controls the lights. Turning this switch to the position turns
on the parking lights, taillights,
instrument panel lights, side-marker
lights, and rear license plate lights. Turning the switch to the
position turns on the headlights. If you leave the lights on with the
ignition switch in ACCESSORY (I)
or LOCK (0), you will hear a
reminder beeper when you open the driver's door.
To change between low beams and high beams, pull the turn signal leveruntil you hear a click, then let go.
The blue high beam indicator will light (see page 57). To flash the high beams, pull the
turn signal lever back lightly, thenrelease it. The high beams will come
on and go off.
The high beams will stay on for as long as you hold the lever back, no
matter what position the headlightswitch is in.
Daytim e Runnin g Light s
(Canadia n Models )
With the headlight switch off, the high beam headlights come on with reduced brightness when you turn
the ignition switch to ON (II) and
release the parking brake. They
remain on until you turn the ignition off, even if you set the parking brake.
The headlights revert to normal operation when you turn them on
with the switch.
Instrument s an d Control s
Page 68 of 279
Control
s Nea r th e Steerin g Whee l
Rea r Windo w Wipe r an d Washe r
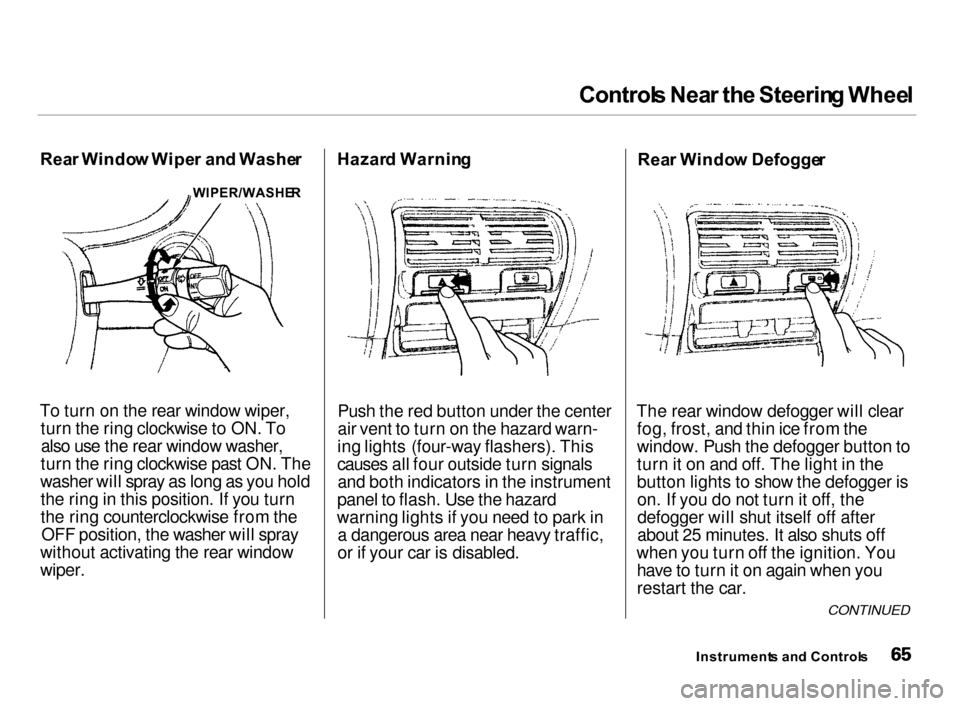
To turn on the rear window wiper, turn the ring clockwise to ON. Toalso use the rear window washer,
turn the ring clockwise past ON. The
washer will spray as long as you hold the ring in this position. If you turn
the ring counterclockwise from the OFF position, the washer will spray
without activating the rear window
wiper. Hazar
d Warnin g
Push the red button under the center
air vent to turn on the hazard warn-
ing lights (four-way flashers). This
causes all four outside turn signals and both indicators in the instrument
panel to flash. Use the hazard
warning lights if you need to park in a dangerous area near heavy traffic,
or if your car is disabled. Rea
r Windo w Defogge r
The rear window defogger will clear fog, frost, and thin ice from the
window. Push the defogger button to
turn it on and off. The light in the
button lights to show the defogger ison. If you do not turn it off, the
defogger will shut itself off after
about 25 minutes. It also shuts off
when you turn off the ignition. You have to turn it on again when you
restart the car.
Instrument s an d Control s
WIPER/WASHE
R
CONTINUED
Page 70 of 279
Control
s Nea r th e Steerin g Wheel , Steerin g Whee l Control s
2. Move the steering wheel to the desired position, making sure the
wheel points toward your chest, not toward your face. Make sure
you can see the instrument panel gauges and the indicator lights.
3. Push the lever up to lock the
steering wheel in that position.
4. Make sure you have securely locked the steering wheel in place
by trying to move it up and down. Cruis
e Contro l
LS, GS and GS-R models
Cruise control allows you to maintain
a set speed above 25 mph (40 km/h)
without keeping your foot on the accelerator pedal. It should be used
for cruising on straight, open
highways. It is not recommended for conditions such as city driving,
winding roads, slippery roads, heavy rain, or bad weather. You should
have full control of the car under
those conditions.
The cruise control, as it operates,
moves the accelerator pedal. You can damage your car's accelerator
mechanism by resting your foot under the pedal and blocking the movement.
CONTINUED
Instrument s an d Control s
Improper use of the cruise
control can lead to a crash.
Use the cruise control only
when traveling on open highways in good weather.
NOTIC
E