lock Acura Integra 2000 Hatchback Service Manual
[x] Cancel search | Manufacturer: ACURA, Model Year: 2000, Model line: Integra, Model: Acura Integra 2000Pages: 279, PDF Size: 3.57 MB
Page 145 of 279

Automati
c Transmissio n
Driv e (D 3) —This position is similar
to D4, except only the first three
gears are selected. Use D3 when
towing a trailer in hilly terrain, or to
provide engine braking when going down a steep hill. D3 can also keep
the transmission from cycling
between third and fourth gears in stop-and-go driving.
For faster acceleration when in D3 or
D4, you can get the transmission to
automatically downshift by pushing
the accelerator pedal to the floor.
The transmission will shift down one or two gears, depending on your
speed.
Secon d (2 ) — To shift to Second,
press the release button on the side of the shift lever. This position locks
the transmission in second gear. It does not downshift to first gear
when you come to a stop. Second
gives you more power when climbing, and increased engine braking when going down steep hills. Use second
gear when starting out on a slippery
surface or in deep snow. It will help
reduce wheelspin.
Firs t (1 ) — To shift from Second to
First, press the release button on the side of the shift lever. With the lever
in this position, the transmission
locks in First gear. By upshifting and downshifting through 1, 2, D3 and D4,
you can operate this transmission much like a manual transmission
without a clutch pedal. Engin
e Spee d Limite r
If you exceed the maximum speed
for the gear you are in, the engine speed will enter into the
tachometer's red zone. If this occurs, you may feel the engine
cut in and out. This is caused by a
limiter in the engine's computer
controls. The engine will run
normally when you reduce the
RPM below the red zone.
Drivin g
Page 146 of 279

Automati
c Transmissio n
Shif t Loc k Releas e
This allows you to move the shift lever out of Park if the normalmethod of pushing on the brake
pedal and pressing the release
button does not work.
1. Set the Parking brake.
2. Remove the key from the ignition
switch.
3. Put a cloth on the edge of the Shift Lock Release slot cover next to
the shift lever.
Use a small flat-tipped screwdriver
or small metal plate (neither are
included in the tool kit) to remove
the cover. Carefully pry off the
edge of the cover. 4. Insert the key in the Shift Lock
Release slot.
5. Push down on the key while you press the release button on theshift lever and move the shift lever
out of Park to Neutral. 6. Remove the key from the shift
lock release slot, then reinstall the
cover.
Depress the brake pedal and
restart the engine.
If you need to use the Shift Lock
Release, it means your car is
developing a problem. Have the car
checked by your Acura dealer.
Driving
RELEAS
E BUTTO N
SHIF T LOC K
RELEAS E SLO T
Page 147 of 279

Parkin
g
Always use the parking brake when you park your car. The indicator onthe instrument panel shows that the
parking brake is not fully released; it does not indicate that the parking
brake is firmly set. Make sure the
parking brake is set firmly or your car may roll if it is parked on an
incline.
If your car has an automatic
transmission, set the parking brake
before you put the transmission inPark. This keeps the car frommoving and putting pressure on the
parking mechanism in the
transmission — making it easier to move the shift lever out of Park
when you want to drive away. If the car is facing uphill, turn the
front wheels away from the curb. If
you have a manual transmission, put it in first gear.
If the car is facing downhill, turn the
front wheels toward the curb. If you
have a manual transmission, put it in reverse gear.
Make sure the parking brake is fully
released before driving away.
Driving with the parking brake
partially set can overheat or damagethe rear brakes. Parkin
g Tip s Make sure the moonroof and the
windows are closed.
Turn off the lights. Place any packages, valuables, etc.,
in the cargo area or take them
with you.
Lock the doors.
Never park over dry leaves, tall
grass, or other flammable materials. The three way catalytic
converter gets very hot, and could
cause these materials to catch on
fire.
Drivin g
Page 149 of 279
Th
e Brakin g Syste m
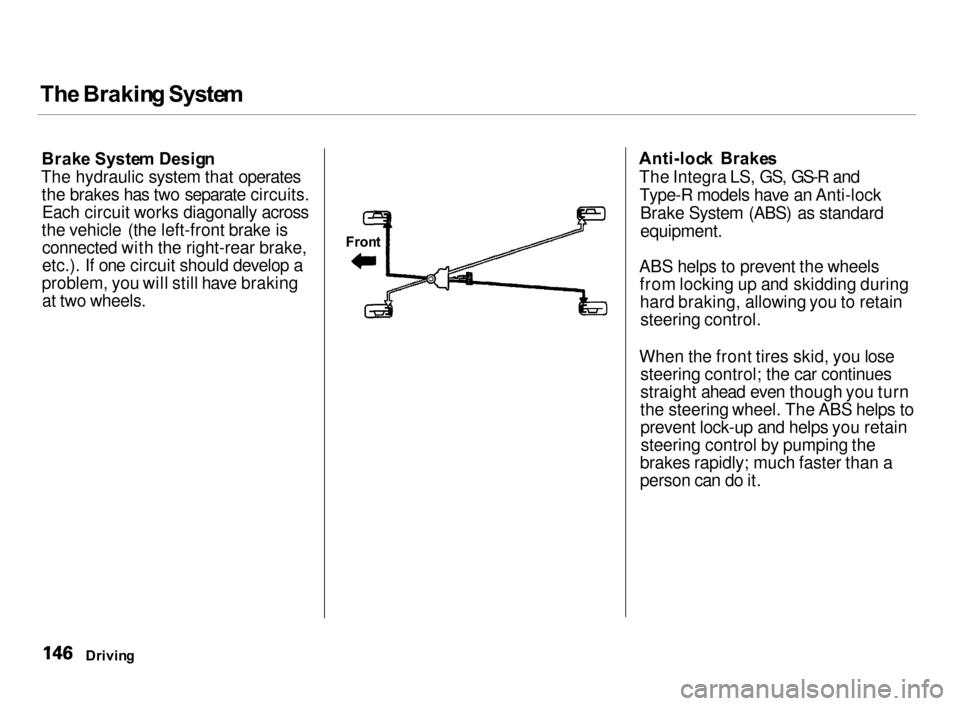
Brak e Syste m Desig n
The hydraulic system that operates the brakes has two separate circuits.Each circuit works diagonally across
the vehicle (the left-front brake is connected with the right-rear brake,
etc.). If one circuit should develop a
problem, you will still have braking at two wheels.
Fron
t
Anti-loc
k Brake s
The Integra LS, GS, GS-R and Type-R models have an Anti-lock Brake System (ABS) as standard
equipment.
ABS helps to prevent the wheels from locking up and skidding duringhard braking, allowing you to retainsteering control.
When the front tires skid, you lose steering control; the car continues
straight ahead even though you turn
the steering wheel. The ABS helps to
prevent lock-up and helps you retainsteering control by pumping the
brakes rapidly; much faster than a
person can do it.
Drivin g
Page 150 of 279

Th
e Brakin g Syste m
Yo u shoul d neve r pum p th e
brak e pedal , this defeats the
purpose of the ABS. Let the ABS
work for you by always keeping firm, steady pressure on the brake pedal
as you steer away from the hazard.
This is sometimes referred to as
"stomp and steer."
You will feel a pulsation in the brake pedal when the ABS activates, and
you may hear some noise. This is normal, it is the ABS rapidly
pumping the brakes.
Activation varies with the amount of traction your tires have. On dry
pavement, you will need to press on
the brake pedal very hard before you activate the ABS. However, you may
feel the ABS activate immediately if
you are trying to stop on snow or ice.
Important Safety Reminders
AB S doe s no t reduc e th e tim e o r
distanc e i t take s t o sto p th e car , it
only helps with steering control
during braking. You should always
maintain a safe following distance
from other vehicles.
AB S wil l no t preven t a ski d tha t
result s fro m changin g directio n
abruptly , such as trying to take a
corner too fast or making a sudden
lane change. Always drive at a safe,
prudent speed for the road and
weather conditions.
AB S canno t preven t a los s o f
stability . Always steer moderately
when you are braking hard. Severe or sharp steering wheel movement
can still cause your car to veer into
oncoming traffic or off the road. A
vehicl e wit h AB S ma y requir e a
longe r distanc e t o sto p on loose or
uneven surfaces, such as gravel or snow, than a vehicle without anti-
lock. Slow down and allow a greater distance between vehicles under
those conditions.
CONTINUED
Drivin g
Page 151 of 279
Th
e Brakin g System , Limite d Sli p Differentia l
ABS Indicator
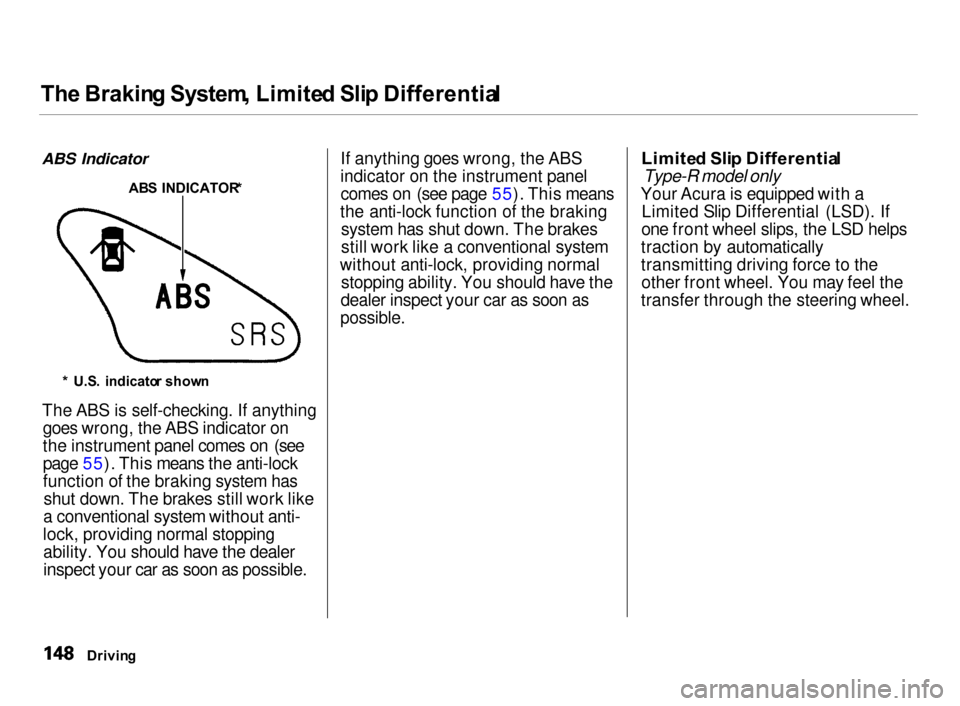
The ABS is self-checking. If anything goes wrong, the ABS indicator on
the instrument panel comes on (see
page 55). This means the anti-lock
function of the braking system hasshut down. The brakes still work like
a conventional system without anti-
lock, providing normal stopping ability. You should have the dealer
inspect your car as soon as possible. If anything goes wrong, the ABS
indicator on the instrument panel comes on (see page 55). This means
the anti-lock function of the braking system has shut down. The brakes
still work like a conventional system
without anti-lock, providing normal stopping ability. You should have the
dealer inspect your car as soon as
possible.
Limite
d Sli p Differentia l
Type-R model only
Your Acura is equipped with a Limited Slip Differential (LSD). If
one front wheel slips, the LSD helps
traction by automatically
transmitting driving force to the other front wheel. You may feel the
transfer through the steering wheel.
Drivin gAB
S INDICATOR *
* U.S . indicato r show n
Page 153 of 279
Drivin
g in Ba d Weathe r
Tractio n — Check your tires
frequently for wear and proper
pressure. Both are important in
preventing "hydroplaning" (loss of
traction on a wet surface). In the
winter, mount snow tires on all four
wheels for the best handling.
Watch road conditions carefully, they can change from moment to
moment. Wet leaves can be as slip-
pery as ice. "Clear" roads can have
patches of ice. Driving conditionscan be very hazardous when theoutside temperature is near freezing.
The road surface can become covered with areas of water puddles
mixed with areas of ice, so your
traction can change without warning.
Be careful when downshifting. If
traction is low, you can lock up the drive wheels for a moment and cause
a skid.
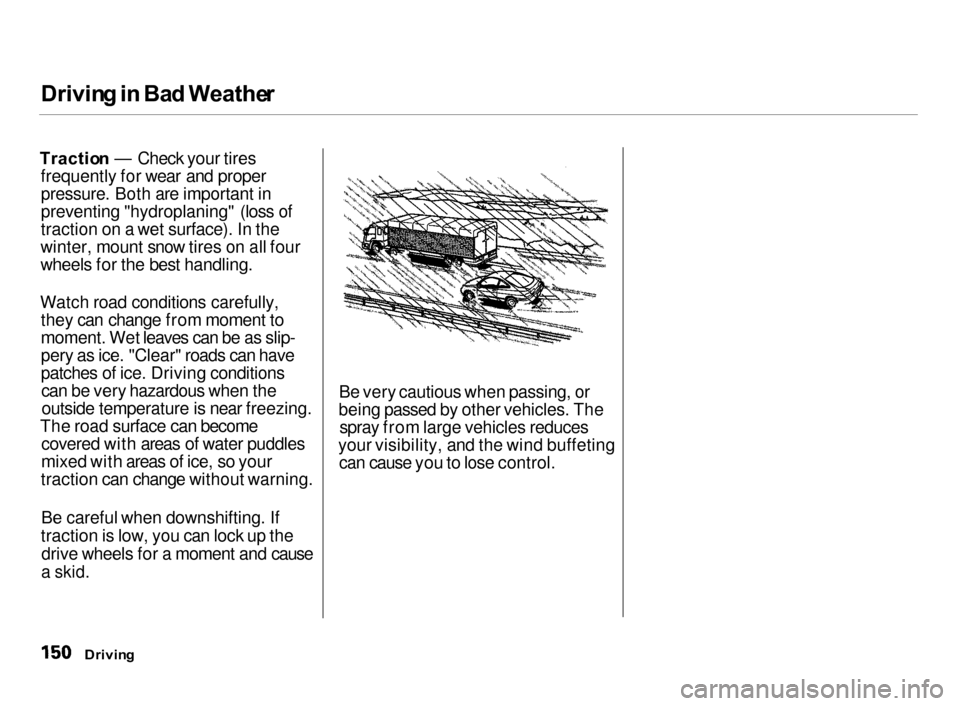
Be very cautious when passing, or
being passed by other vehicles. The spray from large vehicles reduces
your visibility, and the wind buffeting can cause you to lose control.
Drivin g
Page 180 of 279
Coolin
g Syste m
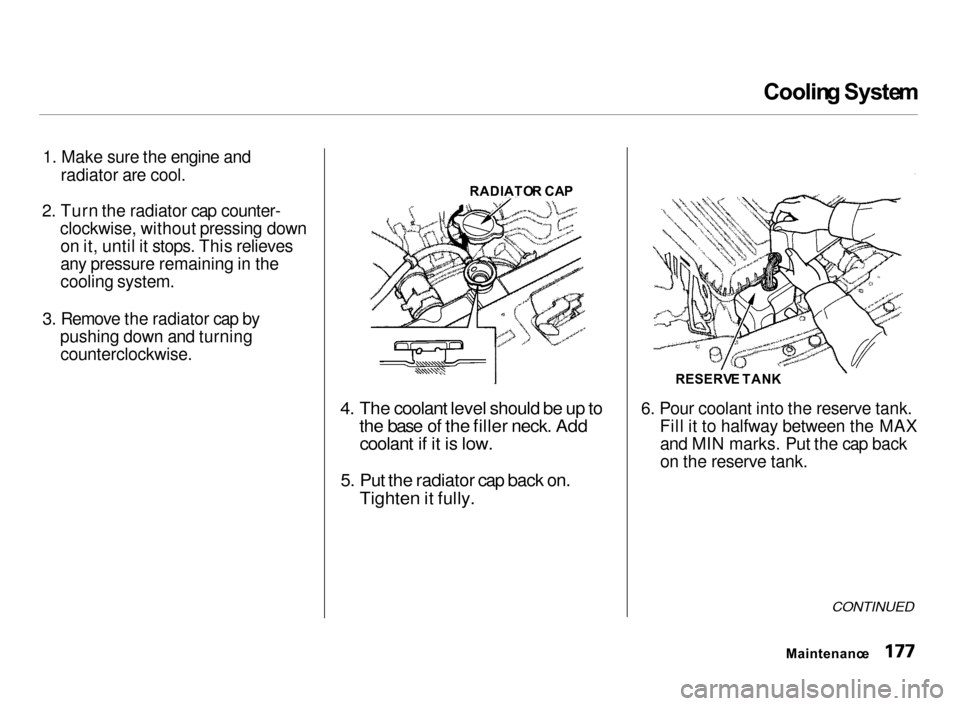
1. Make sure the engine and
radiator are cool.
2. Turn the radiator cap counter-
clockwise, without pressing down on it, until it stops. This relieves
any pressure remaining in the
cooling system.
3. Remove the radiator cap by
pushing down and turningcounterclockwise.
4. The coolant level should be up to
the base of the filler neck. Add
coolant if it is low.
5. Put the radiator cap back on.
Tighten it fully.
6. Pour coolant into the reserve tank.
Fill it to halfway between the MAXand MIN marks. Put the cap back
on the reserve tank.
CONTINUED
Maintenanc e
RESERV
E TAN K
RADIATO
R CA P
Page 181 of 279
Coolin
g Syste m
Do not add any rust inhibitors or other additives to your car's cooling
system. They may not be compatible
with the coolant or engine compo-
nents.
Replacin g Engin e Coolan t
The cooling system should be completely drained and refilled with
new coolant according to the time
and distance recommendations in
the maintenance schedule. Only use Genuine Honda Antifreeze/Coolant.
Draining the coolant requires access
to the underside of the car. Unless
you have the tools and knowledge,
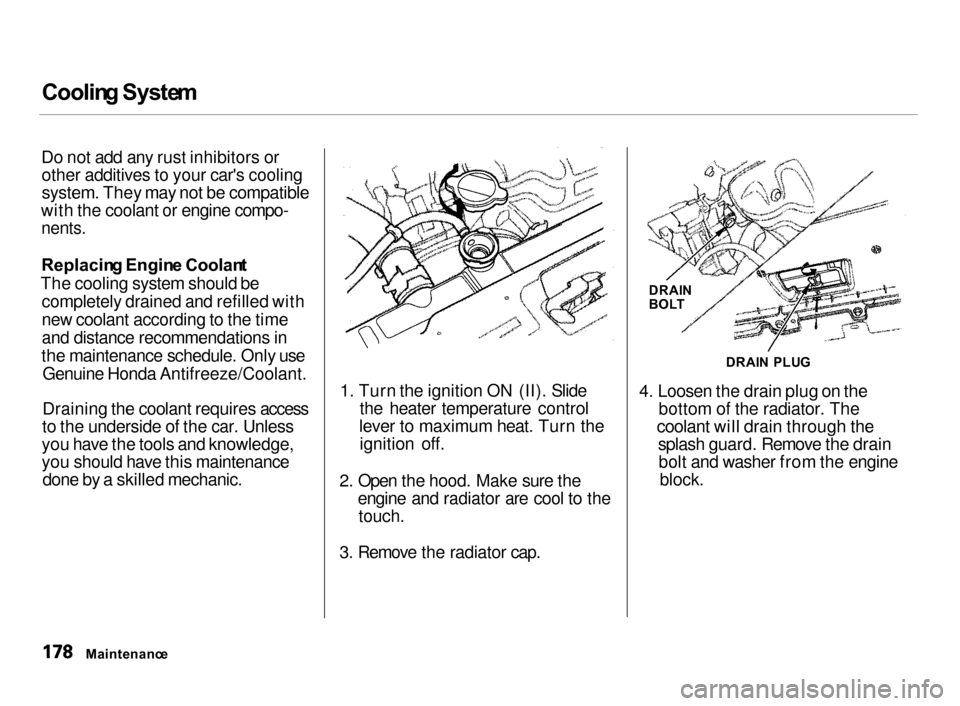
you should have this maintenance done by a skilled mechanic. 1. Turn the ignition ON (II). Slidethe heater temperature control
lever to maximum heat. Turn the ignition off.
2. Open the hood. Make sure the
engine and radiator are cool to the touch.
3. Remove the radiator cap. 4. Loosen the drain plug on the
bottom of the radiator. The
coolant will drain through the splash guard. Remove the drainbolt and washer from the engine block.
Maintenanc e DRAI
N PLU G
DRAI
N
BOL T
Page 182 of 279
Coolin
g Syste m
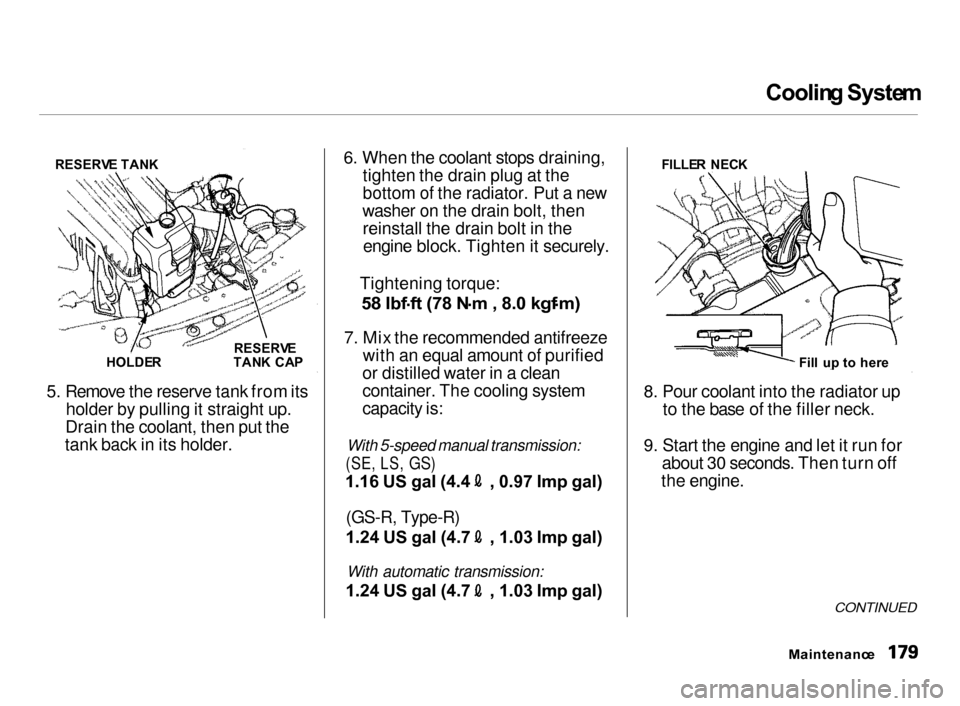
5. Remove the reserve tank from itsholder by pulling it straight up.
Drain the coolant, then put the
tank back in its holder.
6. When the coolant stops draining,
tighten the drain plug at the
bottom of the radiator. Put a new
washer on the drain bolt, then reinstall the drain bolt in theengine block. Tighten it securely.
Tightening torque:
58 Ibf .
ft (78 N .
m , 8.0 kgf .
m)
7. Mix the recommended antifreeze
with an equal amount of purified
or distilled water in a clean
container. The cooling system
capacity is:
With 5-speed manual transmission:
(SE,
LS,
GS)
1.16 US gal (4.4 , 0.97 Imp gal)
(GS-R, Type-R)
1.24 US gal (4.7 , 1.03 Imp gal)
With automatic transmission:
1.24 US gal (4.7 , 1.03 Imp gal)
8. Pour coolant into the radiator up
to the base of the filler neck.
9. Start the engine and let it run for
about 30 seconds. Then turn off
the engine.
CONTINUED
Maintenanc e
HOLDE
R RESERV
E
TAN K CA P
RESERV
E TAN K
Fill u p t o her e
FILLE
R NEC K