audio Acura MDX 2009 Workshop Manual
[x] Cancel search | Manufacturer: ACURA, Model Year: 2009, Model line: MDX, Model: Acura MDX 2009Pages: 489, PDF Size: 11.91 MB
Page 245 of 489

SEEK/SKIP-Press and hold the
+ button to move forward; you will
see the time elapsed shown in the
overhead screen advancing rapidly.
Press and hold the -button to move
backward; you will see the time
elapsed shown in the overhead
screen decreasing. Release the
button when the system reaches the
point you want.
Each time you press the +button
and release it, the system skips
forward to the beginning of the next
track or chapter. Press and release
the -button to skip backward to the
beginning of the current track. Press
and release it again to skip to the
beginning of the previous track or
chapter. EJECT
-Press the eject button to
remove the DVD from the drive.
To Return to Front Audio Controls
To return front panel control to the
front audio system. Press the
FRONT SOURCE button. You will
hear a beep and the indicator in the
button comes on. The indicator also
comes on automatically, when you do
not operate the rear entertainment
system for 10 seconds. Using the Rear Control Panel
To turn on the rear entertainment
system from the rear control panel,
press the PWR button. Use the AM/
FM button, XM RADIO button, 6
DISC button, DVD button, or AUX
button to select the entertainment
source. The selected source will be
shown in the display. Make sure the
rear control operation has not been
disabled with the REAR CTRL button
on the front panel. When the audio
system is off or the front side rear
power is off, the rear control panel
cannot be turned on.
CONTINUED
Rear Entertainment System
241
Feat ures
08/06/06 16:58:07 09 ACURA MDX MMC North America Owner's M 50 31STX620 enu
2009 MDX
Page 246 of 489
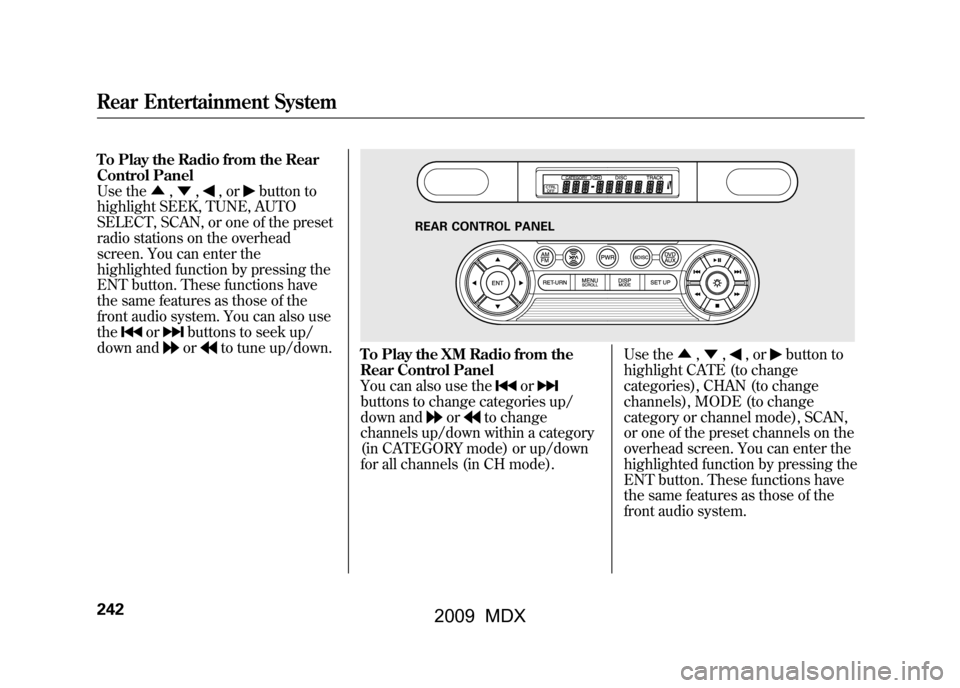
To Play the Radio from the Rear
Control Panel
Use the▲,▼ ,
,or
button to
highlight SEEK, TUNE, AUTO
SELECT, SCAN, or one of the preset
radio stations on the overhead
screen. You can enter the
highlighted function by pressing the
ENT button. These functions have
the same features as those of the
front audio system. You can also use
the
or
buttons to seek up/
down andor
to tune up/down.
To Play the XM Radio from the
Rear Control Panel
You can also use the
or
buttons to change categories up/
down and
or
to change
channels up/down within a category
(in CATEGORY mode) or up/down
for all channels (in CH mode). Use the
▲,▼ ,
,or
button to
highlight CATE (to change
categories), CHAN (to change
channels), MODE (to change
category or channel mode), SCAN,
or one of the preset channels on the
overhead screen. You can enter the
highlighted function by pressing the
ENT button. These functions have
the same features as those of the
front audio system.
REAR CONTROL PANEL
Rear Entertainment System24208/06/06 16:58:07 09 ACURA MDX MMC North America Owner's M 50 31STX620 enu
2009 MDX
Page 247 of 489

While the overhead screen is closed,
you can see the XM radio
information in the subsidiary display
in the ceiling. Pressing the DISP
MODE button repeatedly changes
the subsidiary display from the
channel number, to the category
name, to the music title, to the artist
name, and to the channel name, and
then back to the channel number.
To change mode, press and hold the
DISP MODE button for 5 seconds.To Play a Disc in the 6-Disc
Changer from the Rear Control
Panel
If discs are loaded in the disc
changer, select them by pressing the
6 DISC button.
Use the
▲,▼ ,
,or
button to
highlight REPEAT, RANDOM,
SCAN,
,
(skip),
,or
(cue) on the overhead screen. You
can enter the highlighted function by
pressing the ENT button. These
functions have the same features as
those of the front audio system. To change the disc currently playing,
use the
▲,▼ ,
,or
button to
highlight your selected disc icon, and
press ENT.
If CDs are loaded in the CD changer
and the overhead screen is not open,
pressing the ▲or▼ button changes
the discs.CONTINUED
Rear Entertainment System
243
Feat ures
08/06/06 16:58:07 09 ACURA MDX MMC North America Owner's M 50 31STX620 enu
2009 MDX
Page 249 of 489
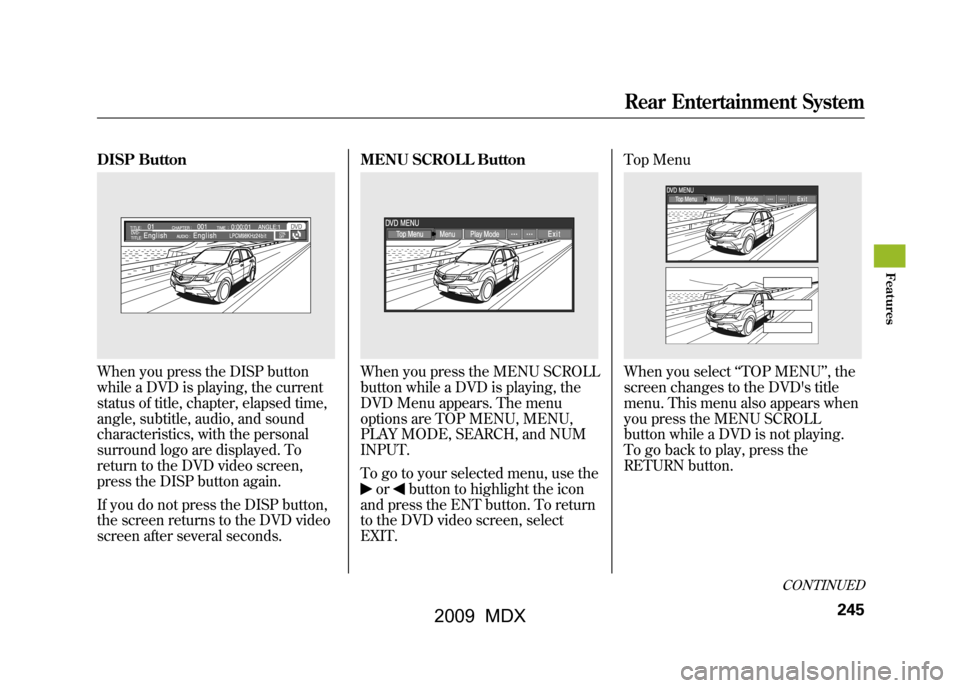
DISP ButtonWhen you press the DISP button
while a DVD is playing, the current
status of title, chapter, elapsed time,
angle, subtitle, audio, and sound
characteristics, with the personal
surround logo are displayed. To
return to the DVD video screen,
press the DISP button again.
If you do not press the DISP button,
the screen returns to the DVD video
screen after several seconds.MENU SCROLL Button
When you press the MENU SCROLL
button while a DVD is playing, the
DVD Menu appears. The menu
options are TOP MENU, MENU,
PLAY MODE, SEARCH, and NUM
INPUT.
To go to your selected menu, use the
or
button to highlight the icon
and press the ENT button. To return
to the DVD video screen, select
EXIT. Top Menu
When you select
‘‘TOP MENU ’’, the
screen changes to the DVD's title
menu. This menu also appears when
you press the MENU SCROLL
button while a DVD is not playing.
To go back to play, press the
RETURN button.
CONTINUED
Rear Entertainment System
245
Feat ures
08/06/06 16:58:07 09 ACURA MDX MMC North America Owner's M 50 31STX620 enu
2009 MDX
Page 250 of 489
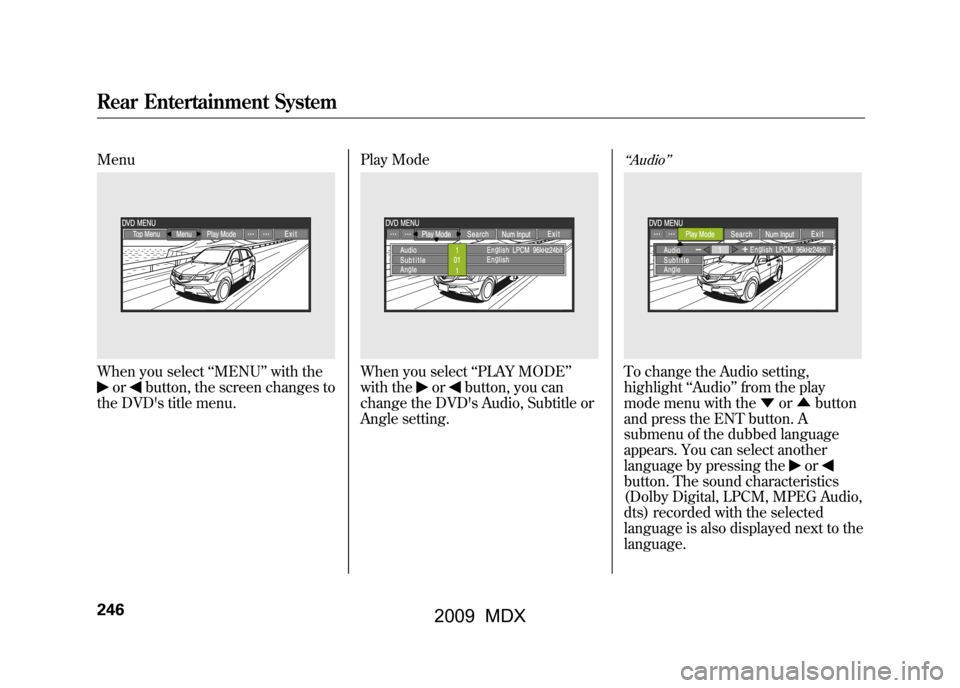
MenuWhen you select‘‘MENU ’’with the
or
button, the screen changes to
the DVD's title menu. Play Mode
When you select
‘‘PLAY MODE’’
with the
or
button, you can
change the DVD's Audio, Subtitle or
Angle setting.
‘‘ Audio ’’To change the Audio setting,
highlight ‘‘Audio ’’from the play
mode menu with the ▼or▲ button
and press the ENT button. A
submenu of the dubbed language
appears. You can select another
language by pressing the
or
button. The sound characteristics
(Dolby Digital, LPCM, MPEG Audio,
dts) recorded with the selected
language is also displayed next to the
language.
Rear Entertainment System24608/06/06 16:58:07 09 ACURA MDX MMC North America Owner's M 50 31STX620 enu
2009 MDX
Page 260 of 489
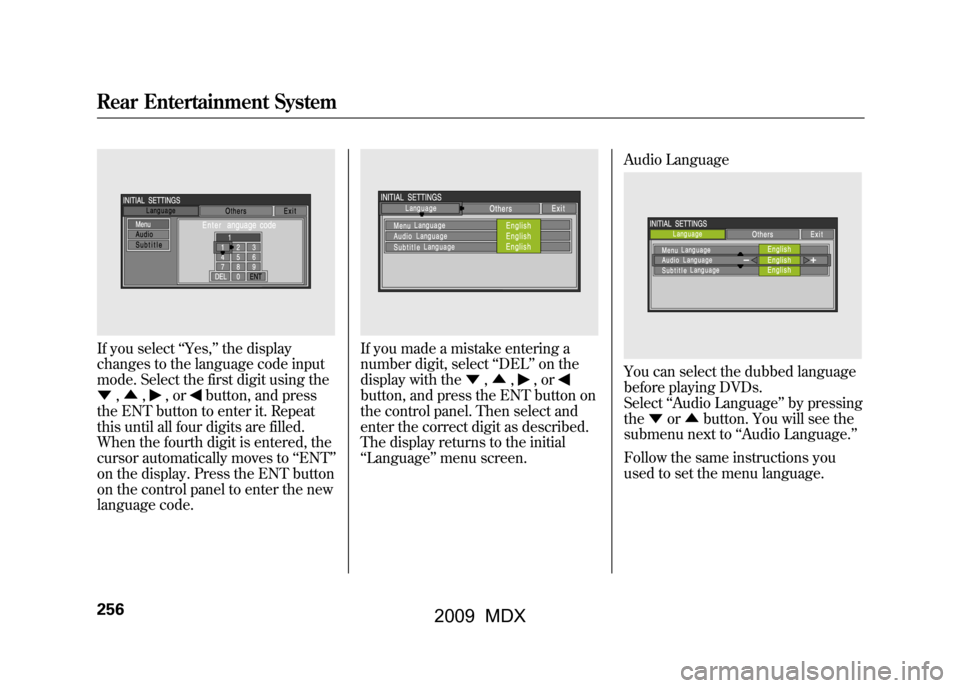
If you select‘‘Yes, ’’the display
changes to the language code input
mode. Select the first digit using the
▼ ,▲ ,
,or
button, and press
the ENT button to enter it. Repeat
this until all four digits are filled.
When the fourth digit is entered, the
cursor automatically moves to ‘‘ENT ’’
on the display. Press the ENT button
on the control panel to enter the new
language code.
If you made a mistake entering a
number digit, select ‘‘DEL ’’on the
display with the ▼,▲ ,
,or
button, and press the ENT button on
the control panel. Then select and
enter the correct digit as described.
The display returns to the initial
‘‘Language ’’menu screen. Audio Language
You can select the dubbed language
before playing DVDs.
Select
‘‘Audio Language ’’by pressing
the ▼or▲ button. You will see the
submenu next to ‘‘Audio Language. ’’
Follow the same instructions you
used to set the menu language.
Rear Entertainment System25608/06/06 16:58:07 09 ACURA MDX MMC North America Owner's M 50 31STX620 enu
2009 MDX
Page 269 of 489

DVD Player Error Messages
The chart on the right explains the
error messages you may see in the
display while playing a disc.
If you see an error message in the
display while playing a disc, press
the eject button. After ejecting the
disc, check it for damage or
deformation. If there is no damage,
insert the disc again.
The audio system will try to play the
disc. If there is still a problem, the
error message will reappear. Press
the eject button, and pull out the
disc.
Insert a different disc. If the new disc
plays, there is a problem with the
first disc. If the error message cycle
repeats and you cannot clear it, take
your vehicle to a dealer.Error Message Cause
Solution
DISC ERRORFOCUS Error Press the disc eject button, and remove the disc.
Check for an error indication. Insert the disc again.
If the code does not disappear or the disc cannot be
removed, consult your dealer.
MECH ERROR Mechanical Error Press the disc eject button, and remove the disc.
Check for an error indication. Insert the disc again.
If the code does not disappear or the disc cannot be
removed, consult your dealer.
HEAT ERROR High Temperature Will disappear when the temperature returns to
normal.
REGION ERR Invalid region code The disc is not playable in this unit. Eject the disc,
and insert a disc compatible with this system.
PARENT ERR Invalid parental
control level Reinsert the disc, and increase the parental control
level (see page259).
CONTINUED
Rear Entertainment System
265
Feat ures
08/06/06 16:58:07 09 ACURA MDX MMC North America Owner's M 50 31STX620 enu
2009 MDX
Page 270 of 489
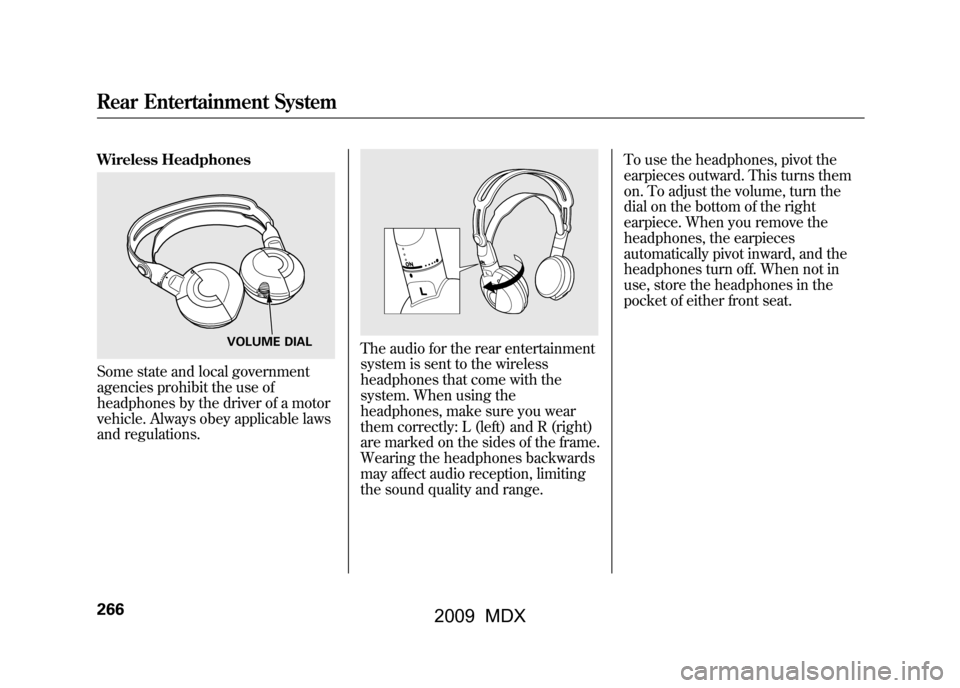
Wireless HeadphonesSome state and local government
agencies prohibit the use of
headphones by the driver of a motor
vehicle. Always obey applicable laws
and regulations.
The audio for the rear entertainment
system is sent to the wireless
headphones that come with the
system. When using the
headphones, make sure you wear
them correctly: L (left) and R (right)
are marked on the sides of the frame.
Wearing the headphones backwards
may affect audio reception, limiting
the sound quality and range.To use the headphones, pivot the
earpieces outward. This turns them
on. To adjust the volume, turn the
dial on the bottom of the right
earpiece. When you remove the
headphones, the earpieces
automatically pivot inward, and the
headphones turn off. When not in
use, store the headphones in the
pocket of either front seat.
VOLUME DIAL
Rear Entertainment System26608/06/06 16:58:07 09 ACURA MDX MMC North America Owner's M 50 31STX620 enu
2009 MDX
Page 272 of 489
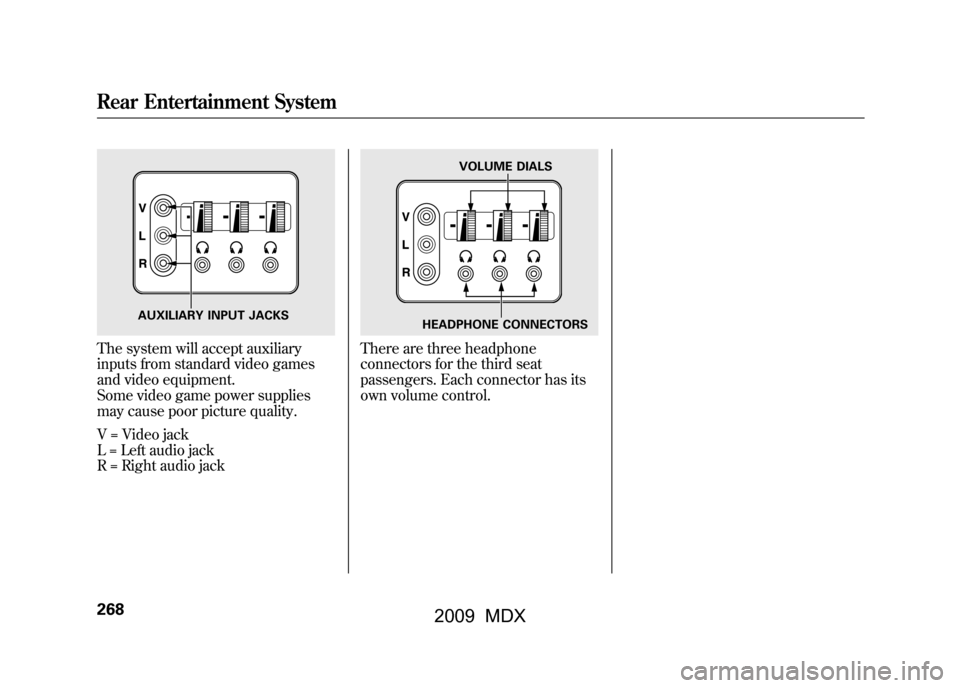
The system will accept auxiliary
inputs from standard video games
and video equipment.
Some video game power supplies
may cause poor picture quality.
V = Video jack
L = Left audio jack
R = Right audio jack
There are three headphone
connectors for the third seat
passengers. Each connector has its
own volume control.
AUXILIARY INPUT JACKS
VOLUME DIALS
HEADPHONE CONNECTORS
Rear Entertainment System26808/06/06 16:58:07 09 ACURA MDX MMC North America Owner's M 50 31STX620 enu
2009 MDX
Page 273 of 489

The security system helps to protect
your vehicle and valuables from
theft. The horn sounds and a
combination of headlights, position
lights, side marker lights and
taillights flashes if someone attempts
to break into your vehicle or remove
the audio unit. This alarm continues
for 2 minutes, then the system
resets. To reset an activated system
before the 2 minutes have elapsed,
unlock the driver's door with the key
or the remote transmitter.
The security system automatically
sets 15 seconds after you lock the
doors, hood, and the tailgate. For the
system to activate, you must lock the
doors and the tailgate from the
outside with the key, driver's lock
tab, door lock master switch, or
remote transmitter. The security
system indicator on the instrument
panel starts blinking immediately to
show you the system is setting itself.
Once the security system is set,
opening any door, the tailgate, or the
hood without using the key or the
remote transmitter, will cause it to
alarm. It also alarms if the radio is
removed from the dashboard or the
wiring is cut.The security system will not set if the
hood, tailgate, or any door is not fully
closed. If the system will not set,
check that the doors, the tailgate and
the hood are fully closed.
Do not attempt to alter this system or
add other devices to it.
SECURITY SYSTEM INDICATOR
Security System
269
Feat ures
08/06/06 16:58:07 09 ACURA MDX MMC North America Owner's M 50 31STX620 enu
2009 MDX