change time Acura MDX 2012 Owner's Guide
[x] Cancel search | Manufacturer: ACURA, Model Year: 2012, Model line: MDX, Model: Acura MDX 2012Pages: 621, PDF Size: 11.15 MB
Page 211 of 621
To Play a Disc
To load or play discs, the ignition
switch must be in the ACCESSORY
(I) or ON (II) position.
You operate the disc changer with
the same controls used for the radio.
To select the disc changer, press the
DISC button. You will see‘‘DISC’’in
the display. The disc and track
numbers, and the elapsed time are
shown in the display. You can also
select the displayed information with
the TITLE button (see page 205).
The system will continuously play a
disc until you change modes.Do not use discs with adhesive labels.
The label can curl up and cause the
disc to jam in the unit.This audio system can also play
CD-Rs and CD-RWs compressed in
MP3 or WMA formats. When playing
a disc in MP3, you will see‘‘MP3’’in
the display. In WMA format,‘‘WMA’’
will appear in the display. The disc,
folder and track numbers are
displayed. You can select up to 255
folders or tracks.
Video CDs and DVD discs do not
work in this unit.NOTE:
If a file on an MP3 or WMA disc is
protected by digital rights
management (DRM), the audio unit
displays FORMAT, and then skips to
the next file.
Depending on the software the files
were made with, it may not be
possible to play some files, or display
some text data.Playing Discs (Models without navigation system)204
Page 212 of 621
Loading DiscsYour vehicle's in-dash disc changer
holds up to six discs.
1. To load all disc, press the LOAD
button until you hear a beep and
see‘‘LOAD’’in the display. To load
only one disc, press and release
the LOAD button.
2. The disc number for an empty
position begins blinking.
3. Insert the disc into the disc slot
when the green disc load indicator
comes on. Insert it only about
halfway; the drive will pull it in the
rest of the way. You will see
‘‘BUSY’’in the display while the
disc load indicator turns red and
blinks as the disc is loaded.You cannot load and play 3-inch
(8-cm) discs in this unit.
4. When the disc load indicator turns
green and‘‘LOAD’’appears in the
display again, insert the next disc
in the slot. Do not try to insert a
disc until‘‘LOAD’’appears. You
could damage the audio unit.
5. Repeat this until all six positions
are loaded. If you are not loading
all six positions, the system begins
playing the last disc loaded.
You can also load a disc into an
empty position while a disc is playing
by pressing the appropriate preset
button. The system stops playing the
current disc and starts the loading
sequence. It then plays the disc just
loaded.
Text Data Display FunctionEach time you press the TITLE
button, the display shows you the
text data on a disc, if the disc was
recorded with text data.
You can see the album, artist, and
track name in the display. If a disc is
recorded in MP3 or WMA, you can
see the folder and file name, and the
album, artist, and track tag.
With the folder name, you will see
the FOLDER indicator in the display.
The TRACK indicator is shown with
the file or track name.
When you press and release the
TITLE button while a disc without
text data is playing, you will see‘‘NO
INFOMATION’’on the display.
The display shows up to about 16
characters of selected text data (the
folder name, file name, etc.).
CONTINUED
Playing Discs (Models without navigation system)
205
Features
Page 213 of 621
If the text data has more than 16
characters, you will see the first 15
characters and the>indicator in the
display. Press and hold the TITLE
button until the next 16 characters
are shown. You can see up to about
31 characters of the text data.
If you press and hold the TITLE
button again, the display shows the
first 16 characters again.
If any letter is not available, it is
replaced with‘‘.’’(dot) in the
display.
When the disc has no text data, you
will see‘‘NO INFORMATION’’on
the display.
You will also see some text data
under these conditions:●
When a new folder, file, or track is
selected.
●
When you change the audio mode
to play a disc with text data or in
MP3 or WMA.
●
When you insert a disc, and the
system begins to play.
When playing a CD-DA with text
data, the album and track name are
shown in the display. With a disc in
MP3 or WMA, the display shows the
folder and file name.
When you turn on the audio system
next time, the system keeps your
selection with the TITLE button.
To Change or Select Tracks/FilesUse the SKIP buttons while a disc is
playing to select passages and
change tracks (files in MP3 or WMA
mode).
In MP3 or WMA mode, use the
TUNE knob to select folders in the
disc and use either SKIP button to
change files.
To select a different disc, use the
appropriate preset buttons (1
through 6). If you select an empty
position, the system will go into the
loading sequence (see page 205).
SKIP-Each time you press and
release the
SKIP button, the
player skips forward to the beginning
of the next track (file in MP3 or
WMA mode). Press and release the
SKIP button to skip backward to
the beginning of the current track.
Press it again to skip to the
beginning of the previous track.
Playing Discs (Models without navigation system)206
Page 215 of 621
Each time you press and release the
RPT button, the mode changes from
file repeat to folder repeat, to disc
repeat then to normal playing.
RANDOM (Random within a disc)
-This feature plays the tracks
within a disc (the files in MP3 or
WMA mode) in random order. To
activate random play, press and
release the RDM button. In MP3 or
WMA mode, press the RDM button
repeatedly to select RDM (within a
disc random play). You will see RDM
in the display. Press the RDM button
for 2 seconds to return to normal
play.
In MP3 or WMA modeFOLDER RANDOM-This
feature, when activated, plays the
files within a current folder in
random order, rather than in the
order they are compressed in MP3
or WMA. To activate folder random
play, press and release the RDM
button repeatedly. You will see F-
RDM in the display. The system will
then select and play files randomly.
This continues until you deactivate
folder random play by pressing and
holding the RDM button again, or
you select a different folder with the
TUNE knob.
Each time you press and release the
RDM button, the mode changes from
folder random play, to within a disc
random play, then to normal play.SCAN-The SCAN function
samples all the tracks on the disc in
the order they are recorded on the
disc (all files in the selected folder in
MP3 or WMA mode). To activate the
scan feature, press and release the
SCAN button. You will see SCAN in
the display. You will get a 10 second
sampling of the track/file in each
disc/folder. Press and hold the
SCAN button to get out of scan mode
and play the last track sampled.
Playing Discs (Models without navigation system)208
Page 216 of 621
In MP3 or WMA modeF-SCAN-This feature, when
activated, samples the first file in
each folder on the disc in the order
they are recorded. To activate the
folder scan feature, press and release
the SCAN button repeatedly. You will
see F-SCAN in the display. The
system will then play the first file in
the main folders for about 10
seconds. If you do nothing, the
system will then play the following
first files for 10 seconds each. When
it plays a file that you want to
continue listening to, press and hold
the SCAN button.
Pressing either SKIP button, or
selecting a different disc (using the
preset buttons) or folder (using the
TUNE knob) turns off the SCAN or
F-SCAN feature.D-SCAN-This feature, when
activated, samples the first track in
each disc in order (the first file in the
main folder on each disc in MP3 or
WMA mode). To activate the disc
scan feature, press and release the
SCAN button repeatedly until
D-SCAN shows in the display. The
system will then play the first track/
file in the first main folder on the first
disc for about 10 seconds. If you do
nothing, the system will then play the
following first tracks/files for 10
seconds each. When it plays a track/
file that you want to continue
listening to, press and hold the
SCAN button again.When the first track in the last disc,
or the first file in the last main folder
in the last disc begins to play, the
disc scan mode will be canceled.
Pressing either skip button or
selecting a different folder with the
TUNE knob also turns off the scan
feature.
Each time you press and release the
SCAN button, the mode changes
from scan, disc scan, then to normal
playing.
In MP3 or WMA modeEach time you press and release the
SCAN button, the mode changes
from file scan, folder scan, disc scan,
then to normal playing.
CONTINUED
Playing Discs (Models without navigation system)
209
Features
Page 221 of 621
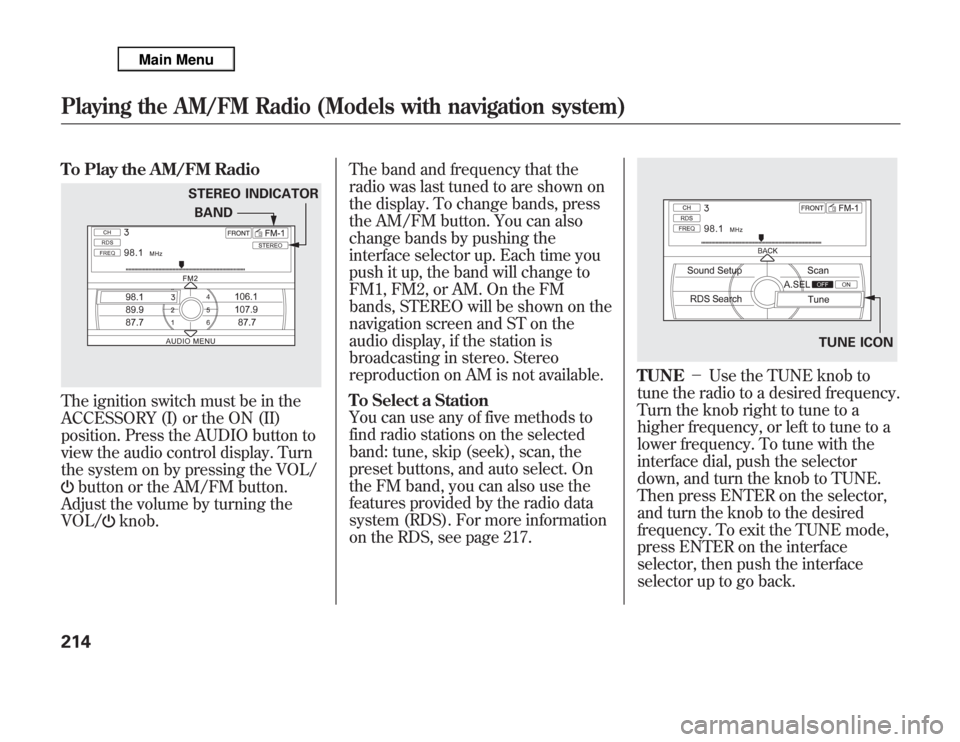
To Play the AM/FM RadioThe ignition switch must be in the
ACCESSORY (I) or the ON (II)
position. Press the AUDIO button to
view the audio control display. Turn
the system on by pressing the VOL/
button or the AM/FM button.
Adjust the volume by turning the
VOL/
knob.The band and frequency that the
radio was last tuned to are shown on
the display. To change bands, press
the AM/FM button. You can also
change bands by pushing the
interface selector up. Each time you
push it up, the band will change to
FM1, FM2, or AM. On the FM
bands, STEREO will be shown on the
navigation screen and ST on the
audio display, if the station is
broadcasting in stereo. Stereo
reproduction on AM is not available.
To Select a Station
You can use any of five methods to
find radio stations on the selected
band: tune, skip (seek), scan, the
preset buttons, and auto select. On
the FM band, you can also use the
features provided by the radio data
system (RDS). For more information
on the RDS, see page 217.
TUNE-Use the TUNE knob to
tune the radio to a desired frequency.
Turn the knob right to tune to a
higher frequency, or left to tune to a
lower frequency. To tune with the
interface dial, push the selector
down, and turn the knob to TUNE.
Then press ENTER on the selector,
and turn the knob to the desired
frequency. To exit the TUNE mode,
press ENTER on the interface
selector, then push the interface
selector up to go back.
STEREO INDICATOR
BAND
TUNE ICON
Playing the AM/FM Radio (Models with navigation system)214
Page 234 of 621
Your vehicle is capable of receiving
XM
®Radio anywhere in the United
States, and Canada, except Hawaii,
Alaska and Puerto Rico. XM is a
registered trademark of Sirius XM
Radio, Inc. and XM CANADA
®is a
registered business name of
Canadian Satellite Radio Inc.
XM Radio receives signals from two
satellites to produce clear, high-
quality digital reception. It offers
many channels in several categories.
Along with a large selection of
different types of music, XM Radio
also allows you to view channel and
category selections in the audio
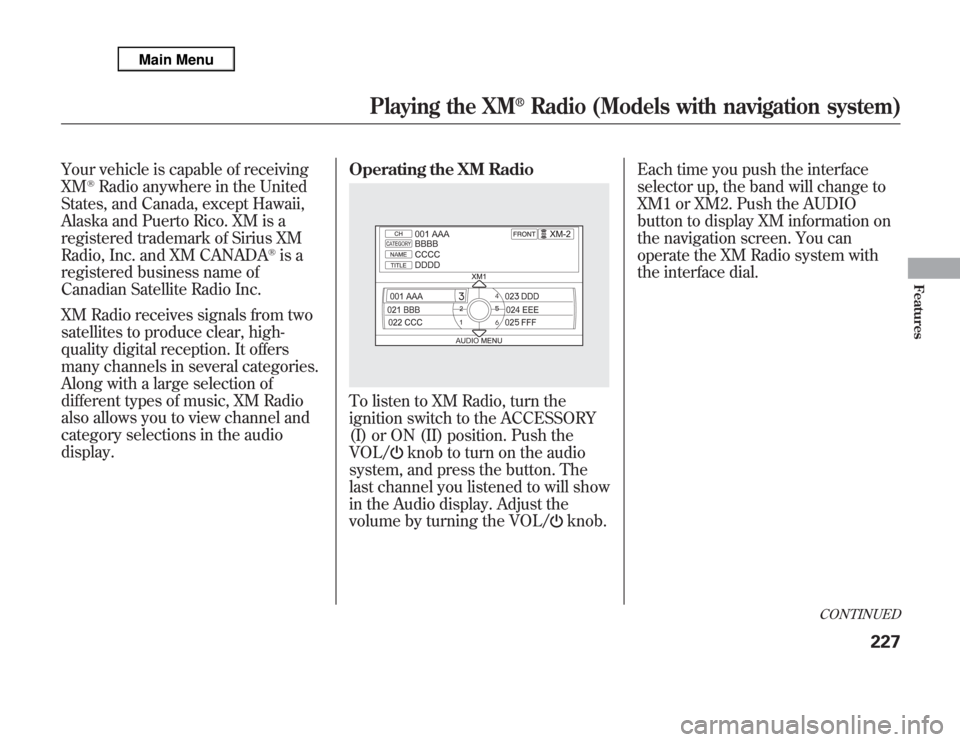
display.Operating the XM Radio
To listen to XM Radio, turn the
ignition switch to the ACCESSORY
(I) or ON (II) position. Push the
VOL/
knob to turn on the audio
system, and press the button. The
last channel you listened to will show
in the Audio display. Adjust the
volume by turning the VOL/
knob.Each time you push the interface
selector up, the band will change to
XM1 or XM2. Push the AUDIO
button to display XM information on
the navigation screen. You can
operate the XM Radio system with
the interface dial.
CONTINUED
Playing the XM
®
Radio (Models with navigation system)
227
Features
Page 235 of 621
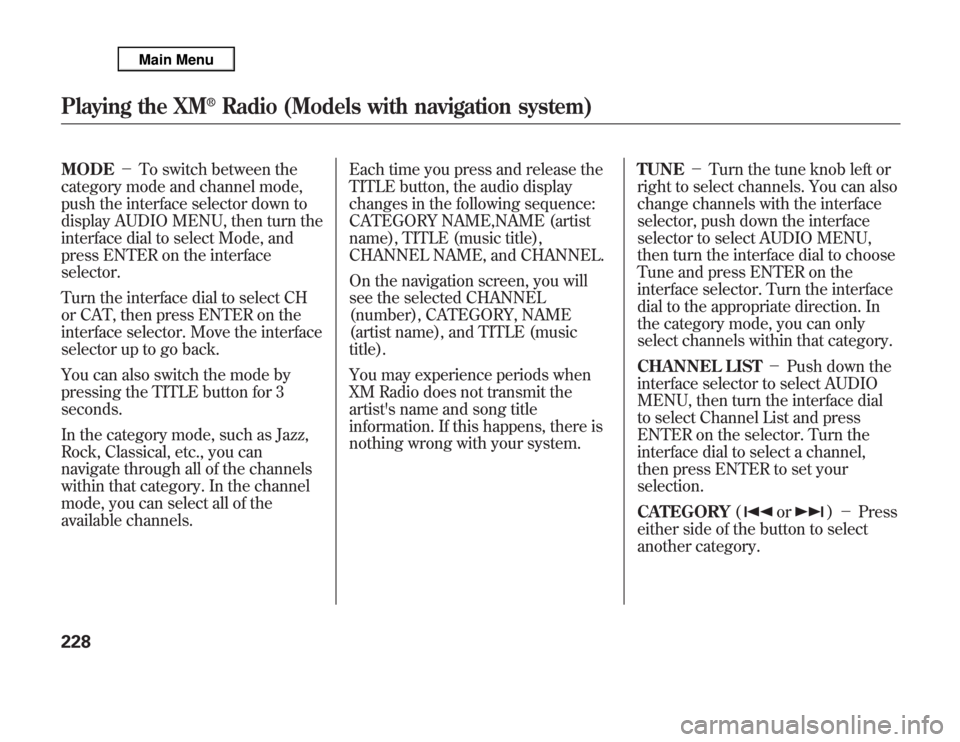
MODE-To switch between the
category mode and channel mode,
push the interface selector down to
display AUDIO MENU, then turn the
interface dial to select Mode, and
press ENTER on the interface
selector.
Turn the interface dial to select CH
or CAT, then press ENTER on the
interface selector. Move the interface
selector up to go back.
You can also switch the mode by
pressing the TITLE button for 3
seconds.
In the category mode, such as Jazz,
Rock, Classical, etc., you can
navigate through all of the channels
within that category. In the channel
mode, you can select all of the
available channels.Each time you press and release the
TITLE button, the audio display
changes in the following sequence:
CATEGORY NAME,NAME (artist
name), TITLE (music title),
CHANNEL NAME, and CHANNEL.
On the navigation screen, you will
see the selected CHANNEL
(number), CATEGORY, NAME
(artist name), and TITLE (music
title).
You may experience periods when
XM Radio does not transmit the
artist's name and song title
information. If this happens, there is
nothing wrong with your system.TUNE-Turn the tune knob left or
right to select channels. You can also
change channels with the interface
selector, push down the interface
selector to select AUDIO MENU,
then turn the interface dial to choose
Tune and press ENTER on the
interface selector. Turn the interface
dial to the appropriate direction. In
the category mode, you can only
select channels within that category.
CHANNEL LIST-Push down the
interface selector to select AUDIO
MENU, then turn the interface dial
to select Channel List and press
ENTER on the selector. Turn the
interface dial to select a channel,
then press ENTER to set your
selection.
CATEGORY(
or
)-Press
either side of the button to select
another category.
Playing the XM
®
Radio (Models with navigation system)
228
Page 239 of 621
Depending on where you drive, you
may experience reception problems.
Interference can be caused by any of
these conditions:●
Driving on the north side of an
east/west mountain road.
●
Driving on the north side of a large
commercial truck on an east/west
road.
●
Driving in tunnels.
●
Driving on a road beside a vertical
wall, steep cliff, or hill to the south
of you.
●
Driving on the lower level of a
multi-tiered road.
●
Driving on a single lane road
alongside dense trees taller than
50 ft. (15 m) to the south of you.
There may be other geographic
situations that could affect XM Radio
reception.
As required by the FCC:
Changes or modifications not expressly
approved by the party responsible for
compliance could void the user's
authority to operate the equipment.
This Category II radiocommunication
device complies with Industry Canada
Standard RSS-310.
Operation is subject to the following two
conditions: (1) this device may not cause
interference, and (2) this device must
accept any interference, including
interference that may cause undesired
operation of the device.Note Function
If equipped
This function stores the sound
content played on the selected XM
satellite radio station with the
channel, category, name, and title
information.
To activate this function, press and
hold the
button for about 2
seconds while a song or passage
which you want to store is playing.
You can record for up to 10 seconds.
To stop recording, press the AM/
FM button or
button.
Once you store the recorded sound
file, you can replay it and confirm the
information. The system can store up
to 30 sound files. If you continue to
store more files, the oldest one will
be deleted each time you add a new
file.
Playing the XM
®
Radio (Models with navigation system)
232
Page 245 of 621
Each time you press the TITLE
button, the audio display changes
from artist name to album name, to
track name and then to normal
display that shows the track number
and the elapsed time. When playing a
disc in MP3/WMA/AAC, the display
mode changes from folder name, to
file name, to artist tag, to album tag,
to track tag, and then to normal
display.To Change Tracks
Each time you press and release the
side of the skip button, the
player skips forward to the beginning
of the next track. Press and release
the
side of the skip button to
skip backward to the beginning of
the current track. Press the
side
again to skip to the previous track.
To move rapidly within a track, press
and hold either side of the skip
button.
When you insert a CD for the first
time, the system automatically starts
recording to the hard disc. For
information on recording from music
CDs, see page 253.To Choose a Track
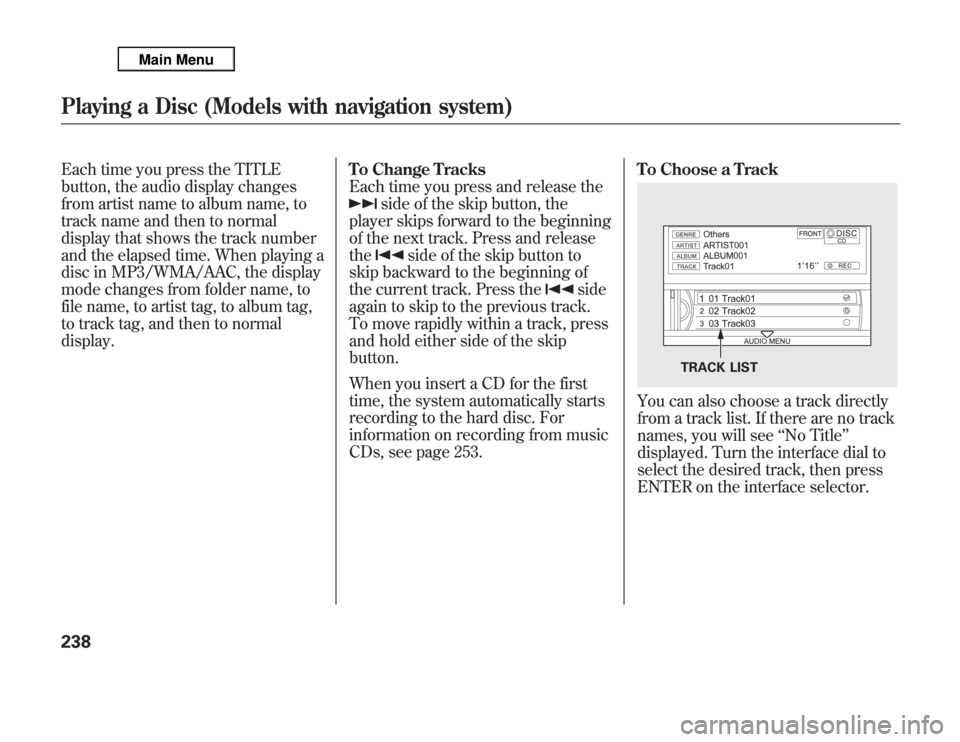
You can also choose a track directly
from a track list. If there are no track
names, you will see‘‘No Title’’
displayed. Turn the interface dial to
select the desired track, then press
ENTER on the interface selector.
TRACK LIST
Playing a Disc (Models with navigation system)238