back up Acura MDX 2015 Owner's Guide
[x] Cancel search | Manufacturer: ACURA, Model Year: 2015, Model line: MDX, Model: Acura MDX 2015Pages: 505, PDF Size: 18.62 MB
Page 65 of 505
64
uuChild Safety uSafety of Larger Children
Safe Driving
Safety of Larger ChildrenThe following pages give instructi ons on how to check proper seat belt fit, what kind
of booster seat to use if one is needed, and important precautions for a child who
must sit in front.
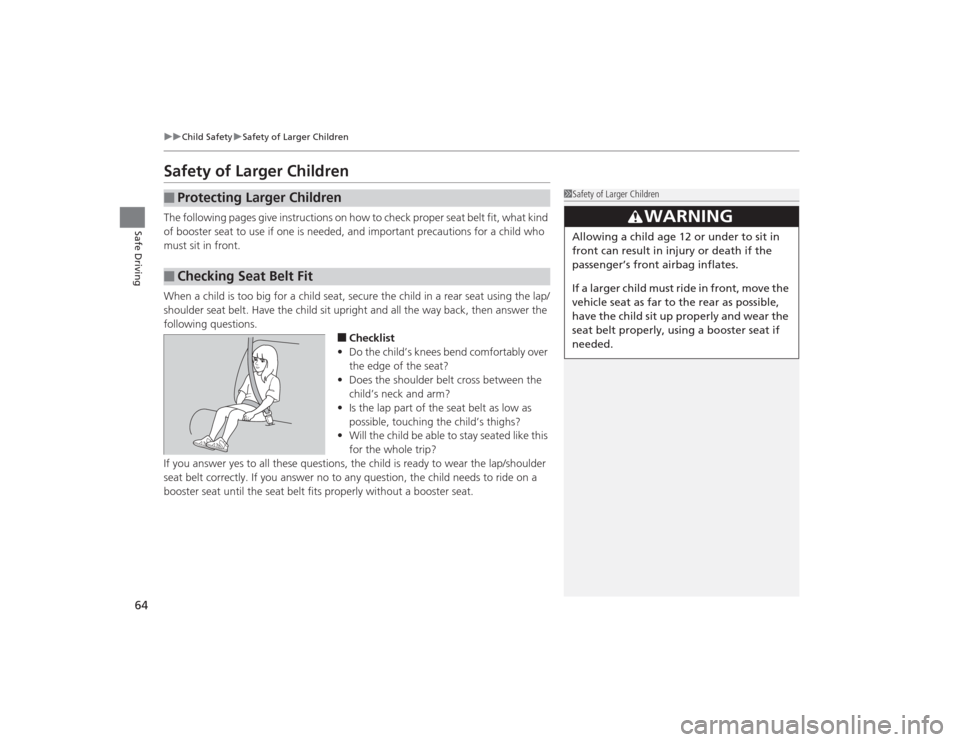
When a child is too big for a child seat, secure the child in a rear seat using the lap/
shoulder seat belt. Have the child sit upright and all the way back, then answer the
following questions.
■Checklist
• Do the child’s knees bend comfortably over
the edge of the seat?
• Does the shoulder belt cross between the
child’s neck and arm?
• Is the lap part of the seat belt as low as
possible, touching th e child’s thighs?
• Will the child be able to stay seated like this
for the whole trip?
If you answer yes to all these questions, the child is ready to wear the lap/shoulder
seat belt correctly. If you answer no to any question, the child needs to ride on a
booster seat until the seat belt fits properly without a booster seat.
■
Protecting Larger Children
■
Checking Seat Belt Fit
1 Safety of Larger Children
3
WARNING
Allowing a child age 12 or under to sit in
front can result in injury or death if the
passenger’s front airbag inflates.
If a larger child must ride in front, move the
vehicle seat as far to the rear as possible,
have the child sit up properly and wear the
seat belt properly, using a booster seat if
needed.
Page 66 of 505
65
uuChild Safety uSafety of Larger Children
Safe Driving
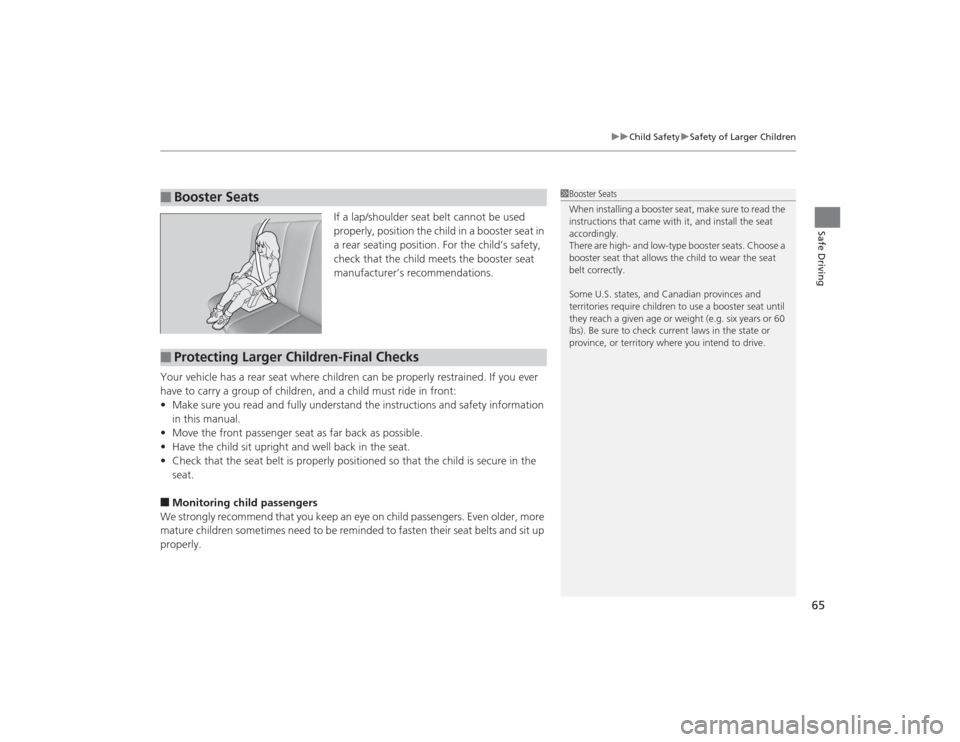
If a lap/shoulder seat belt cannot be used
properly, position the child in a booster seat in
a rear seating position. For the child’s safety,
check that the child meets the booster seat
manufacturer’s recommendations.
Your vehicle has a rear seat where children can be properly restrained. If you ever
have to carry a group of children, and a child must ride in front:
• Make sure you read and fully understand the instructions and safety information
in this manual.
• Move the front passenger seat as far back as possible.
• Have the child sit upright and well back in the seat.
• Check that the seat belt is properly positioned so that the child is secure in the
seat.
■Monitoring child passengers
We strongly recommend that you keep an eye on child passengers. Even older, more
mature children sometimes need to be reminded to fasten their seat belts and sit up
properly.■
Booster Seats
1 Booster Seats
When installing a booster seat, make sure to read the
instructions that came with it, and install the seat
accordingly.
There are high- and low-type booster seats. Choose a
booster seat that allows the child to wear the seat
belt correctly.
Some U.S. states, and Canadian provinces and
territories require children to use a booster seat until
they reach a given age or weight (e.g. six years or 60
lbs). Be sure to check current laws in the state or
province, or territory where you intend to drive.
■
Protecting Larger Children-Final Checks
Page 77 of 505
76
uuIndicators u
Instrument Panel
Indicator
Name
On/Blinking
Explanation
Message
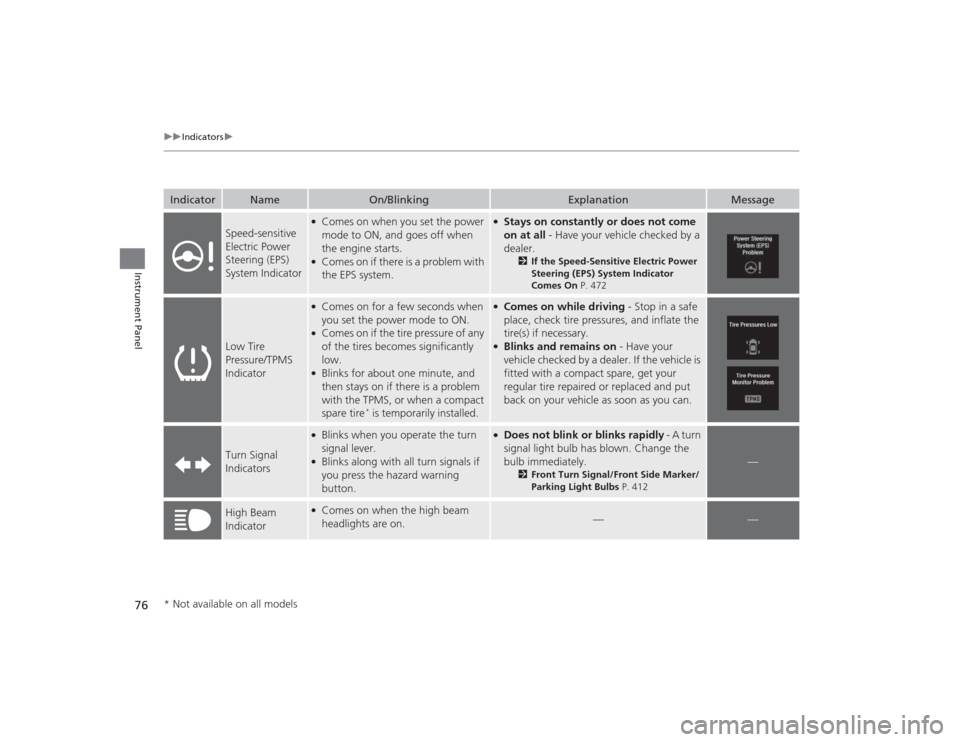
Speed-sensitive
Electric Power
Steering (EPS)
System Indicator
●Comes on when you set the power
mode to ON, and goes off when
the engine starts.●Comes on if there is a problem with
the EPS system.
●Stays on constantly or does not come
on at all - Have your vehicle checked by a
dealer.
2 If the Speed-Sensitive Electric Power
Steering (EPS) System Indicator
Comes On P. 472
Low Tire
Pressure/TPMS
Indicator
●Comes on for a few seconds when
you set the power mode to ON.●Comes on if the tire pressure of any
of the tires becomes significantly
low.●Blinks for about one minute, and
then stays on if there is a problem
with the TPMS, or when a compact
spare tire
* is temporarily installed.
●Comes on while driving - Stop in a safe
place, check tire pressures, and inflate the
tire(s) if necessary.●Blinks and remains on - Have your
vehicle checked by a dealer. If the vehicle is
fitted with a compact spare, get your
regular tire repaired or replaced and put
back on your vehicle as soon as you can.
Turn Signal
Indicators
●Blinks when you operate the turn
signal lever.●Blinks along with all turn signals if
you press the hazard warning
button.
●Does not blink or blinks rapidly - A turn
signal light bulb has blown. Change the
bulb immediately.
2 Front Turn Signal/Front Side Marker/
Parking Light Bulbs P. 412
—
High Beam
Indicator
●Comes on when the high beam
headlights are on.
—
—
* Not available on all models
Page 81 of 505
80
uuIndicators u
Instrument Panel
Indicator
Name
On/Blinking
Explanation
Message
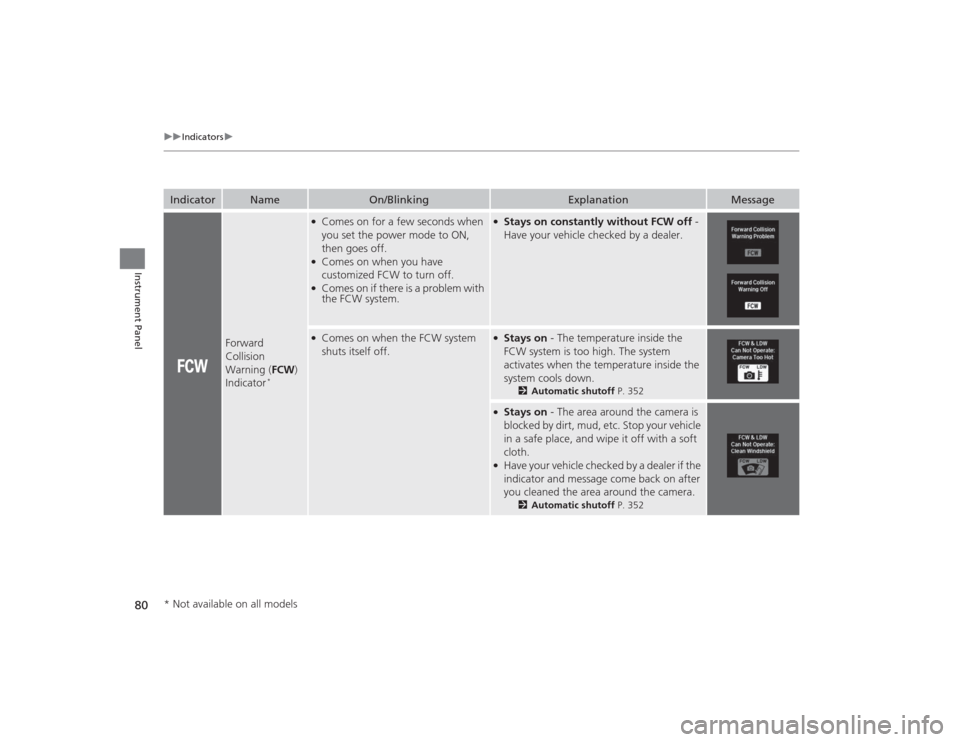
Forward
Collision
Warning (FCW)
Indicator
*
●Comes on for a few seconds when
you set the power mode to ON,
then goes off.●Comes on when you have
customized FCW to turn off.●Comes on if there is a problem with
the FCW system.
●Stays on constantly without FCW off -
Have your vehicle checked by a dealer.
●Comes on when the FCW system
shuts itself off.
●Stays on - The temperature inside the
FCW system is too high. The system
activates when the temperature inside the
system cools down.
2 Automatic shutoff P. 352
●Stays on - The area around the camera is
blocked by dirt, mud, etc. Stop your vehicle
in a safe place, and wipe it off with a soft
cloth.●Have your vehicle checked by a dealer if the
indicator and message come back on after
you cleaned the area around the camera.
2 Automatic shutoff P. 352
* Not available on all models
Page 82 of 505
81
uuIndicators u
Continued
Instrument Panel
*1:Models without LKAS
*2:Models with LKASIndicator
Name
On/Blinking
Explanation
Message
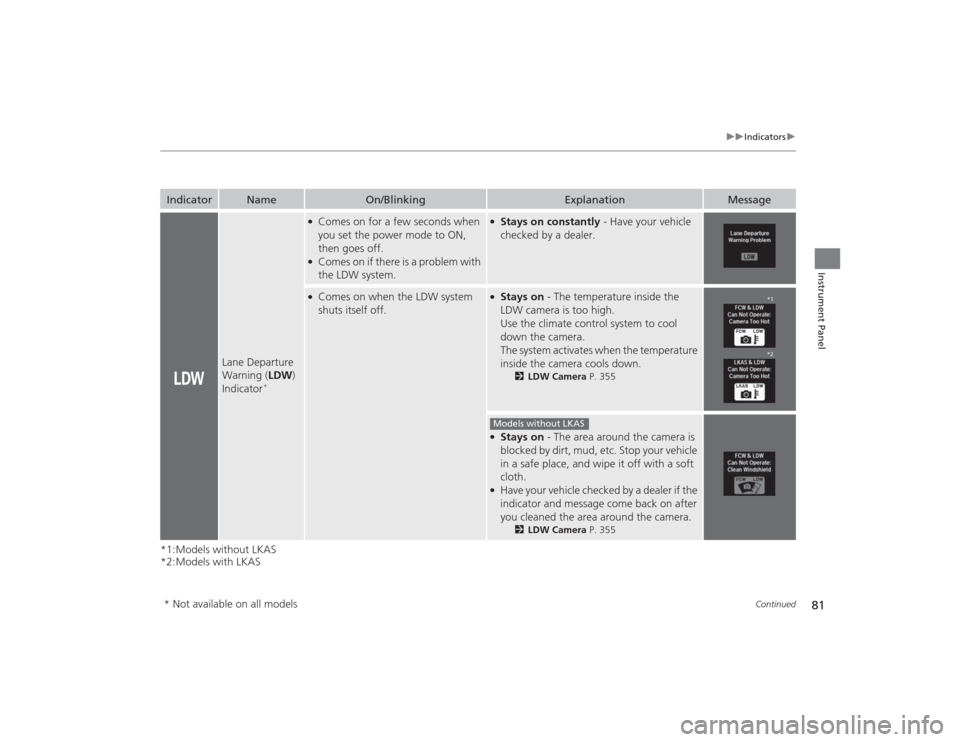
Lane Departure
Warning (LDW)
Indicator
*
●Comes on for a few seconds when
you set the power mode to ON,
then goes off.●Comes on if there is a problem with
the LDW system.
●Stays on constantly - Have your vehicle
checked by a dealer.
●Comes on when the LDW system
shuts itself off.
●Stays on - The temperature inside the
LDW camera is too high.
Use the climate control system to cool
down the camera.
The system activates when the temperature
inside the camera cools down.
2 LDW Camera P. 355
●Stays on - The area around the camera is
blocked by dirt, mud, etc. Stop your vehicle
in a safe place, and wipe it off with a soft
cloth.●Have your vehicle checked by a dealer if the
indicator and message come back on after
you cleaned the area around the camera.
2 LDW Camera P. 355
*1
*2
Models without LKAS
* Not available on all models
Page 89 of 505
88
uuIndicators uMulti-Information Display (MID) Warning and Information Messages
Instrument Panel
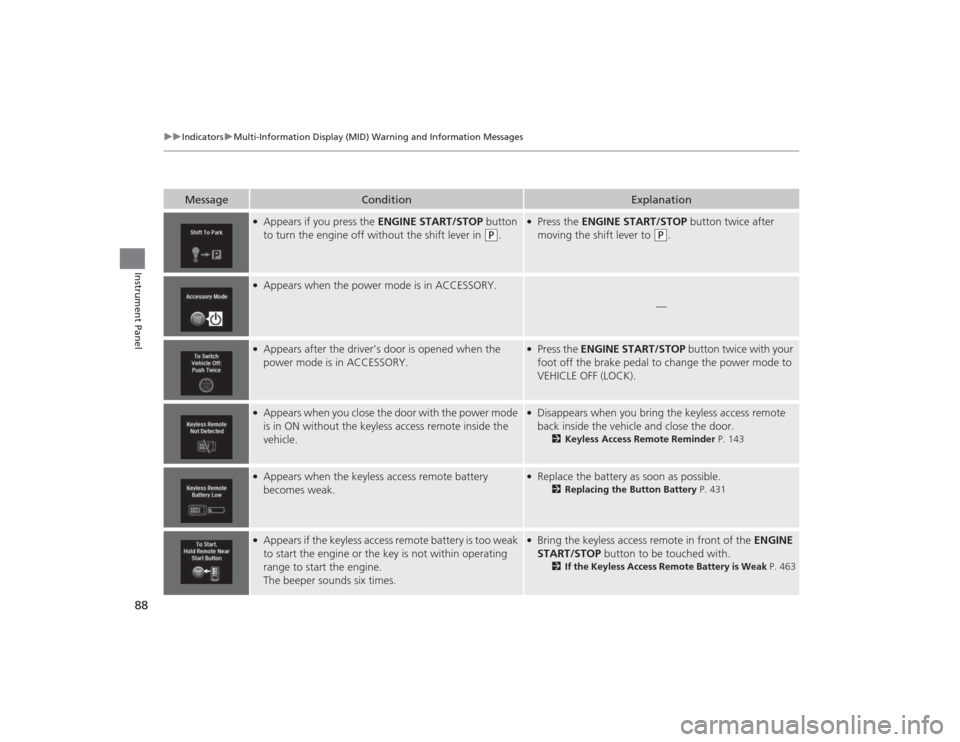
Message
Condition
Explanation
●Appears if you press the ENGINE START/STOP button
to turn the engine off without the shift lever in
(P
.
●Press the ENGINE START/STOP button twice after
moving the shift lever to
(P
.
●Appears when the power mode is in ACCESSORY.
—
●Appears after the driver’s door is opened when the
power mode is in ACCESSORY.
●Press the ENGINE START/STOP button twice with your
foot off the brake pedal to change the power mode to
VEHICLE OFF (LOCK).
●Appears when you close the door with the power mode
is in ON without the keyless access remote inside the
vehicle.
●Disappears when you bring the keyless access remote
back inside the vehicle and close the door.
2 Keyless Access Remote Reminder P. 143
●Appears when the keyless access remote battery
becomes weak.
●Replace the battery as soon as possible.
2Replacing the Button Battery P. 431
●Appears if the keyless access remote battery is too weak
to start the engine or the key is not within operating
range to start the engine.
The beeper sounds six times.
●Bring the keyless access remote in front of the ENGINE
START/STOP button to be touched with.
2 If the Keyless Access Remote Battery is Weak P. 463
Page 96 of 505
95
uuIndicators uMulti-Information Display (MID) Warning and Information Messages
Continued
Instrument Panel
Message
Condition
Explanation
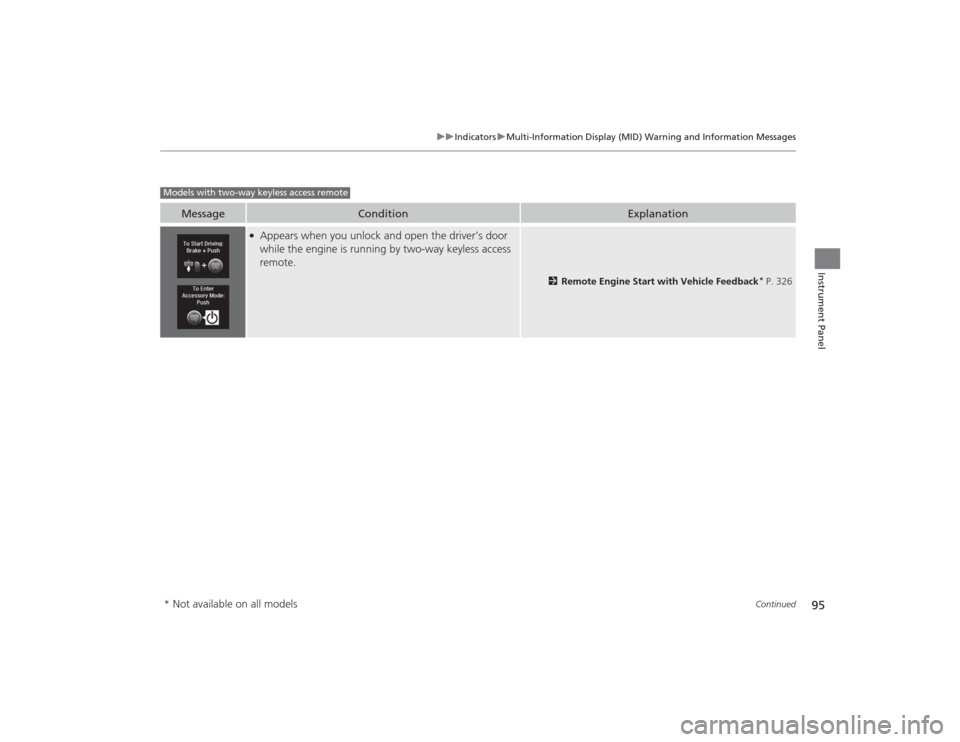
●Appears when you unlock and open the driver’s door
while the engine is running by two-way keyless access
remote.
2 Remote Engine Start with Vehicle Feedback
* P. 326
Models with two-way keyless access remote* Not available on all models
Page 107 of 505

106
uuGauges and Multi-Informa tion Display (MID)uMID
Instrument Panel
Exit
Door SetupIDS SetupDefault AllLighting Setup
Key And Remote Unlock Mode
Auto Door LockAuto Door Unlock
Keyless Lock Answer BackSecurity Relock Timer
Interior Light Dimming Time
Headlight Auto Off TimerAuto Light Sensitivity
Roll
PushPush
RollRollRollRoll
Roll
Roll
Power Tailgate Setup
Push
Power Open By Outer Handle
Keyless Open Mode
Push
Maintenance Info.
Roll
Push
Preferred IDS Mode
RollRollRoll
Page 110 of 505
109
uuGauges and Multi-Information Display (MID) uMID
Continued
Instrument Panel
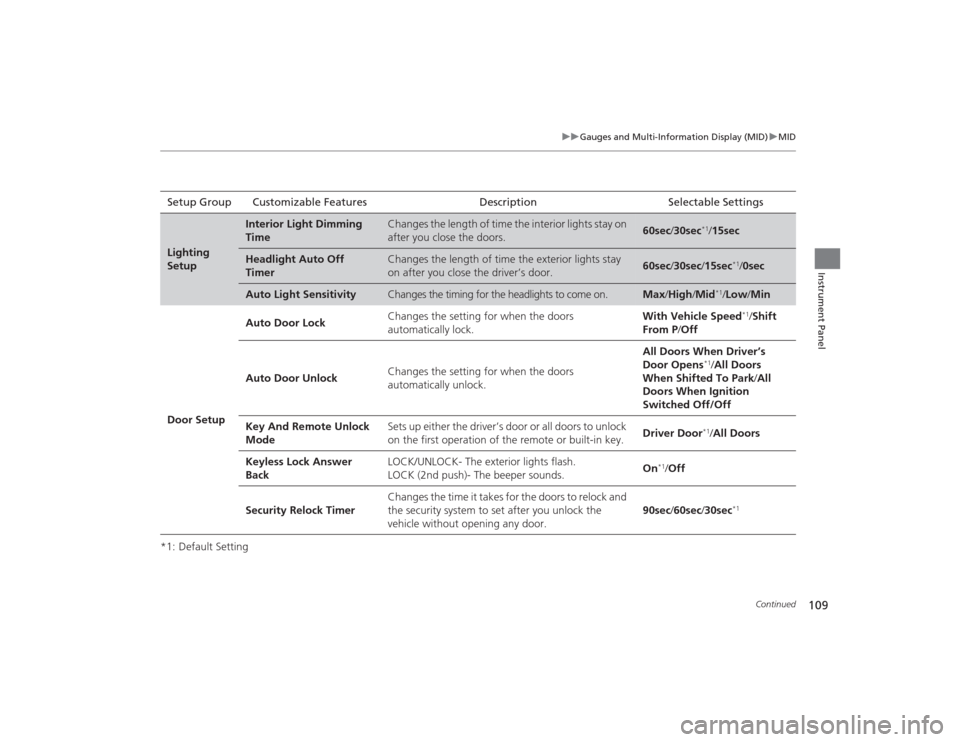
*1: Default SettingSetup Group Customizable Features Description Selectable SettingsLighting
Setup
Interior Light Dimming
Time
Changes the length of time the interior lights stay on
after you close the doors.
60sec
/30sec
*1/15sec
Headlight Auto Off
Timer
Changes the length of time the exterior lights stay
on after you close the driver’s door.
60sec /30sec /15sec
*1/ 0sec
Auto Light Sensitivity
Changes the timing for the headlights to come on.
Max /High /Mid
*1/Low /Min
Door Setup Auto Door Lock
Changes the setting for when the doors
automatically lock. With Vehicle Speed
*1/
Shift
From P /Off
Auto Door Unlock Changes the setting for when the doors
automatically unlock. All Doors When Driver’s
Door Opens
*1/
All Doors
When Shifted To Park /All
Doors When Ignition
Switched Off/Off
Key And Remote Unlock
Mode Sets up either the driver’s door or all doors to unlock
on the first operation of the remote or built-in key.
Driver Door*1/
All Doors
Keyless Lock Answer
Back LOCK/UNLOCK- The exterior lights flash.
LOCK (2nd push)- The beeper sounds.
On
*1/
Off
Security Relock Timer Changes the time it takes for the doors to relock and
the security system to set after you unlock the
vehicle without opening any door.
90sec
/60sec /30sec
*1
Page 116 of 505
115
Continued
Controls
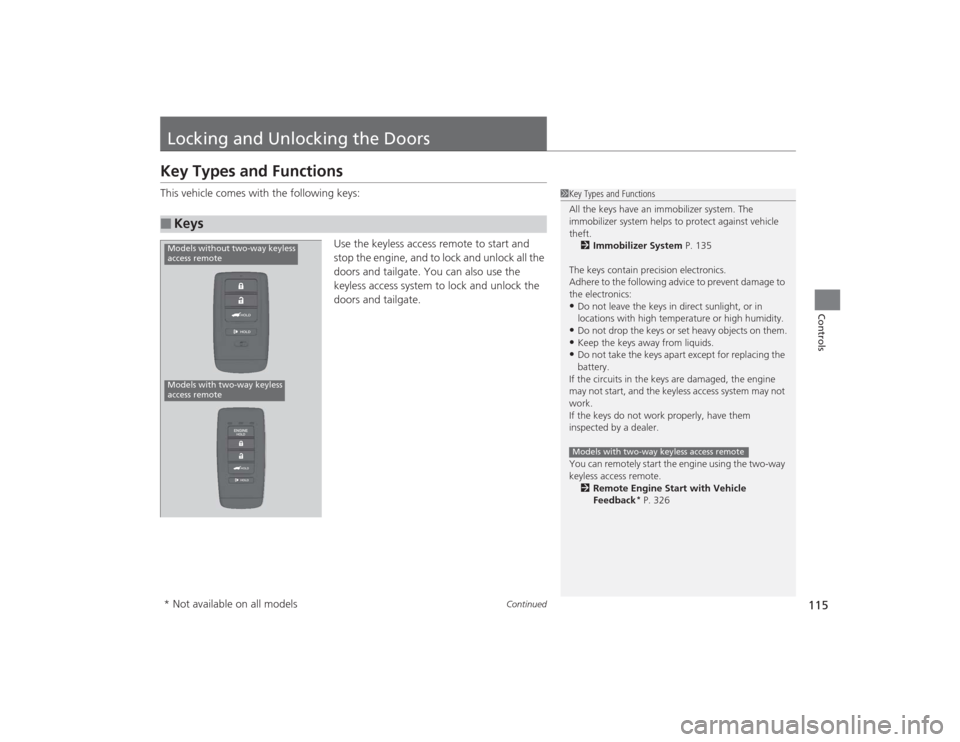
Locking and Unlocking the DoorsKey Types and FunctionsThis vehicle comes with the following keys:Use the keyless access remote to start and
stop the engine, and to lock and unlock all the
doors and tailgate. You can also use the
keyless access system to lock and unlock the
doors and tailgate.■
Keys
1Key Types and Functions
All the keys have an immobilizer system. The
immobilizer system helps to protect against vehicle
theft.
2 Immobilizer System P. 135
The keys contain precision electronics.
Adhere to the following advice to prevent damage to
the electronics:•Do not leave the keys in direct sunlight, or in
locations with high temperature or high humidity.•Do not drop the keys or set heavy objects on them.•Keep the keys away from liquids.•Do not take the keys apa rt except for replacing the
battery.
If the circuits in the keys are damaged, the engine
may not start, and the keyless access system may not
work.
If the keys do not work properly, have them
inspected by a dealer.
You can remotely start the engine using the two-way
keyless access remote. 2 Remote Engine Start with Vehicle
Feedback
* P. 326
Models with two-way keyless access remote
Models with two-way keyless
access remoteModels without two-way keyless
access remote* Not available on all models