reset Acura MDX 2017 Navigation Manual
[x] Cancel search | Manufacturer: ACURA, Model Year: 2017, Model line: MDX, Model: Acura MDX 2017Pages: 369, PDF Size: 29.59 MB
Page 150 of 369
149
Audio
Audio Remote Controls
Steering Wheel Controls
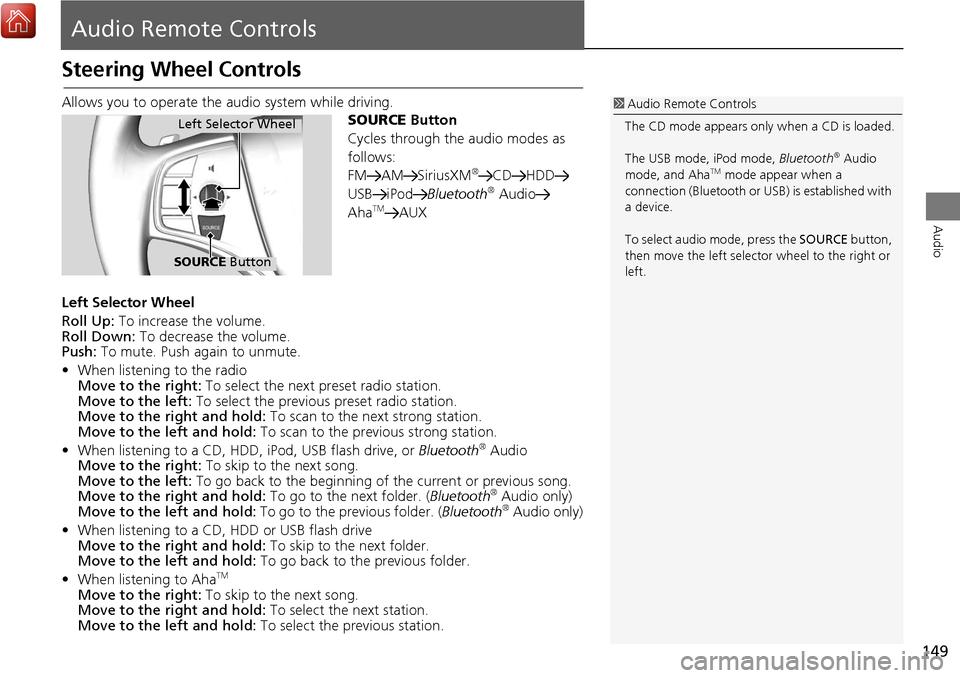
Allows you to operate the audio system while driving.
SOURCE Button
Cycles through the audio modes as
follows:
FM AM SiriusXM
®CD HDD
USB iPod Bluetooth® Audio
AhaTMAUX
Left Selector Wheel
Roll Up: To increase the volume.
Roll Down: To decrease the volume.
Push: To mute. Push again to unmute.
• When listening to the radio
Move to the right: To select the next preset radio station.
Move to the left: To select the previous preset radio station.
Move to the ri ght and hold: To scan to the next strong station.
Move to the left and hold: To scan to the previous strong station.
• When listening to a CD, HDD, iPod, USB flash drive, or Bluetooth
® Audio
Move to the right: To skip to the next song.
Move to the left: To go back to the beginning of the current or previous song.
Move to the ri ght and hold: To go to the next folder. ( Bluetooth
® Audio only)
Move to the left and hold: To go to the previous folder. (Bluetooth® Audio only)
• When listening to a CD, HDD or USB flash drive
Move to the ri ght and hold: To skip to the next folder.
Move to the left and hold: To go back to the previous folder.
• When listening to Aha
TM
Move to the right: To skip to the next song.
Move to the ri ght and hold: To select the next station.
Move to the left and hold: To select the previous station.
1Audio Remote Controls
The CD mode appears only when a CD is loaded.
The USB mode, iPod mode, Bluetooth
® Audio
mode, and AhaTM mode appear when a
connection (Bluetooth or US B) is established with
a device.
To select audio mode, press the SOURCE button,
then move the left selector wheel to the right or
left.
Left Selector Wheel
SOURCE Button
Page 152 of 369
151
Audio Settings
Audio
•Update Gracenote Album Info (CD or HDD mode): Updates the Gracenote®
Album Info (Gracenote® Media Database) from CD or from USB.
2
Updating Gracenote® Album Info P. 194
• Delete All HDD Data (HDD mode): Resets all the menu and customized settings,
and delete all music data on the HDD.
• Bluetooth Device List: Displays the Bluetooth
® device list.
• Connect Bluetooth Audio Device (Bluetooth
® Audio or Aha™ mode):
Connects, disconnects or pairs a Bluetooth® Audio device to HFL.
• DVD Auto Play (DVD mode): Turns the auto play feature on or off.
• Audio Language (DVD mode): Selects a language for the audio that is available
on the DVD.
• Subtitle Language (DVD mode): Selects a language for the subtitle that is
available on the DVD.
• Menu Language (DVD mode): Selects a language for the DVD menu that is
available on the DVD.
• Dynamic Range (DVD mode): Sets whether to control the range of the loud and
low sounds.
• Source Select Popup: Selects whether the list of selectable audio sources comes
on when the AUDIO button is pressed.
• Cover Art (CD (MP3/WMA/AAC), iPod , USB or Aha™ mode): Turns on and off
the cover art display.
• Default: Cancels/Resets all customized it ems in the Audio Settings group as
default.
Page 155 of 369
154
Audio
Playing FM/AM Radio
Selecting FM/AM Mode
1.Press the MENU button. (in AUDIO mode)
2. Rotate i to select Change Source . Press u.
3. Rotate i to select the frequency band (FM, AM). Press u.
The band and frequency are displayed on the audio/information screen.
1. Select Source .
2. Select the frequency band (AM, FM) icon.
The band and frequency are displayed on the On Demand Multi-Use DisplayTM.
Audio Screen Control
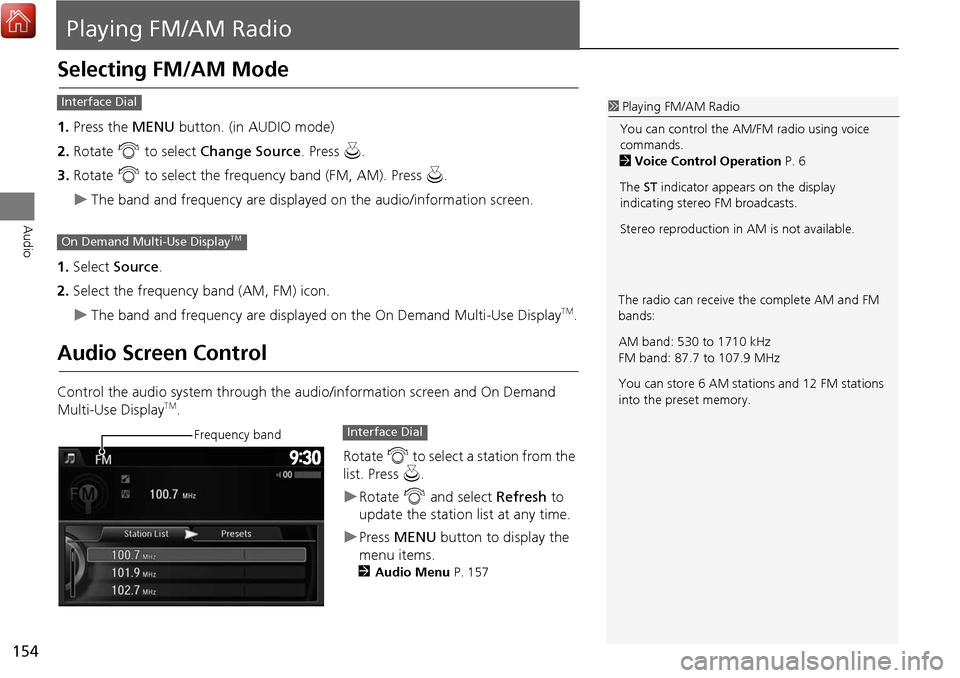
Control the audio system through the audio/information screen and On Demand
Multi-Use DisplayTM.
Rotate i to select a station from the
list. Press u.
Rotate i and select Refresh to
update the station list at any time.
Press MENU button to display the
menu items.
2 Audio Menu P. 157
1Playing FM/AM Radio
You can control the AM/FM radio using voice
commands.
2 Voice Control Operation P. 6
The ST indicator appears on the display
indicating stereo FM broadcasts.
Stereo reproduction in AM is not available.Interface Dial
On Demand Multi-Use DisplayTM
The radio can receive the complete AM and FM
bands:
AM band: 530 to 1710 kHz
FM band: 87.7 to 107.9 MHz
You can store 6 AM stations and 12 FM stations
into the preset memory.
Frequency bandInterface Dial
Page 156 of 369
155
Playing FM/AM RadioAudio Screen Control
Audio
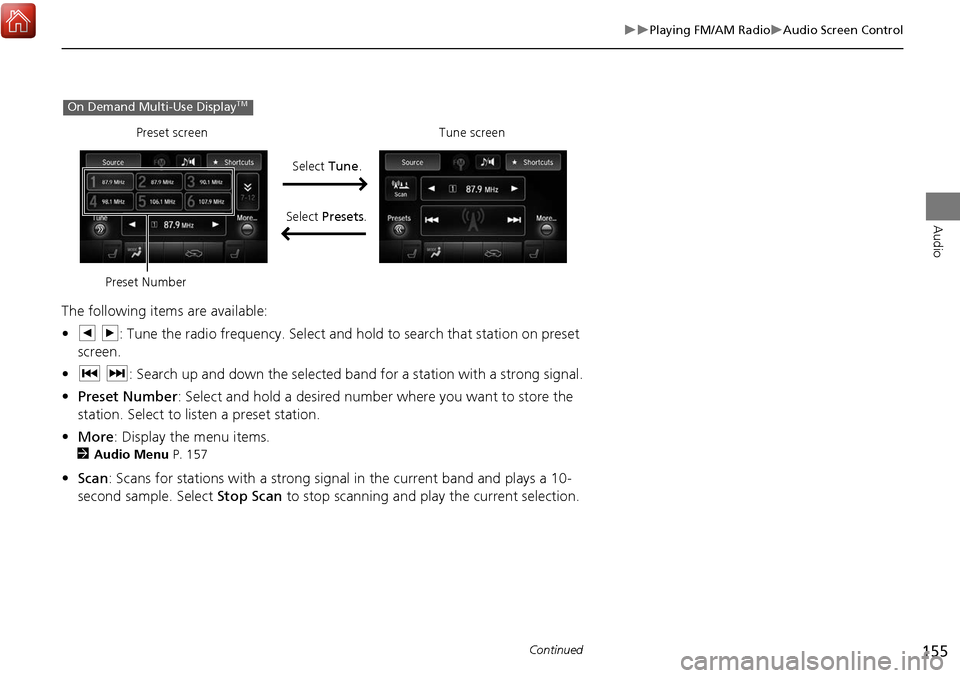
The following items are available:
•b n: Tune the radio frequency. Select and hold to search that station on preset
screen.
• c x: Search up and down the selected band for a station with a strong signal.
• Preset Number : Select and hold a desired number where you want to store the
station. Select to listen a preset station.
• More : Display the menu items.
2Audio Menu P. 157
•Scan : Scans for stations with a strong signal in the current band and plays a 10-
second sample. Select Stop Scan to stop scanning and play the current selection.
On Demand Multi-Use DisplayTM
Preset screenTune screen
Select Tune.
Select Presets .
Preset Number
Continued
Page 157 of 369
156
Playing FM/AM RadioAudio Screen Control
Audio
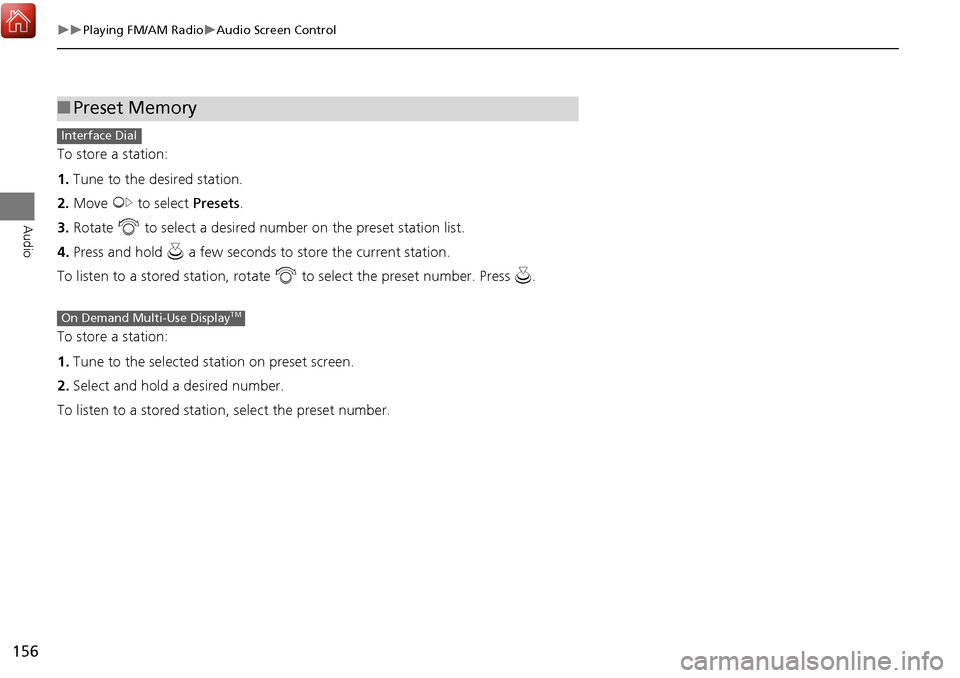
To store a station:
1.Tune to the desired station.
2. Move y to select Presets.
3. Rotate i to select a desired number on the preset station list.
4. Press and hold u a few seconds to stor e the current station.
To listen to a stor ed station, rotate i to select the preset number. Press u.
To store a station:
1. Tune to the selected station on preset screen.
2. Select and hold a desired number.
To listen to a stored statio n, select the preset number.
■Preset Memory
Interface Dial
On Demand Multi-Use DisplayTM
Page 158 of 369
157
Playing FM/AM RadioAudio Menu
Audio
Audio Menu
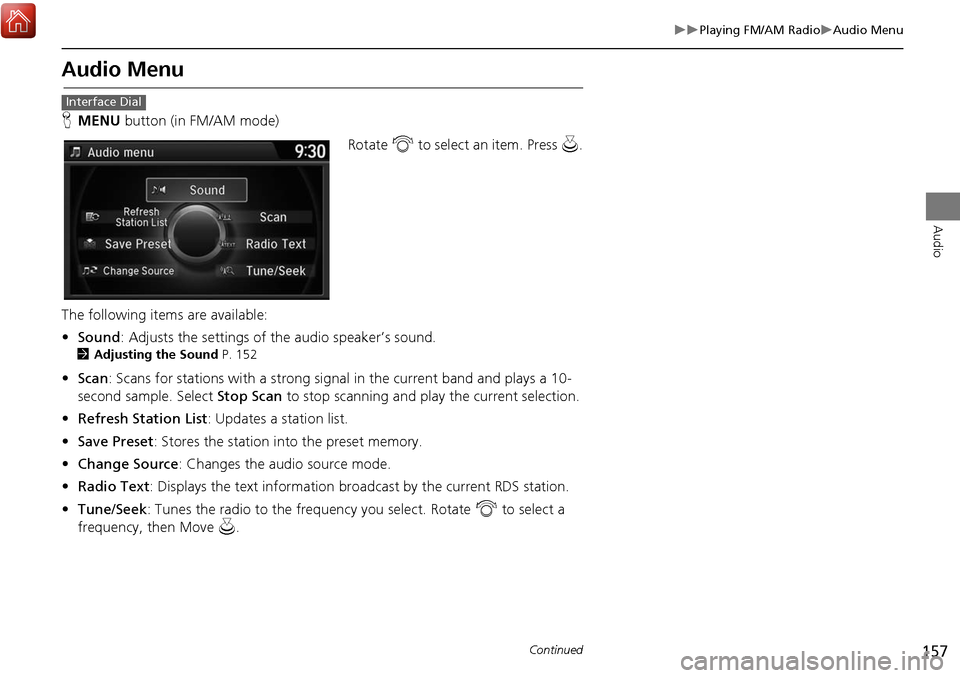
HMENU button (in FM/AM mode)
Rotate i to select an item. Press u.
The following items are available:
• Sound : Adjusts the settings of the audio speaker’s sound.
2Adjusting the Sound P. 152
•Scan : Scans for stations with a strong signal in the current band and plays a 10-
second sample. Select Stop Scan to stop scanning and play the current selection.
• Refresh Station List : Updates a station list.
• Save Preset : Stores the station into the preset memory.
• Change Source : Changes the audio source mode.
• Radio Text : Displays the text information br oadcast by the current RDS station.
• Tune/Seek : Tunes the radio to the frequency you select. Rotate i to select a
frequency, then Move u.
Interface Dial
Continued
Page 159 of 369
158
Playing FM/AM RadioAudio Menu
Audio
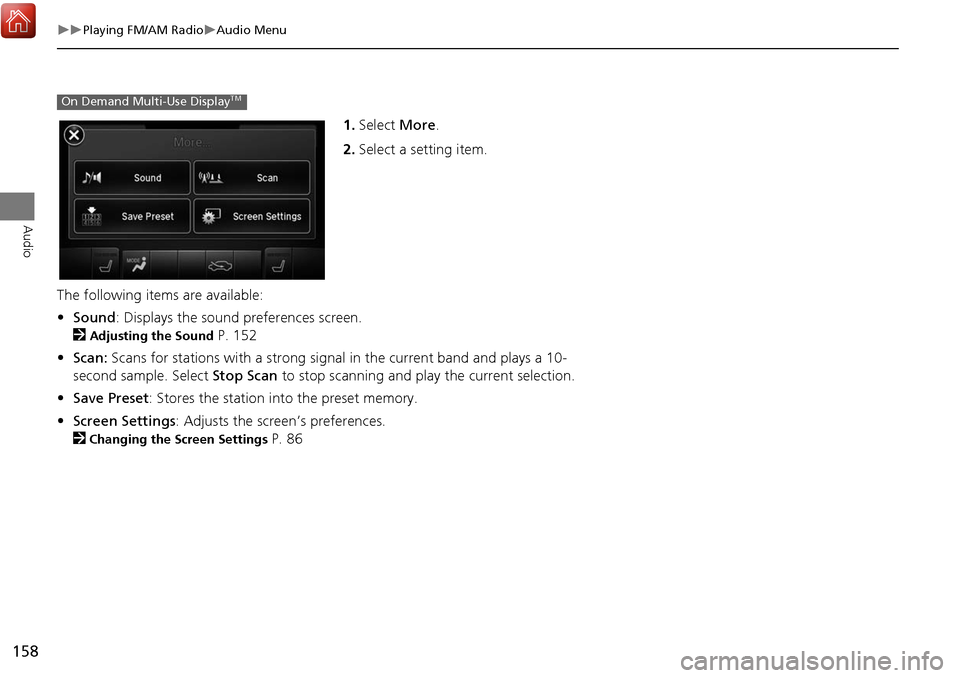
1.Select More.
2. Select a setting item.
The following item s are available:
• Sound : Displays the sound preferences screen.
2
Adjusting the Sound P. 152
• Scan: Scans for stations with a strong signal in the current band and plays a 10-
second sample. Select Stop Scan to stop scanning and play the current selection.
• Save Preset : Stores the station into the preset memory.
• Screen Settings : Adjusts the screen’s preferences.
2
Changing the Screen Settings P. 86
On Demand Multi-Use DisplayTM
Page 160 of 369
159
Audio
Playing SiriusXM® Radio
Selecting SiriusXM® Mode
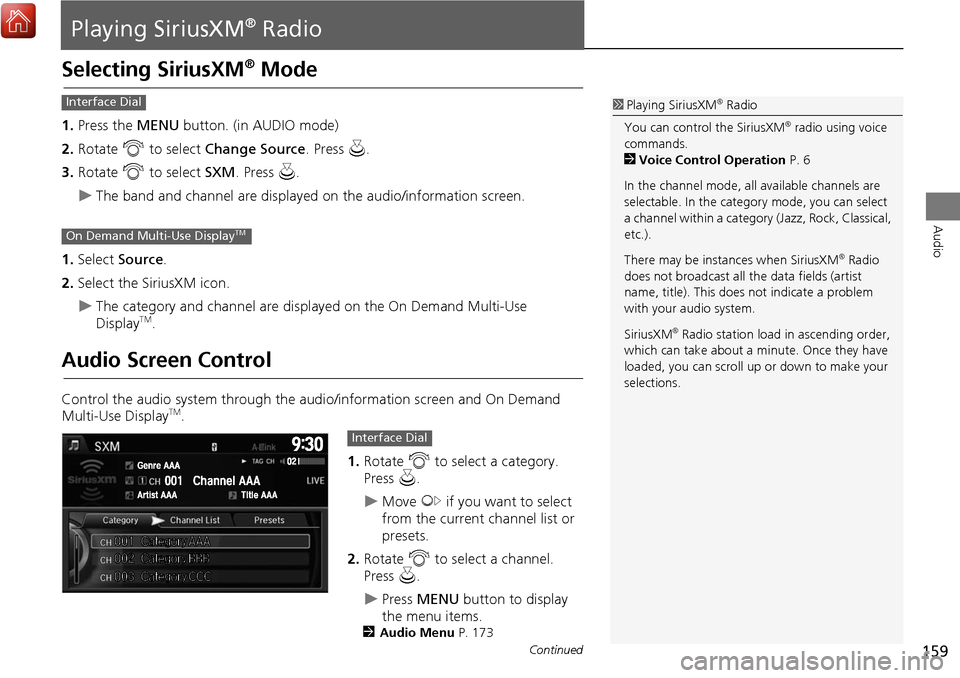
1.Press the MENU button. (in AUDIO mode)
2. Rotate i to select Change Source . Press u.
3. Rotate i to select SXM. Press u .
The band and channel are displayed on the audio/information screen.
1. Select Source .
2. Select the SiriusXM icon.
The category and channel are displayed on the On Demand Multi-Use
DisplayTM.
Audio Screen Control
Control the audio system through the audio/information screen and On Demand
Multi-Use DisplayTM.
1.Rotate i to select a category.
Press u.
Move y if you want to select
from the current channel list or
presets.
2. Rotate i to select a channel.
Press u.
Press MENU button to display
the menu items.
2 Audio Menu P. 173
1Playing SiriusXM® Radio
You can control the SiriusXM
® radio using voice
commands.
2 Voice Control Operation P. 6
In the channel mode, all available channels are
selectable. In the categor y mode, you can select
a channel within a category (Jazz, Rock, Classical,
etc.).
There may be instances when SiriusXM
® Radio
does not broadcast all the data fields (artist
name, title). This does not indicate a problem
with your audio system.
SiriusXM
® Radio station load in ascending order,
which can take about a minute. Once they have
loaded, you can scroll up or down to make your
selections.
Interface Dial
On Demand Multi-Use DisplayTM
Interface Dial
Continued
Page 161 of 369
160
Playing SiriusXM® RadioAudio Screen Control
Audio
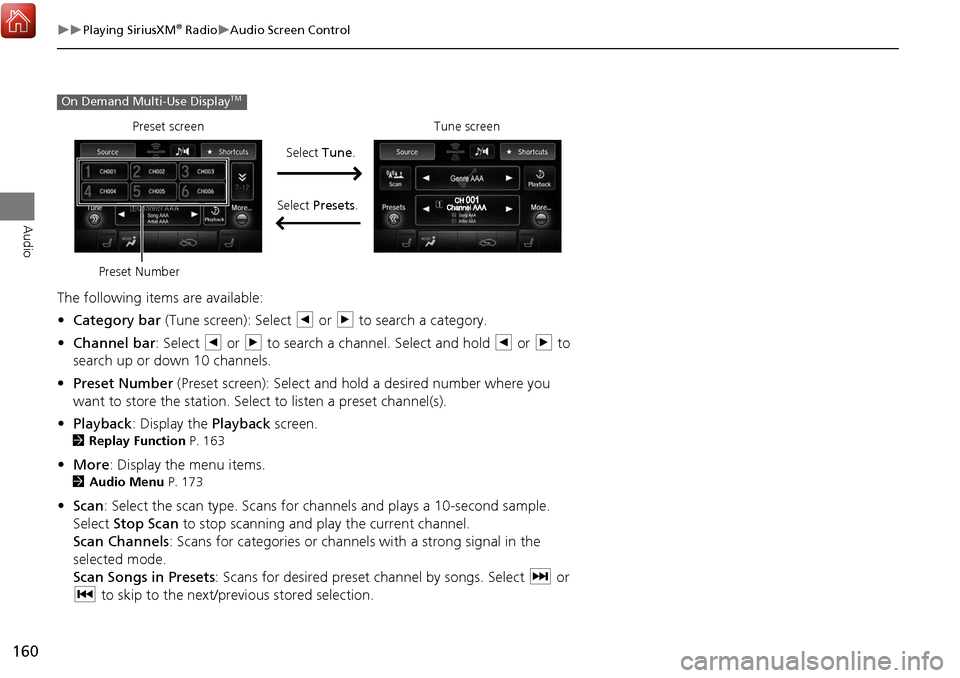
The following items are available:
• Category bar (Tune screen): Select b or n to search a category.
• Channel bar : Select b or n to search a channe l. Select and hold b or n to
search up or down 10 channels.
• Preset Number (Preset screen): Select and hold a desired number where you
want to store the station. Select to listen a preset channel(s).
• Playback : Display the Playback screen.
2Replay Function P. 163
•More : Display the menu items.
2Audio Menu P. 173
•Scan : Select the scan type. Scans for channels and plays a 10-second sample.
Select Stop Scan to stop scanning and play the current channel.
Scan Channels : Scans for categories or channels with a strong signal in the
selected mode.
Scan Songs in Presets: Scans for desired preset channel by songs. Select x or
c to skip to the next/previous stored selection.
On Demand Multi-Use DisplayTM
Tune screen
Preset screen
Select Tune.
Select Presets .
Preset Number
Page 162 of 369
161
Playing SiriusXM® RadioAudio Screen Control
Audio
To store a channel:
1.Tune to the desired channel.
2. Move y to select Presets.
3. Rotate i to select a desired number.
4. Press and hold u a few seconds to store the current channel.
To listen to a stored channel, rotate i to select the preset number. Press u .
To store a channel:
1. Tune to the desired channel.
2. Select and hold a desired number.
To listen to a stored channel, select the preset number.
■ Preset Memory1 Preset Memory
You can store 12 SiriusXM
® channels into the
preset memory.Interface Dial
On Demand Multi-Use DisplayTM
Continued