light Acura NSX 2017 Owner's Guide
[x] Cancel search | Manufacturer: ACURA, Model Year: 2017, Model line: NSX, Model: Acura NSX 2017Pages: 116, PDF Size: 7.19 MB
Page 2 of 116

TABLE OF CONTENTS
*if equipped
This Owner’s Guide is intended to help you quickly get acquainted with your 2017 Acura NSX. It
provides basic information and instructions on technology and convenience features, as well as
emergency procedures and how to get assistance.
This guide is for vehicles sold in the United States and Canada. It covers all NSX models, so you
may find descriptions of features and equipment that are not in your vehicle.
Images throughout this guide are from U.S. vehicles and represent features and equipment that
are available on some, but not all, models. Images shown in this guide should be considered
examples and used for demonstration purposes only.
This guide is not intended to be a substitute for the Owner’s Manual. The Owner Information
CD enclosed in your information kit includes the Owner’s Manual, Navigation Manual, and
vehicle and tire warranties in electronic format. This information can be viewed on a computer
(PC
or Mac platform) and saved or printed for
your reference. In addition, you can visit owners.
acura.com (U.S.) or myacura.ca (Canada) to view the complete and most current information.
If you are the first registered owner of your vehicle, you may request a complimentary printed
copy of the Owner’s Manual, Navigation Manual, or Vehicle Warranty within the first six months
of vehicle purchase. To request a copy, visit owners.acura.com and create or log in to your
account. In Canada, please request a copy from your authorized Acura NSX dealer.
American Honda Motor Co., Inc. strives to be proactive in protecting our environment and
natural resources. By using electronic delivery for a considerable portion of the information
typically found in a vehicle owner’s manual, we are further reducing our impact on the
environment.
VISUAL INDEX ................................................................ 2
Steering Wheel and Nearby C ontrols ..............................2
Dashboard and C
eiling Controls
....................................... 6
PHONE PAIRING QUICK
START...................................8
HANDS-FREE PHONE QUICK START
........................ 10
VOICE RECOGNITION QUICK ST
ART
.......................11
SPORT HYBRID SUPER HANDLING ALL
-WHEEL
DRIVE
™ ........................................................................\
.. 13
SAFETY INFORMATION
.............................................. 14
High-Voltage S
ystem Precautions
................................. 18
Seat Belts ........................................................................\
.... 19
Airbags ........................................................................\
......... 24
Child Safety ........................................................................\
.33
Safety Label Locations
......................................................43
Reporting Safety Defects ................................................ 44
INSTRUMENT PANEL..................................................
45
Malfunction Indicators
..................................................... 46
Condition Indicators ........................................................ 48
On/Off Indicators .............................................................. 50
Driver Information Interface ........................................... 51
VEHICLE CONTROLS
.................................................. 54
Using the R
emote Transmitter
........................................ 54
Keyless Access
System
...................................................... 55
Door Operation from
Inside the Vehicle
.......................57
Power Window Operation ............................................... 59
Interior and Exterior Lights .............................................. 60
Wiper Operation ................................................................ 63Intermittent (INT) wipers
................................................
64
Adjusting the Seats ........................................................... 65
Driving Position Memory S
ystem*
................................
71
Adjusting the Mirr
ors
........................................................
72
HomeLink® Universal T
ransceiver
..................................
74
Climate Control
System
...................................................
76
Seat Heaters* ..................................................................... 77
Customized Featur
es
........................................................
78
Setting the Clock ............................................................... 79
AUDIO AND CONNECTIVITY
................................... 80
Basic Audio Operation ..................................................... 80
Operating Display Audio ................................................. 84
Wi-Fi Connection ............................................................... 87
Apple® CarPlay® ................................................................ 88
Android Auto™ ................................................................... 90
FM Radio ........................................................................\
.....92
SiriusXM
® Radio* ............................................................... 93
USB Flash Drive .................................................................. 96
Pandora®* ........................................................................\
.... 97
Bluetooth® Audio ............................................................... 99
BLUETOOTH
® HANDSFREELINK® ............................ 101
Basic HFL Operation ....................................................... 101
Pairing a Phone.................................................................
103
Making a Call
.................................................................... 104
SMS Text Messaging and E-Mail ................................... 108
Siri™ Eyes Free ................................................................... 109
Page 5 of 116

4 || 5
VISUAL INDEXVISUAL INDEX
Steering Wheel and Nearby Controls (continued)uLights/turn signals p. 60, p. 62
vPaddle Shifters p. 133
wBrightness Control p. 61
Km/Mile Change Button
xWipers/Washers p. 63
yRight Selector Wheel
zTRIP Button p. 53
{Horn (Press an area around )
|Voice Control Buttons /
Bluetooth HandsFreeLink System p. 101
}Audio Remote Controls p. 82u
v
w
x
y
z
{
}
|
Page 9 of 116

12 || 13
QUICK STARTQUICK START
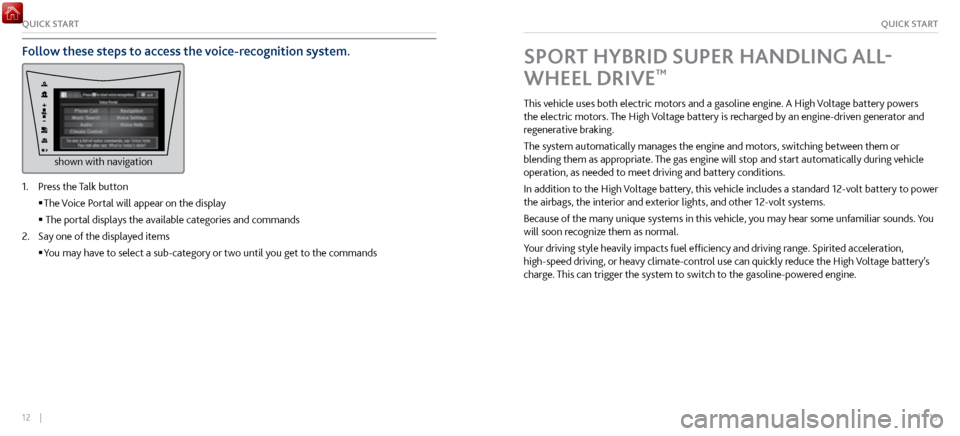
Follow these steps to access the voice-recognition system.
shown with navigation
1. Press the Talk button
The Voice P
ortal will appear on the display
The portal displays the available categories and commands
2.
Say one of the displayed items
You may have to select a sub-category
or two until you get to the commands
SPORT HYBRID SUPER HANDLING ALL-
WHEEL DRIVE
™
This vehicle uses both electric motors and a gasoline engine. A High Voltage battery powers
the electric motors. The High Voltage battery is recharged by an engine-driven generator and
regenerative braking.
The system automatically manages the engine and motors, switching between them or
blending them as appropriate. The gas engine will stop and start automatically during vehicle
operation, as needed to meet driving and battery conditions.
In addition to the High Voltage battery, this vehicle includes a standard 12-volt battery to power
the airbags, the interior and exterior lights, and other 12-volt systems.
Because of the many unique systems in this vehicle, you may hear some unfamiliar sounds. You
will soon recognize them as normal.
Your driving style heavily impacts fuel efficiency and driving range. Spirited acceleration,
high-speed driving, or heavy climate-control use can quickly reduce the High Voltage battery’s
charge. This can trigger the system to switch to the gasoline-powered engine.
Page 26 of 116

46 || 47
INSTRUMENT PANELINSTRUMENT PANEL
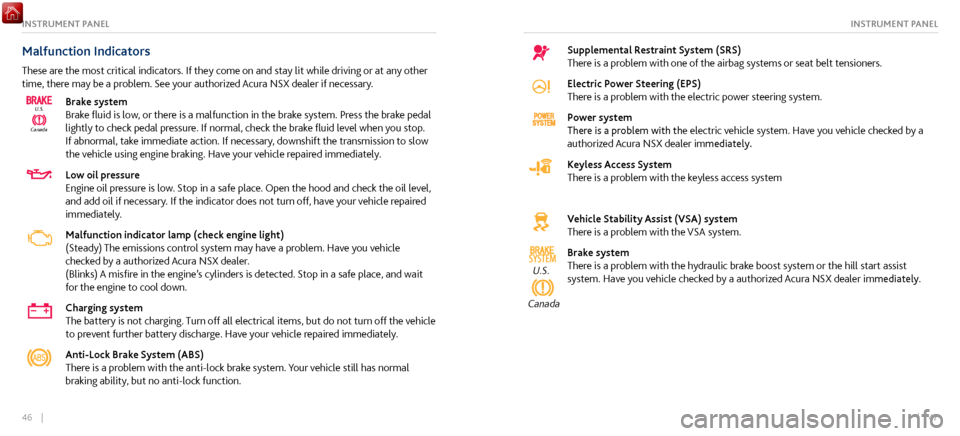
Malfunction Indicators
These are the most critical indicators. If they come on and stay lit while driving or at any other
time, there may be a problem. See your authorized Acura NSX dealer if necessary.
CanadaU.S.
Brake system
Brake fluid is low, or there is a malfunction in the brake system. Press the brake pedal
lightly to check pedal pressure. If normal, check the brake fluid level when you stop.
If abnormal, take immediate action. If necessary, downshift the transmission to slow
the vehicle using engine braking. Have your vehicle repaired immediately.
Low oil pressure
Engine oil pressure is low. Stop in a safe place. Open the hood and check the oil level,
and add oil if necessary. If the indicator does not turn off, have your vehicle repaired
immediately.
Malfunction indicator lamp (check engine light)
(Steady) The emissions control system may have a problem. Have you vehicle
checked by a authorized Acura NSX dealer.
(Blinks) A
misfire in the engine’s cylinders is
detected. Stop in a safe place, and wait
for the engine to cool down.
Charging system
The battery is not charging. Turn off all electrical items, but do not turn off the vehicle
to prevent further battery discharge. Have your vehicle repaired immediately.
Anti-Lock Brake System (ABS)
There is a problem with the anti-lock brake system. Your vehicle still has normal
braking ability, but no anti-lock function.
Supplemental Restraint System (SRS)
There is a problem with one of the airbag systems or seat belt tensioners.
Electric Power Steering (EPS)
There is a problem with the electric power steering system.
Power system
There is a problem with the electric vehicle system. Have you vehicle checked by a
authorized Acura NSX dealer immediately.
Keyless Access System
There is a problem with the keyless access system
Vehicle Stability Assist (VSA) system
There is a problem with the VSA system.
SYSTEMU.S.
Canada
Brake system
There is a problem with the hydraulic brake boost system or the hill start assist
system. Have you vehicle checked by a authorized Acura NSX dealer immediately.
Page 28 of 116

50 || 51
INSTRUMENT PANELINSTRUMENT PANEL
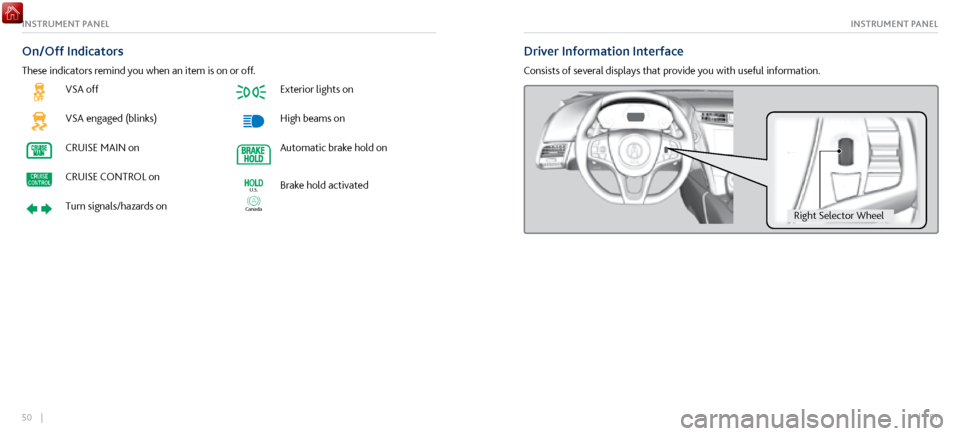
VSA off
VSA engaged (blinks)
CRUISE MAIN on
CRUISE CONTROL on
Turn signals/hazards on
Exterior lights on
High beams on
Automatic brake hold on
Canada
U.S.Brake hold activated
On/Off Indicators
These indicators remind you when an item is on or off.
Driver Information Interface
Consists of several displays that provide you with useful information.
Right Selector Whee l
Page 32 of 116

58 || 59
VEHICLE CONTROLSVEHICLE CONTROLS
n Using the Front Door Inner Handle
To unlock: Pull
the inner handle. The door unlocks and opens
in one motion.
To lock: Press the lock side of the switch to lock both doors.
Inner Handle
Both doors unlock when opening the driver’s door from the inside.
Do not pull an inner handle while the vehicle is moving.
n
Opening the Hatch
To unlock:
Press the hatch release button on the driver’s door.
Hatch Release Button
n Hatch Main Switch
To disable all hatch r elease methods: Use the hatch main
switch in the glove compartment.
Main Switch
ON
OFF
Power Window Operation
The power windows can be opened and closed when the vehicle is on by using the switches on
the doors. The switches on the driver’s side can be used to open and close boith windows.
n
Automatic Operation
To open: Push the
switch down firmly.
To close: Pull the switch up firmly.
The window opens or closes completely. To stop the window
at any time, push or pull the switch again briefly.
ON
OF F
Lock ButtonPower Window
Indicator
Driver’s
Window
Switch Passenger’s
Window Switch
n Manual Operation
To open: Push the switch
down lightly.
To close: Pull the switch up lightly.
Release the switch when the windows reach the desired position.
n
Power Window Lock
Push in the power
window lock button so only the driver’s window can be operated.
Closing a power window on someone’s hands or fingers can cause serious injury.
Make sure your passengers are away from the windows before closing them.
WARNING
Page 33 of 116

60 || 61
VEHICLE CONTROLSVEHICLE CONTROLS
Interior and Exterior Lights
Operate interior and exterior lights when the vehicle is on or off.
n
Exterior Lights
Rotate the switches on the lev
er to operate the exterior lights. Push the lever forward to
turn on high beams. Return the lever to its original position for low beams.
Turn on all exterior lights including headlights.High Beams
Flashing the high beams
Low Beams
OFF All exterior lights are off.
Turn on exterior lights except headlights.
AUTO Turn on the automatic lighting feature.
Headlights turn on or off depending on ambient
brightness when the vehicle is on. Headlights
automatically come on after the wipers are
engaged for a certain time. n
Interior Lights
Located on the ceiling in the fr
ont.
ON position: Interior lights remain on.
Door activated position: Interior lights come on a door is
opened, the driver’s door is unlocked, or the vehicle is turned
off.
OFF position: Interior lights remain off.
Of f
Door
Activated Position
On
n Brightness Control
Adjust instrument panel brightness when the vehicle is on.
To brighten: Press the (+) button.
To dim: Press the (–) button.
A beep sounds when the brightness reaches minimum or
maximum.
(+) Button
(-) Butto n
Page 34 of 116

62 || 63
VEHICLE CONTROLSVEHICLE CONTROLS
n Map Lights
Press the map lights
in the ceiling to turn them on or off.
n One-Touch Turn Signal
Use this quick and conv enient method to signal a lane
change.
Lightly push the turn signal lever up or down for a three-blink
sequence.
For a continuous signal, push the lever up or down until it
locks into place.
Right
Left
Wiper Operation
The windshield wipers and washers can be used when the vehicle is on.
n
Front Wipers
Mov
e the wiper lever up or down to the desired position.
Pull to use
washer. MIST
OFF
INT (intermittent)
LO: Low speed wipe
HI: High speed wipe
Page 39 of 116

72 || 73
VEHICLE CONTROLSVEHICLE CONTROLS
Adjusting the Mirrors
Adjust the angle of the mirrors for the best visibility when you are sitting in the correct driving
position.
n Automatic Dimming Rearview Mirror
When driving after dark, the
automatic dimming function
reduces the glare in the rearview mirror (and power door
mirrors) from headlights behind you.
The function cancels when the transmission is in Reverse (R).
n Power Door Mirrors
Adjust the power door
mirrors using the switches on the driver’s door when the vehicle is on.
L/R selector switch: Select the left or right mirror. After
adjusting the mirror, return the switch to the center position.
Mirror position adjustment switch: Press the switch left,
right, up, or down to move the mirror.
SwitchSelector
Switch Adjustment
n Reverse Tilt Door Mirrors
The selected door mirror can tilt downward when you shift to Reverse (R), improving
visibility on the selected side of the vehicle while reversing. The mirror returns to its original
position when you shift out of Reverse.
Models with driving position memory system
Either side mirror can tilt by moving the selector switch to the
appropriate side.
Slide the selector switch to left
or right to tilt down either side
door mirror.
Models without driving position memory system
The passenger-side door mirror can tilt downward by moving
the selector switch to the right.
Selector Switch
Page 40 of 116

74 || 75
VEHICLE CONTROLSVEHICLE CONTROLS
HomeLink® Universal Transceiver
Program your vehicle to operate up to three remote-controlled devices around your home—
such as garage doors, lighting, or home security systems—using the buttons on the ceiling.
Red Indicator
n Training a Button
Park near the system
you want to program, and follow the instructions in the flowchart.
To retrain a button or erase codes, see the Owner’s Manual on the Owner Information CD
or visit owners.acura.com (U.S.) or www.myacura.ca (Canada). If you need help, call (800)
355-3515 or visit www.homelink.com.
Press and hold the button on the r emote
and the HomeLink button at the same
time. Then, while continuing to hold the
HomeLink button, press and r elease the
button on the remote every 2 seconds.
Does the LED blink at a f ast er ra te within 20 seconds ?
Press and hold the
HomeLink button
again. Training
complete
YES
NO
HomeLink indicator
�ashes for 2 seconds,
then r emains on. HomeLink LED
r
emains on.YES
NO
YES
NO
Position the remote transmitter
1–3 inches (3–8 cm) from the
HomeLink button you want to program.1
Press and hold the desired HomeLink
button and the button on the remote
transmitter.
Does the HomeLink indicator (LED) blink at a f aster
rate after about 10 seconds ?
2
a
The remote has a rolling code. Press
the “learn” button on the remote-
controlled device (e.g., garage door
opener).
Press the programmed HomeLink
button again; the remote-controlled
device should operate. Within 30 seconds, press and hold the
programmed HomeLink button for 2
seconds.a
Press and hold the programmed
HomeLink button for about a second.
Does the devic e (garage door opener) work ?
3
b
4
5
HomeLink® is a registered trademark of Gentex Corporation.