ECU Acura RL 2000 3.5 Owner's Guide
[x] Cancel search | Manufacturer: ACURA, Model Year: 2000, Model line: RL, Model: Acura RL 2000Pages: 330, PDF Size: 4.53 MB
Page 100 of 330
Armres
t
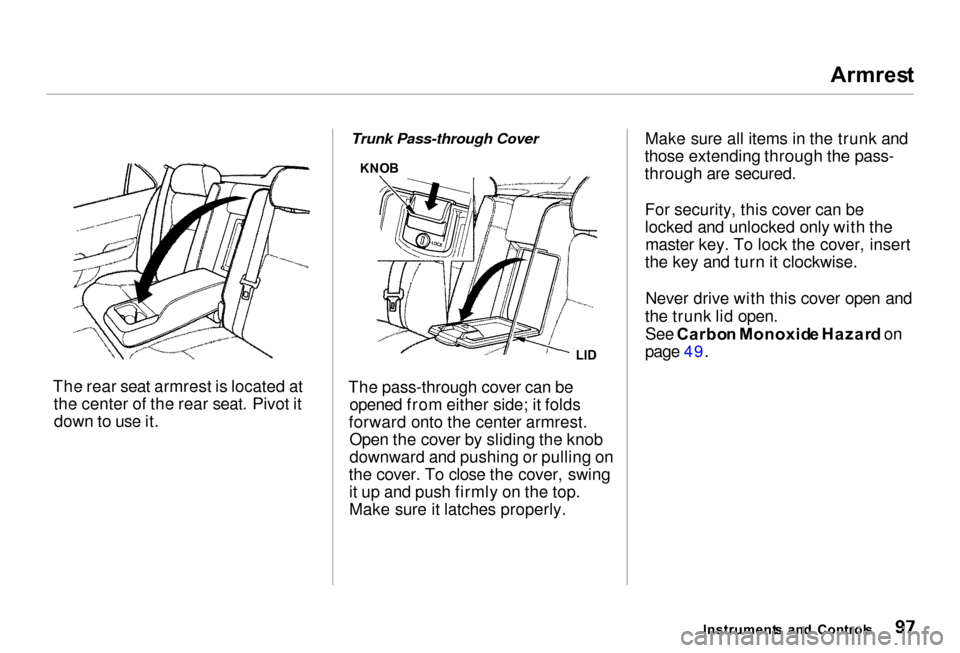
The rear seat armrest is located at the center of the rear seat. Pivot itdown to use it.
Trunk Pass-through Cover
The pass-through cover can be opened from either side; it folds
forward onto the center armrest. Open the cover by sliding the knob
downward and pushing or pulling on
the cover. To close the cover, swing it up and push firmly on the top.
Make sure it latches properly. Make sure all items in the trunk and
those extending through the pass-
through are secured.
For security, this cover can be
locked and unlocked only with themaster key. To lock the cover, insert
the key and turn it clockwise.
Never drive with this cover open and
the trunk lid open. See Carbo n Monoxid e Hazar d on
page 49.
Instrument s an d Control s
LI
D
KNO
B
Page 103 of 330
Drivin
g Positio n Memor y Syste m
Your Acura has a memory feature for the steering wheel, driver's seatand outside mirror positions.
Two seat, steering wheel, and outside mirror positions, for
different drivers or driving
conditions, can be stored in separate
memories. You select a memorized
position by pushing the appropriate
button.
Storing a Driving Position in Memory
Store a driving position as explained
in this section only when the car is
parked.
1. Turn the ignition switch ON (II). You cannot add a new drivingposition in the memory unless the
ignition switch is ON (II). You can
recall a memorized position with
the ignition switch in any position.
2. Adjust the seat to a comfortable position (see page 93). Adjust
the steering wheel to acomfortable position (see page 71).
Adjust the outside mirrors for best
visibility (see page 98).
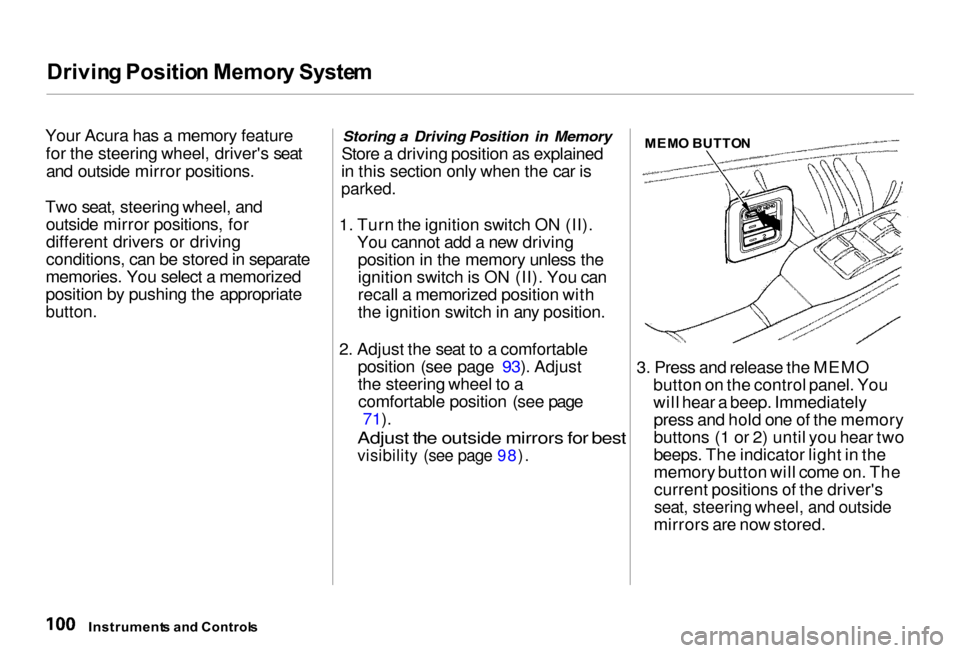
MEM
O BUTTO N
3. Press and release the MEMO button on the control panel. You
will hear a beep. Immediatelypress and hold one of the memory
buttons (1 or 2) until you hear two
beeps. The indicator light in the
memory button will come on. Thecurrent positions of the driver's
seat, steering wheel, and outside
mirrors are now stored.
Instrument s an d Control s
Page 107 of 330
Sk
i Sleev e
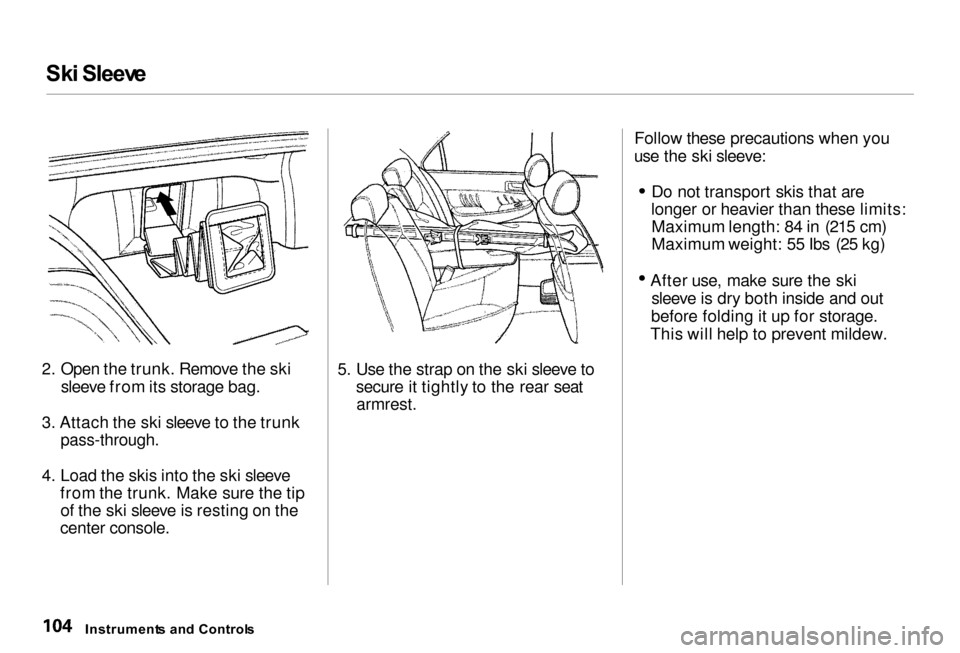
2. Open the trunk. Remove the ski sleeve from its storage bag.
3. Attach the ski sleeve to the trunk
pass-through.
4. Load the skis into the ski sleeve from the trunk. Make sure the tipof the ski sleeve is resting on the
center console. 5. Use the strap on the ski sleeve to
secure it tightly to the rear seatarmrest. Follow these precautions when you
use the ski sleeve: Do not transport skis that are
longer or heavier than these limits: Maximum length: 84 in (215 cm)
Maximum weight: 55 Ibs (25 kg) After use, make sure the ski
sleeve is dry both inside and out
before folding it up for storage.
This will help to prevent mildew.
Instrument s an d Control s
Page 122 of 330
Comfor
t an d Convenienc e Feature s
The climate control system in your
Acura provides a comfortable driving
environment in all weather condi-
tions.
The standard audio system has
many features. This section de-
scribes those features and how to
use them.
Your Acura has an anti-theft audio
system that requires a code number
to enable it.
The security system helps to dis-
courage vandalism and theft of your
Acura. Climate Control System................ 120
3.5 RL without Navigation System
Fully-automatic Operation........ 122
Semi-automatic Operation........ 123
3.5 RL with Navigation System
Fully-automatic Operation ........ 127
Semi-automatic Operation ........ 128
Rear Ventilation ......................... 132
Sunlight Sensor/ Temperature Sensor.............
133
Audio System ................................. 134
AM/FM/Cassette Stereo
Audio System......................... 134
3.5 RL without Navigation System
Operating the Radio.................. 135
Adjusting the Sound.................. 138
Audio System Lighting............. 139 Operating the Cassette Player...................................... 139
Tape Search Functions............. 140 Operating the CD Changer...... 142
3.5 RL with Navigation System
Operating the Radio.................. 145
Adjusting the Sound.................. 148
Audio System Lighting............. 149 Radio Frequencies..................... 149
Radio Reception......................... 149Operating the Cassette
Player...................................... 151
Tape Search Functions............. 151 Caring for the Cassette Player...................................... 154
Operating the CD Changer...... 155
Loading the CD Changer ......... 157
Protecting Compact Discs........ 159 CD Changer Error Indications.............................. 160
Remote Audio Controls ............ 161
Theft Protection........................ 162
Security System............................. 163
Comfor t an d Convenienc e Feature s
Page 144 of 330
Audi
o Syste m
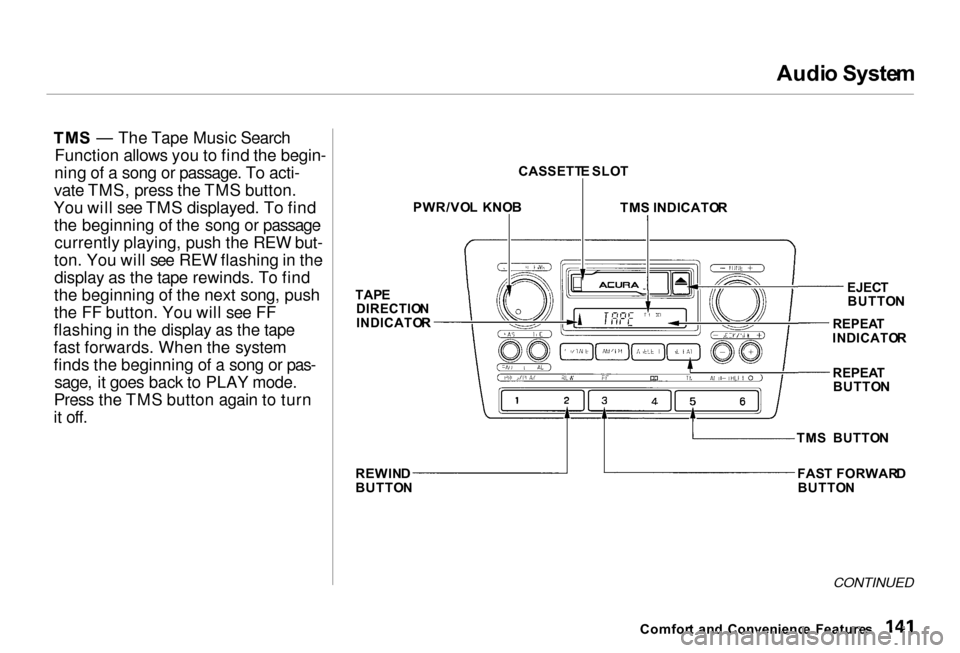
TM S — The Tape Music Search
Function allows you to find the begin-
ning of a song or passage. To acti-
vate TMS, press the TMS button.
You will see TMS displayed. To find the beginning of the song or passagecurrently playing, push the REW but-
ton. You will see REW flashing in the display as the tape rewinds. To find
the beginning of the next song, push
the FF button. You will see FF
flashing in the display as the tape
fast forwards. When the system
finds the beginning of a song or pas- sage, it goes back to PLAY mode.
Press the TMS button again to turn
it off.
CONTINUED
Comfor t an d Convenienc e Feature s
CASSETT
E SLO T
TM S INDICATO R
EJECT
BUTTO N
REPEA T
INDICATO R
REPEA T
BUTTO N
TM S BUTTO N
FAS T FORWAR D
BUTTO N
REWIN
D
BUTTO NPWR/VO
L KNO B
TAP E
DIRECTIO N
INDICATO R
Page 155 of 330
Audi
o Syste m
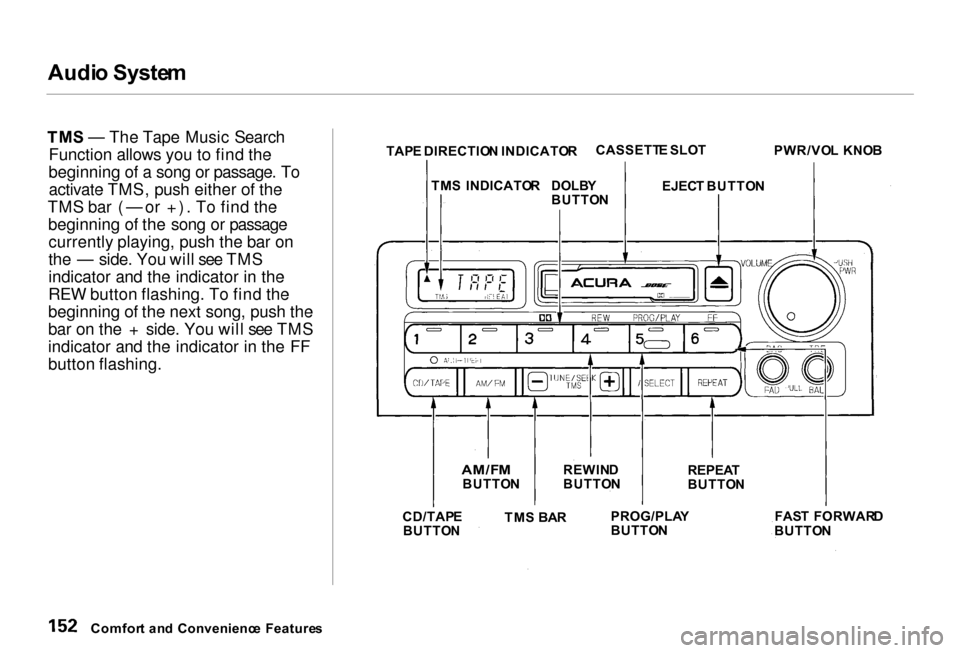
TM S — The Tape Music Search
Function allows you to find the
beginning of a song or passage. To activate TMS, push either of the
TMS bar ( — or +). To find the beginning of the song or passagecurrently playing, push the bar on
the — side. You will see TMS
indicator and the indicator in the
REW button flashing. To find the
beginning of the next song, push the
bar on the + side. You will see TMS
indicator and the indicator in the FF
button flashing.
Comfor t an d Convenienc e Feature s TAP
E DIRECTIO N INDICATO RCASSETT
E SLO T
PWR/VOL KNO B
EJEC T BUTTO N
TM
S INDICATO R
DOLB Y
BUTTO N
AM/F M
BUTTO N
CD/TAP E
BUTTO N REWIN
D
BUTTO N REPEA
T
BUTTO N
FAST FORWAR D
BUTTO N
PROG/PLA
Y
BUTTO N
TM
S BA R
Page 166 of 330
Securit
y Syste m
The security system helps to protect your car and valuables from theft.
The horn sounds and a combination of headlights, parking lights, side
marker lights and taillights flashes if
someone attempts to break into your
car or remove the radio. This alarm continues for two minutes, then the
system resets. To reset an alarming
system before the two minutes have
elapsed, unlock either front door
with the key or the remote
transmitter.
The security system sets auto- matically fifteen seconds after you
lock the doors, hood, and trunk. For
the system to activate, you must lock
the doors from the outside with the key, lock tab, door lock switch, or
remote transmitter. The security
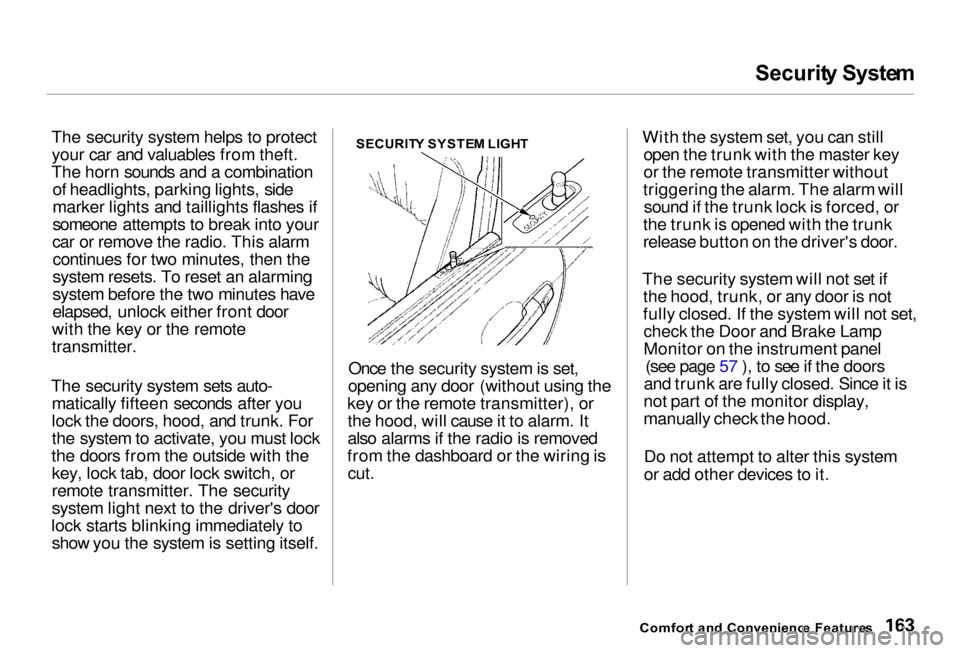
system light next to the driver's door
lock starts blinking immediately to show you the system is setting itself. SECURIT
Y SYSTE M LIGH T
Once the security system is set,
opening any door (without using the
key or the remote transmitter), or the hood, will cause it to alarm. It
also alarms if the radio is removed
from the dashboard or the wiring is
cut.
With the system set, you can still
open the trunk with the master key
or the remote transmitter without
triggering the alarm. The alarm will sound if the trunk lock is forced, or
the trunk is opened with the trunk
release button on the driver's door.
The security system will not set if the hood, trunk, or any door is not
fully closed. If the system will not set,check the Door and Brake Lamp
Monitor on the instrument panel (see page 57 ), to see if the doors
and trunk are fully closed. Since it is
not part of the monitor display,
manually check the hood.
Do not attempt to alter this system
or add other devices to it.
Comfor t an d Convenienc e Feature s
Page 172 of 330
Servic
e Statio n Procedure s
If you can open the hood without
sliding the hood latch handle, or the
hood latch handle moves stiffly or does not spring back as before, the
mechanism should be cleaned and
lubricated (see page 229 ).
3. Lift the hood up most of the way.
The hydraulic supports will lift it up the rest of the way and hold it
up .
To close the hood, lower it to about a
foot (30 cm) above the fender, thenpress down firmly with your hands.
After closing the hood, make sure it is securely latched. Oil Check
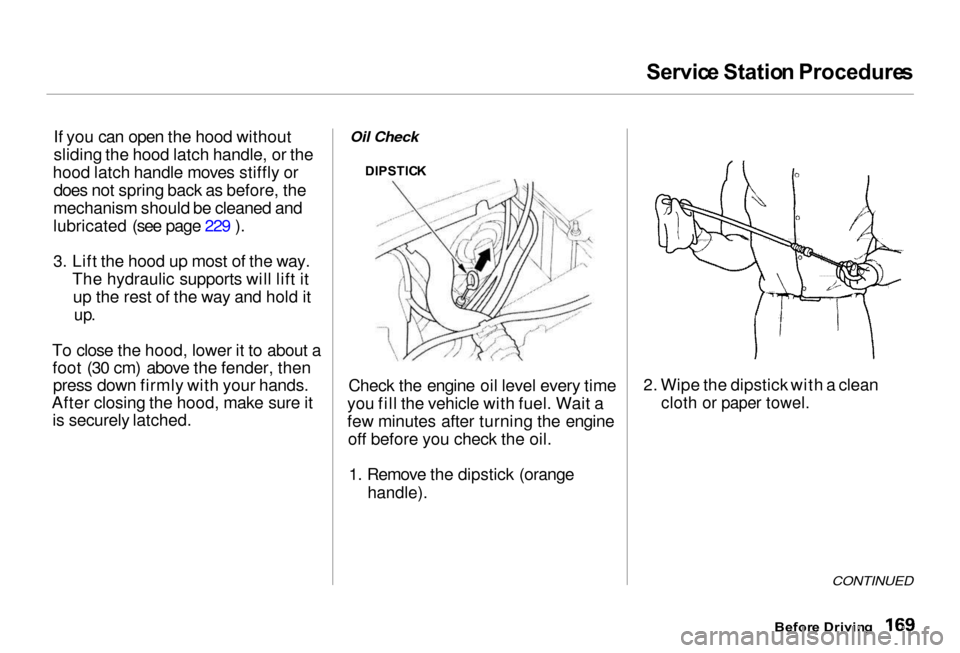
Check the engine oil level every time
you fill the vehicle with fuel. Wait a
few minutes after turning the engine off before you check the oil.
1. Remove the dipstick (orange
handle).
2. Wipe the dipstick with a clean
cloth or paper towel.
CONTINUED
Befor e Drivin g
DIPSTIC
K
Page 178 of 330
Carryin
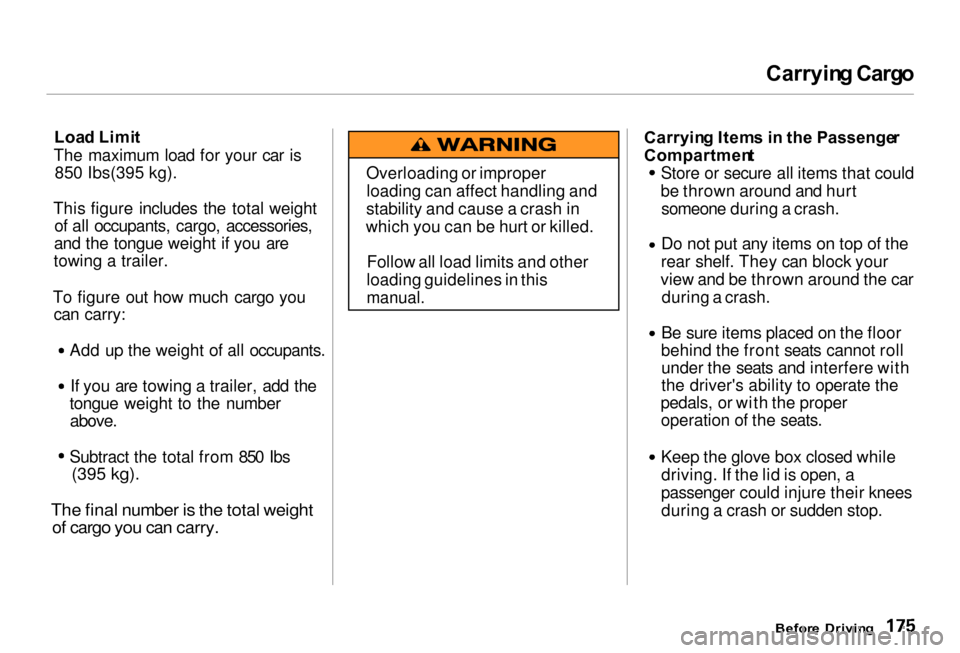
g Carg o
Loa d Limi t
The maximum load for your car is 850 Ibs(395 kg).
This figure includes the total weight of all occupants, cargo, accessories,
and the tongue weight if you are
towing a trailer.
To figure out how much cargo you can carry: Add up the weight of all occupants.
If you are towing a trailer, add the
tongue weight to the number
above.
Subtract the total from 850 Ibs
(395 kg).
The final number is the total weight
of cargo you can carry.
Carryin
g Item s i n th e Passenge r
Compartmen t
Store or secure all items that could
be thrown around and hurt someone during a crash.
Do not put any items on top of the
rear shelf. They can block your
view and be thrown around the car during a crash. Be sure items placed on the floor
behind the front seats cannot roll under the seats and interfere with
the driver's ability to operate the
pedals, or with the proper operation of the seats.
Keep the glove box closed while
driving. If the lid is open, a
passenger could injure their knees during a crash or sudden stop.
Before Drivin g
Overloading or improper
loading can affect handling and
stability and cause a crash in
which you can be hurt or killed.
Follow all load limits and other
loading guidelines in this
manual.
Page 181 of 330
Preparin
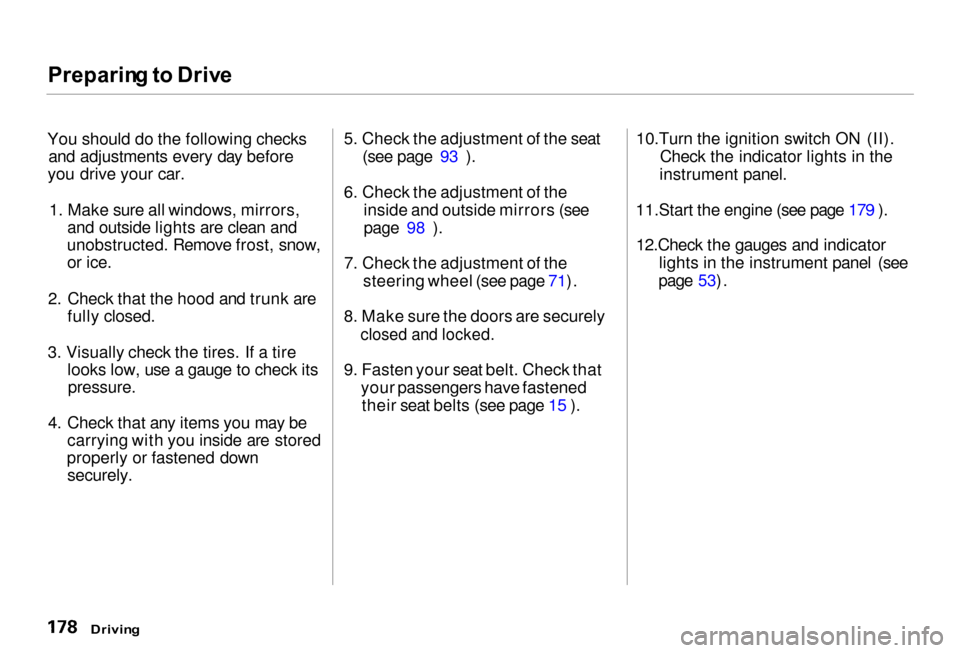
g to Driv e
You should do the following checks and adjustments every day before
you drive your car.
1. Make sure all windows, mirrors,
and outside lights are clean and
unobstructed. Remove frost, snow, or ice.
2. Check that the hood and trunk are
fully closed.
3. Visually check the tires. If a tire
looks low, use a gauge to check itspressure.
4. Check that any items you may be
carrying with you inside are stored
properly or fastened down
securely.
5. Check the adjustment of the seat
(see page 93 ).
6. Check the adjustment of the
inside and outside mirrors (see
page 98 ).
7. Check the adjustment of the
steering wheel (see page 71).
8. Make sure the doors are securely
closed and locked.
9. Fasten your seat belt. Check that
your passengers have fastened their seat belts (see page 15 ).
10.Turn the ignition switch ON (II).
Check the indicator lights in the
instrument panel.
11.Start the engine (see page 179 ).
12.Check the gauges and indicator
lights in the instrument panel (see
page 53).
Drivin g