ECU Acura RL 2000 3.5 Owner's Guide
[x] Cancel search | Manufacturer: ACURA, Model Year: 2000, Model line: RL, Model: Acura RL 2000Pages: 330, PDF Size: 4.53 MB
Page 187 of 330
Parkin
g
Always use the parking brake when
you park your car. The indicator on the instrument panel shows that the
parking brake is not fully released; it does not indicate that the parking
brake is firmly set. Make sure the
parking brake is set firmly or your
car may roll if it is parked on an
incline.
Set the parking brake before you put
the transmission in Park. This keeps
the car from moving and putting
pressure on the parking mechanism
in the transmission — making it
easier to move the shift lever out of
Park when you want to drive away. If the car is facing uphill, turn the
front wheels away from the curb.
If the car is facing downhill, turn the
front wheels toward the curb.
Make sure the parking brake is fully
released before driving away. Driving with the parking brake
partially set can overheat or damage
the rear brakes. Parkin
g Tip s
Make sure the moonroof and the
windows are closed. Turn off the lights.
Place any packages, valuables, etc.,
in the trunk or take them with you.
Lock the doors with the key or the
remote transmitter. Check the
indicator on the driver's door to
verify that the security system is set. Never park over dry leaves, tall
grass, or other flammable materials. The three way catalytic
converter gets very hot, and could
cause these materials to catch on
fire.
Drivin g
Page 199 of 330
Towin
g a Traile r
Towin g Equipmen t an d
Accessorie s
Towing can require a variety of equipment, depending on the size of
your trailer, how it will be used, and
how much load you are towing.
Discuss your needs with your trailersales or rental agency, and follow the
guidelines in the rest of this section.
Also make sure that all equipment is properly installed and that it meets
federal, state, province, and localregulations.
Hitches
Any hitch used on your vehicle must be properly bolted to the underbody.
Safety Chain
Always use a safety chain. Make sure that it is secured to both the
trailer and hitch, and that it crosses
under the tongue so it can catch the
trailer if it becomes unhitched. Leave enough slack to allow the
trailer to turn corners easily, but do
not let the chain drag on the ground.
Trailer Brakes
Acura recommends that any trailer having a total weight of 1,000 Ibs (450 kg) or more be equipped with
its own electric or surge-type brakes.
If you choose electric brakes, be sure they are electronically actuated.
Do not attempt to tap into your
vehicle's hydraulic system. No matter how successful it may seem,any attempt to attach trailer brakes
to your vehicle's hydraulic system
will lower braking effectiveness and create a potential hazard.
Drivin g
Page 201 of 330
Towin
g a Traile r
Additional Trailer Equipment Many states and Canadian provinces
require special outside mirrors when
towing a trailer. Even if they don't,
you should install special mirrors if
you cannot clearly see behind you, or if the trailer creates a blind spot.
Ask your trailer sales or rental agency if any other items are
recommended or required for your
towing situation.
Pre-To
w Checklis t
When preparing to tow, and before driving away, be sure to check the
following: The vehicle has been properly
serviced, and the tires, brakes,
suspension, and cooling system
are in good operating condition.
All weights and loads are within limits (see pages 194 and 195 ).
The hitch, safety chain, and any other attachments are secure. All items on and in the trailer are
properly secured and cannot shift
while you drive. The lights and brakes on your
vehicle and the trailer are working
properly. Your vehicle tires and spare are
properly inflated (see page 242 ),and the trailer tires and spare are
inflated as recommended by the
trailer maker.
Drivin g
Page 218 of 330
Engin
e Oil
Addin g Oi l
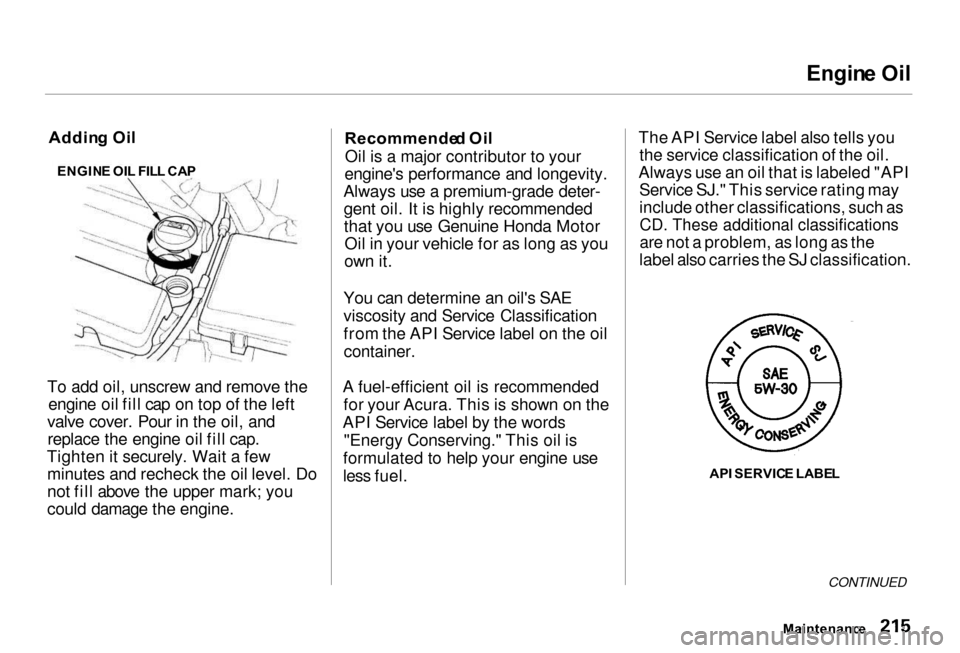
To add oil, unscrew and remove the engine oil fill cap on top of the left
valve cover. Pour in the oil, and replace the engine oil fill cap.
Tighten it securely. Wait a few minutes and recheck the oil level. Do
not fill above the upper mark; you
could damage the engine. Recommende
d Oi l
Oil is a major contributor to your
engine's performance and longevity.
Always use a premium-grade deter- gent oil. It is highly recommended
that you use Genuine Honda Motor Oil in your vehicle for as long as you
own it.
You can determine an oil's SAE
viscosity and Service Classification
from the API Service label on the oil container.
A fuel-efficient oil is recommended for your Acura. This is shown on the
API Service label by the words "Energy Conserving." This oil is
formulated to help your engine use
less fuel. The API Service label also tells you
the service classification of the oil.
Always use an oil that is labeled "API Service SJ." This service rating may
include other classifications, such as
CD. These additional classifications
are not a problem, as long as the
label also carries the SJ classification.
API SERVIC E LABE L
CONTINUED
Maintenanc e
ENGIN
E OI L FIL L CA P
Page 225 of 330
Coolin
g Syste m
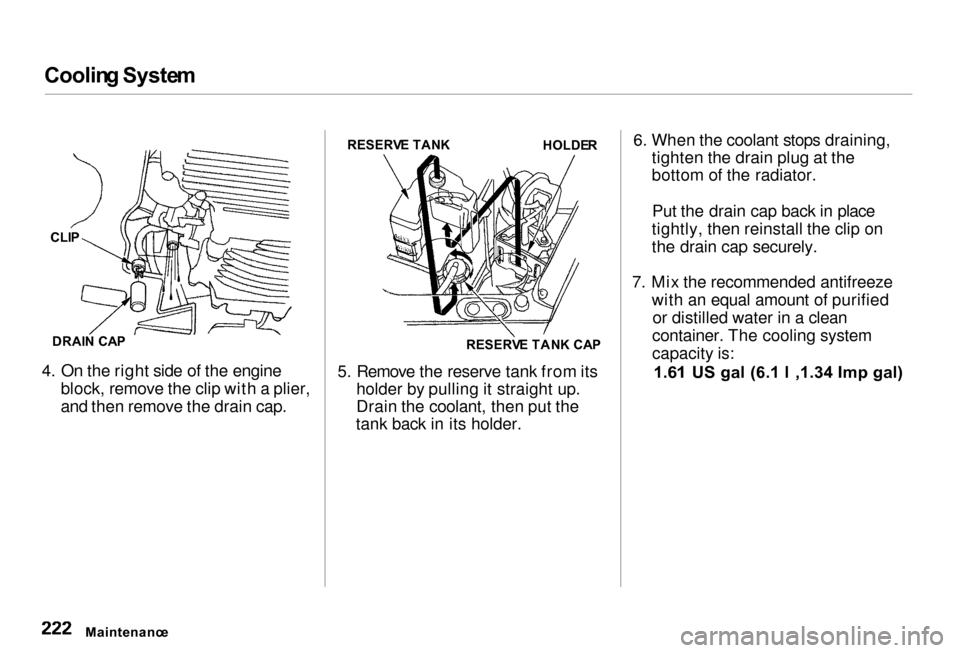
4. On the right side of the engine block, remove the clip with a plier,
and then remove the drain cap. 5. Remove the reserve tank from its
holder by pulling it straight up.
Drain the coolant, then put the
tank back in its holder. 6. When the coolant stops draining,
tighten the drain plug at the
bottom of the radiator.
Put the drain cap back in place
tightly, then reinstall the clip on
the drain cap securely.
7. Mix the recommended antifreeze with an equal amount of purifiedor distilled water in a clean
container. The cooling system
capacity is:
1.61 US gal (6.1 l ,1.34 Imp gal)
Maintenanc e
CLI
P
DRAI N CA P RESERV
E TAN K
HOLDER
RESERV E TAN K CA P
Page 230 of 330
Differentia
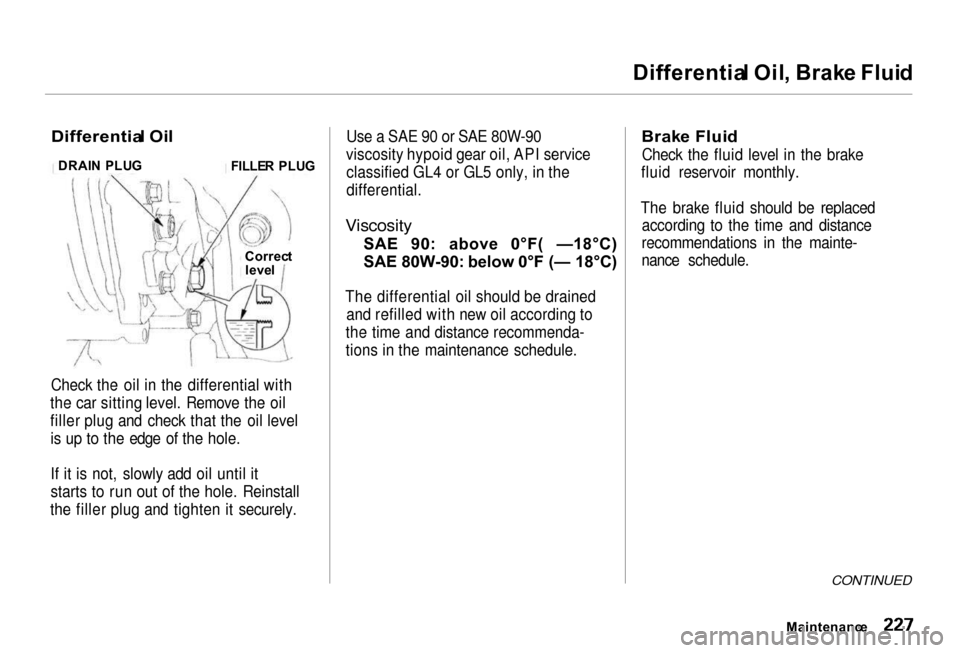
l Oil , Brak e Flui dCheck the oil in the differential with
the car sitting level. Remove the oil
filler plug and check that the oil level is up to the edge of the hole.
If it is not, slowly add oil until it
starts to run out of the hole. Reinstall
the filler plug and tighten it securely. Use a SAE 90 or SAE 80W-90
viscosity hypoid gear oil, API service classified GL4 or GL5 only, in the
differential.
Viscosity
SAE 90: above 0°F( —18°C)
SAE 80W-90: below 0°F (— 18°C)
The differential oil should be drained and refilled with new oil according to
the time and distance recommenda-
tions in the maintenance schedule.
Brak e Flui d
Check the fluid level in the brake
fluid reservoir monthly.
The brake fluid should be replaced according to the time and distance
recommendations in the mainte-
nance schedule.
CONTINUED
Maintenanc e
Correc
t
leve l
Differentia
l Oi l
FILLER PLU G
DRAI
N PLU G
Page 268 of 330

Interio
r Car e
Dirt build-up in the loops of the seat
belt anchors can cause the belts to
retract slowly. Wipe the insides of
the loops with a clean cloth dampened in mild soap and warm
water or isopropyl alcohol.
Woo d Tri m
Clean the wood trim with a soft cloth
dipped in clear water and wipe it dry
with another soft cloth. Soap may leave a film that dulls the finish. Window
s
Clean the windows, inside and out,
with a commercially-available glass cleaner. You can also use a mixture
of one part white vinegar to ten parts
water. This will remove the haze that builds up on the inside of the
windows. Use a soft cloth or paper
towels to clean all glass and clear
plastic surfaces.
The rear window defogger and
antenna wires are bonded to the inside of the glass. Wiping vigorously up-and-
down can dislodge and break these wires. When cleaning the rear window,
use gentle pressure and wipe side-to-
side.
Ai
r Freshener s
If you want to use an air freshener/ deodorizer in the interior of your car,
it is best to use a solid type. Some
liquid air fresheners contain chemi- cals that may cause parts of the
interior trim and fabric to crack or discolor.
If you use a liquid air freshener,
make sure you fasten it securely so it does not spill as you drive.
Appearance Car e
NOTIC
E
Page 277 of 330
Changin
g a Fla t Tir e
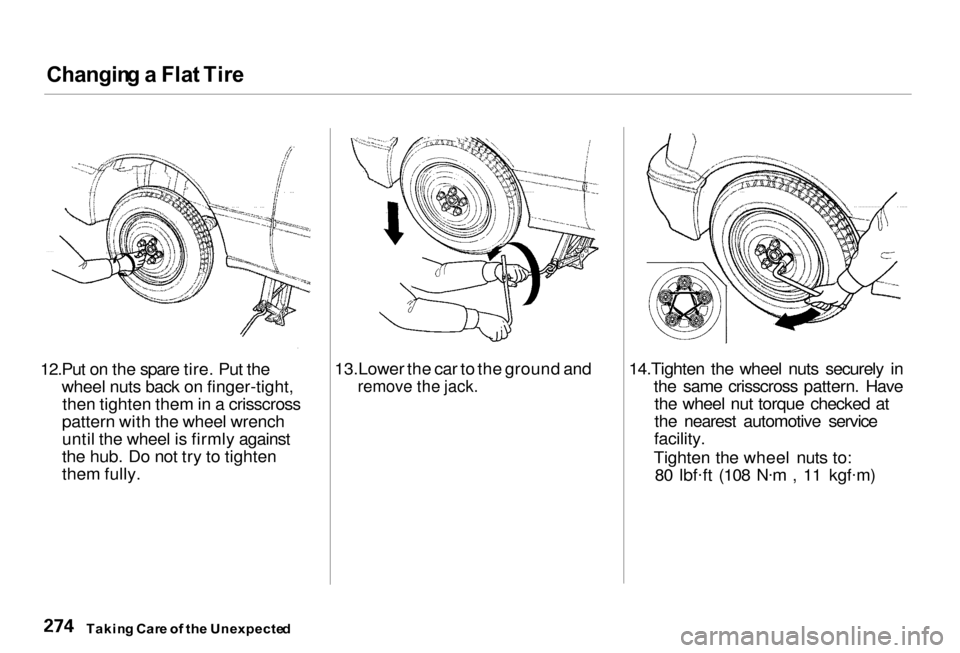
12.Put on the spare tire. Put the wheel nuts back on finger-tight,then tighten them in a crisscross
pattern with the wheel wrench
until the wheel is firmly against
the hub. Do not try to tighten
them fully. 13.Lower the car to the ground and
remove the jack.
14.Tighten the wheel nuts securely in
the same crisscross pattern. Havethe wheel nut torque checked at
the nearest automotive service
facility.
Tighten the wheel nuts to: 80 lbf .
ft (108 N .
m , 11 kgf .
m)
Takin g Car e o f th e Unexpecte d
Page 279 of 330
Changin
g a Fla t Tire , I f You r Engin e Won' t Star t
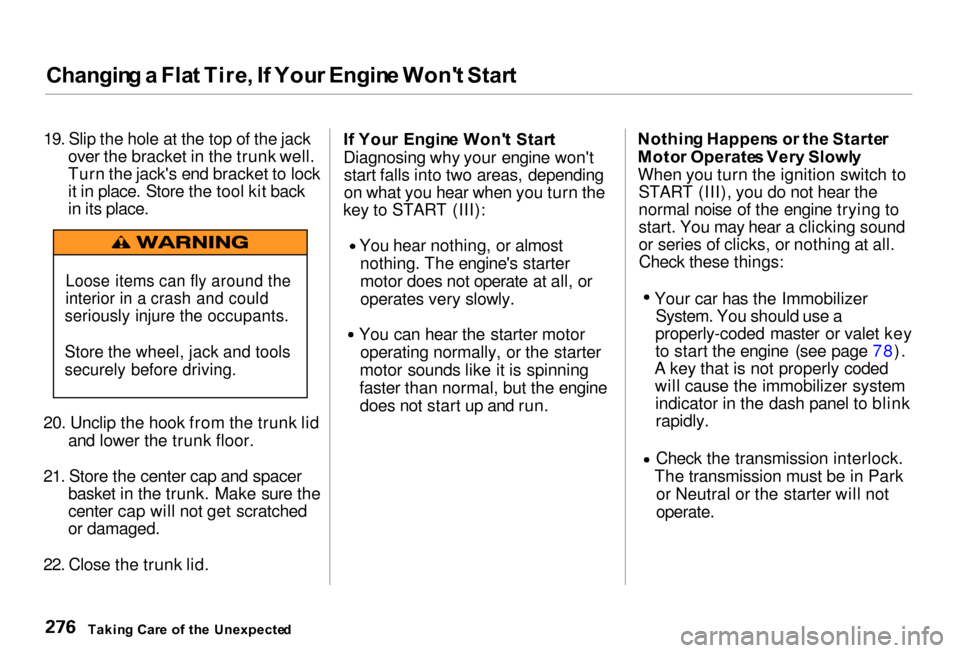
19. Slip the hole at the top of the jack over the bracket in the trunk well.
Turn the jack's end bracket to lock
it in place. Store the tool kit back
in its place.
20. Unclip the hook from the trunk lid and lower the trunk floor.
21. Store the center cap and spacer
basket i
n the trunk. Make sure the
center cap will
not get scratched
or damaged.
22. Close th
e trunk lid. I
f You r
Engin
e Won' t Star t
Diagnosing why your engine won't start falls into two areas, depending
on what you hear when you turn the
key to START (III): You hear nothing, or almost
nothing. The engine's starter
motor does not operate at all, or
operates very slowly. You can hear the starter motor
operating normally, or the starter
motor sounds like it is spinning
faster than normal, but the engine does not start up
and run. Nothin
g Happen s
o
r th e Starte r
Moto r Operate s Ver y Slowl y
When you turn the ignition switch to START (III), you do not hear the
normal noise of the engine trying to
start. You may hear a clicking sound
or series of clicks, or nothing at all.Check these things:
Your car has the ImmobilizerSystem. You should use a
properly-coded master or valet key
to start the engine (see page 78).
A key that is not properly coded will cause the immobilizer systemindicator in the dash panel to blinkrapidly. Check the transmission interlock.
The transmission must be in Park or Neutral or the starter will not
operate.
Takin g Car e o f th e Unexpecte d
Loose items can fly around the
interior in a crash and could
seriously injure the occupants.
Store the wheel, jack and tools
securely before driving.
Page 303 of 330
Vehicl
e Stabilit y Assis t (VSA ) Syste m
The Vehicle Stability Assist system (VSA) monitors the car's actions
during straight-line acceleration and
cornering behavior. It reduces
engine power and applies selective
braking if it senses any loss of
traction.
Controllin g Tractio n Durin g
Straight-lin e Acceleratio n
If one drive wheel is turning faster
than the other, or both drive wheels
are turning faster than the non- driven wheels, VSA senses
wheelspin. It reduces engine power and applies braking at the wheels as
necessary to increase traction.
To do this, VSA monitors the pulse frequencies from the wheel speed sensors. It also uses information
from the steering wheel angle sensor
and the lateral acceleration sensor to determine if the car is accelerating in
a straight line or if it is cornering.
VSA can then calculate how much wheelspin, if any, to allow. It signals
the ECU to reduce fuel flow andretard ignition timing. This reduces
available engine power. The ECU
will also apply braking at the wheels as necessary. When wheelspin has
been controlled, braking and engine
control return to normal.
Controllin g Tractio n Durin g
Cornerin g
VSA monitors steering input and the car's expected response to that input.
VSA's yaw rate sensor measures the car's actual cornering behavior. If VSA determines that the car is
turning more or less than expected,
the system reduces engine power
and applies braking at the
appropriate wheel to try and
maintain adequate traction during
cornering.
VSA uses the same wheel speed sensor assemblies as the ABS.
Additional sensors measure steering wheel angle, lateral acceleration, and
yaw rate.
The control unit monitors the VSA circuitry while driving. If it senses a
problem, it turns off the system and illuminates the VSA System
Indicator on the instrument panel.
Technica l Informatio n