trunk release Acura RL 2000 3.5 Owner's Manual
[x] Cancel search | Manufacturer: ACURA, Model Year: 2000, Model line: RL, Model: Acura RL 2000Pages: 330, PDF Size: 4.53 MB
Page 60 of 330
Indicato
r Light s
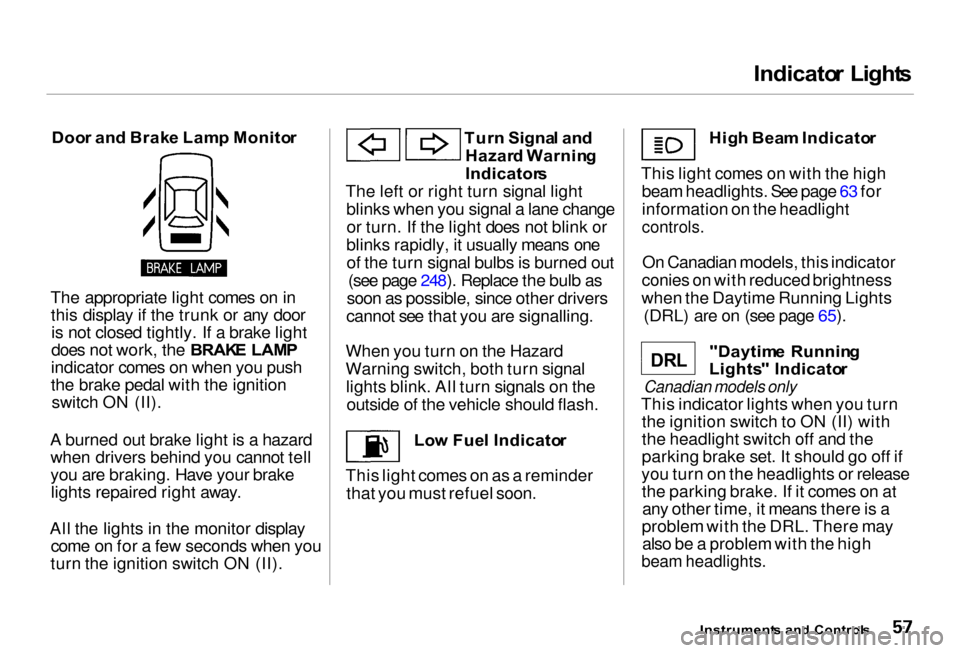
Doo r an d Brak e Lam p Monito r
The appropriate light comes on in this display if the trunk or any dooris not closed tightly. If a brake light
does not work, the BRAK E LAM P
indicator comes on when you push
the brake pedal with the ignition switch ON (II).
A burned out brake light is a hazard when drivers behind you cannot tell
you are braking. Have your brakelights repaired right away.
All the lights in the monitor display come on for a few seconds when you
turn the ignition switch ON (II). Tur
n Signa l an d
Hazar d Warnin g
Indicator s
The left or right turn signal light blinks when you signal a lane changeor turn. If the light does not blink or
blinks rapidly, it usually means one of the turn signal bulbs is burned out (see page 248). Replace the bulb as
soon as possible, since other drivers
cannot see that you are signalling.
When you turn on the Hazard
Warning switch, both turn signal lights blink. All turn signals on the outside of the vehicle should flash.
Low Fue l Indicato r
This light comes on as a reminder that you must refuel soon. Hig
h Bea m Indicato r
This light comes on with the high beam headlights. See page 63 for
information on the headlight
controls.
On Canadian models, this indicator
conies on with reduced brightness
when the Daytime Running Lights (DRL) are on (see page 65).
"Daytim e Runnin g
Lights " Indicato r
Canadian models only
This indicator lights when you turn the ignition switch to ON (II) with
the headlight switch off and the
parking brake set. It should go off if
you turn on the headlights or release the parking brake. If it comes on atany other time, it means there is a
problem with the DRL. There may also be a problem with the high
beam headlights.
Instrument s an d Control s
D R L
Page 86 of 330

Key
s an d Lock s
If you unlock the doors with the
remote transmitter, but do not open
any of the doors within 30 seconds,
the doors automatically relock and
the security system sets.
You cannot lock any of the doors with the remote transmitter if any door is not fully closed or the key is
in the ignition switch. You cannot
unlock any of the doors with the key
in the ignition switch.
To open the trunk, push the Trunk Release button for approximately
one second.
You can open the trunk with the remote transmitter regardless of the
position of the main switch in the
glove box. The trunk will not open if
the key is in the ignition switch.
Turning the Beep Off and On
You can program the keyless entry system so it does not beep when you
lock and unlock the doors. This
procedure only turns off the beep;
the exterior lights will still flash.
To turn this feature off, stand near the car with the remote transmitter.Press and hold the Trunk Release
button, then press the Lock button
within one second. You should see the LED on the remote transmittercome on for one second. Release the
buttons after the LED goes out.
To turn this feature on, repeat the above procedure. You should see the
LED blink twice.
After you program the remote transmitter, make sure the trunk lidis closed.
Panic Mode
Panic mode allows you to remotely activate your car's security system to
attract attention. When activated, the
horn will sound, and the exterior
lights will flash, for about 30 seconds.
To activate panic mode, press and hold the PANIC button for about two
seconds.
To cancel Panic mode before 30 seconds, press any button on the
remote transmitter. You can also
turn the ignition switch to ON (II).
Panic mode will not activate if the
ignition switch is in ON (II).
CONTINUED
Instrument s an d Control s
Page 89 of 330
Key
s an d Lock s
Trun k
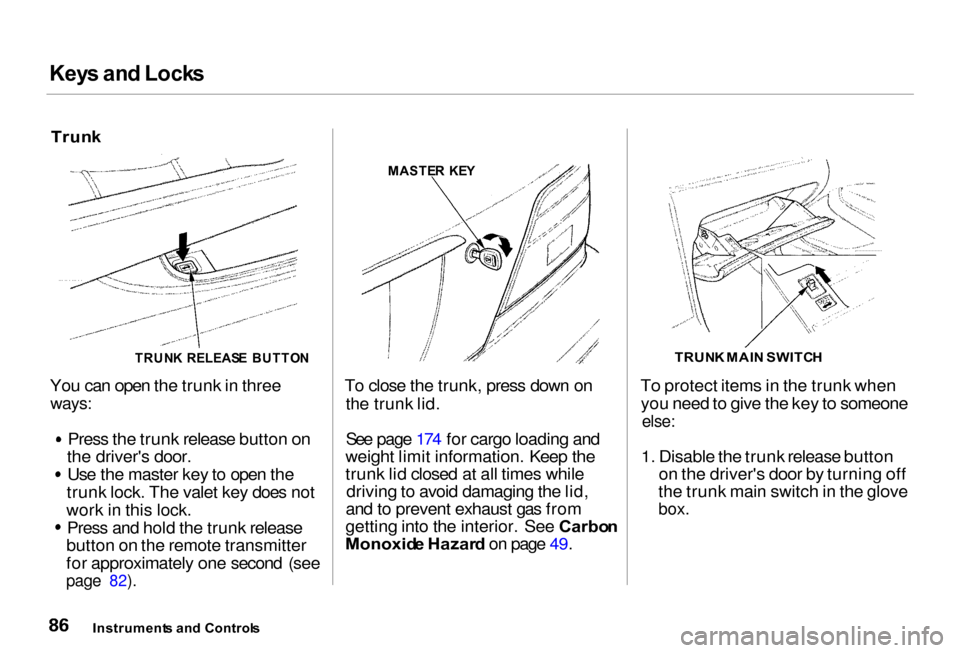
You can open the trunk in three
ways:
Press the trunk release button on
the driver's door.
Use the master key to open the
trunk lock. The valet key does not
work in this lock. Press and hold the trunk release
button on the remote transmitter
for approximately one second (see
page 82).
To close the trunk, press down on
the trunk lid.
See page 174 for cargo loading and
weight limit information. Keep the
trunk lid closed at all times while driving to avoid damaging the lid,
and to prevent exhaust gas from
getting into the interior. See Carbo n
Monoxid e Hazar d on page 49. To protect items in the trunk when
you need to give the key to someone
else:
1. Disable the trunk release button on the driver's door by turning off
the trunk main switch in the glove
box.
Instrument s an d Control s
TRUN
K RELEAS E BUTTO N MASTE
R KE Y
TRUNK MAI N SWITC H
Page 166 of 330
Securit
y Syste m
The security system helps to protect your car and valuables from theft.
The horn sounds and a combination of headlights, parking lights, side
marker lights and taillights flashes if
someone attempts to break into your
car or remove the radio. This alarm continues for two minutes, then the
system resets. To reset an alarming
system before the two minutes have
elapsed, unlock either front door
with the key or the remote
transmitter.
The security system sets auto- matically fifteen seconds after you
lock the doors, hood, and trunk. For
the system to activate, you must lock
the doors from the outside with the key, lock tab, door lock switch, or
remote transmitter. The security
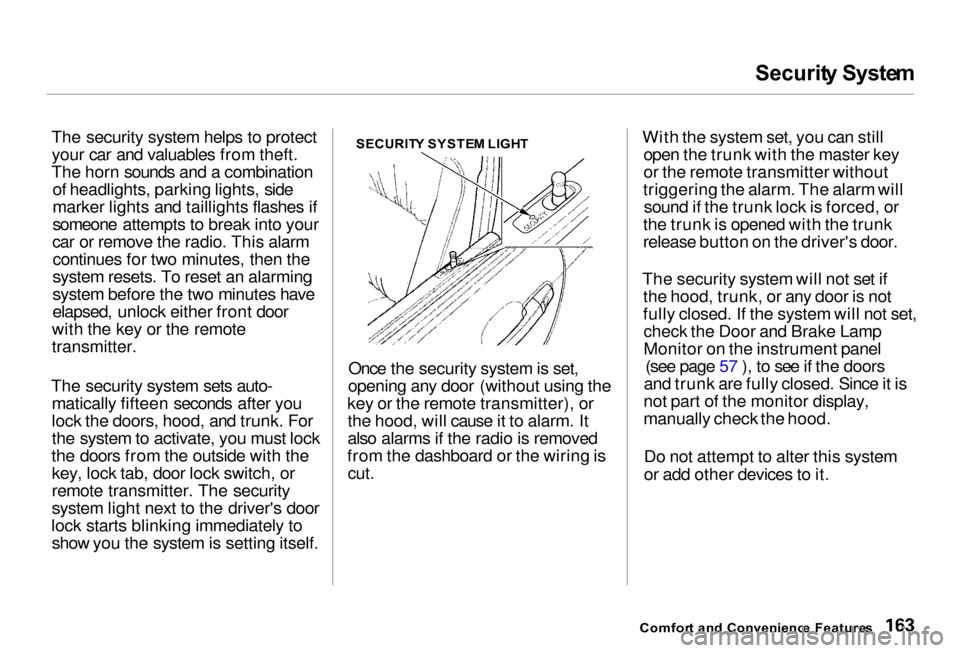
system light next to the driver's door
lock starts blinking immediately to show you the system is setting itself. SECURIT
Y SYSTE M LIGH T
Once the security system is set,
opening any door (without using the
key or the remote transmitter), or the hood, will cause it to alarm. It
also alarms if the radio is removed
from the dashboard or the wiring is
cut.
With the system set, you can still
open the trunk with the master key
or the remote transmitter without
triggering the alarm. The alarm will sound if the trunk lock is forced, or
the trunk is opened with the trunk
release button on the driver's door.
The security system will not set if the hood, trunk, or any door is not
fully closed. If the system will not set,check the Door and Brake Lamp
Monitor on the instrument panel (see page 57 ), to see if the doors
and trunk are fully closed. Since it is
not part of the monitor display,
manually check the hood.
Do not attempt to alter this system
or add other devices to it.
Comfor t an d Convenienc e Feature s
Page 187 of 330
Parkin
g
Always use the parking brake when
you park your car. The indicator on the instrument panel shows that the
parking brake is not fully released; it does not indicate that the parking
brake is firmly set. Make sure the
parking brake is set firmly or your
car may roll if it is parked on an
incline.
Set the parking brake before you put
the transmission in Park. This keeps
the car from moving and putting
pressure on the parking mechanism
in the transmission — making it
easier to move the shift lever out of
Park when you want to drive away. If the car is facing uphill, turn the
front wheels away from the curb.
If the car is facing downhill, turn the
front wheels toward the curb.
Make sure the parking brake is fully
released before driving away. Driving with the parking brake
partially set can overheat or damage
the rear brakes. Parkin
g Tip s
Make sure the moonroof and the
windows are closed. Turn off the lights.
Place any packages, valuables, etc.,
in the trunk or take them with you.
Lock the doors with the key or the
remote transmitter. Check the
indicator on the driver's door to
verify that the security system is set. Never park over dry leaves, tall
grass, or other flammable materials. The three way catalytic
converter gets very hot, and could
cause these materials to catch on
fire.
Drivin g
Page 321 of 330
Inde
x
Automatic Speed Control................ 73
Automatic Transmission............... 180
Capacity, Fluid........................... 298
Checking Fluid Level................ 226
Shifting........................................ 180
Shift Lever Position Indicator.. 180
Shift Lever Positions................. 180
Shift Lock Release..................... 183
Battery
Charging System
Indicator............................ 54, 283
Jump Starting............................. 278
Maintenance............................... 234
Specifications............................. 299
Before Driving............................... 165
Belts, Seat..................................... 8, 40
Beverage Holder............................ 111
Body Repair.................................... 267
Brakes
Anti-lock System (ABS)............ 186
Break-in, New Linings .............. 166
Fluid............................................ 227
Light, Burned-out...................... 254 Parking........................................ 108
System Indicator.................. 54, 285
Wear Indicators......................... 185
Brakes, ABS Operation.................................... 186System Indicator.................. 56, 187
Braking System.............................
. 185
Break-in, New Car......................... 166
Brightness Control, Instruments... 66
Brights, Headlights......................... 63
Bulb Replacement Back-up Lights........................... 254
Brake Lights............................... 254
Ceiling Lights............................. 257
Courtesy Lights......................... 257
Fog Lights.................................. 251 Front Side Marker Lights......... 253
Headlights.................................. 250
High-mount Brake Light.......... 255
License Plate Lights.................. 256
Specifications............................. 299
Trunk Light................................ 258
Turn Signal Lights..................... 253
Bulbs, Halogen............................... 250
Cables, Jump Starting With.......... 278
Cancel Button................................... 75
Capacities Chart............................. 298
Carbon Monoxide Hazard.............. 49
Carrying, Cargo............................. 174
Cassette Player
Care............................................. 154
Operation........................... 139, 151
CAUTION, Explanation of............... ii
CD Changer................. 142, 155, 157
Ceiling Lights................................. 117
Certification Label......................... 296
Chains............................................. 247
Change Oil
How to......................................... 217
When to....................................... 206
Changing a Flat Tire..................... 271
Changing Engine Coolant............. 221
Charging System Indicator.... 54, 283
Checking Automatic Transmission
Fluid........................................ 226
Battery Condition...................... 234
Brake Fluid................................. 227