display Acura RL 2009 Owner's Manual
[x] Cancel search | Manufacturer: ACURA, Model Year: 2009, Model line: RL, Model: Acura RL 2009Pages: 560, PDF Size: 11.21 MB
Page 272 of 560
CONT INUED
If you receive a call when the
Bluetooth
Audio is playing, press
the Talk button on the steering
wheel. The screen and the upper
displayswitchtotheHFLmode(see
page ).
Af ter ending the call, press the HFL
Backbuttontogobacktothe
Bluetooth
Audio mode.
If you receive a call while the system
is in the pause mode, the mode will
be canceled and Bluetooth
Audio
will continue to play. Select any other audio mode by
pressing a button; FM, AM or DISC
(if a disc is loaded), on the audio
control panel or press the mode
buttononthesteeringwheel
repeatedly to select another audio
mode.If aniPodorUSBflash
memory device is connected to the
USB adapter cable or audio unit is
connected to AUX jack, pressing the
DISC/AUX button also changes a
mode.
Switching to another mode pauses
the music playing f rom your phone.
Select any other audio mode by
pressing a button; FM/AM, XM or
DISC/AUX (if a disc is loaded), on
the audio control panel or press the
modebuttononthesteeringwheel
repeatedly to select another audio
mode.If aniPodorUSBflash
memory device is connected to the
USB adapter cable or audio unit is
connected to AUX jack, pressing the
AUX button also changes a mode.
355
Hawaiian models
All models except Hawaiian
Audio System
T o swit ch t o HFL mode T o t urn of f t he Bluet oot hAudio
mode
Features
269
2009 RL
Page 274 of 560
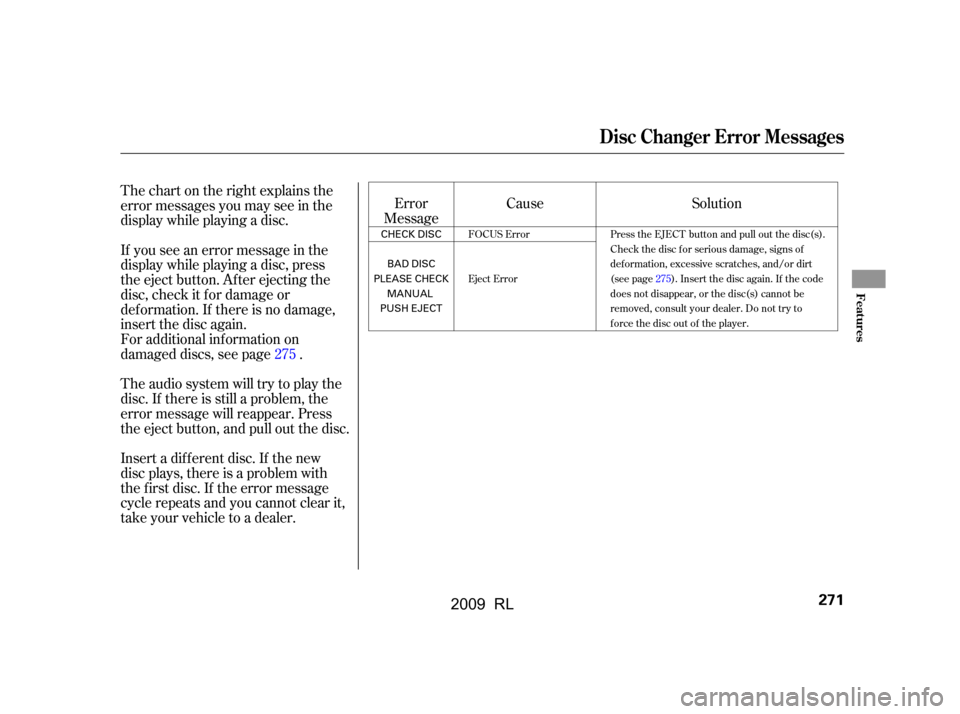
Thechartontherightexplainsthe
error messages you may see in the
display while playing a disc.
If you see an error message in the
display while playing a disc, press
the eject button. After ejecting the
disc, check it for damage or
deformation. If there is no damage,
insert the disc again.Error
Message
For additional information on
damaged discs, see page .
Theaudiosystemwilltrytoplaythe
disc. If there is still a problem, the
error message will reappear. Press
the eject button, and pull out the disc.
Insert a dif f erent disc. If the new
disc plays, there is a problem with
the f irst disc. If the error message
cycle repeats and you cannot clear it,
take your vehicle to a dealer. Cause Solution
275
FOCUS Error
Eject Error Press the EJECT button and pull out the disc(s).
Check the disc for serious damage, signs of
deformation, excessive scratches, and/or dirt
(see page275).Insert the disc again. If the code
does not disappear, or the disc(s) cannot be
removed, consult your dealer. Do not try to
force the disc out of the player.
Disc Changer Error Messages
Features
271
CHECK DISC
BAD DISC
PLEASE CHECK MANUAL
PUSH EJECT
2009 RL
Page 275 of 560

If you see an error message in the
upper display while playing an iPod,
findthesolutioninthecharttothe
right. If you cannot clear the error
message, take your vehicle to your
dealer.Error
Message Cause
Solution
USB ROM error
Abnormal power source
No files in iPod
Use of unsupported
device
Recognition failure of
iPod There is a problem with the USB adapter unit.
Appears when the overcurrent protection
feature of the system stops supplying power to
USB because an incompatible device is
connected. Disconnect the device. Then, turn
the audio system off, and turn it on again. Do
not reconnect the device that caused the error.
Appears when the iPod is empty. Store some
AAC files in the iPod.
Appears when an unsupported device is
connected. Disconnect the device.
Appears when the system does not
acknowledge the iPod. Reconnect the iPod.
iPod Error Messages
272
USB ERROR
BAD DEVICE
PLEASE CHECK MANUAL
NO SONG
UNSUPPORTED iPod RETRY
2009 RL
Page 276 of 560

If you see an error message in the
upper display while playing a USB
f lash memory device, f ind the
solution in the chart to the right. If
you cannot clear the error message,
take your vehicle to your dealer.Error
Message Cause
Solution
USB ROM error
Abnormal power source
Use of unsupported files
No files in USB flash
memory device
Use of unsupported USB
flash memory device There is a problem with the USB adapter unit.
Appears when the overcurrent protection
feature of the system stops supplying power to
USB because an incompatible device is
connected. Disconnect the device. Then, turn
the audio system off, and turn it on again. Do
not reconnect the device that caused the error.
Appears when the files in the USB flash
memory device are DRM or an unsupported
format. This error message appears for a few
seconds, then plays the next song.
Appears when the USB flash memory device is
emptyortherearenoMP3,WMA,orAACfiles
in the USB flash memory device. Save some
MP3, WMA, or AAC files in the USB flash
memory device.
Appears when an unsupported device is
connected. See page188for the specification
information for the USB flash memory device.
If it appears when the supported device is
connected, reconnect the device.
USB Flash Memory Device Error Messages
Features
273
USB ERROR
BAD DEVICE
PLEASE CHECK MANUAL
UNPLAYABLE
NO SONG
UNSUPPORTED
2009 RL
Page 280 of 560
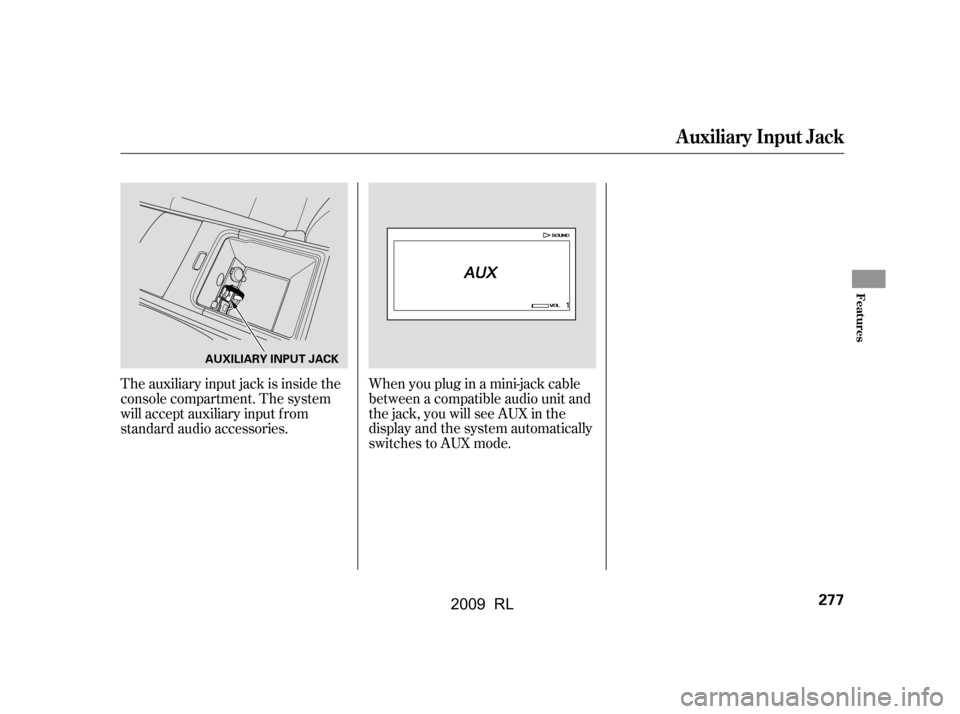
The auxiliary input jack is inside the
console compartment. The system
will accept auxiliary input f rom
standard audio accessories.Whenyoupluginamini-jackcable
between a compatible audio unit and
the jack, you will see AUX in the
display and the system automatically
switches to AUX mode.
Auxiliary Input Jack
Features
277
AUXILIARY INPUT JACK
2009 RL
Page 283 of 560

Your vehicle’s audio system may
disable itself if it is disconnected
f rom electrical power f or any reason.
To make it work again, you must
enter a specif ic f ive-digit code with
the preset buttons. Because there
are hundreds of number
combinations possible f rom the f ive
digits, making the system work
without knowing the exact code is
nearly impossible.
If you lose the card, you must obtain
the code number f rom your dealer.
To do this, you will need the audio
system’s serial number.If your vehicle’s battery is discon-
nected or goes dead, or the radio
f use is removed, the audio system
will disable itself . If this happens,
youwillsee‘‘ ’’intheupper
display the next time you turn on the
system. Use the preset buttons to
enter the code. The code is located
on the radio code card included in
your owner’s manual kit. When it is
entered correctly, the radio will start
playing.
If you make a mistake entering the
code, do not start over; complete the
f ive-digit sequence, then enter the
correct code. You have 10 tries to
enter the correct code.
If thecodecardislost,yourdealer
can access your code with your
radio’s serial number. To access the
serial number, turn the radio on. It
must display ‘‘ ’’, then turn
the radio off. Push and hold the
preset 1 and preset 6 buttons, thenpush the power/volume knob. The
serial number will appear in two sets
of f our digits.
The system will retain your AM and
FM presets even if power is
disconnected.
You should have received a radio
code card that lists your audio
system’s code and serial numbers. It
is best to store this card in a saf e
place at home. In addition, you
should write the audio system’s
serial number in this owner’s manual.
Radio T hef t Protection
280
2009 RL
Page 284 of 560
Press this button to display thescreen (see page ).
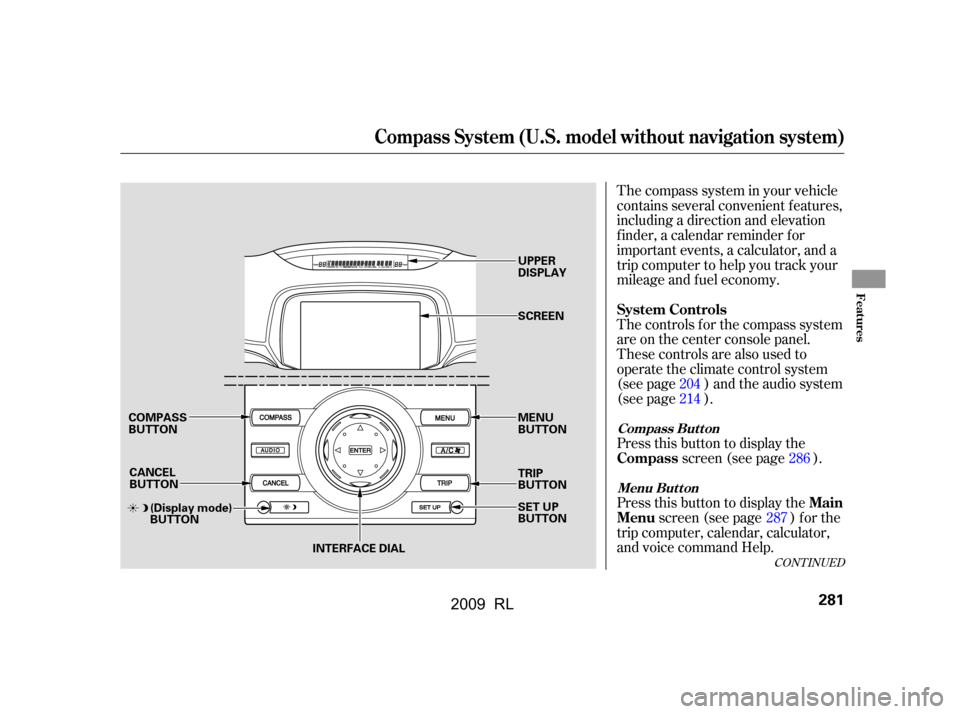
The compass system in your vehicle
contains several convenient features,
including a direction and elevation
f inder, a calendar reminder f or
important events, a calculator, and a
trip computer to help you track your
mileage and f uel economy.
The controls f or the compass system
are on the center console panel.
These controls are also used to
operate the climate control system
(see page ) and the audio system
(see page ).
Press this button to display the
screen (see page ) f or the
trip computer, calendar, calculator,
and voice command Help. 204
214
286
287
CONT INUED
Menu Button
Compass But t on
Compass
System Controls
Main
Menu
Compass System (U.S. model without navigation system)
Features
281
CANCEL
BUTTON
COMPASS
BUTTON
(Display mode)
BUTTON INTERFACE DIAL UPPER
DISPLAY
SCREEN
MENU
BUTTON
TRIP
BUTTON
SET UP
BUTTON
2009 RL
Page 285 of 560
Press this button to cancel the
current screen and return to the
previous screen.
This button switches the display
between day mode, night mode, and
of f (see page ).
Press the button to display the set up
screen (see page ) to change and
update inf ormation in the system.
Press this button to display thescreen (see page ).
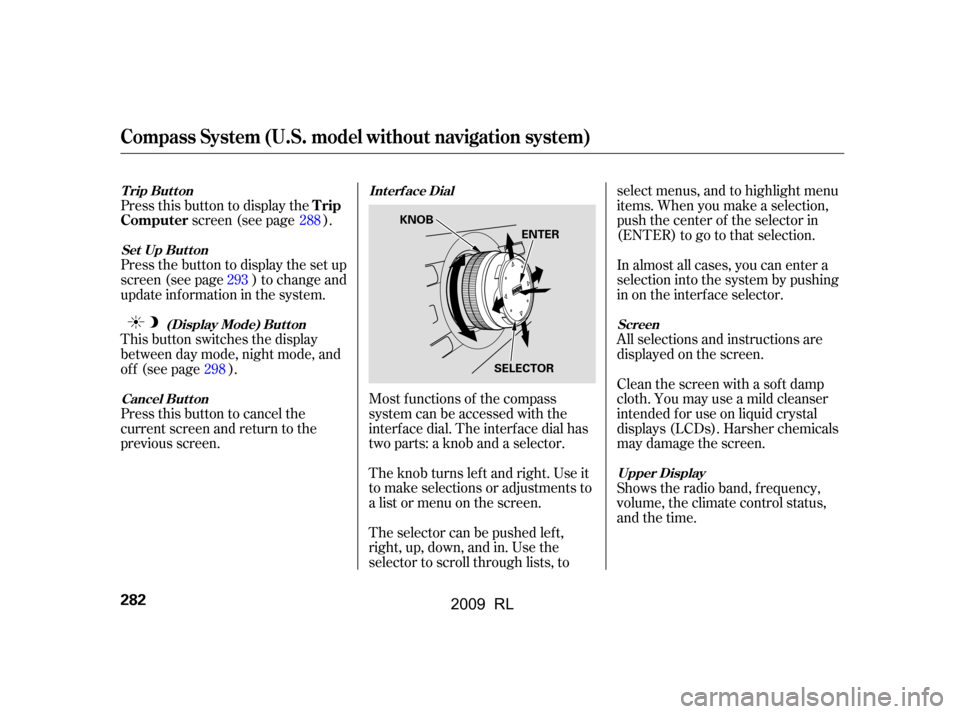
Most f unctions of the compass
system can be accessed with the
interf ace dial. The interf ace dial has
two parts: a knob and a selector.
The knob turns lef t and right. Use it
to make selections or adjustments to
a list or menu on the screen.
The selector can be pushed lef t,
right, up, down, and in. Use the
selector to scroll through lists, to select menus, and to highlight menu
items. When you make a selection,
push the center of the selector in
(ENTER)togotothatselection.
All selections and instructions are
displayed on the screen.
In almost all cases, you can enter a
selection into the system by pushing
in on the interf ace selector.
Clean the screen with a sof t damp
cloth. You may use a mild cleanser
intended f or use on liquid crystal
displays (LCDs). Harsher chemicals
may damage the screen.
Shows the radio band, f requency,
volume, the climate control status,
and the time.
288
293
298
Int erf ace Dial
Cancel But t on (Display Mode) But t on
Set Up But t on
Trip Button
Screen
Upper Display
Trip
Computer
Compass System (U.S. model without navigation system)
282
KNOB
ENTER
SELECTOR
2009 RL
Page 286 of 560
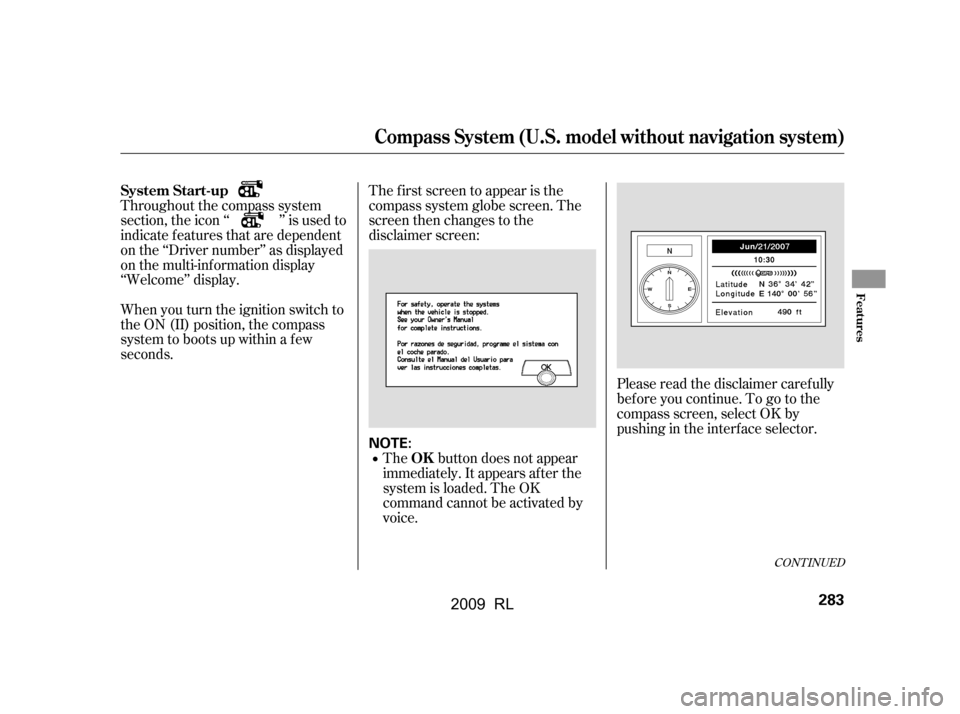
Please read the disclaimer carefully
beforeyoucontinue.Togotothe
compass screen, select OK by
pushingintheinterfaceselector.
The f irst screen to appear is the
compass system globe screen. The
screen then changes to the
disclaimer screen:
The button does not appear
immediately. It appears af ter the
system is loaded. The OK
command cannot be activated by
voice.
Throughout the compass system
section, the icon ‘‘ ’’ is used to
indicate f eatures that are dependent
on the ‘‘Driver number’’ as displayed
on the multi-information display
‘‘Welcome’’ display.
When you turn the ignition switch to
the ON (II) position, the compass
system to boots up within a f ew
seconds.
CONT INUED
System Start-up
OK
Compass System (U.S. model without navigation system)
Features
283
NOTE:
2009 RL
Page 287 of 560
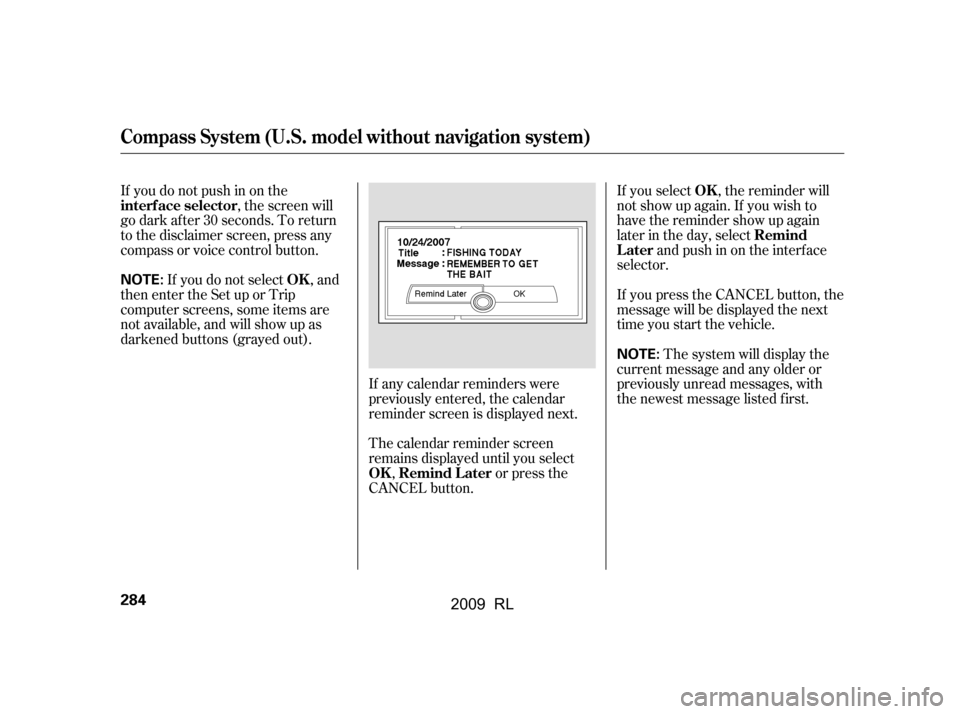
If you select , the reminder will
not show up again. If you wish to
have the reminder show up again
later in the day, selectandpushinontheinterface
selector.
If you press the CANCEL button, the
message will be displayed the next
time you start the vehicle.
Thesystemwilldisplaythe
current message and any older or
previously unread messages, with
the newest message listed f irst.
If you do not push in on the
, the screen will
go dark af ter 30 seconds. To return
to the disclaimer screen, press any
compass or voice control button.
If you do not select , and
then enter the Set up or Trip
computer screens, some items are
not available, and will show up as
darkened buttons (grayed out).
If any calendar reminders were
previously entered, the calendar
reminder screen is displayed next.
The calendar reminder screen
remains displayed until you select,orpressthe
CANCEL button. OK
Remind
Later
interf ace selector
OK
OK Remind L ater
Compass System (U.S. model without navigation system)
284
NOTE:
NOTE:
2009 RL