Acura RLX 2014 Owner's Manual
Manufacturer: ACURA, Model Year: 2014, Model line: RLX, Model: Acura RLX 2014Pages: 518, PDF Size: 15.83 MB
Page 221 of 518

uuAudio System Basic OperationuPlaying AM/FM Radio
220Features
■Radio text
Display the radio text information of the selected RDS station.
1.Press the MENU button.
2.Rotate to select Radio Text, then press .■Scan
Samples each of the strongest stations on the selected band for 10 seconds.
1.Press the MENU button.
2.Rotate to select Scan, then press .
To turn off scan, press to select Cancel Scan, or press the BACK button.
1.Select More.
2.Select Scan.
To turn off scan, select Cancel Scan.■Tag song to device
You can store the TAG information in the connected iPod®/iPhone®.
If the iPod®/iPhone® is not connected to the audio system, the information is stored
in the audio unit temporarily, then once the device is connected to the system, data
is transferred to the iPod®/iPhone®.
To store the TAG information to the iPod®/iPhone®, or the audio system:
1.Press the MENU button.
2.Rotate to select Tag Song, then press .
3.Select the song you want to save the information.
1Radio text
The text indicator comes on when you received a text
message. The indicator stays on until you read the
message.
Interface DialOn Demand Multi-Use Display
TM
Models with HD Radio
TM feature
Page 222 of 518

221
uuAudio System Basic OperationuPlaying AM/FM Radio
Features
■Tagged song list
Displays the TAG information saved to the audio system.
1.Press the MENU button.
2.Rotate to select Tagged Song List, then press .■HD subchannel
Displays the subchannel list when an HD Radio
TM station is selected.
1.Press the MENU button.
2.Rotate to select HD Subchannel, then press .
3.Rotate to select a channel from a list, then press .
Select the or when the subchannel number is displayed.
You can also select the channel by the following procedure.
1.Select More.
2.Select HD Subchannel.
3.Select the channel number.
Interface DialOn Demand Multi-Use Display
TM
Page 223 of 518
222
uuAudio System Basic OperationuPlaying XM® Radio
Features
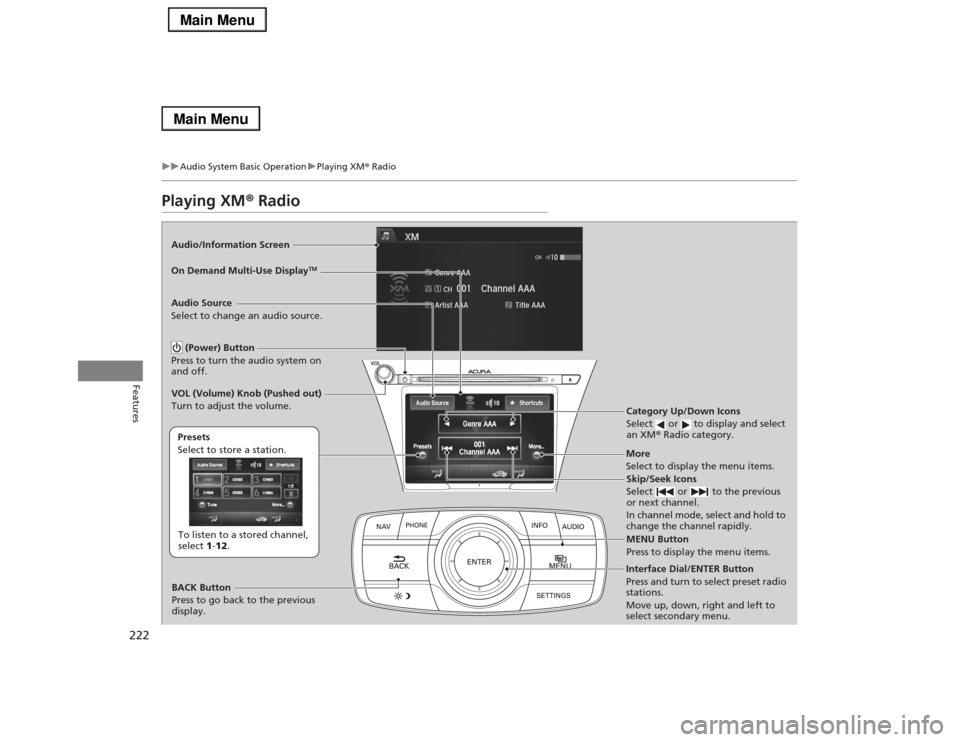
Playing XM® RadioAudio/Information Screen
On Demand Multi-Use Display
TM
Category Up/Down Icons
Select or to display and select
an XM® Radio category.MENU Button
Press to display the menu items.
(Power) Button
Press to turn the audio system on
and off.Audio Source
Select to change an audio source.To listen to a stored channel,
select 1-12. Presets
Select to store a station.
Skip/Seek Icons
Select or to the previous
or next channel.
In channel mode, select and hold to
change the channel rapidly.
More
Select to display the menu items.
BACK Button
Press to go back to the previous
display. VOL (Volume) Knob (Pushed out)
Turn to adjust the volume.Interface Dial/ENTER Button
Press and turn to select preset radio
stations.
Move up, down, right and left to
select secondary menu.
Page 224 of 518
Continued
223
uuAudio System Basic OperationuPlaying XM® Radio
Features
1.Select the XM® mode.
2Audio Remote Controls P. 192
2On Demand Multi-Use Display
TM P. 194
2.Press the MENU button.
3.Rotate to select Channel List, then press .
4.Rotate to select a channel from a list, then press .
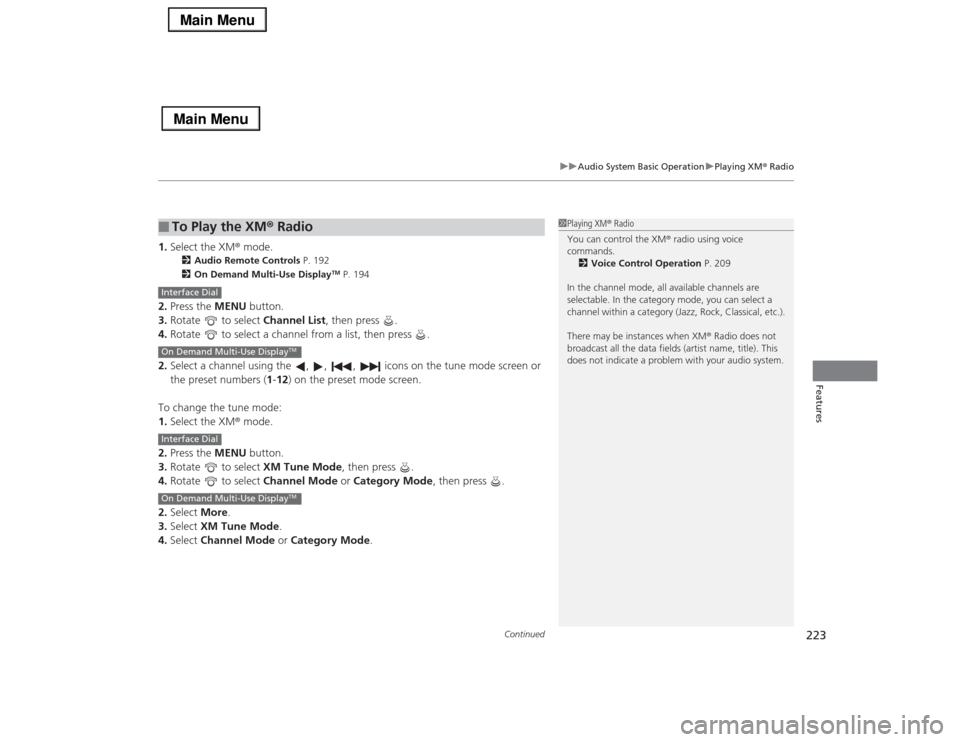
2.Select a channel using the , , , icons on the tune mode screen or
the preset numbers (1-12) on the preset mode screen.
To change the tune mode:
1.Select the XM® mode.
2.Press the MENU button.
3.Rotate to select XM Tune Mode, then press .
4.Rotate to select Channel Mode or Category Mode, then press .
2.Select More.
3.Select XM Tune Mode.
4.Select Channel Mode or Category Mode.■
To Play the XM® Radio
1Playing XM® Radio
You can control the XM® radio using voice
commands.
2Voice Control Operation P. 209
In the channel mode, all available channels are
selectable. In the category mode, you can select a
channel within a category (Jazz, Rock, Classical, etc.).
There may be instances when XM® Radio does not
broadcast all the data fields (artist name, title). This
does not indicate a problem with your audio system.
Interface DialOn Demand Multi-Use Display
TM
Interface DialOn Demand Multi-Use Display
TM
Page 225 of 518
uuAudio System Basic OperationuPlaying XM® Radio
224Features
To store a station:
1.Tune to the selected station.
2.Press the MENU button.
3.Rotate to select Save Preset, then press .
4.Rotate to select the preset number you want to store that station, then press
.
You can also store that station by the following procedure.
1.Tune to the selected station.
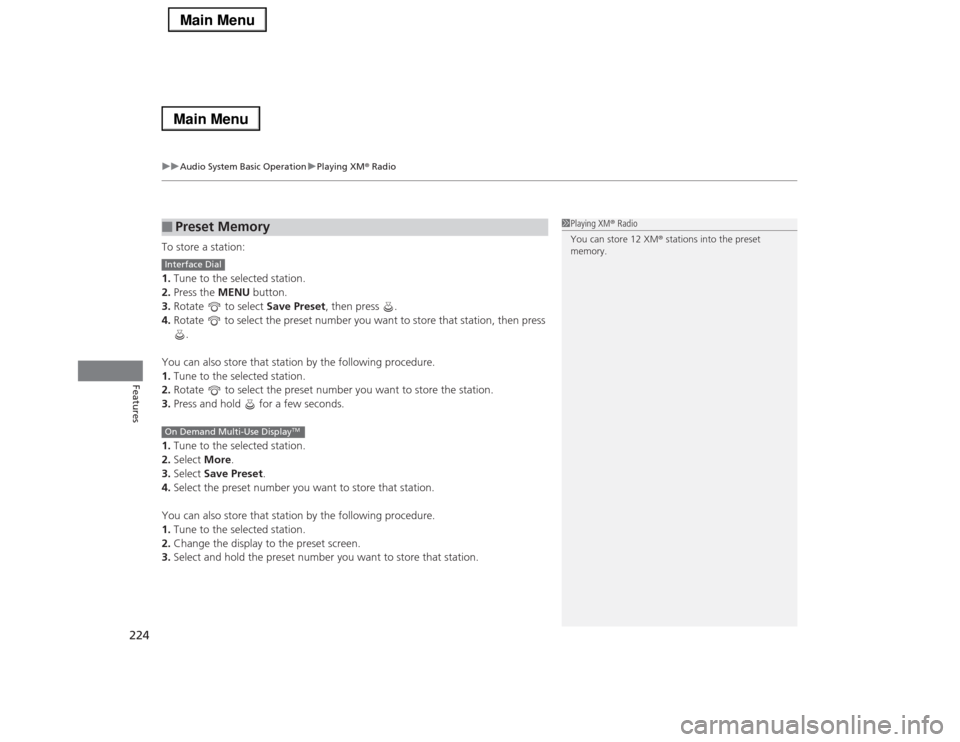
2.Rotate to select the preset number you want to store the station.
3.Press and hold for a few seconds.
1.Tune to the selected station.
2.Select More.
3.Select Save Preset.
4.Select the preset number you want to store that station.
You can also store that station by the following procedure.
1.Tune to the selected station.
2.Change the display to the preset screen.
3.Select and hold the preset number you want to store that station.■
Preset Memory
1Playing XM® Radio
You can store 12 XM® stations into the preset
memory.
Interface DialOn Demand Multi-Use Display
TM
Page 226 of 518
225
uuAudio System Basic OperationuPlaying a CD
Continued
Features
Playing a CDYour audio system supports audio CDs, CD-Rs and CD-RWs in either MP3, WMA, or
AAC
*1 format. With the CD loaded, select the CD mode.
*1:Only AAC format files recorded with iTunes® are playable on this unit.
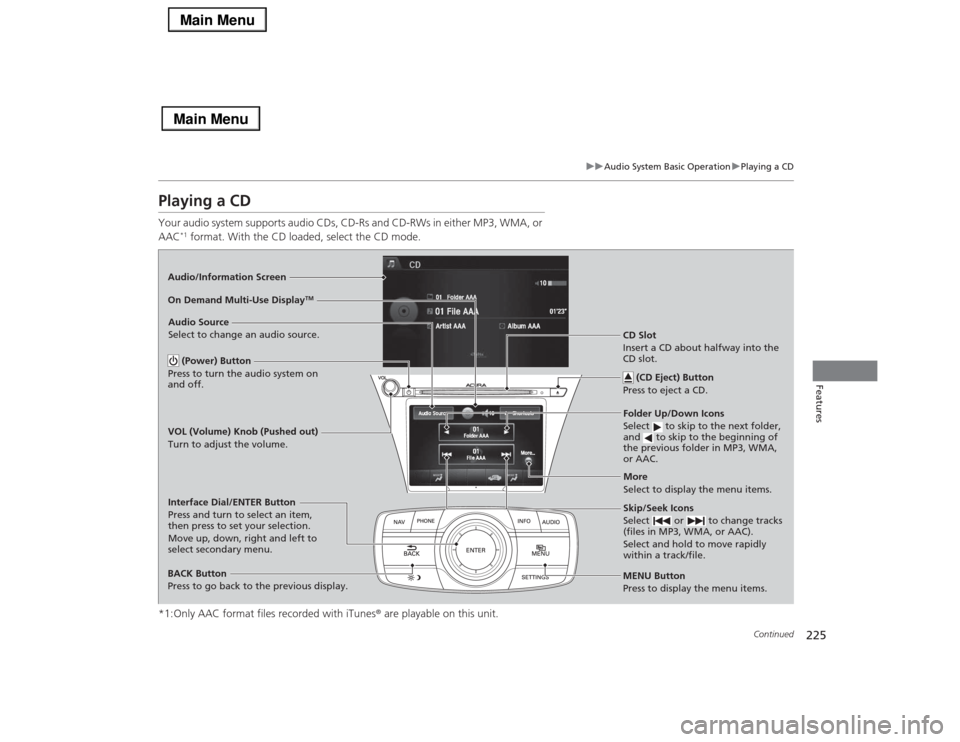
Audio/Information Screen
MENU Button
Press to display the menu items.
CD Slot
Insert a CD about halfway into the
CD slot.
(CD Eject) Button
Press to eject a CD.Folder Up/Down Icons
Select to skip to the next folder,
and to skip to the beginning of
the previous folder in MP3, WMA,
or AAC.
Audio Source
Select to change an audio source.
Skip/Seek Icons
Select or to change tracks
(files in MP3, WMA, or AAC).
Select and hold to move rapidly
within a track/file.
More
Select to display the menu items.
BACK Button
Press to go back to the previous display.Interface Dial/ENTER Button
Press and turn to select an item,
then press to set your selection.
Move up, down, right and left to
select secondary menu.On Demand Multi-Use Display
TM
(Power) Button
Press to turn the audio system on
and off.VOL (Volume) Knob (Pushed out)
Turn to adjust the volume.
Page 227 of 518
uuAudio System Basic OperationuPlaying a CD
226Features
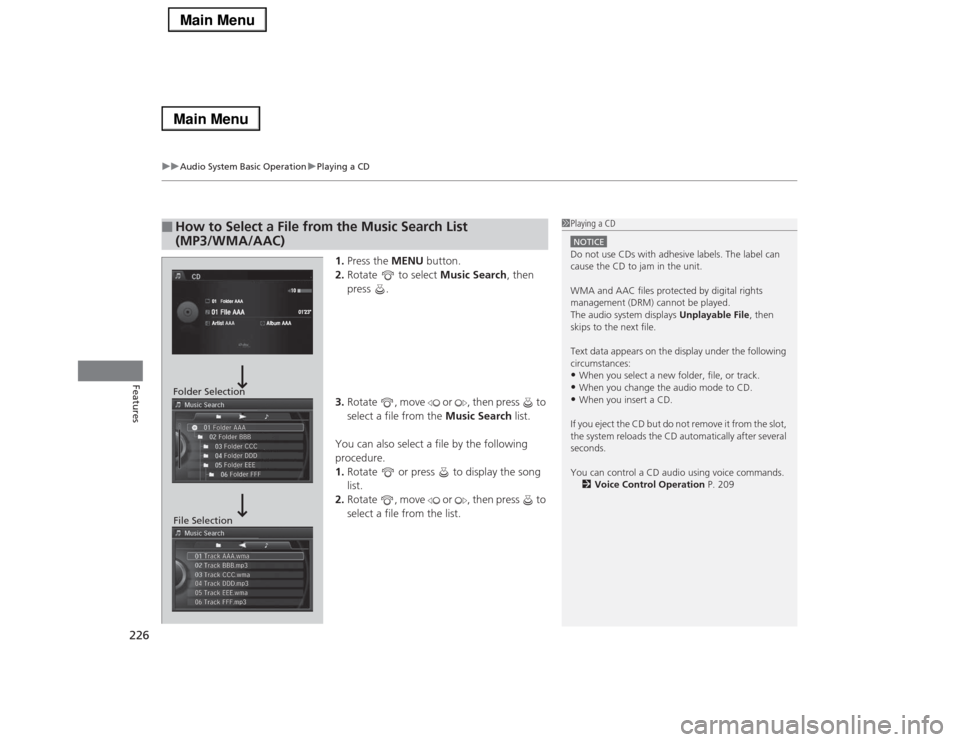
1.Press the MENU button.
2.Rotate to select Music Search, then
press .
3.Rotate , move or , then press to
select a file from the Music Search list.
You can also select a file by the following
procedure.
1.Rotate or press to display the song
list.
2.Rotate , move or , then press to
select a file from the list.
■
How to Select a File from the Music Search List
(MP3/WMA/AAC)
1Playing a CDNOTICEDo not use CDs with adhesive labels. The label can
cause the CD to jam in the unit.
WMA and AAC files protected by digital rights
management (DRM) cannot be played.
The audio system displays Unplayable File, then
skips to the next file.
Text data appears on the display under the following
circumstances:•When you select a new folder, file, or track.•When you change the audio mode to CD.•When you insert a CD.
If you eject the CD but do not remove it from the slot,
the system reloads the CD automatically after several
seconds.
You can control a CD audio using voice commands.
2Voice Control Operation P. 209
Folder Selection
File Selection
Page 228 of 518
227
uuAudio System Basic OperationuPlaying a CD
Features
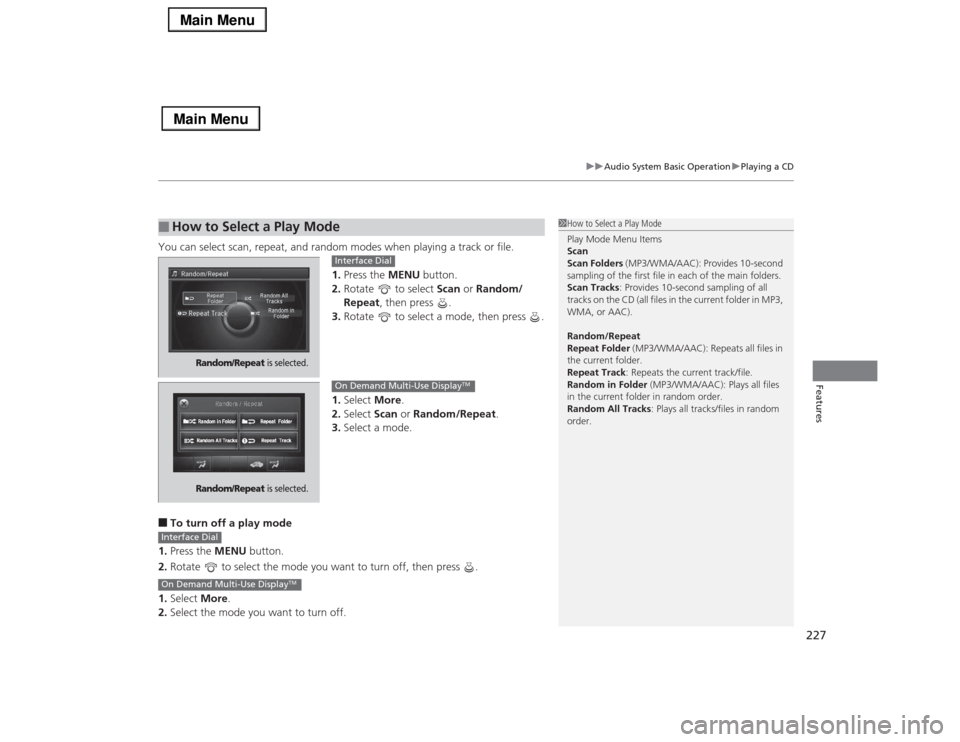
You can select scan, repeat, and random modes when playing a track or file.
1.Press the MENU button.
2.Rotate to select Scan or Random/
Repeat, then press .
3.Rotate to select a mode, then press .
1.Select More.
2.Select Scan or Random/Repeat.
3.Select a mode.■To turn off a play mode
1.Press the MENU button.
2.Rotate to select the mode you want to turn off, then press .
1.Select More.
2.Select the mode you want to turn off.■
How to Select a Play Mode
1How to Select a Play Mode
Play Mode Menu Items
Scan
Scan Folders (MP3/WMA/AAC): Provides 10-second
sampling of the first file in each of the main folders.
Scan Tracks: Provides 10-second sampling of all
tracks on the CD (all files in the current folder in MP3,
WMA, or AAC).
Random/Repeat
Repeat Folder (MP3/WMA/AAC): Repeats all files in
the current folder.
Repeat Track: Repeats the current track/file.
Random in Folder (MP3/WMA/AAC): Plays all files
in the current folder in random order.
Random All Tracks: Plays all tracks/files in random
order.
Random/Repeat
is selected.
Interface Dial
Random/Repeat
is selected.
On Demand Multi-Use Display
TM
Interface DialOn Demand Multi-Use Display
TM
Page 229 of 518
228
uuAudio System Basic OperationuPlaying Hard Disc Drive (HDD) Audio
Features
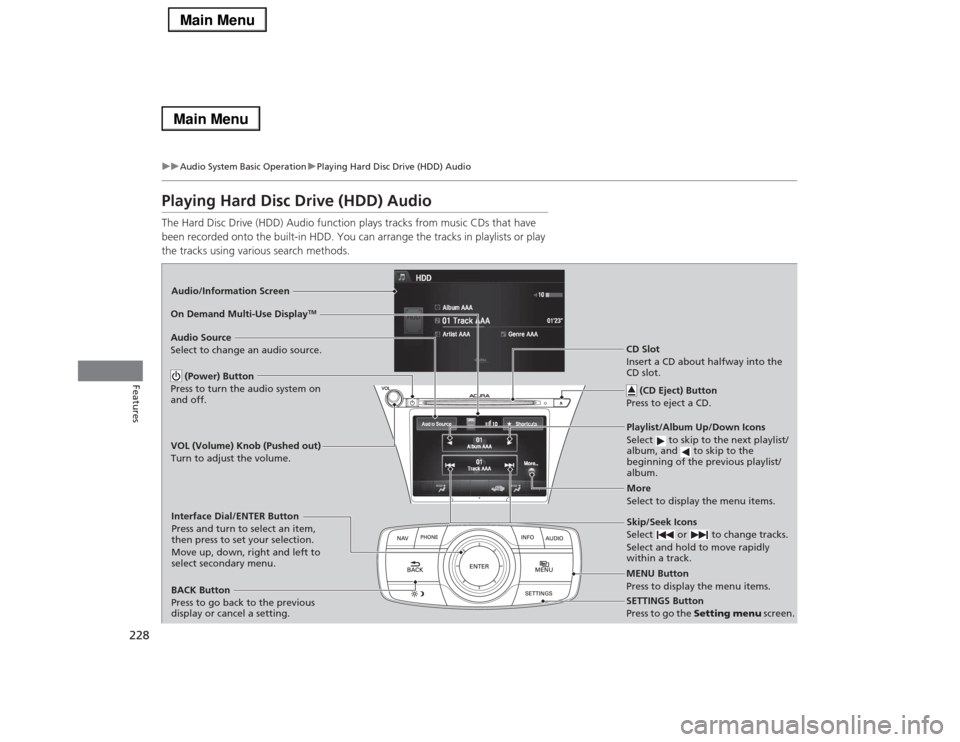
Playing Hard Disc Drive (HDD) AudioThe Hard Disc Drive (HDD) Audio function plays tracks from music CDs that have
been recorded onto the built-in HDD. You can arrange the tracks in playlists or play
the tracks using various search methods.Audio/Information Screen
MENU Button
Press to display the menu items.
CD Slot
Insert a CD about halfway into the
CD slot.
(CD Eject) Button
Press to eject a CD.Playlist/Album Up/Down Icons
Select to skip to the next playlist/
album, and to skip to the
beginning of the previous playlist/
album.
Audio Source
Select to change an audio source.
Skip/Seek Icons
Select or to change tracks.
Select and hold to move rapidly
within a track.
More
Select to display the menu items.
BACK Button
Press to go back to the previous
display or cancel a setting.Interface Dial/ENTER Button
Press and turn to select an item,
then press to set your selection.
Move up, down, right and left to
select secondary menu.
SETTINGS Button
Press to go the Setting menu screen. On Demand Multi-Use Display
TM
(Power) Button
Press to turn the audio system on
and off.VOL (Volume) Knob (Pushed out)
Turn to adjust the volume.
Page 230 of 518

Continued
229
uuAudio System Basic OperationuPlaying Hard Disc Drive (HDD) Audio
Features
The songs on music CDs are automatically recorded by factory default to the HDD
the first time you play each disc. You can then play the songs directly from the HDD.
1.Press the MENU button.
2.Rotate to select Cancel Record to HDD, then press .
1.Press the MENU button.
2.Rotate to select Rec to HDD, then press .■
Recording a Music CD to HDD
1Recording a Music CD to HDD
You can add tracks to user playlists, where you can
mix and match tracks from other CDs recorded on
the HDD.
2Editing an Album or Playlist P. 232
2Editing Track Information P. 235
If you stop the engine or the power system is turned
off while recording a CD, there may be pauses
between songs when you play back from the HDD.
Repeat, random, and scan functions are not available
during recording.
You can play music from other sources (e.g., XM,
HDD, etc.) while recording.
Please note that there is no compensation offered in
the case of unsuccessful recording of audio data or
the loss of audio data due to any cause whatsoever.
Clearing the HDD
Any music tracks stored on the HDD can be deleted.
2Deleting all HDD Data P. 284
■
Stop Recording
■
Recording a CD Manually
Album AAA
Artist AAA10
01’23”Track AAA 01
Recording Indicator
Recording
Ready to record