navigation system Acura RLX 2014 Owner's Guide
[x] Cancel search | Manufacturer: ACURA, Model Year: 2014, Model line: RLX, Model: Acura RLX 2014Pages: 518, PDF Size: 15.83 MB
Page 103 of 518
uuGauges and Multi-Information DisplayuMulti-Information Display
102Instrument Panel
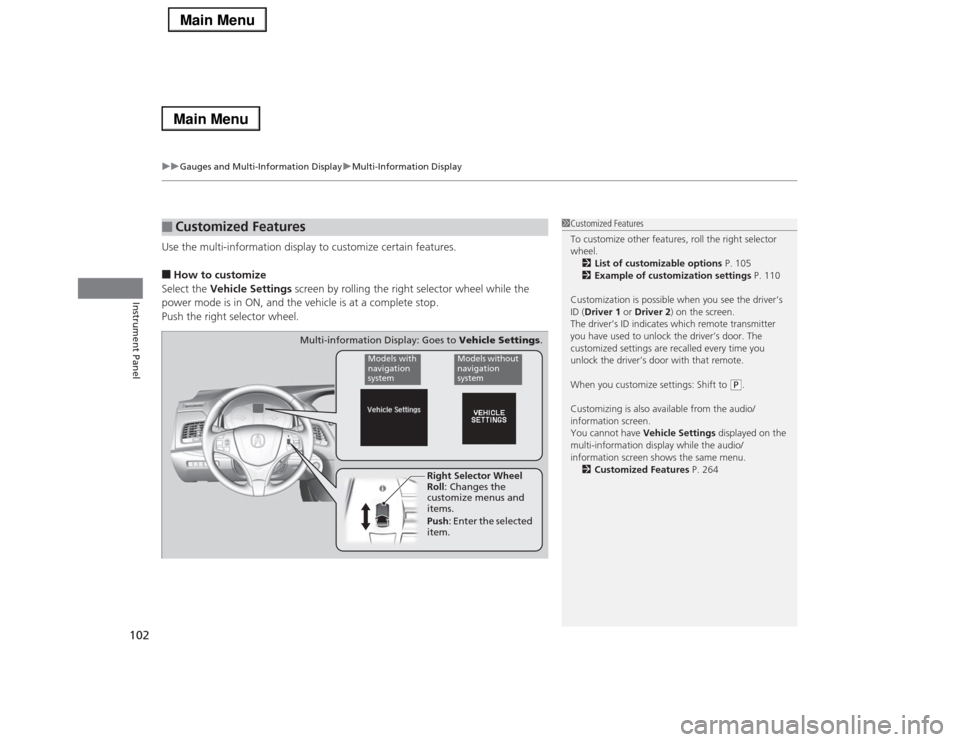
Use the multi-information display to customize certain features.■How to customize
Select the Vehicle Settings screen by rolling the right selector wheel while the
power mode is in ON, and the vehicle is at a complete stop.
Push the right selector wheel.■
Customized Features
1Customized Features
To customize other features, roll the right selector
wheel.
2List of customizable options P. 105
2Example of customization settings P. 110
Customization is possible when you see the driver’s
ID (Driver 1 or Driver 2) on the screen.
The driver’s ID indicates which remote transmitter
you have used to unlock the driver’s door. The
customized settings are recalled every time you
unlock the driver’s door with that remote.
When you customize settings: Shift to
(P.
Customizing is also available from the audio/
information screen.
You cannot have Vehicle Settings displayed on the
multi-information display while the audio/
information screen shows the same menu.
2Customized Features P. 264
Right Selector Wheel
Roll: Changes the
customize menus and
items.
Push: Enter the selected
item.
Models with
navigation
system
Models without
navigation
system
Multi-information Display: Goes to Vehicle Settings.
Page 111 of 518
110
uuGauges and Multi-Information DisplayuMulti-Information Display
Instrument Panel
■Example of customization settings
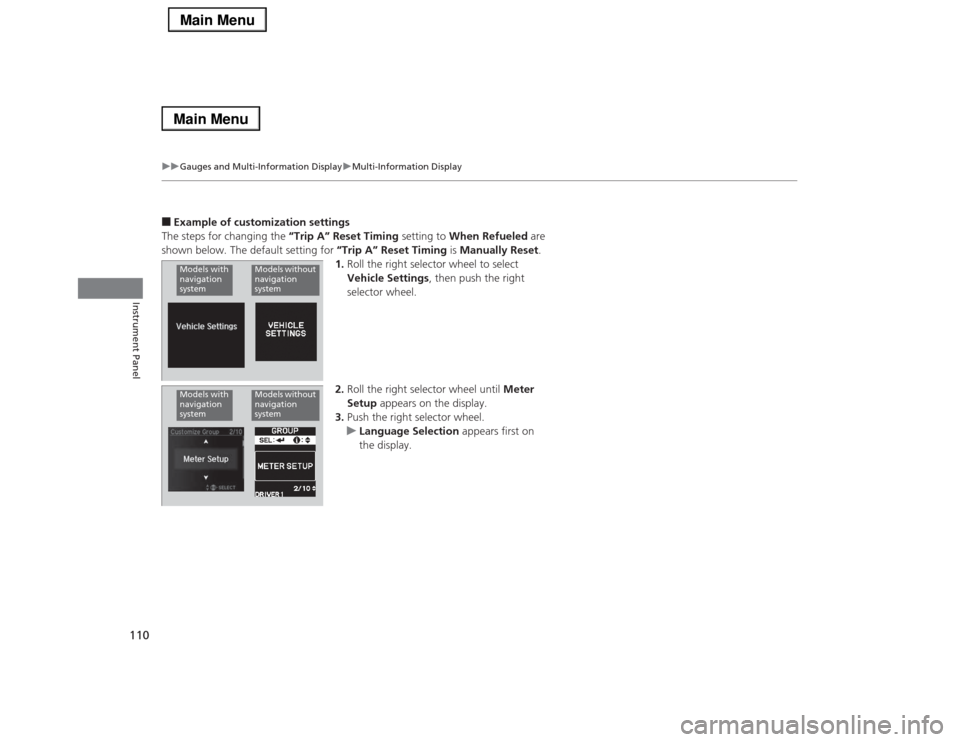
The steps for changing the “Trip A” Reset Timing setting to When Refueled are
shown below. The default setting for “Trip A” Reset Timing is Manually Reset.
1.Roll the right selector wheel to select
Vehicle Settings, then push the right
selector wheel.
2.Roll the right selector wheel until Meter
Setup appears on the display.
3.Push the right selector wheel.
uLanguage Selection appears first on
the display.Models with
navigation
system
Models without
navigation
system
Models with
navigation
system
Models without
navigation
system
Page 112 of 518
111
uuGauges and Multi-Information DisplayuMulti-Information Display
Instrument Panel
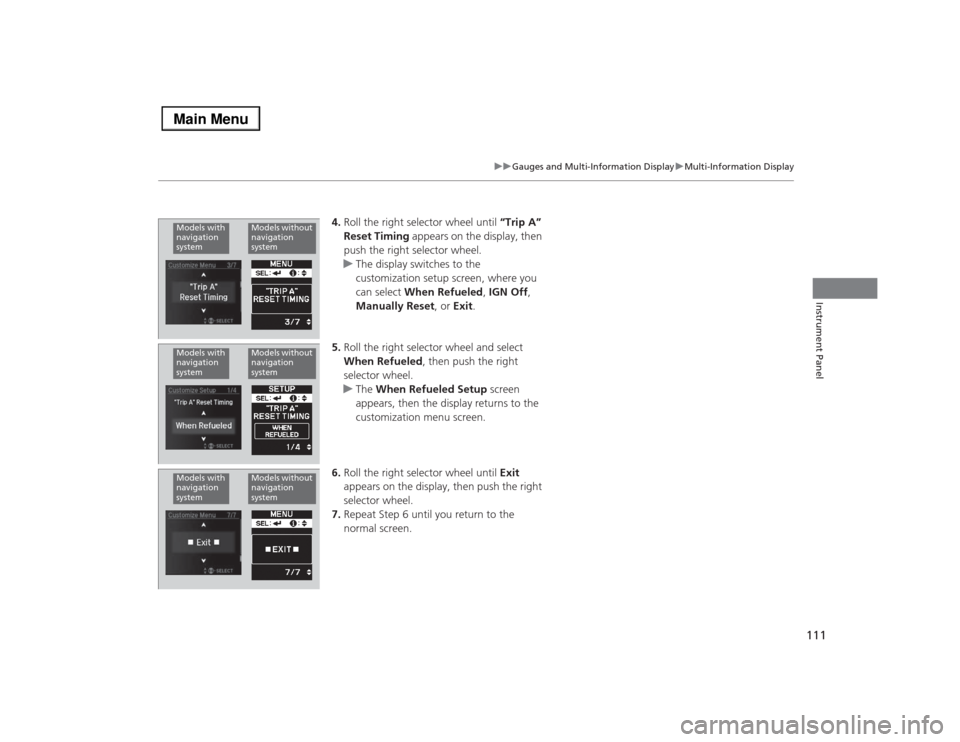
4.Roll the right selector wheel until “Trip A”
Reset Timing appears on the display, then
push the right selector wheel.
uThe display switches to the
customization setup screen, where you
can select When Refueled, IGN Off,
Manually Reset, or Exit.
5.Roll the right selector wheel and select
When Refueled, then push the right
selector wheel.
uThe When Refueled Setup screen
appears, then the display returns to the
customization menu screen.
6.Roll the right selector wheel until Exit
appears on the display, then push the right
selector wheel.
7.Repeat Step 6 until you return to the
normal screen.
Models with
navigation
system
Models without
navigation
system
Models with
navigation
system
Models without
navigation
system
Models with
navigation
system
Models without
navigation
system
Page 115 of 518
114Controls
Setting the ClockClockThe clock is automatically updated through the navigation
*/audio system, so the
time does not need to be adjusted.
You can also adjust the time manually in the audio/information screen, with the
power mode in ON.
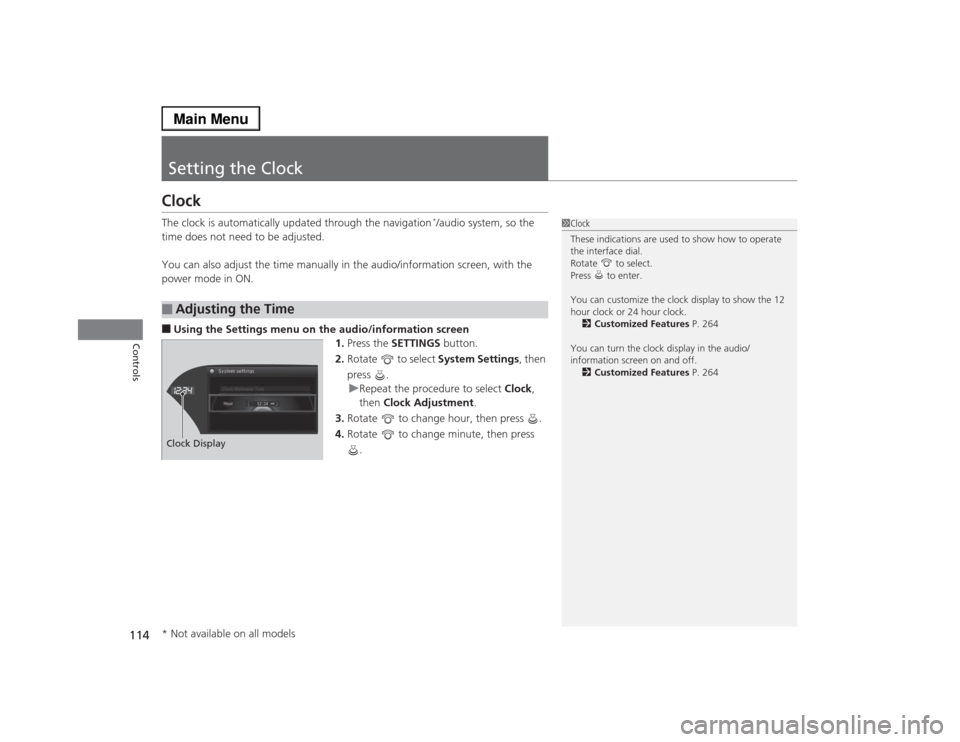
■Using the Settings menu on the audio/information screen
1.Press the SETTINGS button.
2.Rotate to select System Settings, then
press .
uRepeat the procedure to select Clock,
then Clock Adjustment.
3.Rotate to change hour, then press .
4.Rotate to change minute, then press
.■
Adjusting the Time
1Clock
These indications are used to show how to operate
the interface dial.
Rotate to select.
Press to enter.
You can customize the clock display to show the 12
hour clock or 24 hour clock.
2Customized Features P. 264
You can turn the clock display in the audio/
information screen on and off.
2Customized Features P. 264
Hour Clock/Wallpaper TypeSystem settings
Clock Display* Not available on all models
Page 136 of 518
135
uuOperating the Switches Around the Steering WheeluENGINE START/STOP Button
Controls
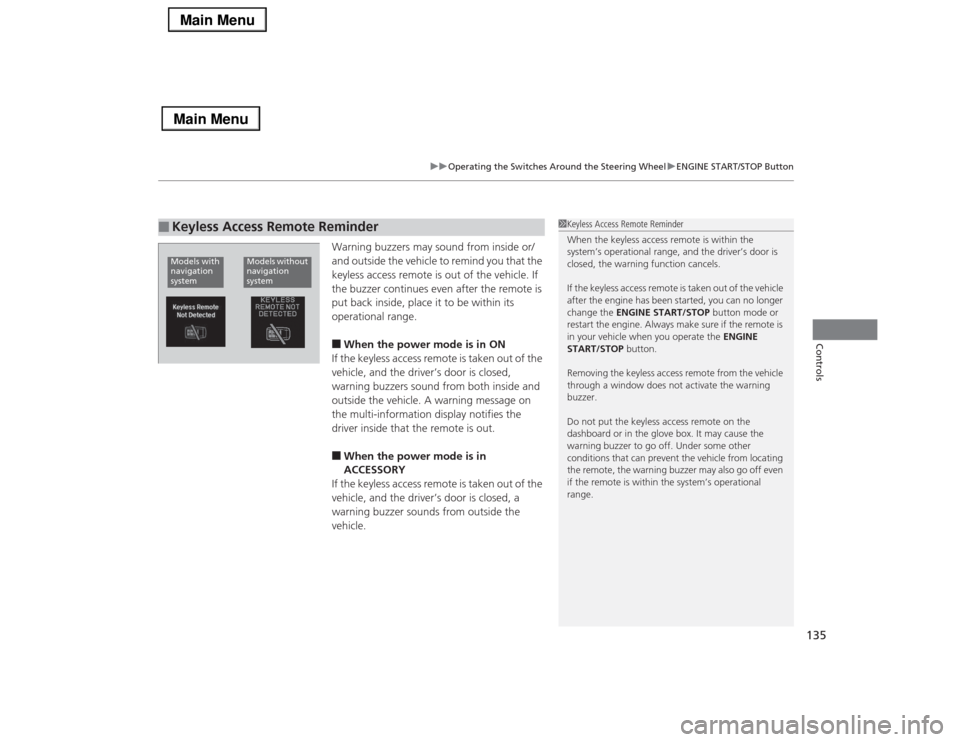
Warning buzzers may sound from inside or/
and outside the vehicle to remind you that the
keyless access remote is out of the vehicle. If
the buzzer continues even after the remote is
put back inside, place it to be within its
operational range.■When the power mode is in ON
If the keyless access remote is taken out of the
vehicle, and the driver’s door is closed,
warning buzzers sound from both inside and
outside the vehicle. A warning message on
the multi-information display notifies the
driver inside that the remote is out.■When the power mode is in
ACCESSORY
If the keyless access remote is taken out of the
vehicle, and the driver’s door is closed, a
warning buzzer sounds from outside the
vehicle.
■
Keyless Access Remote Reminder
1Keyless Access Remote Reminder
When the keyless access remote is within the
system’s operational range, and the driver’s door is
closed, the warning function cancels.
If the keyless access remote is taken out of the vehicle
after the engine has been started, you can no longer
change the ENGINE START/STOP button mode or
restart the engine. Always make sure if the remote is
in your vehicle when you operate the ENGINE
START/STOP button.
Removing the keyless access remote from the vehicle
through a window does not activate the warning
buzzer.
Do not put the keyless access remote on the
dashboard or in the glove box. It may cause the
warning buzzer to go off. Under some other
conditions that can prevent the vehicle from locating
the remote, the warning buzzer may also go off even
if the remote is within the system’s operational
range.
Models with
navigation
system
Models without
navigation
system
Page 145 of 518
144
uuOperating the Switches Around the Steering WheeluBrightness Control
Controls
Brightness Control
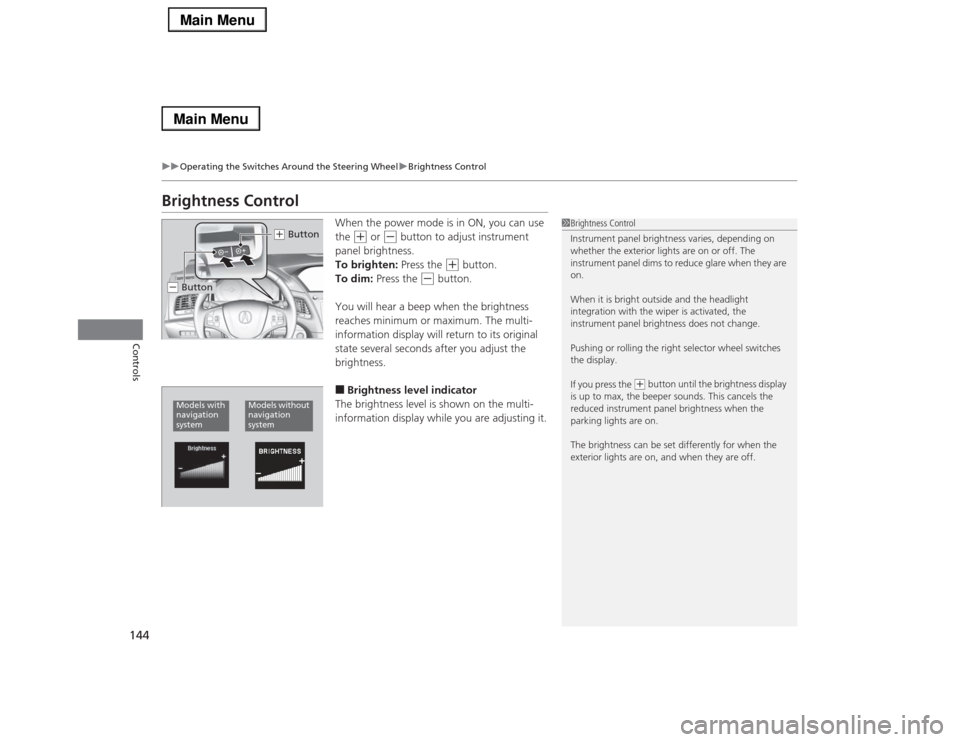
When the power mode is in ON, you can use
the
(+
or
(-
button to adjust instrument
panel brightness.
To brighten: Press the
(+
button.
To dim: Press the
(-
button.
You will hear a beep when the brightness
reaches minimum or maximum. The multi-
information display will return to its original
state several seconds after you adjust the
brightness.
■Brightness level indicator
The brightness level is shown on the multi-
information display while you are adjusting it.
1Brightness Control
Instrument panel brightness varies, depending on
whether the exterior lights are on or off. The
instrument panel dims to reduce glare when they are
on.
When it is bright outside and the headlight
integration with the wiper is activated, the
instrument panel brightness does not change.
Pushing or rolling the right selector wheel switches
the display.
If you press the
(+ button until the brightness display
is up to max, the beeper sounds. This cancels the
reduced instrument panel brightness when the
parking lights are on.
The brightness can be set differently for when the
exterior lights are on, and when they are off.
(+ Button
(- ButtonModels with
navigation
system
Models without
navigation
system
Page 163 of 518
uuInterior Lights/Interior Convenience ItemsuInterior Convenience Items
162Controls
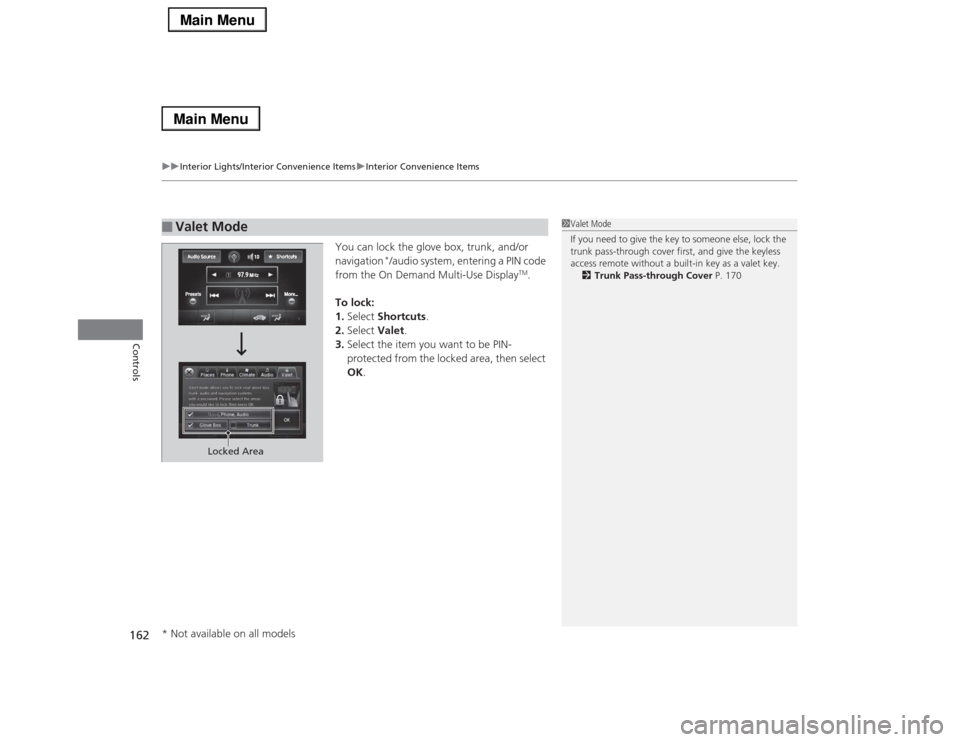
You can lock the glove box, trunk, and/or
navigation
*/audio system, entering a PIN code
from the On Demand Multi-Use Display
TM.
To lock:
1.Select Shortcuts.
2.Select Valet.
3.Select the item you want to be PIN-
protected from the locked area, then select
OK.
■
Valet Mode
1Valet Mode
If you need to give the key to someone else, lock the
trunk pass-through cover first, and give the keyless
access remote without a built-in key as a valet key.
2Trunk Pass-through Cover P. 170
Locked Area
* Not available on all models
Page 182 of 518
Continued
181
uuClimate Control SystemuUsing Automatic Climate Control
Controls
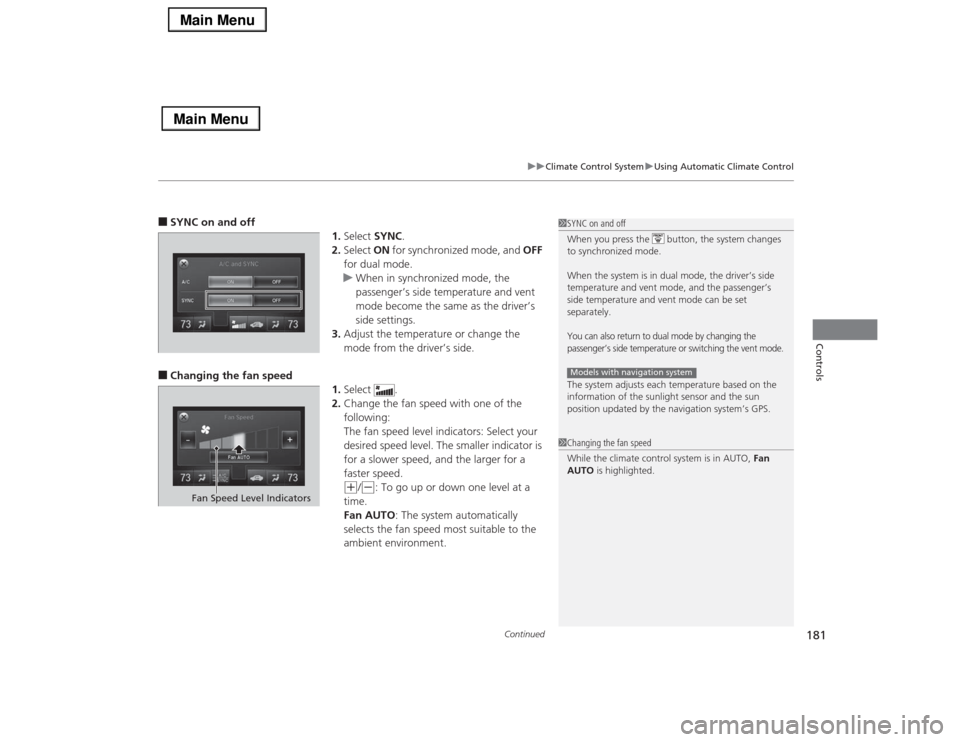
■SYNC on and off
1.Select SYNC.
2.Select ON for synchronized mode, and OFF
for dual mode.
uWhen in synchronized mode, the
passenger’s side temperature and vent
mode become the same as the driver’s
side settings.
3.Adjust the temperature or change the
mode from the driver’s side.■Changing the fan speed
1.Select .
2.Change the fan speed with one of the
following:
The fan speed level indicators: Select your
desired speed level. The smaller indicator is
for a slower speed, and the larger for a
faster speed.
(+
/(-
: To go up or down one level at a
time.
Fan AUTO: The system automatically
selects the fan speed most suitable to the
ambient environment.
1SYNC on and off
When you press the button, the system changes
to synchronized mode.
When the system is in dual mode, the driver’s side
temperature and vent mode, and the passenger’s
side temperature and vent mode can be set
separately.You can also return to dual mode by changing the
passenger’s side temperature or switching the vent mode.The system adjusts each temperature based on the
information of the sunlight sensor and the sun
position updated by the navigation system’s GPS.Models with navigation system1Changing the fan speed
While the climate control system is in AUTO, Fan
AUTO is highlighted.
Fan Speed Level Indicators
Page 189 of 518
188Features
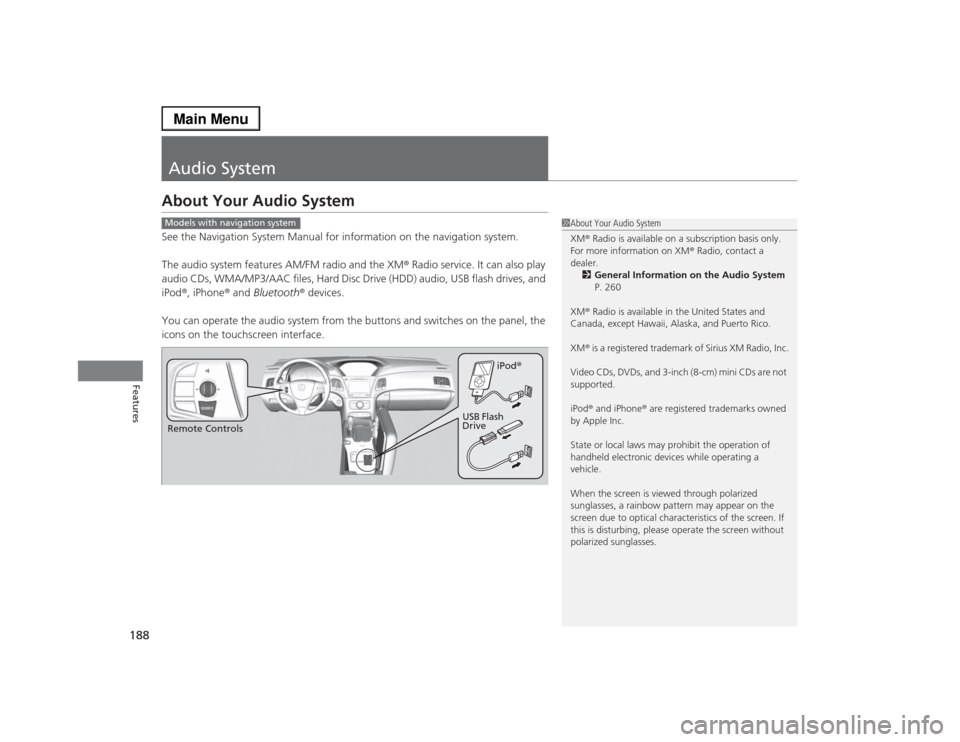
Audio SystemAbout Your Audio SystemSee the Navigation System Manual for information on the navigation system.
The audio system features AM/FM radio and the XM® Radio service. It can also play
audio CDs, WMA/MP3/AAC files, Hard Disc Drive (HDD) audio, USB flash drives, and
iPod®, iPhone® and Bluetooth® devices.
You can operate the audio system from the buttons and switches on the panel, the
icons on the touchscreen interface.
1About Your Audio System
XM® Radio is available on a subscription basis only.
For more information on XM® Radio, contact a
dealer.
2General Information on the Audio System
P. 260
XM® Radio is available in the United States and
Canada, except Hawaii, Alaska, and Puerto Rico.
XM® is a registered trademark of Sirius XM Radio, Inc.
Video CDs, DVDs, and 3-inch (8-cm) mini CDs are not
supported.
iPod® and iPhone® are registered trademarks owned
by Apple Inc.
State or local laws may prohibit the operation of
handheld electronic devices while operating a
vehicle.
When the screen is viewed through polarized
sunglasses, a rainbow pattern may appear on the
screen due to optical characteristics of the screen. If
this is disturbing, please operate the screen without
polarized sunglasses.
Models with navigation systemRemote ControlsiPod®
USB Flash
Drive
Page 194 of 518
193Features
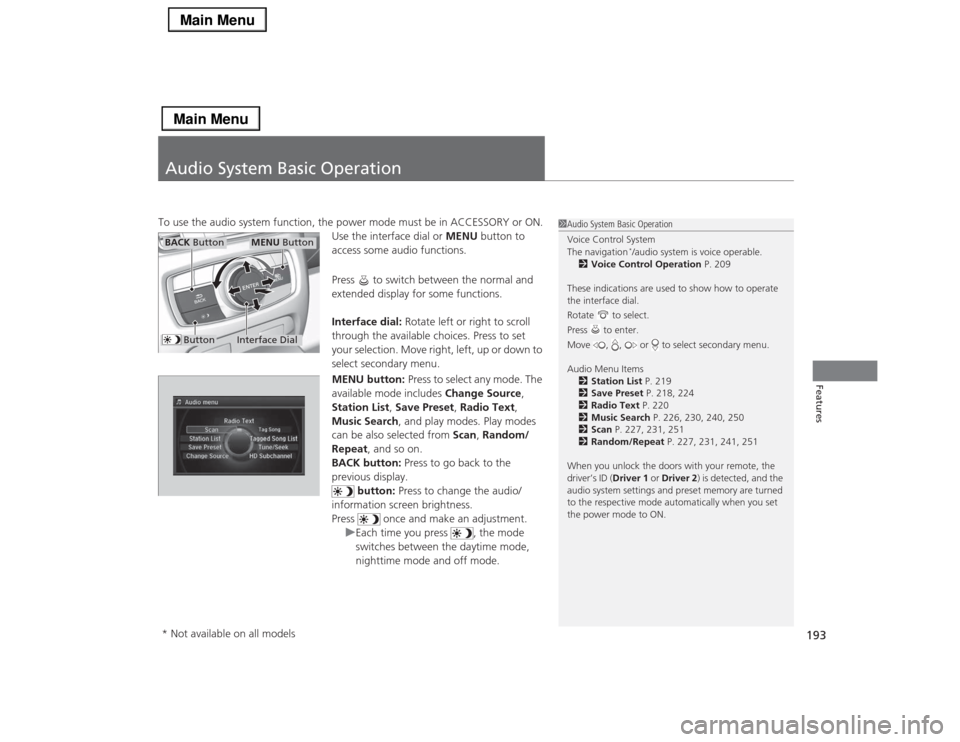
Audio System Basic OperationTo use the audio system function, the power mode must be in ACCESSORY or ON.
Use the interface dial or MENU button to
access some audio functions.
Press to switch between the normal and
extended display for some functions.
Interface dial: Rotate left or right to scroll
through the available choices. Press to set
your selection. Move right, left, up or down to
select secondary menu.
MENU button: Press to select any mode. The
available mode includes Change Source,
Station List, Save Preset, Radio Text,
Music Search, and play modes. Play modes
can be also selected from Scan, Random/
Repeat, and so on.
BACK button: Press to go back to the
previous display.
button: Press to change the audio/
information screen brightness.
Press once and make an adjustment.
uEach time you press , the mode
switches between the daytime mode,
nighttime mode and off mode.
1Audio System Basic Operation
Voice Control System
The navigation
*/audio system is voice operable.
2Voice Control Operation P. 209
These indications are used to show how to operate
the interface dial.
Rotate to select.
Press to enter.
Move , , or to select secondary menu.
Audio Menu Items
2Station List P. 219
2Save Preset P. 218, 224
2Radio Text P. 220
2Music Search P. 226, 230, 240, 250
2Scan P. 227, 231, 251
2Random/Repeat P. 227, 231, 241, 251
When you unlock the doors with your remote, the
driver’s ID (Driver 1 or Driver 2) is detected, and the
audio system settings and preset memory are turned
to the respective mode automatically when you set
the power mode to ON.
Interface Dial
MENU Button
BACK Button
Button
* Not available on all models