display Acura RLX 2014 Manual PDF
[x] Cancel search | Manufacturer: ACURA, Model Year: 2014, Model line: RLX, Model: Acura RLX 2014Pages: 518, PDF Size: 15.83 MB
Page 210 of 518
209
uuAudio System Basic OperationuVoice Control Operation
Continued
Features
Voice Control OperationYour vehicle has a voice control system that allows hands-free operation of most of
the navigation
*/audio system functions.
The voice control system uses the (Talk) and (hang-up/back) buttons on the
steering wheel and a microphone near the map lights on the ceiling.
To achieve optimum voice recognition when using the voice control system:
•Make sure the correct screen is displayed for the voice command that you are
using.
•Close the windows and moonroof.
•Adjust the dashboard and side vents so air does not blow onto the microphone
on the ceiling.
•Speak clearly in a clear, natural speaking voice without pausing between words.
•Reduce any background noise if possible. The system may misinterpret your
command if more than one person is speaking at the same time.
•Refer to the Voice Help feature.
2Refer to the Navigation System Manual
*
■
Voice Recognition
1Voice Control Operation
When you press the button, a helpful prompt asks
what you would like to do. Press and release the
button again to bypass this prompt and give a
command.1Voice Recognition
The voice control system can only be used from the
driver’s seat because the microphone unit removes
noises from the front passenger’s side.
* Not available on all models
Page 211 of 518
210
uuAudio System Basic OperationuVoice Control Operation
Features
The system accepts these commands on the
Voice Portal screen.
•Call Your contact name
•Call Phone Number
•Find nearest POI category name
*
•Go home
*
•Route menu
*
•Cancel route
*
The system accepts these commands on any
screen.
•Call by number
•Call by name
Contacts that are imported from your
phone to the vehicle are all made available
by voice. Voice Tags can also be recorded
for each of your Speed Dial entries.■
Voice Portal Commands
■
Phone Commands
2Refer to the Navigation System ManualThe system accepts these commands on any
screen.
•Trip computer
•Traffic information
*
•Display clock
•Display wallpaper■
Navigation Commands
*
■
Info Commands
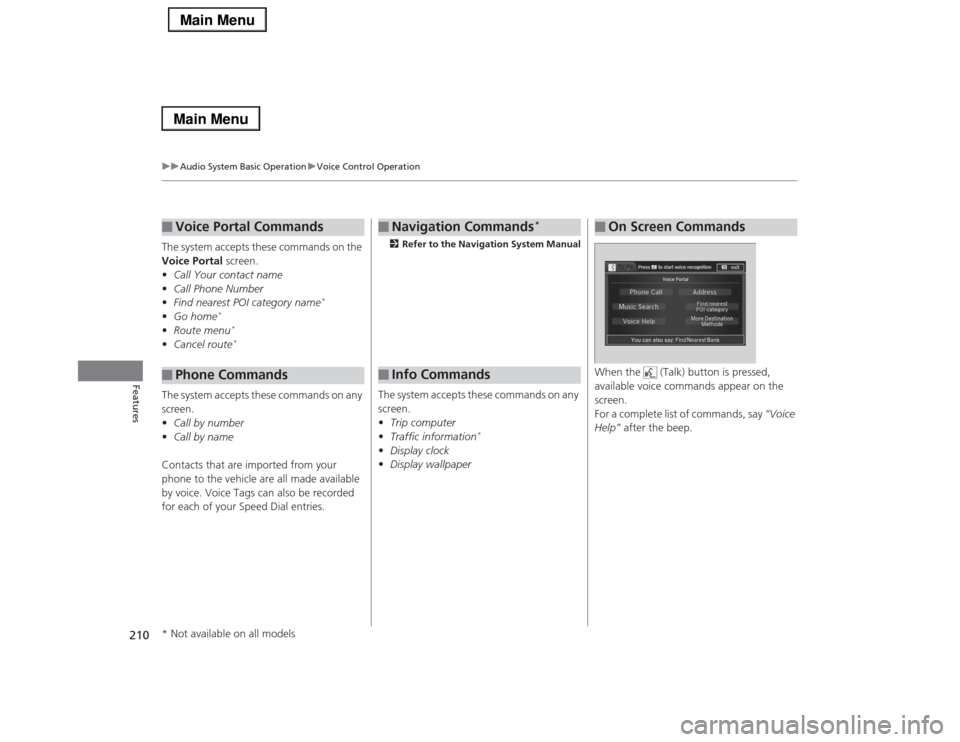
When the (Talk) button is pressed,
available voice commands appear on the
screen.
For a complete list of commands, say “Voice
Help” after the beep.■
On Screen Commands
* Not available on all models
Page 218 of 518
217
uuAudio System Basic OperationuPlaying AM/FM Radio
Continued
Features
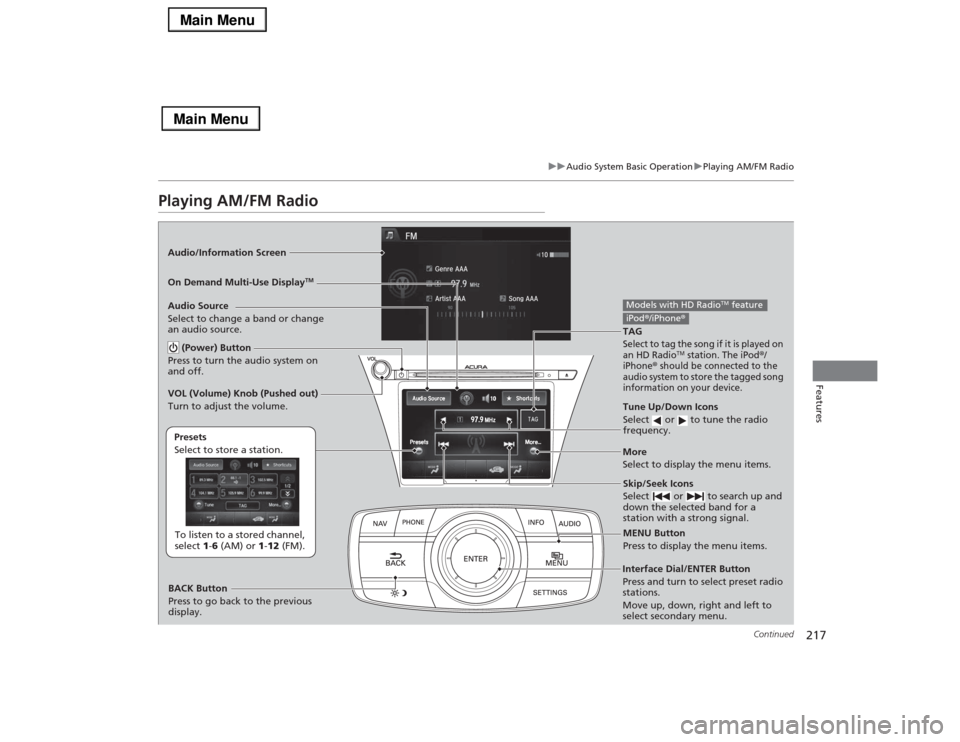
Playing AM/FM RadioAudio/Information Screen
On Demand Multi-Use Display
TM
Tune Up/Down Icons
Select or to tune the radio
frequency.MENU Button
Press to display the menu items.
(Power) Button
Press to turn the audio system on
and off.Audio Source
Select to change a band or change
an audio source.To listen to a stored channel,
select 1-6 (AM) or 1-12 (FM). Presets
Select to store a station.
Skip/Seek Icons
Select or to search up and
down the selected band for a
station with a strong signal.
More
Select to display the menu items.
BACK Button
Press to go back to the previous
display. VOL (Volume) Knob (Pushed out)
Turn to adjust the volume.Interface Dial/ENTER Button
Press and turn to select preset radio
stations.
Move up, down, right and left to
select secondary menu.TAGSelect to tag the song if it is played on
an HD Radio
TM station. The iPod
®/
iPhone
® should be connected to the
audio system to store the tagged song
information on your device.
Models with HD Radio
TM feature
iPod®/iPhone®
Page 219 of 518
uuAudio System Basic OperationuPlaying AM/FM Radio
218Features
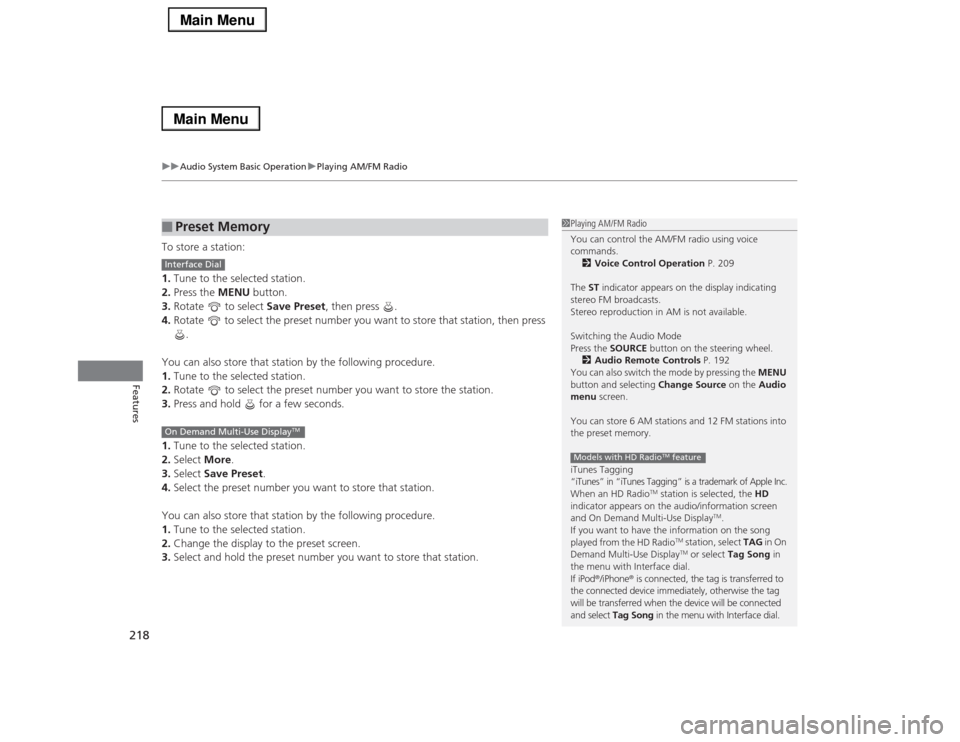
To store a station:
1.Tune to the selected station.
2.Press the MENU button.
3.Rotate to select Save Preset, then press .
4.Rotate to select the preset number you want to store that station, then press
.
You can also store that station by the following procedure.
1.Tune to the selected station.
2.Rotate to select the preset number you want to store the station.
3.Press and hold for a few seconds.
1.Tune to the selected station.
2.Select More.
3.Select Save Preset.
4.Select the preset number you want to store that station.
You can also store that station by the following procedure.
1.Tune to the selected station.
2.Change the display to the preset screen.
3.Select and hold the preset number you want to store that station.■
Preset Memory
1Playing AM/FM Radio
You can control the AM/FM radio using voice
commands.
2Voice Control Operation P. 209
The ST indicator appears on the display indicating
stereo FM broadcasts.
Stereo reproduction in AM is not available.
Switching the Audio Mode
Press the SOURCE button on the steering wheel.
2Audio Remote Controls P. 192
You can also switch the mode by pressing the MENU
button and selecting Change Source on the Audio
menu screen.
You can store 6 AM stations and 12 FM stations into
the preset memory.
iTunes Tagging“iTunes” in “iTunes Tagging” is a trademark of Apple Inc.When an HD Radio
TM station is selected, the HD
indicator appears on the audio/information screen
and On Demand Multi-Use Display
TM.
If you want to have the information on the song
played from the HD Radio
TM station, select TAG in On
Demand Multi-Use DisplayTM or select Tag Song in
the menu with Interface dial.
If iPod®/iPhone® is connected, the tag is transferred to
the connected device immediately, otherwise the tag
will be transferred when the device will be connected
and select Tag Song in the menu with Interface dial.
Models with HD Radio
TM feature
Interface DialOn Demand Multi-Use Display
TM
Page 221 of 518

uuAudio System Basic OperationuPlaying AM/FM Radio
220Features
■Radio text
Display the radio text information of the selected RDS station.
1.Press the MENU button.
2.Rotate to select Radio Text, then press .■Scan
Samples each of the strongest stations on the selected band for 10 seconds.
1.Press the MENU button.
2.Rotate to select Scan, then press .
To turn off scan, press to select Cancel Scan, or press the BACK button.
1.Select More.
2.Select Scan.
To turn off scan, select Cancel Scan.■Tag song to device
You can store the TAG information in the connected iPod®/iPhone®.
If the iPod®/iPhone® is not connected to the audio system, the information is stored
in the audio unit temporarily, then once the device is connected to the system, data
is transferred to the iPod®/iPhone®.
To store the TAG information to the iPod®/iPhone®, or the audio system:
1.Press the MENU button.
2.Rotate to select Tag Song, then press .
3.Select the song you want to save the information.
1Radio text
The text indicator comes on when you received a text
message. The indicator stays on until you read the
message.
Interface DialOn Demand Multi-Use Display
TM
Models with HD Radio
TM feature
Page 222 of 518

221
uuAudio System Basic OperationuPlaying AM/FM Radio
Features
■Tagged song list
Displays the TAG information saved to the audio system.
1.Press the MENU button.
2.Rotate to select Tagged Song List, then press .■HD subchannel
Displays the subchannel list when an HD Radio
TM station is selected.
1.Press the MENU button.
2.Rotate to select HD Subchannel, then press .
3.Rotate to select a channel from a list, then press .
Select the or when the subchannel number is displayed.
You can also select the channel by the following procedure.
1.Select More.
2.Select HD Subchannel.
3.Select the channel number.
Interface DialOn Demand Multi-Use Display
TM
Page 223 of 518
222
uuAudio System Basic OperationuPlaying XM® Radio
Features
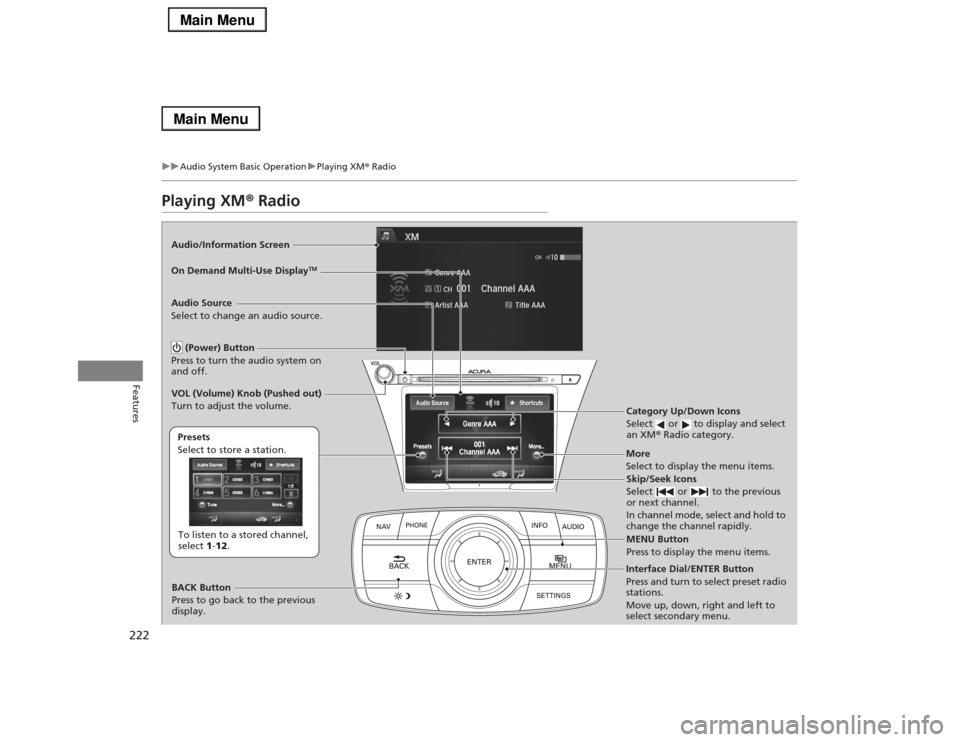
Playing XM® RadioAudio/Information Screen
On Demand Multi-Use Display
TM
Category Up/Down Icons
Select or to display and select
an XM® Radio category.MENU Button
Press to display the menu items.
(Power) Button
Press to turn the audio system on
and off.Audio Source
Select to change an audio source.To listen to a stored channel,
select 1-12. Presets
Select to store a station.
Skip/Seek Icons
Select or to the previous
or next channel.
In channel mode, select and hold to
change the channel rapidly.
More
Select to display the menu items.
BACK Button
Press to go back to the previous
display. VOL (Volume) Knob (Pushed out)
Turn to adjust the volume.Interface Dial/ENTER Button
Press and turn to select preset radio
stations.
Move up, down, right and left to
select secondary menu.
Page 224 of 518
Continued
223
uuAudio System Basic OperationuPlaying XM® Radio
Features
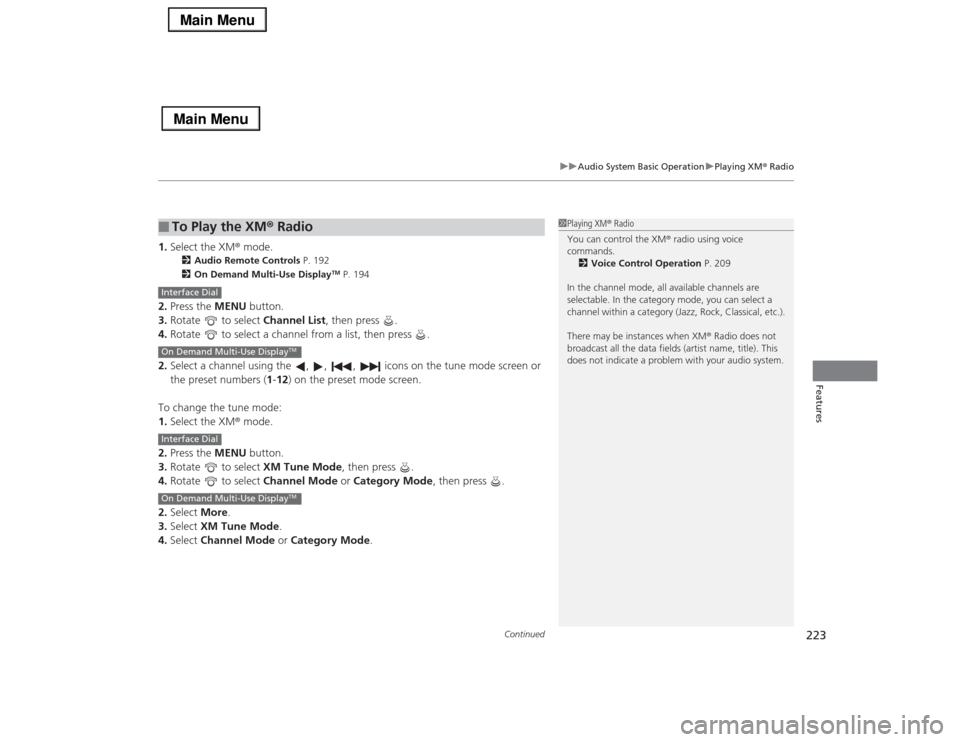
1.Select the XM® mode.
2Audio Remote Controls P. 192
2On Demand Multi-Use Display
TM P. 194
2.Press the MENU button.
3.Rotate to select Channel List, then press .
4.Rotate to select a channel from a list, then press .
2.Select a channel using the , , , icons on the tune mode screen or
the preset numbers (1-12) on the preset mode screen.
To change the tune mode:
1.Select the XM® mode.
2.Press the MENU button.
3.Rotate to select XM Tune Mode, then press .
4.Rotate to select Channel Mode or Category Mode, then press .
2.Select More.
3.Select XM Tune Mode.
4.Select Channel Mode or Category Mode.■
To Play the XM® Radio
1Playing XM® Radio
You can control the XM® radio using voice
commands.
2Voice Control Operation P. 209
In the channel mode, all available channels are
selectable. In the category mode, you can select a
channel within a category (Jazz, Rock, Classical, etc.).
There may be instances when XM® Radio does not
broadcast all the data fields (artist name, title). This
does not indicate a problem with your audio system.
Interface DialOn Demand Multi-Use Display
TM
Interface DialOn Demand Multi-Use Display
TM
Page 225 of 518
uuAudio System Basic OperationuPlaying XM® Radio
224Features
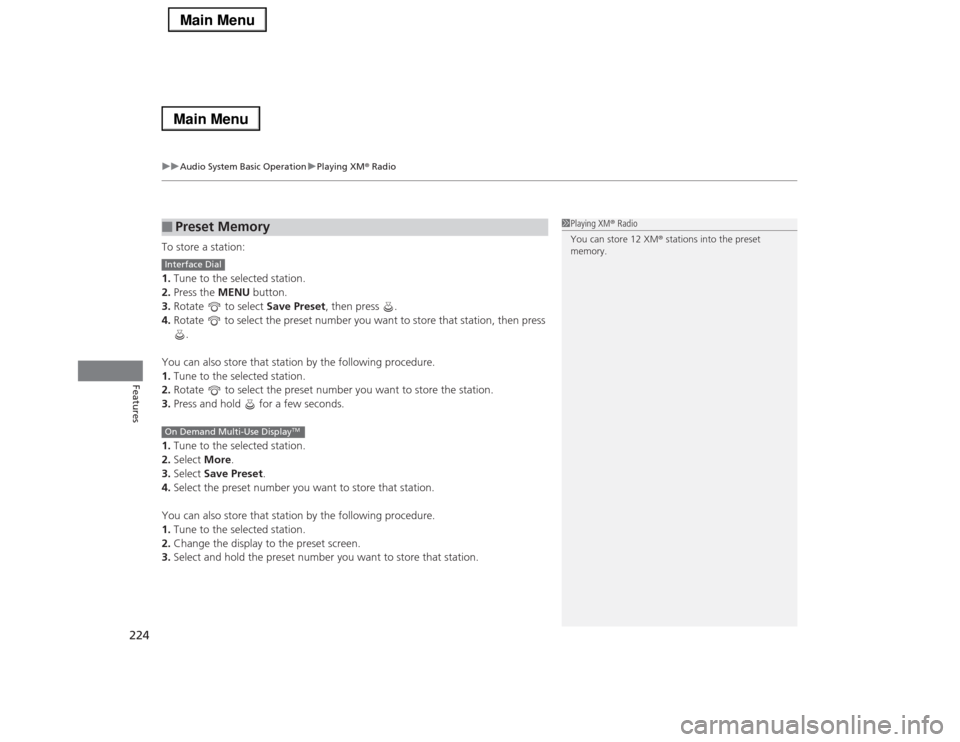
To store a station:
1.Tune to the selected station.
2.Press the MENU button.
3.Rotate to select Save Preset, then press .
4.Rotate to select the preset number you want to store that station, then press
.
You can also store that station by the following procedure.
1.Tune to the selected station.
2.Rotate to select the preset number you want to store the station.
3.Press and hold for a few seconds.
1.Tune to the selected station.
2.Select More.
3.Select Save Preset.
4.Select the preset number you want to store that station.
You can also store that station by the following procedure.
1.Tune to the selected station.
2.Change the display to the preset screen.
3.Select and hold the preset number you want to store that station.■
Preset Memory
1Playing XM® Radio
You can store 12 XM® stations into the preset
memory.
Interface DialOn Demand Multi-Use Display
TM
Page 226 of 518
225
uuAudio System Basic OperationuPlaying a CD
Continued
Features
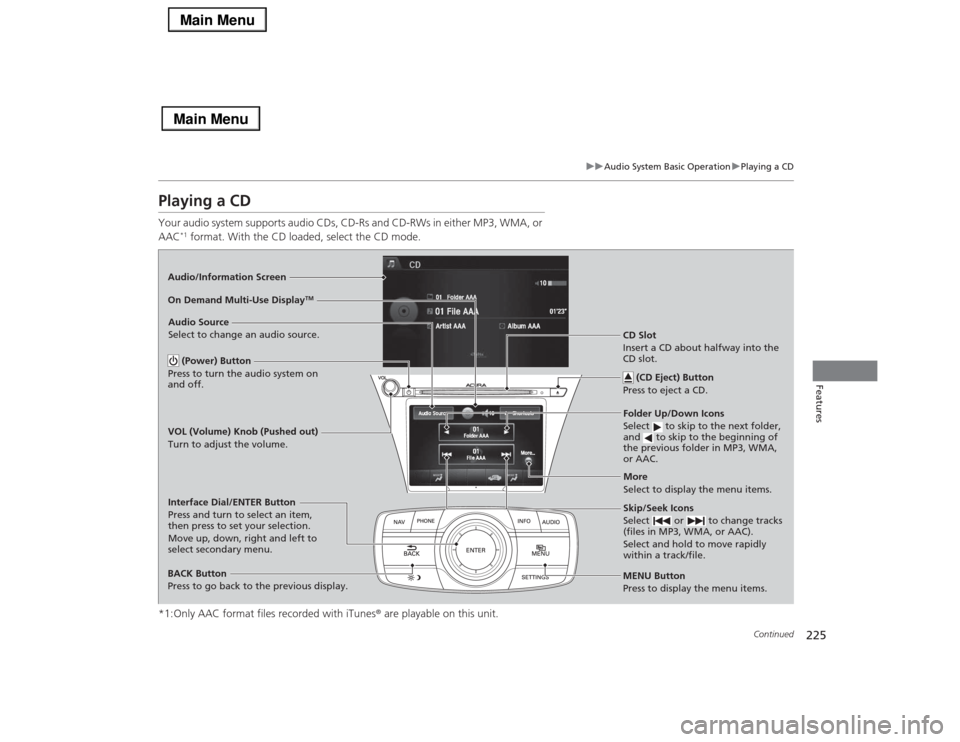
Playing a CDYour audio system supports audio CDs, CD-Rs and CD-RWs in either MP3, WMA, or
AAC
*1 format. With the CD loaded, select the CD mode.
*1:Only AAC format files recorded with iTunes® are playable on this unit.
Audio/Information Screen
MENU Button
Press to display the menu items.
CD Slot
Insert a CD about halfway into the
CD slot.
(CD Eject) Button
Press to eject a CD.Folder Up/Down Icons
Select to skip to the next folder,
and to skip to the beginning of
the previous folder in MP3, WMA,
or AAC.
Audio Source
Select to change an audio source.
Skip/Seek Icons
Select or to change tracks
(files in MP3, WMA, or AAC).
Select and hold to move rapidly
within a track/file.
More
Select to display the menu items.
BACK Button
Press to go back to the previous display.Interface Dial/ENTER Button
Press and turn to select an item,
then press to set your selection.
Move up, down, right and left to
select secondary menu.On Demand Multi-Use Display
TM
(Power) Button
Press to turn the audio system on
and off.VOL (Volume) Knob (Pushed out)
Turn to adjust the volume.