alternator belt ACURA TL 1995 Service Repair Manual
[x] Cancel search | Manufacturer: ACURA, Model Year: 1995, Model line: TL, Model: ACURA TL 1995Pages: 1771, PDF Size: 62.49 MB
Page 47 of 1771

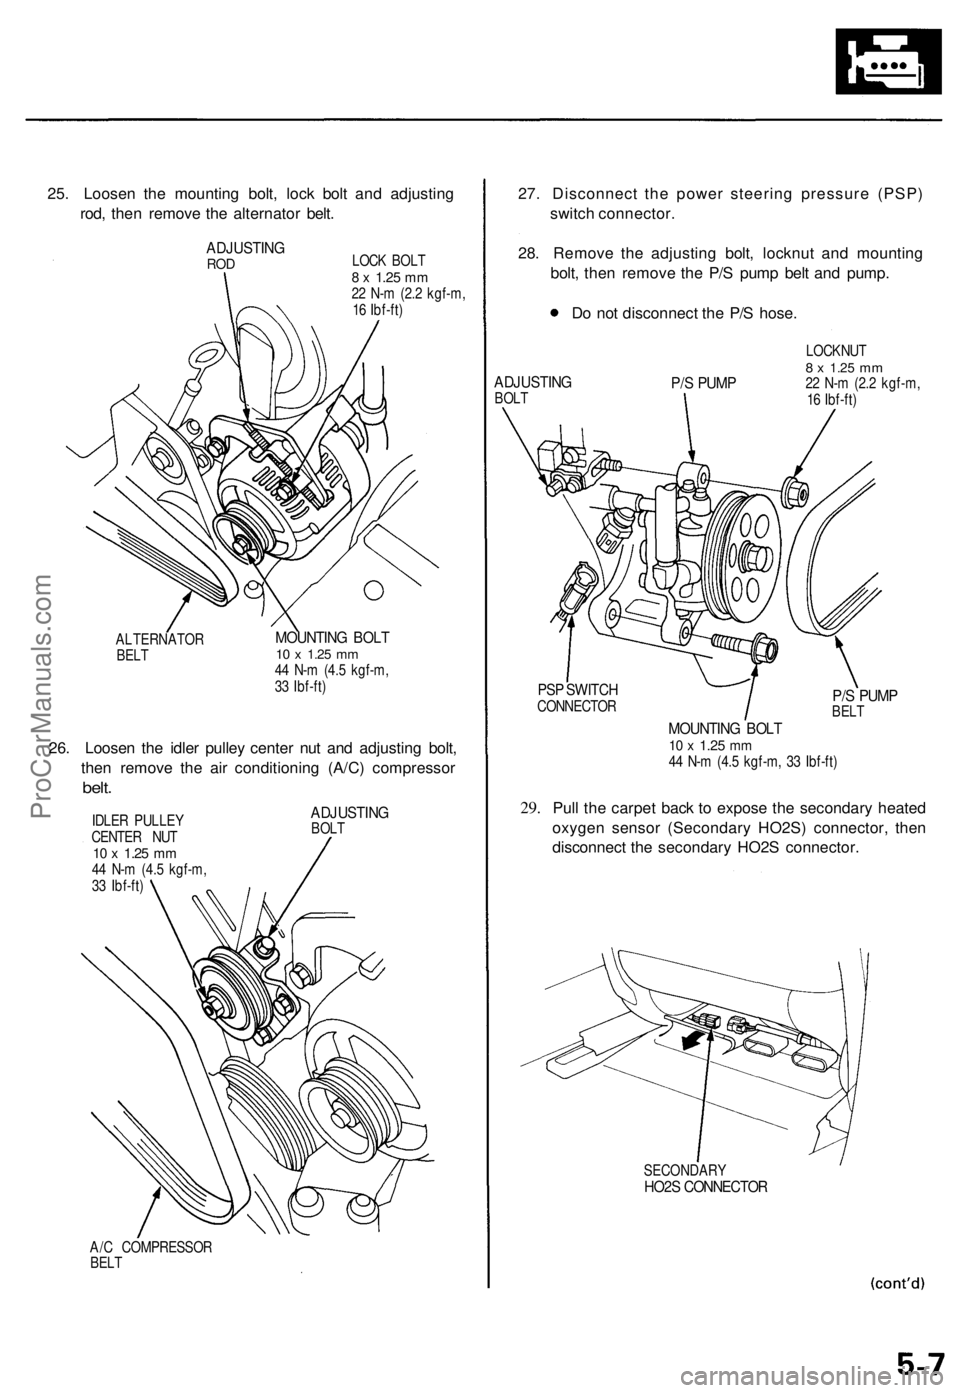
25. Loosen the mounting bolt, lock bolt and adjusting
rod, then remove the alternator belt.
ADJUSTING
ROD
LOCK BOLT
8 x
1.25
mm
22 N-m (2.2 kgf-m,
16 Ibf-ft)
ALTERNATOR
BELT
MOUNTING BOLT
10 x
1.25
mm
44 N-m (4.5 kgf-m,
33 Ibf-ft)
26. Loosen the idler pulley center nut and adjusting bolt,
then remove the air conditioning (A/C) compressor
belt.
IDLER PULLEY
CENTER NUT
10 x
1.25
mm
44 N-m (4.5 kgf-m,
33 Ibf-ft)
ADJUSTING
BOLT
A/C COMPRESSOR
BELT
27. Disconnect the power steering pressure (PSP)
switch connector.
28. Remove the adjusting bolt, locknut and mounting
bolt, then remove the P/S pump belt and pump.
Do not disconnect the P/S hose.
ADJUSTING
BOLT
P/S PUMP
LOCKNUT
8 x
1.25
mm
22 N-m (2.2 kgf-m,
16 Ibf-ft)
PSP SWITCH
CONNECTOR
29.
P/S PUMP
BELT
MOUNTING BOLT
10 x
1.25
mm
44 N-m (4.5 kgf-m, 33 Ibf-ft)
Pull the carpet back to expose the secondary heated
oxygen sensor (Secondary HO2S) connector, then
disconnect the secondary HO2S connector.
SECONDARY
HO2S CONNECTORProCarManuals.com
Page 608 of 1771

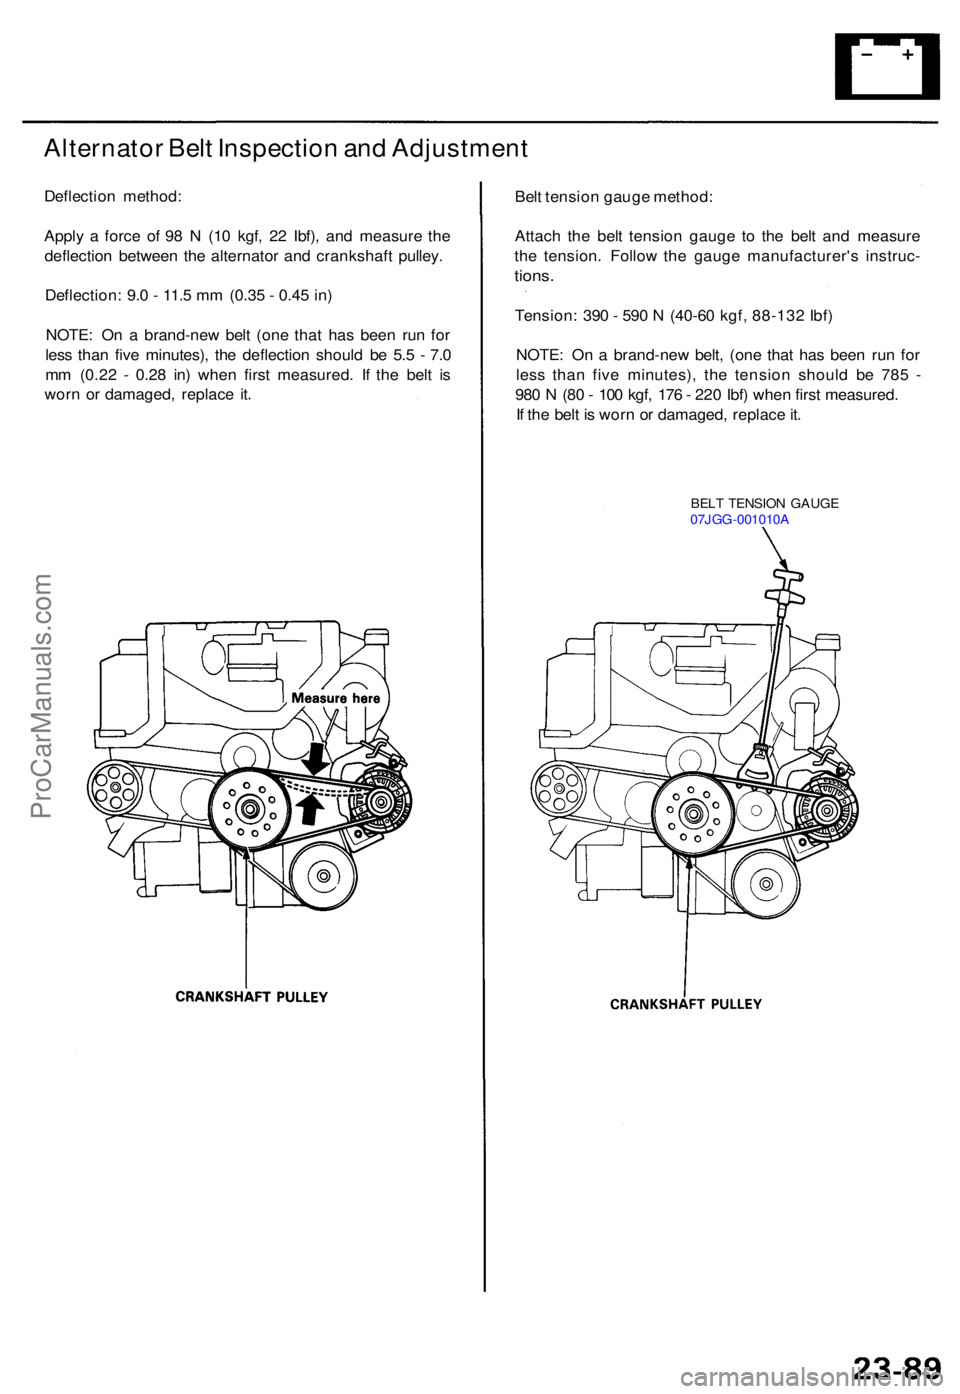
Alternator Bel t Inspectio n an d Adjustmen t
Deflection method :
Appl y a forc e o f 9 8 N (1 0 kgf , 2 2 Ibf) , an d measur e th e
deflectio n betwee n th e alternato r an d crankshaf t pulley .
Deflection : 9. 0 - 11. 5 m m (0.3 5 - 0.4 5 in )
NOTE : O n a brand-ne w bel t (on e tha t ha s bee n ru n fo r
les s tha n fiv e minutes) , th e deflectio n shoul d b e 5. 5 - 7. 0
m m (0.2 2 - 0.2 8 in ) whe n firs t measured . I f th e bel t i s
wor n o r damaged , replac e it . Bel
t tensio n gaug e method :
Attac h th e bel t tensio n gaug e t o th e bel t an d measur e
th e tension . Follo w th e gaug e manufacturer' s instruc -
tions.
Tension : 39 0 - 59 0 N (4 0-6 0 kgf , 88-13 2 Ibf )
NOTE : O n a brand-ne w belt , (on e tha t ha s bee n ru n fo r
les s tha n fiv e minutes) , th e tensio n shoul d b e 78 5 -
98 0 N (8 0 - 10 0 kgf , 17 6 - 22 0 Ibf ) whe n firs t measured .
I f th e bel t i s wor n o r damaged , replac e it .
BEL T TENSIO N GAUG E
07JG G-001010 A
ProCarManuals.com
Page 1536 of 1771

Troubleshooting
Tips and Precautions
Before Troubleshooting
Check applicable fuses in the appropriate fuse/relay
box.
Check the battery for damage, state of charge, and
clean and tight connections.
Check the alternator belt tension.
CAUTION:
Do not quick-charge a battery unless the battery
ground cable has been disconnected, otherwise you
will damage the alternator diodes.
Do not attempt to crank the engine with the battery
ground cable loosely connected or you will severely
damage the wiring.
Handling Connectors
Make sure the connectors are clean and have no loose
wire terminals.
Make sure multiple cavity connectors are packed with
grease (except waterproof connectors).
All connectors have push-down release type locks.
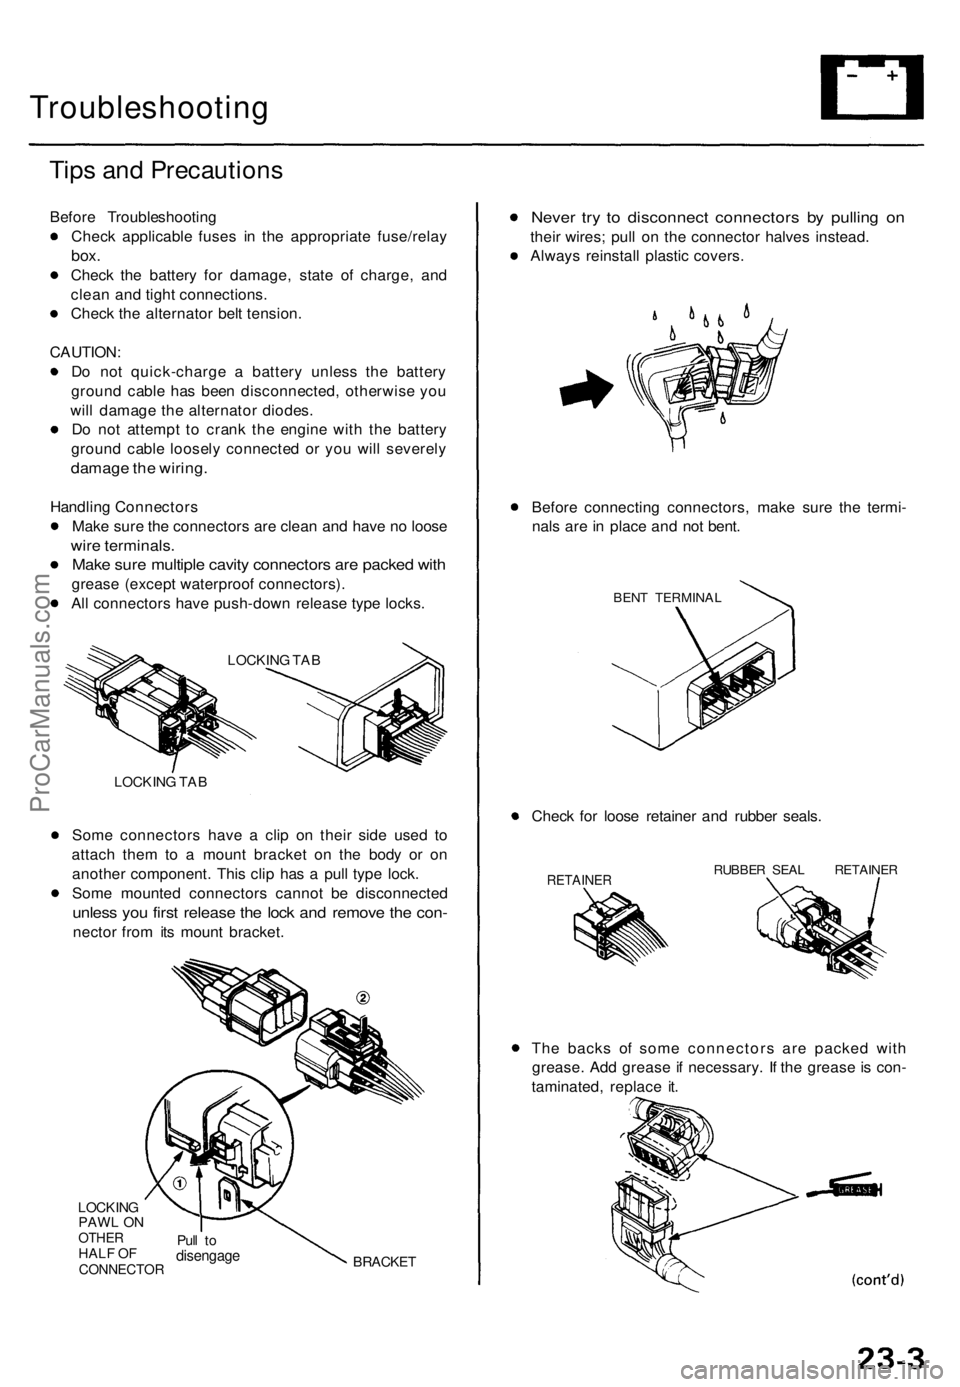
LOCKING TAB
Some connectors have a clip on their side used to
attach them to a mount bracket on the body or on
another component. This clip has a pull type lock.
Some mounted connectors cannot be disconnected
unless you first release the lock and remove the con-
nector from its mount bracket.
LOCKING
PAWL ON
OTHER
HALF OF
CONNECTOR
Pull to
disengage
BRACKET
Never try to disconnect connectors by pulling on
their wires; pull on the connector halves instead.
Always reinstall plastic covers.
Before connecting connectors, make sure the termi-
nals are in place and not bent.
BENT TERMINAL
Check for loose retainer and rubber seals.
RETAINER
RUBBER SEAL RETAINER
The backs of some connectors are packed with
grease. Add grease if necessary. If the grease is con-
taminated, replace it.
LOCKING TABProCarManuals.com