lock Acura TL 2000 3.2 Repair Manual
[x] Cancel search | Manufacturer: ACURA, Model Year: 2000, Model line: TL, Model: Acura TL 2000Pages: 311, PDF Size: 3.05 MB
Page 212 of 311

Cooling System
1. Turn the ignition ON (II). Turnthe heater temperature controldial to maximum heat (climate
control to 90°F/32°C). Turn off
the ignition. Open the hood. Make sure the engine and radiator are
cool to the touch.
2. Remove the radiator cap.
DRAIN PLUG
DRAIN BOLT
3. Loosen the drain plug on thebottom of the radiator. Thecoolant will drain through thesplash guard. Loosen the drain
bolt at the rear of the engine cylinder block.
RESERVE TANK CAP RESERVE TANK
HOLDER
4. Remove the reserve tank from itsholder by pulling it straight up.Drain the coolant, then put the
tank back in its holder.
5. When the coolant stops draining, tighten the drain plug at the
bottom of the radiator.
CONTINUED
Maintenance
Page 213 of 311
Cooling System
6. Tighten the drain bolt at the rearof the engine cylinder blocksecurely.
Tightening torque: 7 Ibf-ft(10N-m,1.0kgf-m)
7. Mix the recommended antifreeze with an equal amount of purifiedor distilled water in a clean
container. The cooling system
capacity is:
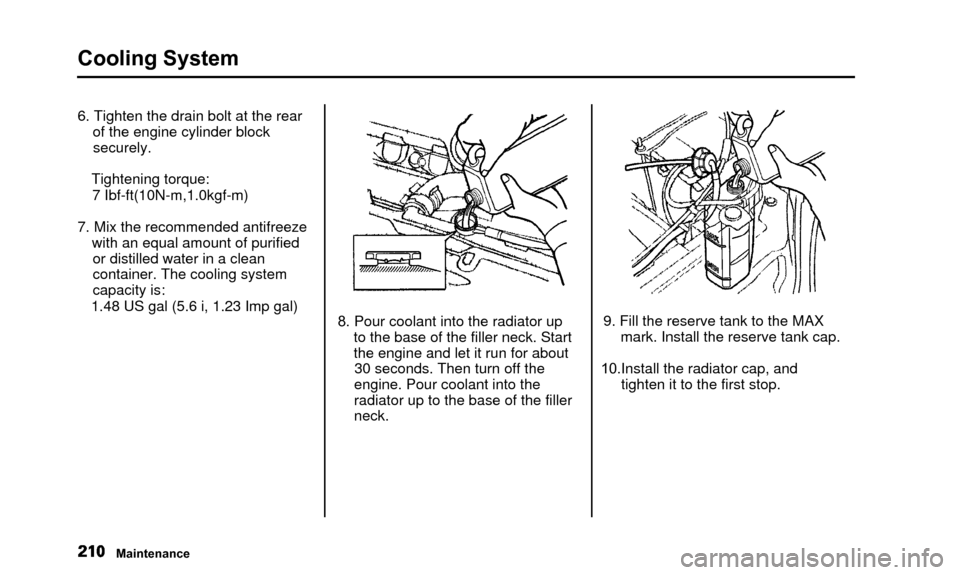
1.48 US gal (5.6 i, 1.23 Imp gal) 8. Pour coolant into the radiator up
to the base of the filler neck. Start
the engine and let it run for about30 seconds. Then turn off the
engine. Pour coolant into the
radiator up to the base of the filler
neck. 9. Fill the reserve tank to the MAX
mark. Install the reserve tank cap.
10.Install the radiator cap, and tighten it to the first stop.
Maintenance
Page 218 of 311

Power Steering, Hood Latch
Power Steering
MAX
Check the level when the engine is
cold. Look at the side of the
reservoir. The fluid should be
between the UPPER LEVEL and LOWER LEVEL. If it is below the
LOWER LEVEL, add power steering
fluid to the UPPER LEVEL. Always use Genuine Honda Power
Steering Fluid. If it is not available,
you may use another power steering
fluid as an emergency replacement. However, continued use can cause
increased wear and poor steering in
cold weather. Have the power steering system flushed and refilled
with Honda PSF as soon as possible.
A low power steering fluid level can indicate a leak in the system. Check
the fluid level frequently and have
the system inspected as soon as
possible.
Turning the steering wheel to full left
or right lock and holding it there can
damage the power steering pump.
Hood Latch
Clean the hood latch assembly with a
mild cleaner, then lubricate it with a
multipurpose grease. Lubricate all
the moving parts, including the pivot.
Follow the time and distance
recommendations in the
Maintenance Schedule. If you are
not sure how to clean and grease the
latch, contact your Acura dealer.
Maintenance
NOTICE
Page 220 of 311
Spark Plugs
The spark plugs in your car shouldbe replaced according to the time
and distance recommendations in
the maintenance schedule. Replacement
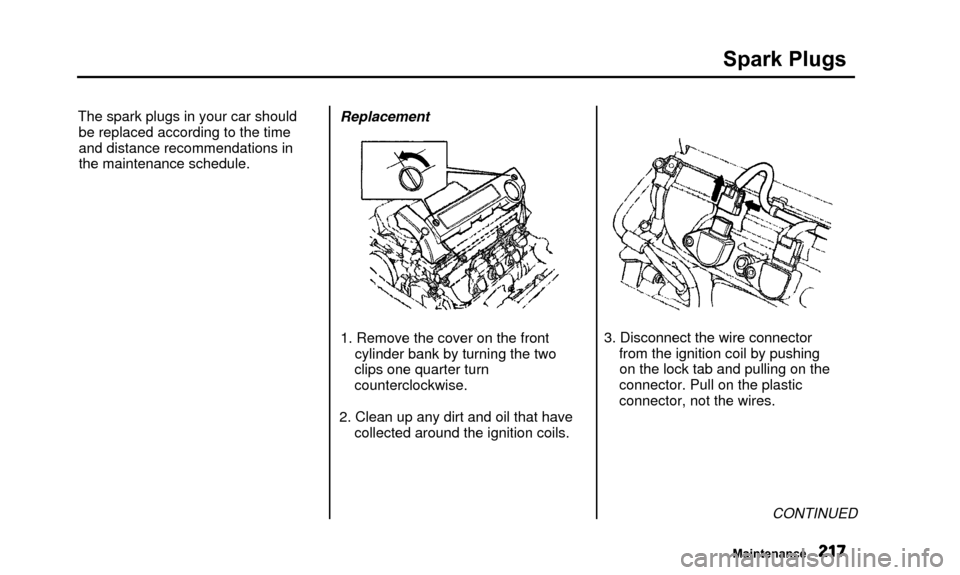
1. Remove the cover on the front cylinder bank by turning the two
clips one quarter turn
counterclockwise.
2. Clean up any dirt and oil that have collected around the ignition coils. 3. Disconnect the wire connector
from the ignition coil by pushingon the lock tab and pulling on the
connector. Pull on the plastic
connector, not the wires.
CONTINUED
Maintenance
Page 222 of 311
Spark Plugs
Tighten the spark plugs carefully. A
spark plug that is too loose can
overheat and damage the engine. Overtightening can cause damage to
the threads in the cylinder head. 8. Install the ignition coil. Reinstall
the hexagon socket head cap bolt.
9. Push the wire connector onto the ignition coil. Make sure it locks in
place.
10.Repeat this procedure for the other five spark plugs.
11.Reinstall the cover on the front cylinder bank. Specifications:
NGK:
DENSO: PZFR5F-11
PKJ16CR-L11
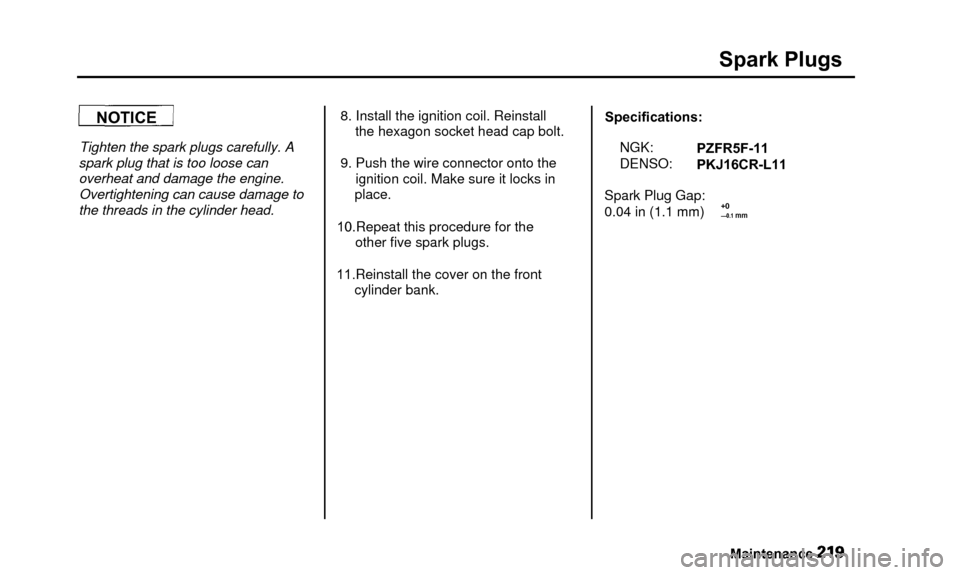
Spark Plug Gap:
0.04 in (1.1 mm)
Maintenance
NOTICE
+0—0.1 mm
Page 226 of 311

Wiper Blades
Check the condition of the wiper
blades at least every six months. Look for signs of cracking in the
rubber, or areas that are getting
hard. Replace the blades if you find these signs, or they leave streaks
and unwiped areas when used.WIPER ARMS
To replace the blade:
1. Turn the ignition ON (II), switch the wipers to INT or — lowposition), then turn the ignition
OFF when the wiper arm is
approximately midway in its travel.
2. Raise the wiper arm off the windshield.
LOCK TAB
3. Disconnect the blade assemblyfrom the wiper arm by pushing in
the lock tab. Hold it in while you
push the blade assembly toward
the base of the arm.
CONTINUED
Maintenance
Page 227 of 311

Wiper Blades
BLADE
4. Remove the blade from its holderby grasping the tabbed end of the
blade. Pull firmly until the tabs
come out of the holder.
BLADE
REINFORCEMENT
5. Examine the new wiper blades. If they have no plastic or metal rein-
forcement along the back edge,
remove the metal reinforcement
strips from the old wiper blade and
install them in the slots along the
edge of the new blade. 6. Slide the new wiper blade into the
holder until the tabs lock.
7. Slide the wiper blade assembly onto the wiper arm. Make sure it
locks in place.
8. Lower the wiper arm down against the windshield.
9. Turn the ignition switch ON (II) and return the windshield wipers
to their park position.
Maintenance
Page 228 of 311
Air Conditioning System
Your car's air conditioning is a sealedsystem. Any major maintenance,
such as recharging, should be done
by a qualified mechanic. You can do
a couple of things to make sure the
air conditioning works efficiently.
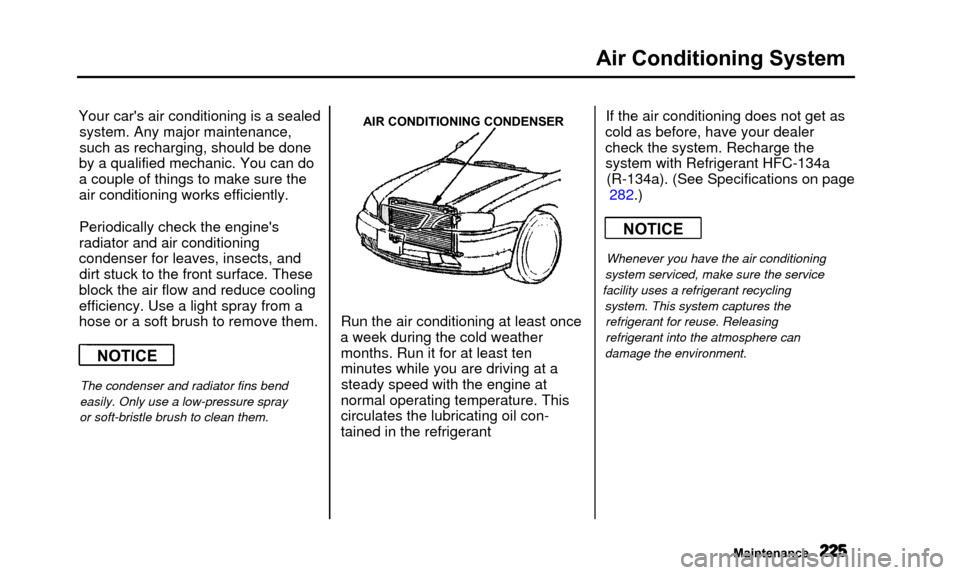
Periodically check the engine's
radiator and air conditioning
condenser for leaves, insects, and dirt stuck to the front surface. These
block the air flow and reduce cooling
efficiency. Use a light spray from a
hose or a soft brush to remove them.
The condenser and radiator fins bend
easily. Only use a low-pressure spray
or soft-bristle brush to clean them. AIR CONDITIONING CONDENSER
Run the air conditioning at least once
a week during the cold weather months. Run it for at least ten
minutes while you are driving at asteady speed with the engine at
normal operating temperature. This
circulates the lubricating oil con-
tained in the refrigerant If the air conditioning does not get as
cold as before, have your dealer
check the system. Recharge the system with Refrigerant HFC-134a (R-134a). (See Specifications on page 282.)
Whenever you have the air conditioning
system serviced, make sure the service
facility uses a refrigerant recycling system. This system captures therefrigerant for reuse. Releasing
refrigerant into the atmosphere can
damage the environment.
Maintenance
NOTICE
NOTICE
Page 239 of 311
Lights
Replacing a Headlight Bulb
The low beam headlight bulbs are a type of high voltage discharge tube.High voltage can remain in the
circuit even with the light switch off
and the key removed. Because of this, you should not attempt to
examine or change a low beam headlight bulb yourself. If a low
beam headlight bulb fails, take the
car to your dealer to have it replaced.
Halogen bulbs are used for the high
beam headlight bulbs. When replacing a high beam headlight bulb,
handle it by its base and protect the
glass from contact with your skin or hard objects. If you touch the glass,
clean it with denatured alcohol and a clean cloth.
Halogen headlight bulbs get very hot
when lit. Oil, perspiration, or a scratch
on the glass can cause the bulb to
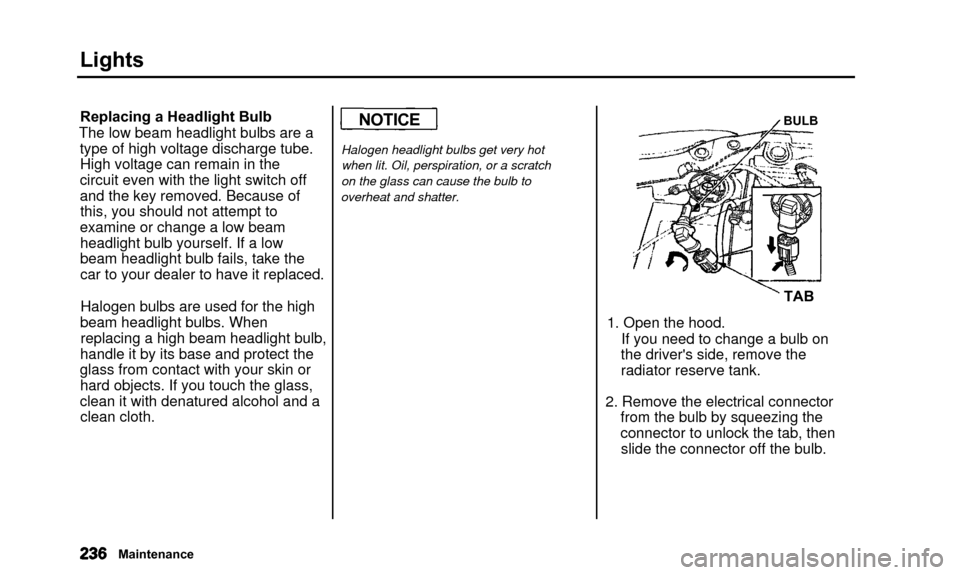
overheat and shatter. BULB
TAB
1. Open the hood. If you need to change a bulb on
the driver's side, remove the
radiator reserve tank.
2. Remove the electrical connector from the bulb by squeezing the
connector to unlock the tab, thenslide the connector off the bulb.
Maintenance
NOTICE
Page 240 of 311
Lights
3. Remove the bulb by turning itapproximately one-quarter turn
counterclockwise.
4. Insert the new bulb into the hole and turn it one-quarter turn clock-
wise to lock it in place.
5. Push the electrical connector back onto the bulb. Make sure it is onall the way.
6. Turn on the headlights to test the new bulb.
7. Reinstall the radiator reserve tank. Replacing Front Turn Signal and
Side Marker Light Bulbs
1. If you are changing the bulb on the driver's side, start the engine,
turn the steering wheel all the way
to the right, and turn off the
engine. If you are changing the
bulb on the passenger's side, turn the steering wheel to the left.
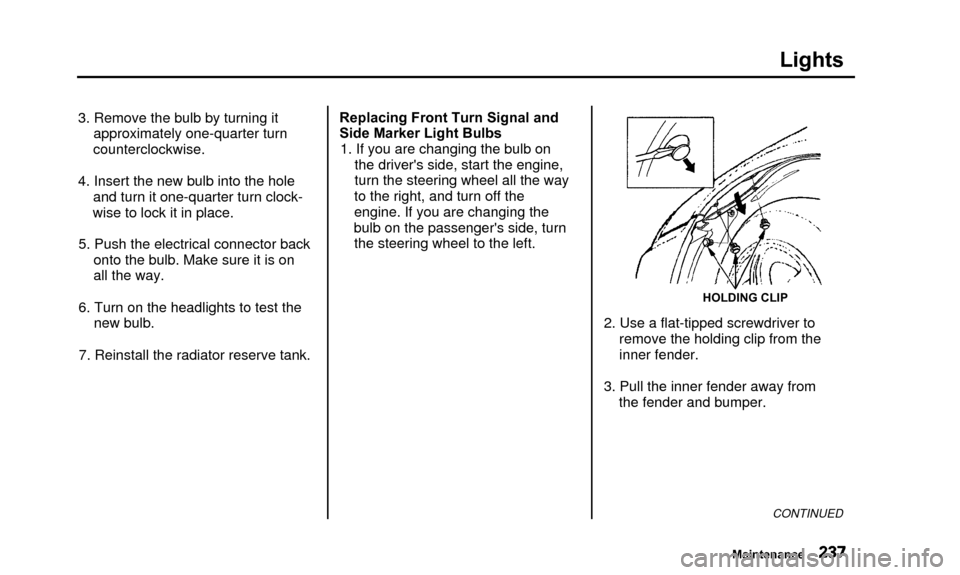
HOLDING CLIP
2. Use a flat-tipped screwdriver to remove the holding clip from the
inner fender.
3. Pull the inner fender away from the fender and bumper.
CONTINUED
Maintenance