Acura TLX 2017 Owner's Manual
Manufacturer: ACURA, Model Year: 2017, Model line: TLX, Model: Acura TLX 2017Pages: 553, PDF Size: 33.77 MB
Page 211 of 553
210
uuAudio System uAudio System Theft Protection
Features
Audio System Theft Protection
The audio system is disabled when it is di sconnected from the power source, such as
when the battery is disconnected or goes dead. In certain conditions, the system
may display a code entry screen. If this occurs, reactivate the audio system.
■Reactivating the audio system
1. Set the power mode to ON.
2. Turn on the audio system.
3. Press and hold the audio system power button for more than two seconds.
u The audio system is reac tivated when the audio co ntrol unit establishes a
connection with the vehicle control unit. If the control unit fails to recognize
the audio unit, you must go to a dealer and have the audio unit checked.
17 ACURA TLX-31TZ36200.book 210 ページ 2016年6月10日 金曜日 午後6時39分
Page 212 of 553
211
uuAudio System uAudio Remote Controls
Features
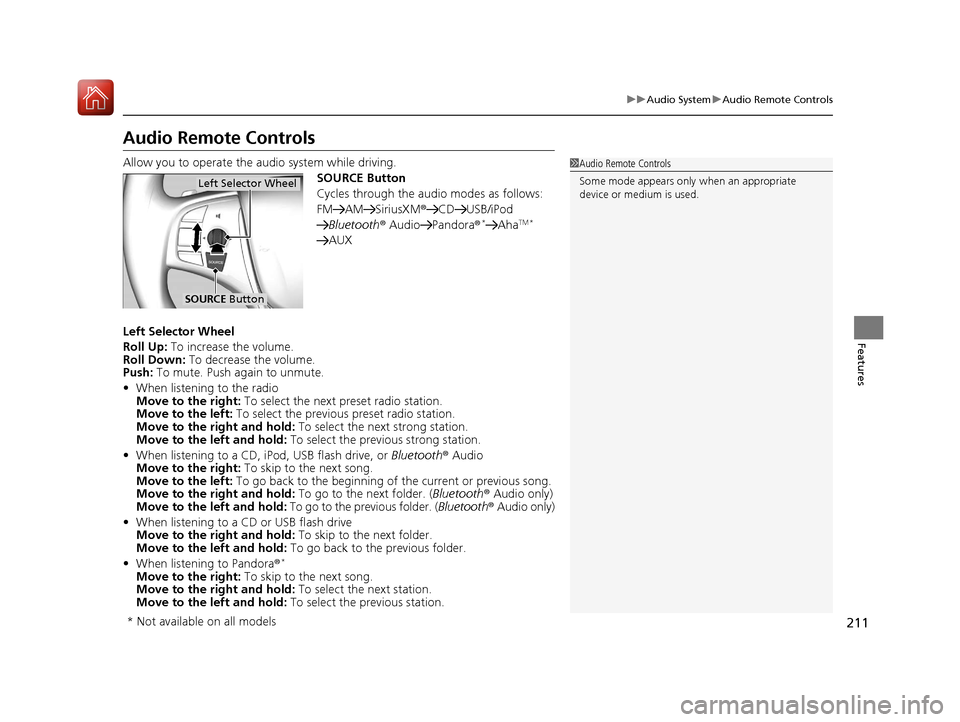
Audio Remote Controls
Allow you to operate the au dio system while driving.
SOURCE Button
Cycles through the audio modes as follows:
FM AM SiriusXM ®CD USB/iPod
Bluetooth ® Audio Pandora ®
*AhaTM *
AUX
Left Selector Wheel
Roll Up: To increase the volume.
Roll Down: To decrease the volume.
Push: To mute. Push again to unmute.
• When listening to the radio
Move to the right: To select the next preset radio station.
Move to the left: To select the previous preset radio station.
Move to the right and hold: To select the next strong station.
Move to the left and hold: To select the previous strong station.
• When listening to a CD, iPod, USB flash drive, or Bluetooth® Audio
Move to the right: To skip to the next song.
Move to the left: To go back to the beginning of the current or previous song.
Move to the right and hold: To go to the next folder. (Bluetooth® Audio only)
Move to the left and hold: To go to the previous folder. ( Bluetooth® Audio only)
• When listening to a CD or USB flash drive
Move to the right and hold: To skip to the next folder.
Move to the left and hold: To go back to the previous folder.
• When listening to Pandora®
*
Move to the right: To skip to the next song.
Move to the right and hold: To select the next station.
Move to the left and hold: To select the previous station.
1Audio Remote Controls
Some mode appears only when an appropriate
device or medium is used.
Left Selector Wheel
SOURCE Button
* Not available on all models
17 ACURA TLX-31TZ36200.book 211 ページ 2016年6月10日 金曜日 午後6時39分
Page 213 of 553
212
Features
Audio System Basic Operation
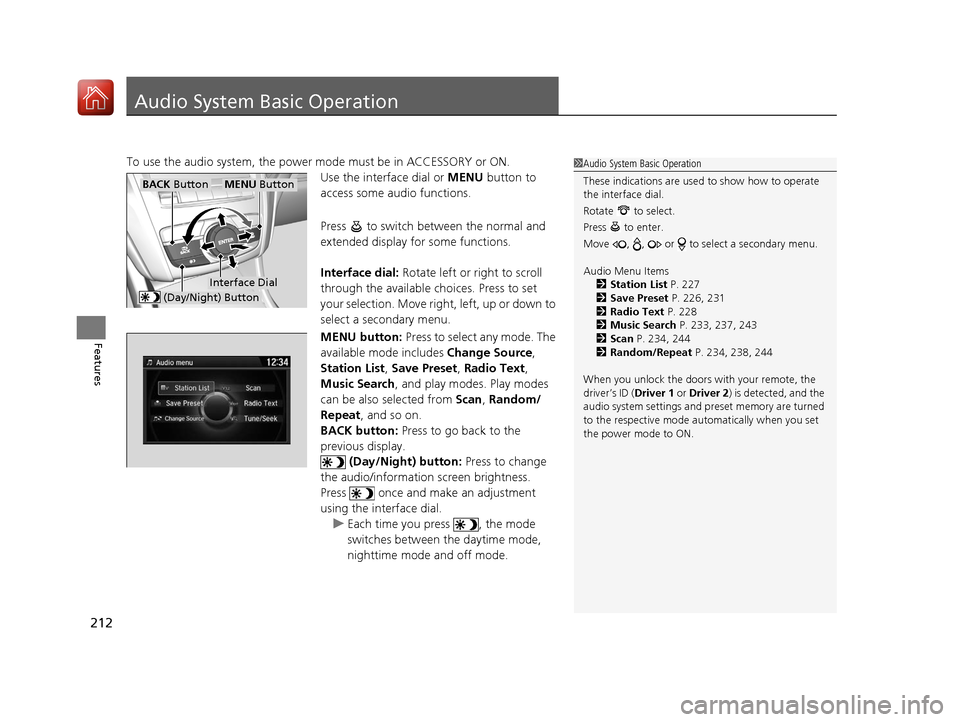
To use the audio system, the power mode must be in ACCESSORY or ON.
Use the interface dial or MENU button to
access some audio functions.
Press to switch between the normal and
extended display fo r some functions.
Interface dial: Rotate left or right to scroll
through the available choices. Press to set
your selection. Move right, left, up or down to
select a secondary menu.
MENU button: Press to select any mode. The
available mode includes Change Source,
Station List , Save Preset , Radio Text ,
Music Search, and play modes. Play modes
can be also selected from Scan, Random/
Repeat , and so on.
BACK button: Press to go back to the
previous display. (Day/Night) button: Press to change
the audio/information screen brightness.
Press once and make an adjustment
using the interface dial. u Each time you press , the mode
switches between the daytime mode,
nighttime mode and off mode.1Audio System Basic Operation
These indications are used to show how to operate
the interface dial.
Rotate to select.
Press to enter.
Move , , or to se lect a secondary menu.
Audio Menu Items 2 Station List P. 227
2 Save Preset P. 226, 231
2 Radio Text P. 228
2 Music Search P. 233, 237, 243
2 Scan P. 234, 244
2 Random/Repeat P. 234, 238, 244
When you unlock the doors with your remote, the
driver’s ID ( Driver 1 or Driver 2) is detected, and the
audio system settings and pr eset memory are turned
to the respective mode automatically when you set
the power mode to ON.
Interface Dial
MENU ButtonBACK Button
(Day/Night) Button
17 ACURA TLX-31TZ36200.book 212 ページ 2016年6月10日 金曜日 午後6時39分
Page 214 of 553
213
uuAudio System Basic Operation uOn Demand Multi-Use DisplayTM
Continued
Features
On Demand Multi-Use DisplayTM
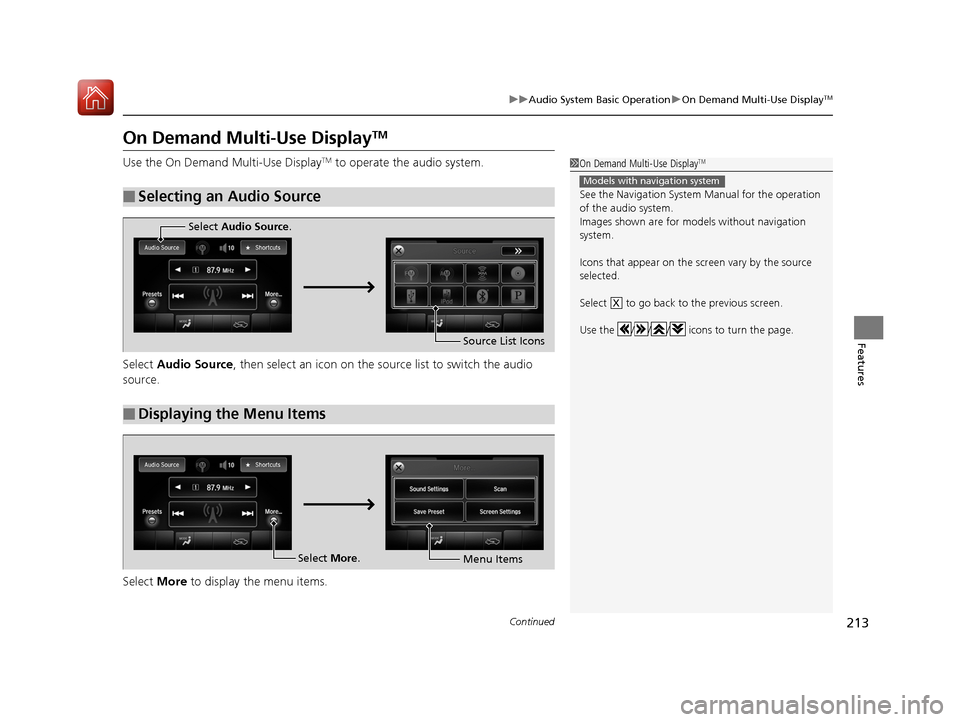
Use the On Demand Multi-Use DisplayTM to operate the audio system.
Select Audio Source , then select an icon on the s ource list to switch the audio
source.
Select More to display the menu items.
■Selecting an Audio Source
1On Demand Multi-Use DisplayTM
See the Navigation System Manual for the operation
of the audio system.
Images shown are for m odels without navigation
system.
Icons that appear on the sc reen vary by the source
selected.
Select to go back to the previous screen.
Use the / / / icons to turn the page.
Models with navigation system
X
■Displaying the Menu Items
Select Audio Source .
Source List Icons
Select More.
Menu Items
17 ACURA TLX-31TZ36200.book 213 ページ 2016年6月10日 金曜日 午後6時39分
Page 215 of 553
214
uuAudio System Basic Operation uOn Demand Multi-Use DisplayTM
Features
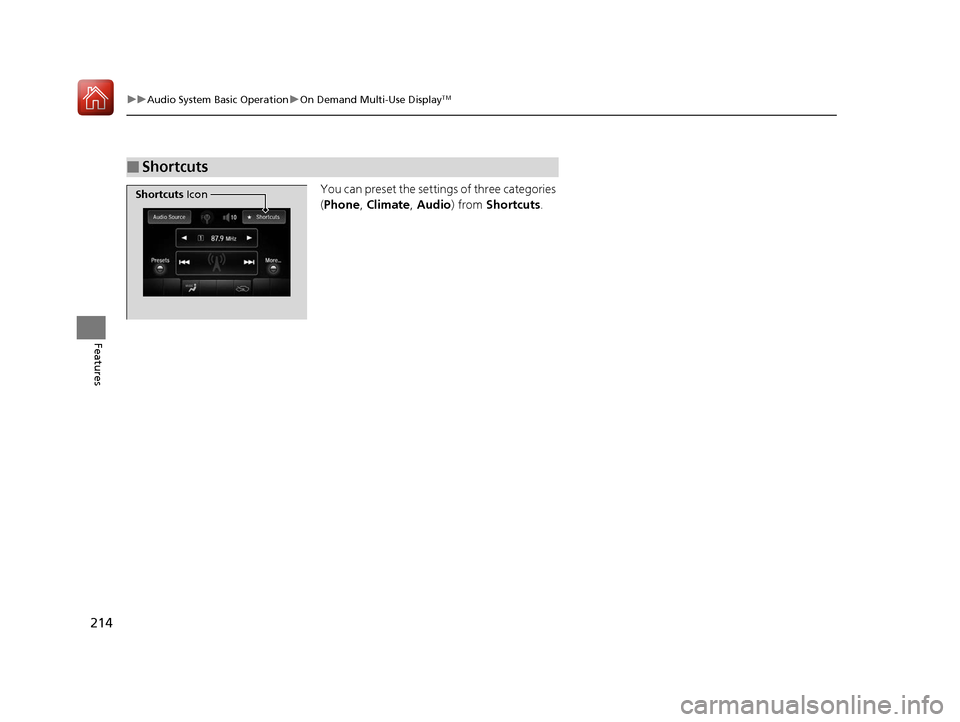
You can preset the settings of three categories
(Phone , Climate , Audio ) from Shortcuts .
■Shortcuts
Shortcuts Icon
17 ACURA TLX-31TZ36200.book 214 ページ 2016年6月10日 金曜日 午後6時39分
Page 216 of 553

Continued215
uuAudio System Basic Operation uOn Demand Multi-Use DisplayTM
Features
■Phone
You can preset five speed dial entries, and make a call from one of the preset
numbers, or call history when the phone is paired and connected to the vehicle‘s
Bluetooth ® HandsFreeLink ® (HFL) system.
2 Phone Setup P. 285
To preset a speed dial:
1.Select Shortcuts .
2. Select Phone.
3. Select Speed Dial .
4. Select Edit or No Entry .
u If you select No Entry, go to step 6.
5. Select Add.
u Five presets appear. Select a No Entry
preset or an existing preset.
u The screen changes to a list of previously
stored speed dial entries.
6. Select a number you want to store as a
shortcut.
To make a call from a speed dial entry:
1. Select Shortcuts .
2. Select Phone.
3. Select Speed Dial .
4. Select a preset number.
u Dialing starts automatically.
1Phone
Dial icon
You can make a call using the keyboard on the On
Demand Multi-Use Display
TM to input numbers.
2 To make a call using a phone number
P. 301
17 ACURA TLX-31TZ36200.book 215 ページ 2016年6月10日 金曜日 午後6時39分
Page 217 of 553
uuAudio System Basic Operation uOn Demand Multi-Use DisplayTM
216
Features
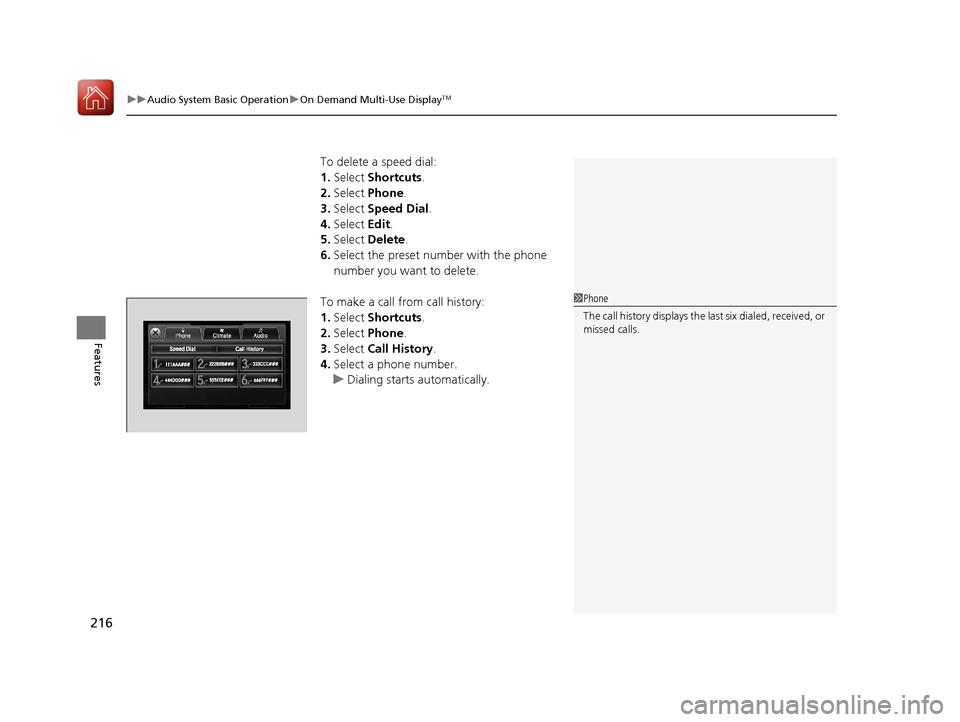
To delete a speed dial:
1. Select Shortcuts .
2. Select Phone .
3. Select Speed Dial .
4. Select Edit.
5. Select Delete.
6. Select the preset number with the phone
number you want to delete.
To make a call from call history:
1. Select Shortcuts .
2. Select Phone .
3. Select Call History .
4. Select a phone number.
u Dialing starts automatically.
1Phone
The call history displays the last six dialed, received, or
missed calls.
17 ACURA TLX-31TZ36200.book 216 ページ 2016年6月10日 金曜日 午後6時39分
Page 218 of 553
Continued217
uuAudio System Basic Operation uOn Demand Multi-Use DisplayTM
Features
■Audio
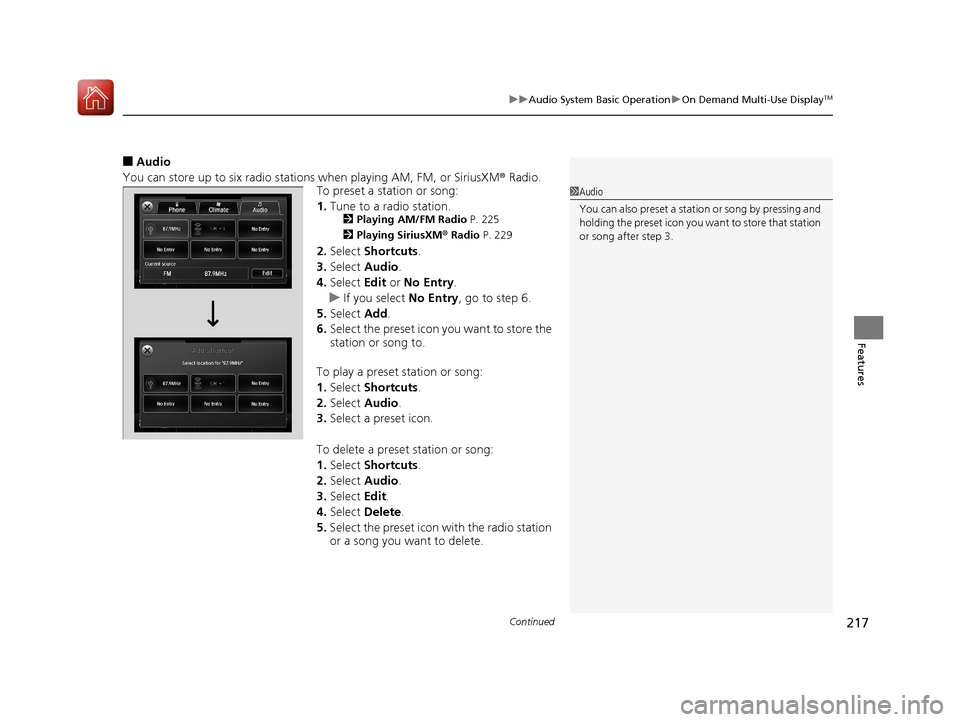
You can store up to six radio stations when playing AM, FM, or SiriusXM ® Radio.
To preset a station or song:
1. Tune to a radio station.
2 Playing AM/FM Radio P. 225
2 Playing SiriusXM ® Radio P. 229
2.Select Shortcuts .
3. Select Audio .
4. Select Edit or No Entry .
u If you select No Entry, go to step 6.
5. Select Add.
6. Select the preset icon you want to store the
station or song to.
To play a preset station or song:
1. Select Shortcuts .
2. Select Audio .
3. Select a preset icon.
To delete a preset station or song:
1. Select Shortcuts .
2. Select Audio .
3. Select Edit.
4. Select Delete .
5. Select the preset icon with the radio station
or a song you want to delete.
1Audio
You can also preset a stat ion or song by pressing and
holding the preset icon you want to store that station
or song after step 3.
17 ACURA TLX-31TZ36200.book 217 ページ 2016年6月10日 金曜日 午後6時39分
Page 219 of 553
uuAudio System Basic Operation uOn Demand Multi-Use DisplayTM
218
Features
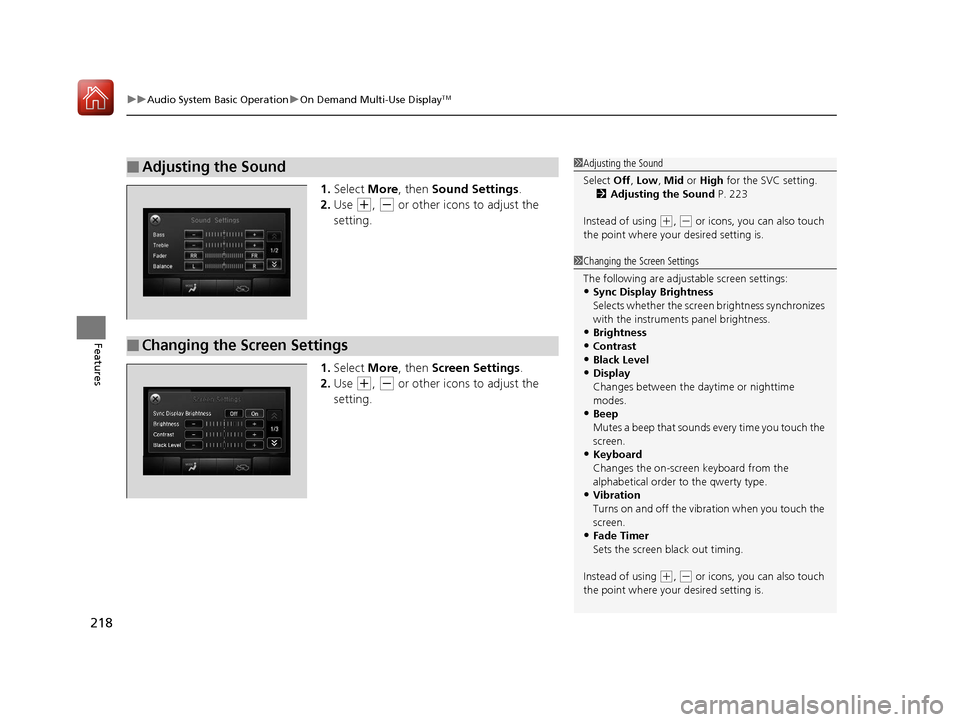
1. Select More, then Sound Settings.
2. Use
(+, (- or other icons to adjust the
setting.
1. Select More, then Screen Settings .
2. Use
(+, (- or other icons to adjust the
setting.
■Adjusting the Sound1 Adjusting the Sound
Select Off, Low , Mid or High for the SVC setting.
2 Adjusting the Sound P. 223
Instead of using
( +, (- or icons, you can also touch
the point where your desired setting is.
■Changing the Screen Settings
1Changing the Screen Settings
The following are adjustable screen settings:
•Sync Display Brightness
Selects whether the screen brightness synchronizes
with the instruments panel brightness.
•Brightness
•Contrast
•Black Level
•Display
Changes between the da ytime or nighttime
modes.
•Beep
Mutes a beep that sounds every time you touch the
screen.
•Keyboard
Changes the on-screen keyboard from the
alphabetical order to the qwerty type.
•Vibration
Turns on and off the vibration when you touch the
screen.
•Fade Timer
Sets the screen black out timing.
Instead of using
( +, (- or icons, you can also touch
the point where your desired setting is.
17 ACURA TLX-31TZ36200.book 218 ページ 2016年6月10日 金曜日 午後6時39分
Page 220 of 553
219
uuAudio System Basic Operation uAudio/Information Screen
Continued
Features
Audio/Information Screen
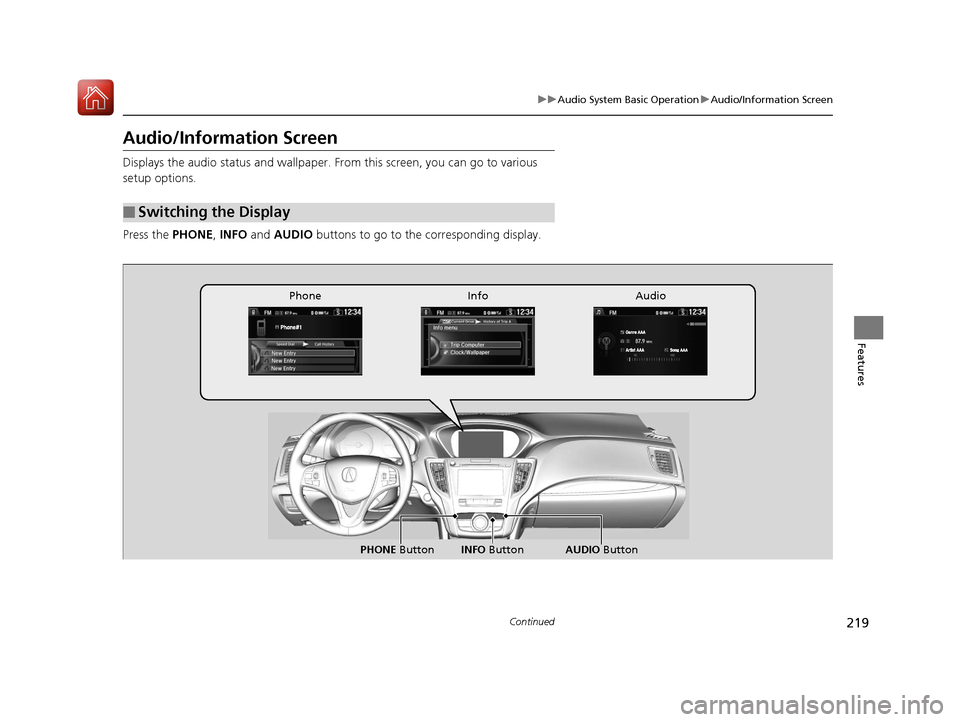
Displays the audio status and wallpaper. From this screen, you can go to various
setup options.
Press the PHONE, INFO and AUDIO buttons to go to the corresponding display.
■Switching the Display
Audio
Info
Phone
AUDIO Button
PHONE Button INFO Button
17 ACURA TLX-31TZ36200.book 219 ページ 2016年6月10日 金曜日 午後6時39分