ESP Alfa Romeo 166 2007 Owner handbook (in English)
[x] Cancel search | Manufacturer: ALFA ROMEO, Model Year: 2007, Model line: 166, Model: Alfa Romeo 166 2007Pages: 272, PDF Size: 4.17 MB
Page 65 of 272
64 CRUISE CONTROL
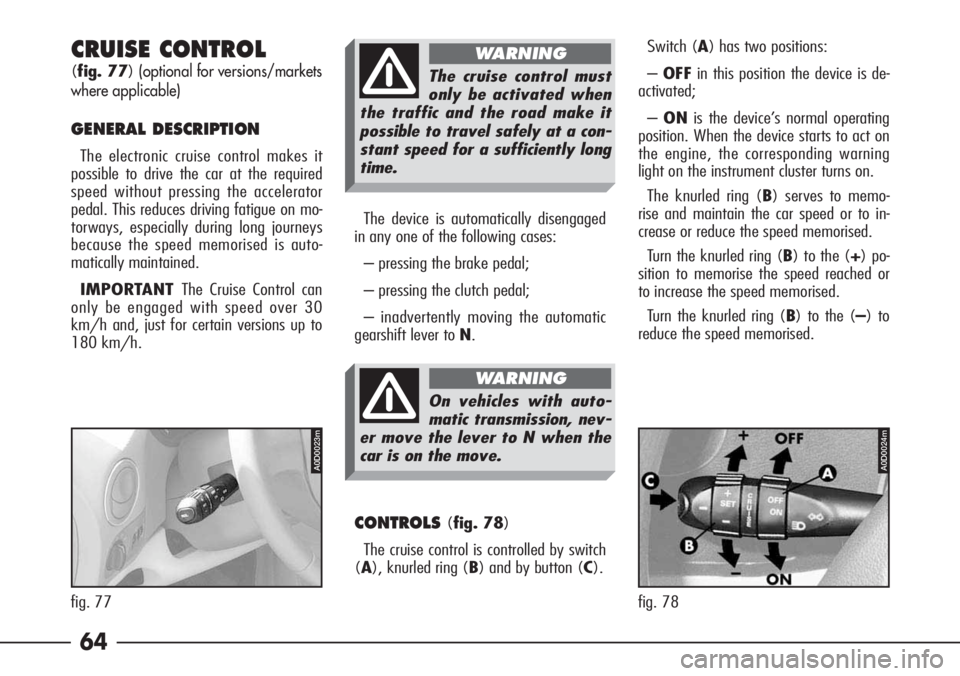
(fig. 77)(optional for versions/markets
where applicable)
GENERAL DESCRIPTION
The electronic cruise control makes it
possible to drive the car at the required
speed without pressing the accelerator
pedal. This reduces driving fatigue on mo-
torways, especially during long journeys
because the speed memorised is auto-
matically maintained.
IMPORTANT The Cruise Control can
only be engaged with speed over 30
km/h and, just for certain versions up to
180 km/h.
CONTROLS(fig. 78)
The cruise control is controlled by switch
(A), knurled ring (B) and by button (C).Switch (A) has two positions:
–OFFin this position the device is de-
activated;
–ONis the device’s normal operating
position. When the device starts to act on
the engine, the corresponding warning
light on the instrument cluster turns on.
The knurled ring (B) serves to memo-
rise and maintain the car speed or to in-
crease or reduce the speed memorised.
Turn the knurled ring (B) to the (+) po-
sition to memorise the speed reached or
to increase the speed memorised.
Turn the knurled ring (B) to the (–) to
reduce the speed memorised.
The cruise control must
only be activated when
the traffic and the road make it
possible to travel safely at a con-
stant speed for a sufficiently long
time.
WARNING
On vehicles with auto-
matic transmission, nev-
er move the lever to N when the
car is on the move.
WARNING
The device is automatically disengaged
in any one of the following cases:
– pressing the brake pedal;
– pressing the clutch pedal;
– inadvertently moving the automatic
gearshift lever to N.
A0D0024m
fig. 78
A0D0023m
fig. 77
Page 66 of 272
65
Each time the knurled ring (B) is oper-
ated the speed increases or lowers by ap-
prox. 1 km/h. Keeping the ring turned
the speed changes continuously. The new
speed reached will be maintained auto-
matically.
With button (C) it is possible to reset
the speed memorised.
IMPORTANT Turning the ignition key
to the STOPposition or switch (A) to
OFF, the memorised speed is cleared
and the system is disengaged.
To memorise the speed
Turn switch (A) to ON, wait for 2 sec-
onds at least, then bring the car to the re-
quired speed as usual by pressing the ac-
celerator pedal or by turning the ring nut
(B) to (+) or to (–) and then releasing
it.The car speed is memorised and it is
therefore possible to release the accelera-
tor pedal.
The car will continue to travel at the re-
quired speed until one of the following
conditions takes place:
– pressing the brake pedal;
– pressing the clutch pedal;
– inadvertently moving the automaticgearshift lever to position N.
IMPORTANT In the case of need (for
example overtaking) it is possible to ac-
celerate simply pressing the accelerator
pedal; afterwards, releasing the accelera-
tor pedal, the car will resume the speed
memorised previously.
To restore the speed memorised
If the device has been disengaged, for
example by pressing the brake or clutch
pedal, the speed memorised can be re-
stored as follows:
– gradually accelerate until reaching a
speed approaching the one memorised;
– engage the gear selected when the
speed was memorised (4th, 5th or 6th
gear);
– press button (C).
To increase the speed memorised
The speed memorised can be increased
in two ways:
– pressing the accelerator and then
memorising the new speed reached (turn-
ing the knurled ring (B) for more than
three seconds;or
– turning the knurled ring (B) momen-
taneously to the (+) position: each pulse
of the knurled ring will correspond to a
small increase of the speed (approx. 1
km/h) while pressing continuously will
correspond to a continuous increase of
the speed. Releasing the knurled ring (B)
the new speed will remain automatically
memorised.
To reduce the memorised speed
The memorised speed can be reduced in
two ways:
– disengaging the device (for example
pressing the brake pedal) and then mem-
orising the new speed (turning the
knurled ring (B) to the (+) position for
at least three seconds);
or
– keeping the knurled ring (B) pressed
on the (–) position until reaching the
new speed which will be automatically
memorised.
Page 72 of 272
71
D - Rev counter
The danger zone (red) indicates exces-
sively high engine revs. Do not drive for
long periods with the pointer in this area.
With the engine at idle speed, the rev
counter may indicate a gradual or sudden
speed increase depending on the cases;
this is normal as it occurs in the normal
operation, for example when the climate
control compressor is engaged or the fan.
In particular a slow change in speed helps
preserve the battery charge.
IMPORTANT Depending on the ver-
sions/markets of the car, the rev counter
may have danger sectors (red) of differ-
ent size and with different top of scale
values.
IMPORTANT The electronic ignition
control system gradually shuts off the
flow of fuel when the engine is “over-
revving” resulting in a gradual loss of en-
gine power. Moving the ignition key to MARthe
following warning lights and displays turn
on and go out after approx. 6 seconds:
1- Light failure
2- Low brake fluid and/or handbrake
engaged
3- Front brake pad wear
4- Low engine oil level
5- Fuel reserve
6- Maximum engine coolant fluid tem-
perature
7- Mileage recorder displayAny faults are signalled by the turning
on of the corresponding warning light for
approx. 15 seconds after the end of the
check.
2) Doors and boot open warning.
With the ignition key at MAR, if a led
of the car symbol (10) lights up, the cor-
responding door or the boot has not been
shut properly.
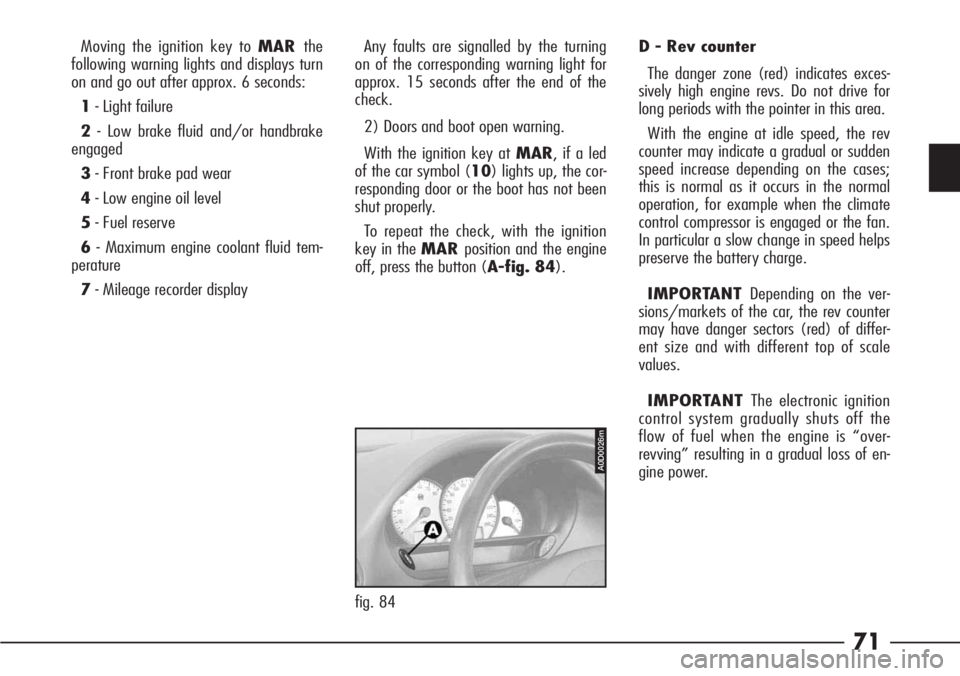
To repeat the check, with the ignition
key in the MARposition and the engine
off, press the button (A-fig. 84).
A0D0026m
fig. 84
Page 85 of 272
84
EQUIVALENT TEMPERATURE
The system makes it possible to control
the passenger compartment climate main-
taining the “equivalent temperature” lev-
el required by the driver. This “equivalent
temperature” is an estimator of the ideal
temperature (obtained through the devel-
opment of a complex mathematical algo-
rithm) needed to obtain the best temper-
ature and well-being in the passenger
compartment.
To bring about this operating condition,
select:
– the “equivalent temperature” re-
quired pressing the button (B-fig. 94);
– the AUTOposition pressing the but-
ton (D).
IMPORTANT The compressor can be
engaged automatically or manually. To
switch from one operating mode to the
other see the “Compressor on/off but-
ton” paragraph in this chapter.
DESCRIPTION OF CONTROLS
(fig. 94)
A- Climate control dedicated screen se-
lector button.
B- Rocker button for adjusting the “e-
quivalent temperature”.
C- Rocker button for fan speed adjust-
ment.
D- Automatic system operation selector
button.
E- Climate control compressor off/on
button.
F- Climate control system off/on but-
ton.
G- Rocker button for selecting air distri-
bution.
H- Air recirculation on/off button.
I- On/off button for maximum defrost-
ing/demisting windscreen and front side
windows, rearscreen heating, door mirror
resistances and resistances at windscreen
base (where applicable).
J- On/off button for rearscreen heating
and mirror defrosting and resistances in
windscreen wiper blade parking are at the
base of the windscreen (where applica-
ble).Adjustment button for
required equivalent
temperature
Pressing this rocker button up or down
respectively raises or lowers the equiva-
lent temperature required in the passen-
ger compartment.
Pressing the button upwards or down-
wards to the extreme HIGHorLOW
positions, the functions with the highest
heating or cooling power are engaged.
Page 86 of 272
85
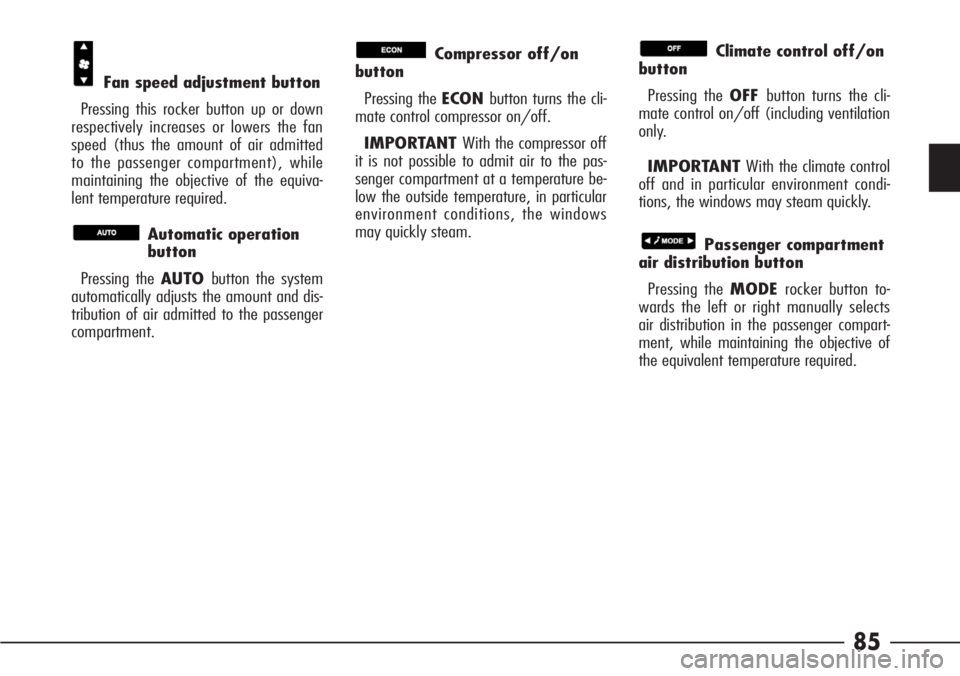
Fan speed adjustment button
Pressing this rocker button up or down
respectively increases or lowers the fan
speed (thus the amount of air admitted
to the passenger compartment), while
maintaining the objective of the equiva-
lent temperature required.
Automatic operation
button
Pressing the AUTObutton the system
automatically adjusts the amount and dis-
tribution of air admitted to the passenger
compartment.
Compressor off/on
button
Pressing the ECONbutton turns the cli-
mate control compressor on/off.
IMPORTANT With the compressor off
it is not possible to admit air to the pas-
senger compartment at a temperature be-
low the outside temperature, in particular
environment conditions, the windows
may quickly steam.Climate control off/on
button
Pressing the OFFbutton turns the cli-
mate control on/off (including ventilation
only.
IMPORTANT With the climate control
off and in particular environment condi-
tions, the windows may steam quickly.
Passenger compartment
air distribution button
Pressing the MODErocker button to-
wards the left or right manually selects
air distribution in the passenger compart-
ment, while maintaining the objective of
the equivalent temperature required.
Page 87 of 272
86
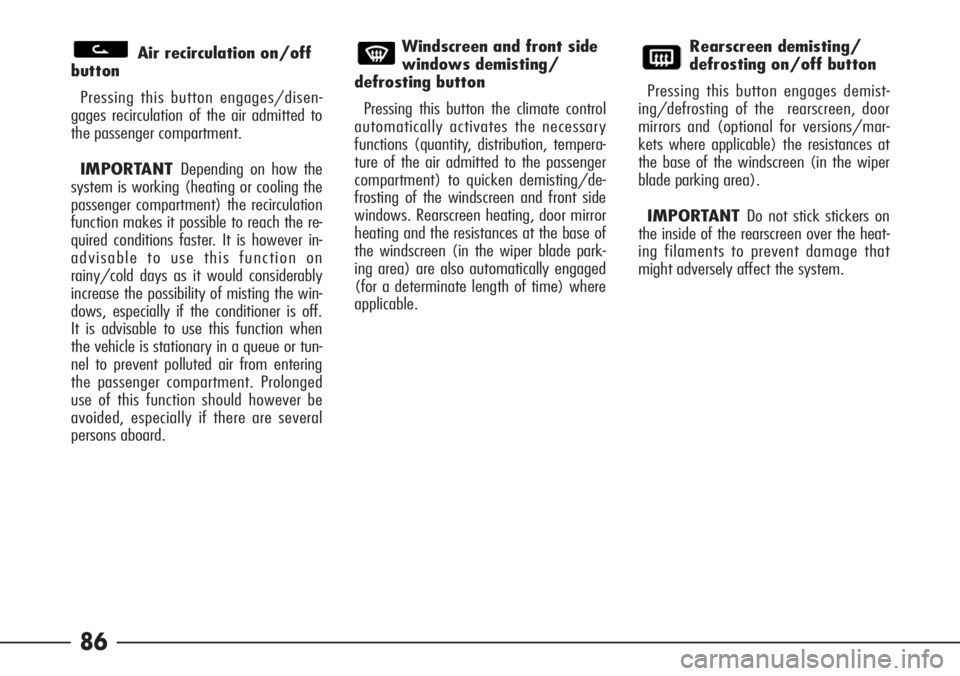
Air recirculation on/off
button
Pressing this button engages/disen-
gages recirculation of the air admitted to
the passenger compartment.
IMPORTANT Depending on how the
system is working (heating or cooling the
passenger compartment) the recirculation
function makes it possible to reach the re-
quired conditions faster. It is however in-
advisable to use this function on
rainy/cold days as it would considerably
increase the possibility of misting the win-
dows, especially if the conditioner is off.
It is advisable to use this function when
the vehicle is stationary in a queue or tun-
nel to prevent polluted air from entering
the passenger compartment. Prolonged
use of this function should however be
avoided, especially if there are several
persons aboard.Windscreen and front side
windows demisting/
defrosting button
Pressing this button the climate control
automatically activates the necessary
functions (quantity, distribution, tempera-
ture of the air admitted to the passenger
compartment) to quicken demisting/de-
frosting of the windscreen and front side
windows. Rearscreen heating, door mirror
heating and the resistances at the base of
the windscreen (in the wiper blade park-
ing area) are also automatically engaged
(for a determinate length of time) where
applicable.Rearscreen demisting/
defrosting on/off button
Pressing this button engages demist-
ing/defrosting of the rearscreen, door
mirrors and (optional for versions/mar-
kets where applicable) the resistances at
the base of the windscreen (in the wiper
blade parking area).
IMPORTANT Do not stick stickers on
the inside of the rearscreen over the heat-
ing filaments to prevent damage that
might adversely affect the system.
Page 94 of 272

93
CONTROLS
OPENING THE LUGGAGE
COMPARTMENT
(fig. 95)
To open the luggage compartment from
inside the car press the button (A) (with
the car stationary) inside the glovebox.
Because of its position, the control can-
not be operated when the glovebox is
key-locked.
IMPORTANT The corresponding
warning light on the check panel lights up
if the luggage compartment is not shut
properly.
HAZARD WARNING LIGHTS
(fig. 96)
These are switched on by pressing but-
ton (A) regardless of the position of the
ignition key.
When the hazard warning lights are
switched on the switch itself begins to
flash together with the direction indicator
on the instrument panel. This function is
switched off by pressing the button again.
IMPORTANT Use the hazard lights in
compliance with local regulations.
FRONT FOGLIGHTS (fig. 97)
These come on when the button (A) is
pressed and when the external lights are
already on.
When the foglights are on the led next
to the button lights up.
Press the button again to switch the
front foglights off.
IMPORTANT The front foglights
should be used in compliance with the lo-
cal traffic laws. The front foglights system
meets EEC/ECE regulations.
534PGSm
fig. 96 fig. 95
574PGSm
fig. 97
1008PGSm
Page 101 of 272
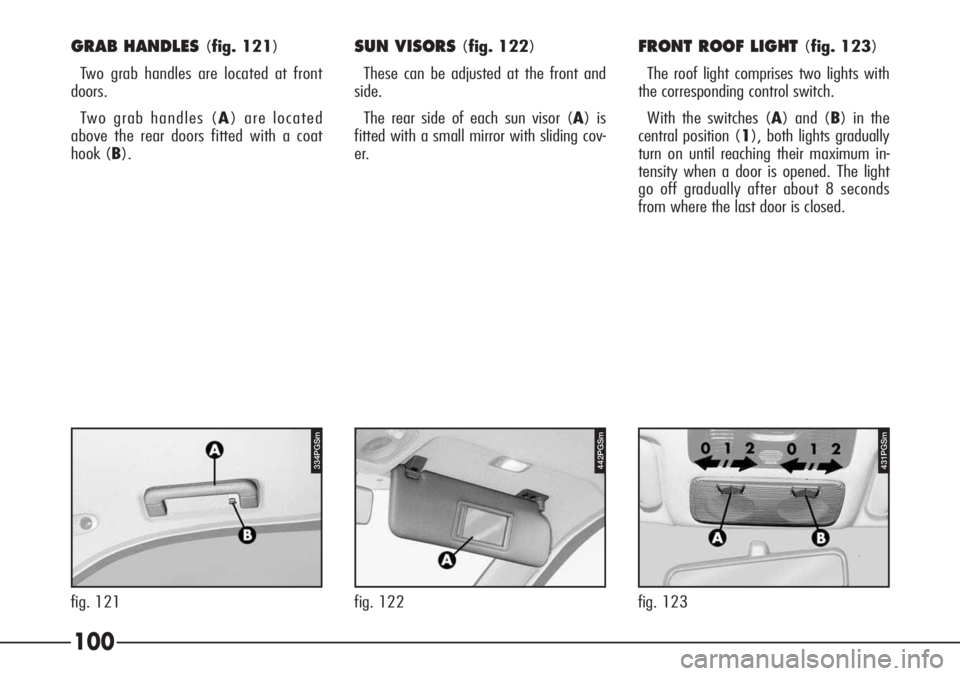
GRAB HANDLES (fig. 121)
Two grab handles are located at front
doors.
Two grab handles (A) are located
above the rear doors fitted with a coat
hook (B).
442PGSm
fig. 122
431PGSm
fig. 123
100
334PGSm
fig. 121
SUN VISORS (fig. 122)
These can be adjusted at the front and
side.
The rear side of each sun visor (A) is
fitted with a small mirror with sliding cov-
er.FRONT ROOF LIGHT (fig. 123)
The roof light comprises two lights with
the corresponding control switch.
With the switches (A) and (B) in the
central position (1), both lights gradually
turn on until reaching their maximum in-
tensity when a door is opened. The light
go off gradually after about 8 seconds
from where the last door is closed.
Page 102 of 272
101
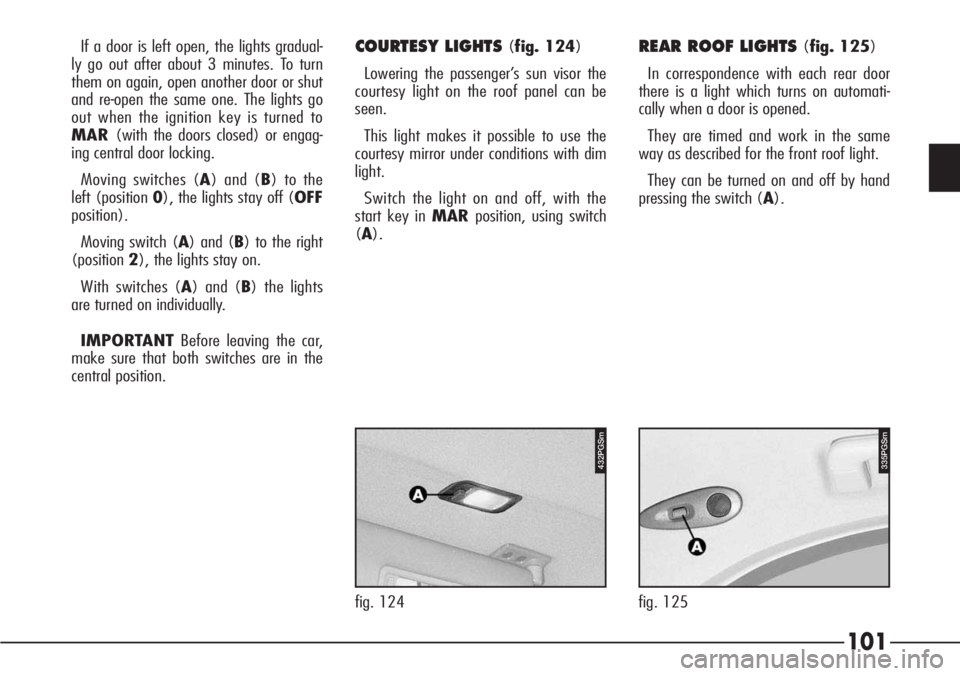
If a door is left open, the lights gradual-
ly go out after about 3 minutes. To turn
them on again, open another door or shut
and re-open the same one. The lights go
out when the ignition key is turned to
MAR(with the doors closed) or engag-
ing central door locking.
Moving switches (A) and (B) to the
left (position 0), the lights stay off (OFF
position).
Moving switch (A) and (B) to the right
(position2), the lights stay on.
With switches (A) and (B) the lights
are turned on individually.
IMPORTANTBefore leaving the car,
make sure that both switches are in the
central position.COURTESY LIGHTS (fig. 124)
Lowering the passenger’s sun visor the
courtesy light on the roof panel can be
seen.
This light makes it possible to use the
courtesy mirror under conditions with dim
light.
Switch the light on and off, with the
start key in MARposition, using switch
(A).
fig. 124
432PGSm
REAR ROOF LIGHTS (fig. 125)
In correspondence with each rear door
there is a light which turns on automati-
cally when a door is opened.
They are timed and work in the same
way as described for the front roof light.
They can be turned on and off by hand
pressing the switch (A).
335PGSm
fig. 125
Page 106 of 272
105
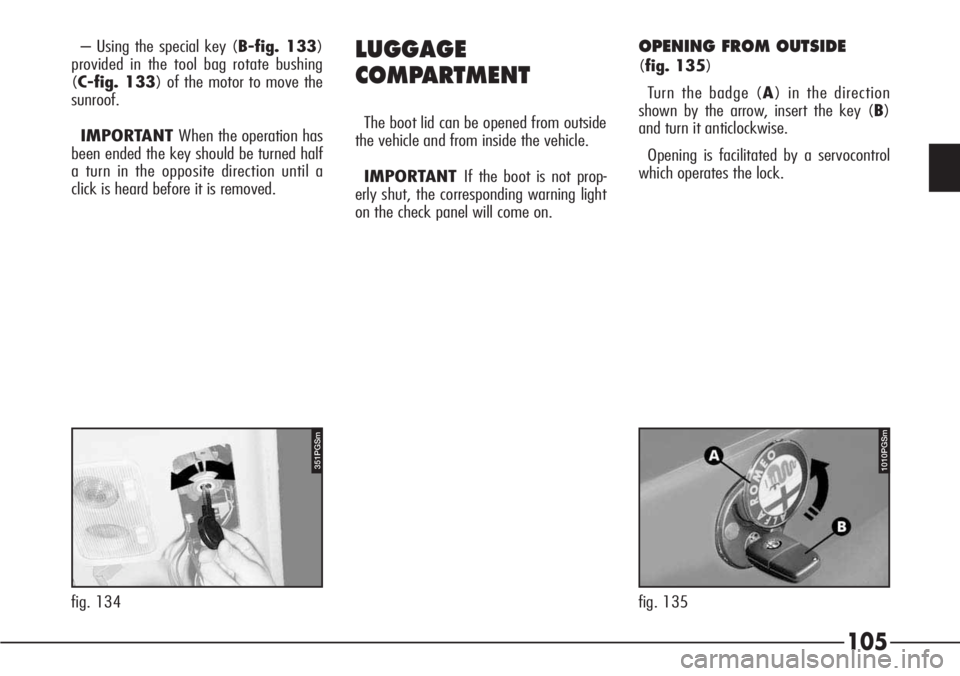
– Using the special key (B-fig. 133)
provided in the tool bag rotate bushing
(C-fig. 133) of the motor to move the
sunroof.
IMPORTANT When the operation has
been ended the key should be turned half
a turn in the opposite direction until a
click is heard before it is removed.LUGGAGE
COMPARTMENT
The boot lid can be opened from outside
the vehicle and from inside the vehicle.
IMPORTANT If the boot is not prop-
erly shut, the corresponding warning light
on the check panel will come on.
OPENING FROM OUTSIDE
(fig. 135)
Turn the badge (A) in the direction
shown by the arrow, insert the key (B)
and turn it anticlockwise.
Opening is facilitated by a servocontrol
which operates the lock.
351PGSm
fig. 134
1010PGSm
fig. 135